
Homemade shortcrust pastry takes just a few ingredients and a few minutes to bring together. I'll show you how to make shortcrust pastry, with tips for getting it right and using it for pies, tarts and more. Once you've tasted your own pastry, you might find yourself reaching for the ready-made kind a lot less often.
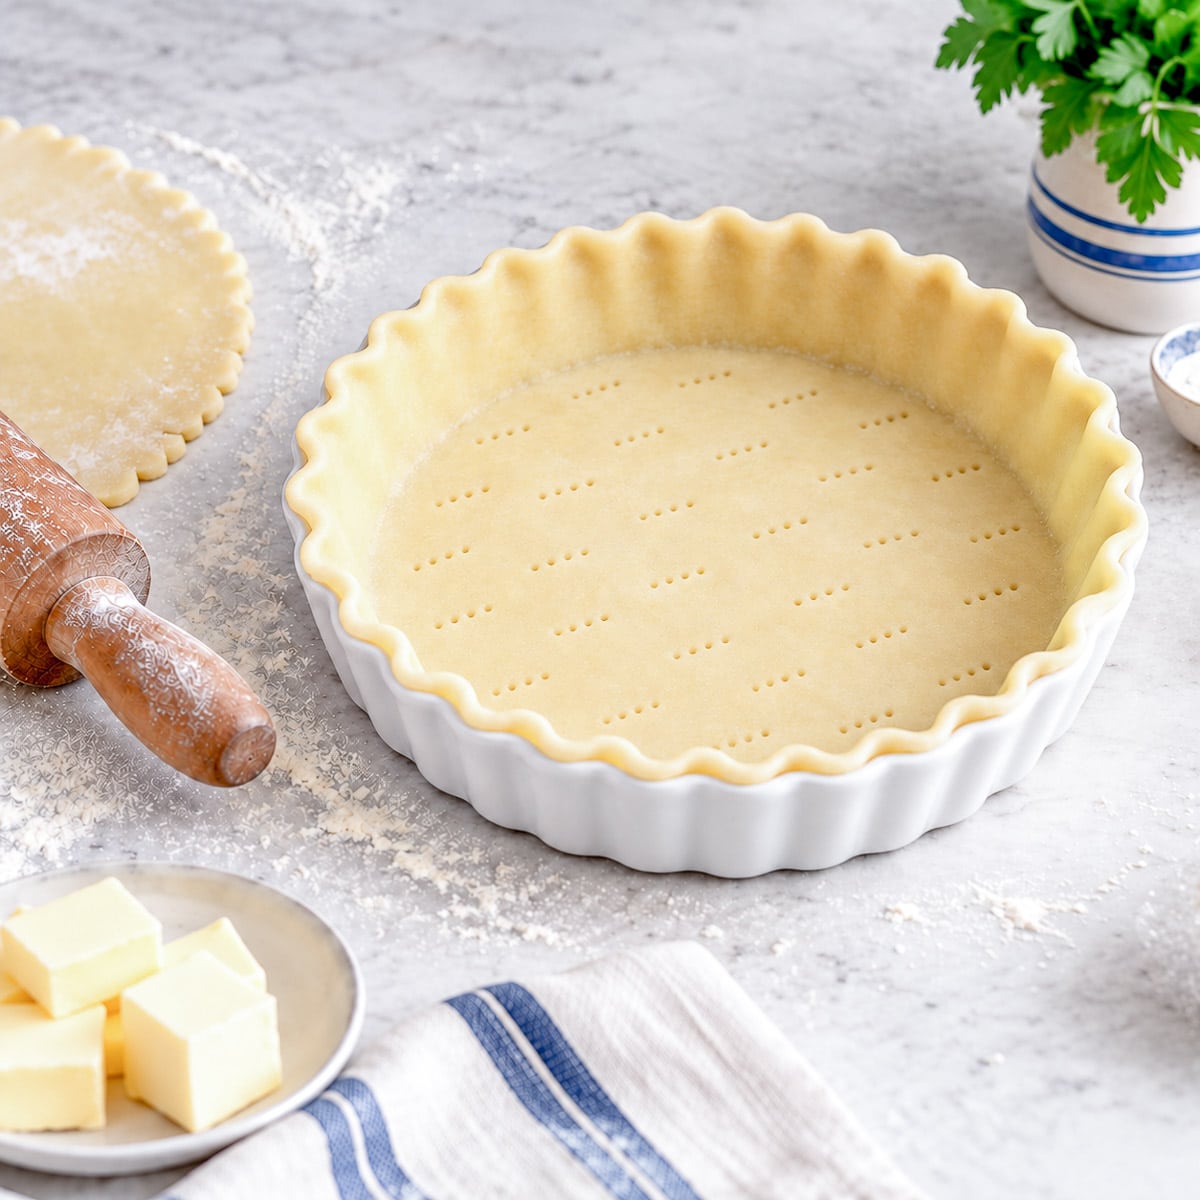
I love making my own pastry for pies and tarts. There's something satisfying about taking a finished dish out of the oven and knowing you made the pastry yourself.
If you've tried making shortcrust pastry before and it turned out hard or tough, don't be put off. Once you understand a few basic steps, it becomes much easier to get right.
Basic shortcrust pastry needs only flour, butter or lard, a little salt and enough water to bring the dough together. You can add an egg for a richer pastry, or sugar for a sweet version.
In this guide, I'll show you how to make shortcrust pastry and share the tips that help me get a tender, crisp result.
If you're wondering how shortcrust differs from puff, choux or other types of pastry, I've explained them in my ultimate guide to pastry. This post focuses on how to make, roll and bake shortcrust pastry.
Jump to:
- Why I love to make my own shortcrust pastry
- Ingredients for basic shortcrust pastry
- Additional ingredients
- How to make shortcrust pastry
- Foodle Club tips for perfect shortcrust pastry
- How to roll pastry
- How to blind bake pastry
- Variations
- Equipment
- Storage
- Shortcrust pastry FAQ
- Save for later
- Related recipes
- 📋The recipe
Why I love to make my own shortcrust pastry
- I know exactly what goes into it. For a basic shortcrust pastry, all you need is flour, butter or lard, a little salt (optional) and water to bind it all together.
- I can make the amount I need. Whether I'm making a small tart or a larger pie with a lid, I can mix up enough pastry for the dish I'm using. I use my shortcrust pastry calculator to work out the amounts for me.
- I can adapt it to the filling. I use plain shortcrust for savoury pies, add sugar for sweet tarts, or make an enriched version with egg.
- It tastes better. Homemade pastry has a lovely buttery flavour, and there's real satisfaction in knowing I made the whole pie myself.
- I can save the offcuts. I keep leftover pastry in a bag in the freezer. The scraps soon add up to enough for a small tart.
Ingredients for basic shortcrust pastry
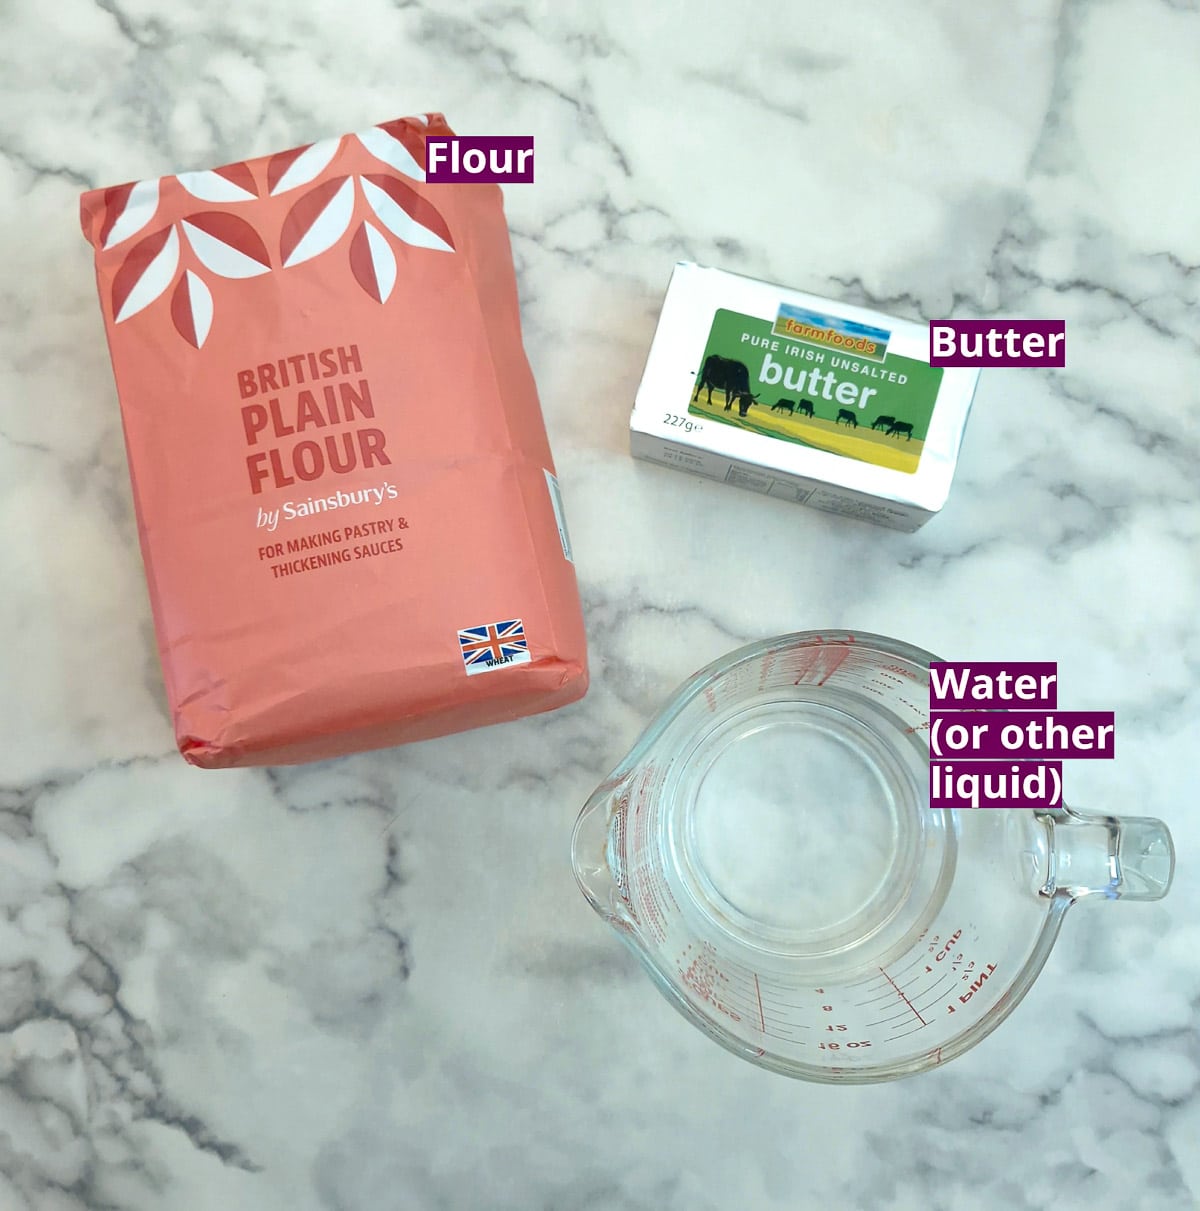
- Flour. Use plain flour, known as all-purpose flour in the US. In South Africa, cake flour is the closest equivalent. Avoid self-raising flour: its raising agent will make the pastry puff up.
- Shortening. Butter gives pastry a lovely flavour, while lard helps give it a short, crumbly texture. I often use a mixture of the two, but you can use all butter if you prefer.
- Lard has a mild flavour and contains virtually no water. It works well in savoury pastry, either on its own or mixed with butter.
- Butter - I think butter gives the best flavour. You can use salted or unsalted butter; if yours is salted, reduce or omit the extra salt. Butter also contains some water, so you may need slightly less liquid when bringing the dough together.
- Baking margarine can be used instead. If using margarine, choose a firm baking block; soft spreadable margarine is not suitable for baking.
- Liquid. A little cold water brings the flour and fat together into a dough. Add it gradually: you need just enough for the pastry to hold together. Some recipes use milk or yoghurt instead.
- Salt. A pinch brings out the flavour of the pastry. Use less if your butter is already salted.
Additional ingredients
Once you know how to make basic shortcrust pastry, you can adapt it to suit the filling.
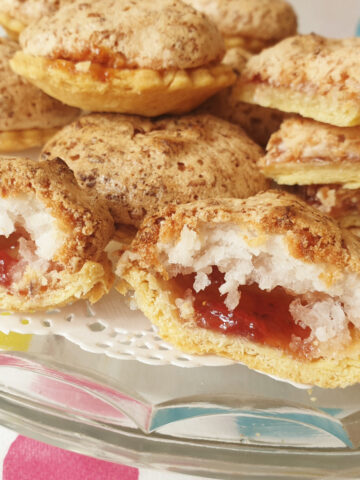
- Egg or egg yolk - makes a richer pastry. Because the egg yolk also adds moisture, you will usually need less water. The pastry in these coconut meringue jam tarts incorporates 2 egg yolks.
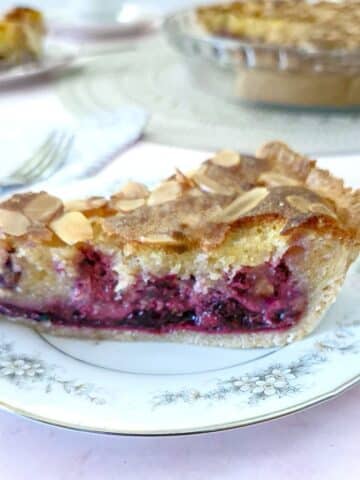
- Sweet shortcrust - sugar or icing sugar makes a sweet pastry for dessert tarts and flans. The pastry in this blackberry frangipane tart uses both egg yolks and sugar.
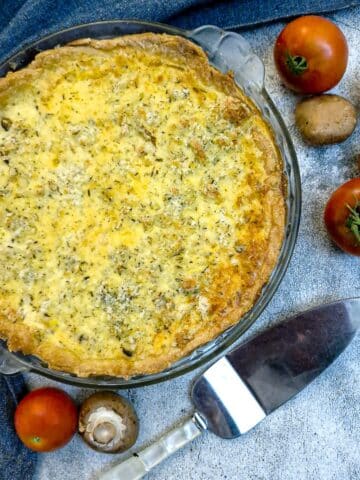
- Savoury shortcrust - grated cheese or a variety of different herbs adds flavour to the pastry for a savoury tart of pie. This cheese and asparagus quiche is an example of using cheese in pastry, while the pastry in these Stilton and walnut tarts incorporates finely chopped walnuts.
How to make shortcrust pastry
In a mixing bowl
Making shortcrust pastry in a mixing bowl doesn't take very long at all.
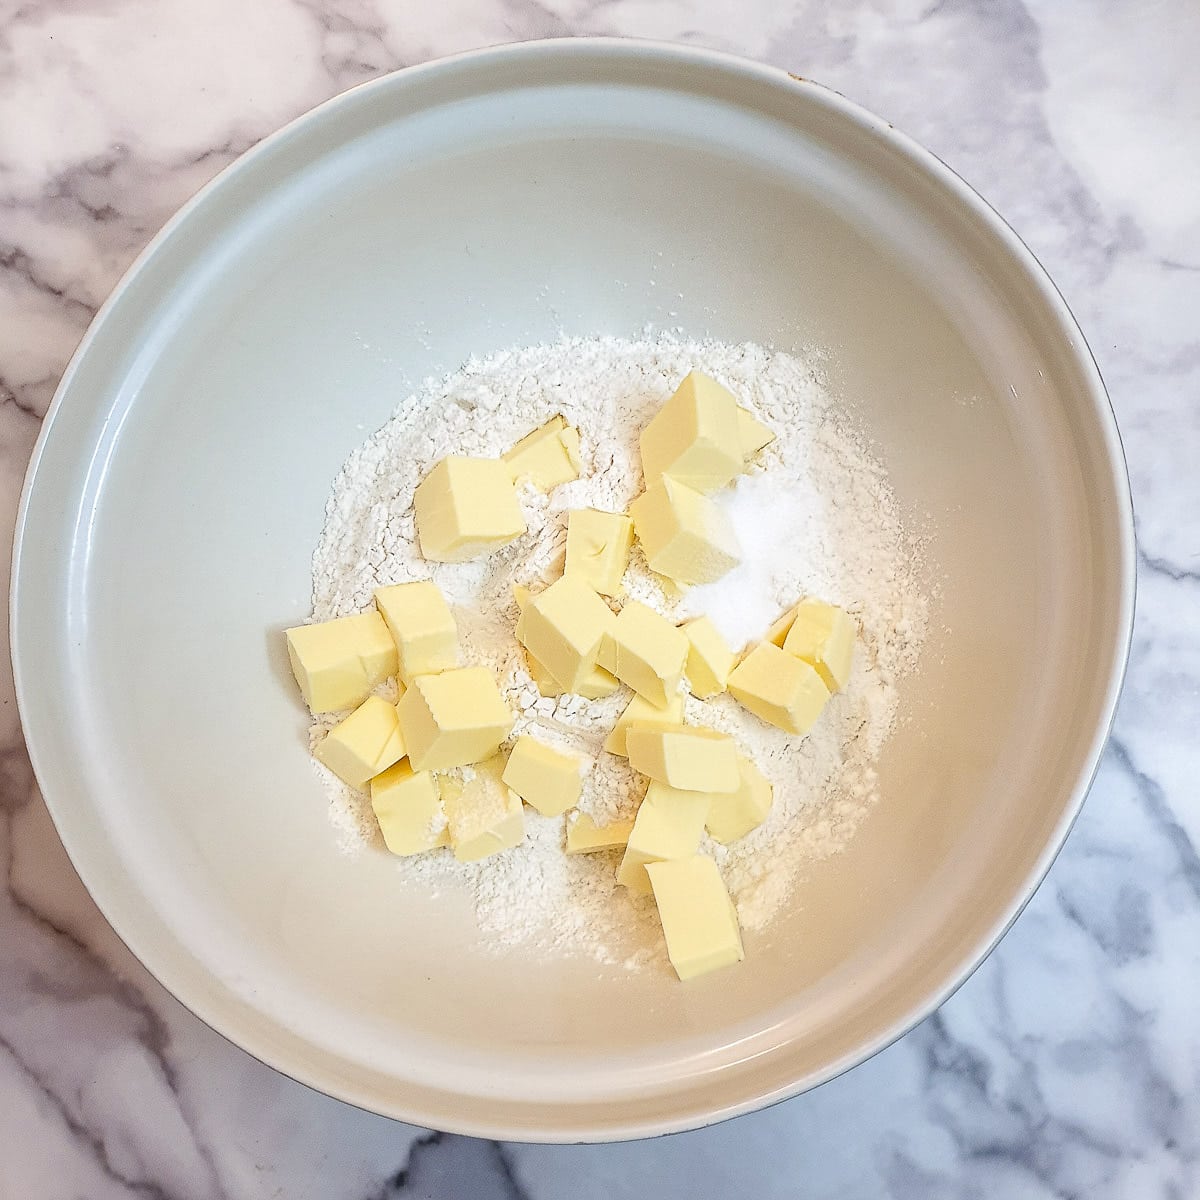
Step 1: Cut the butter or fat into cubes and place in a mixing bowl with the flour and salt (if using).
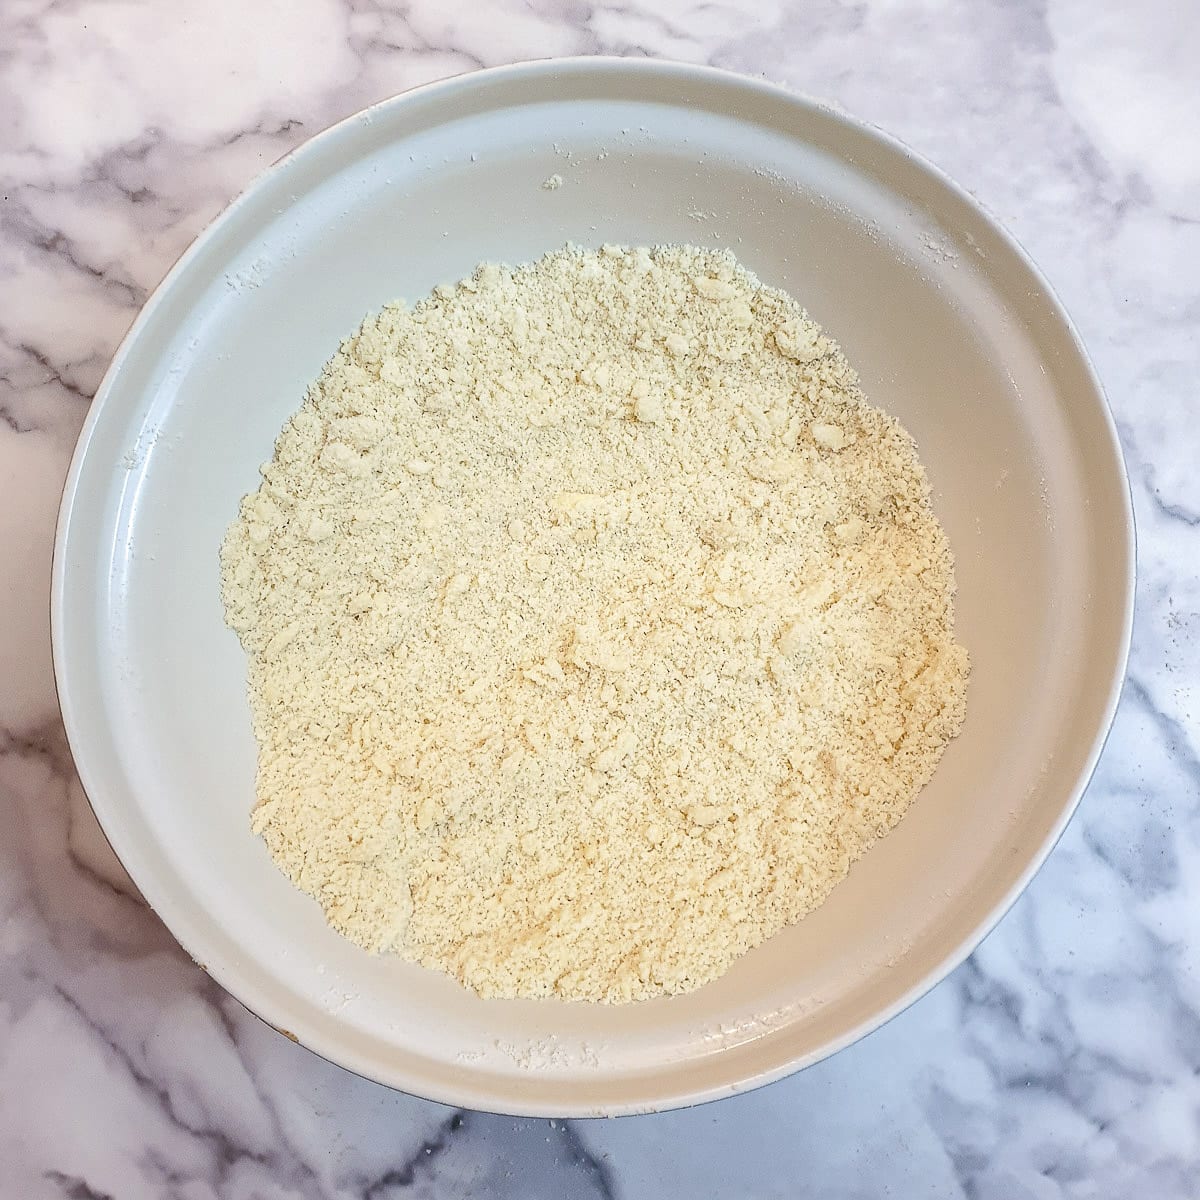
Step 2: Use your fingertips to rub the butter into the flour until the mixture resembles fine breadcrumbs.
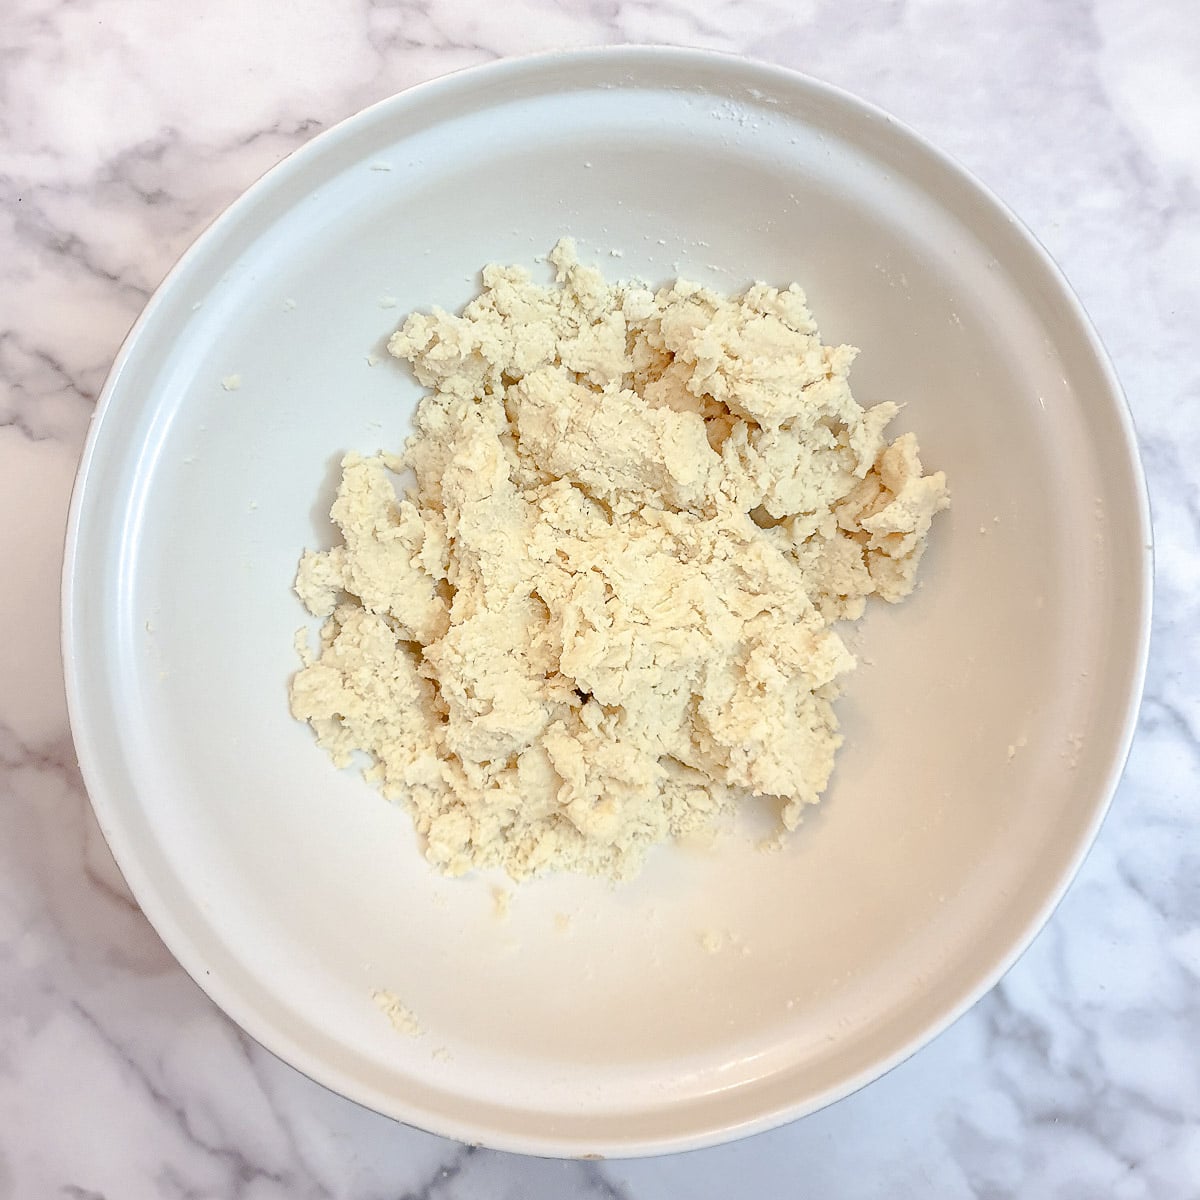
Step 3: Add most of the water, and using extended fingers on one hand (pretend you are holding a tennis ball), mix the water into the flour until it starts to come together in a shaggy ball.
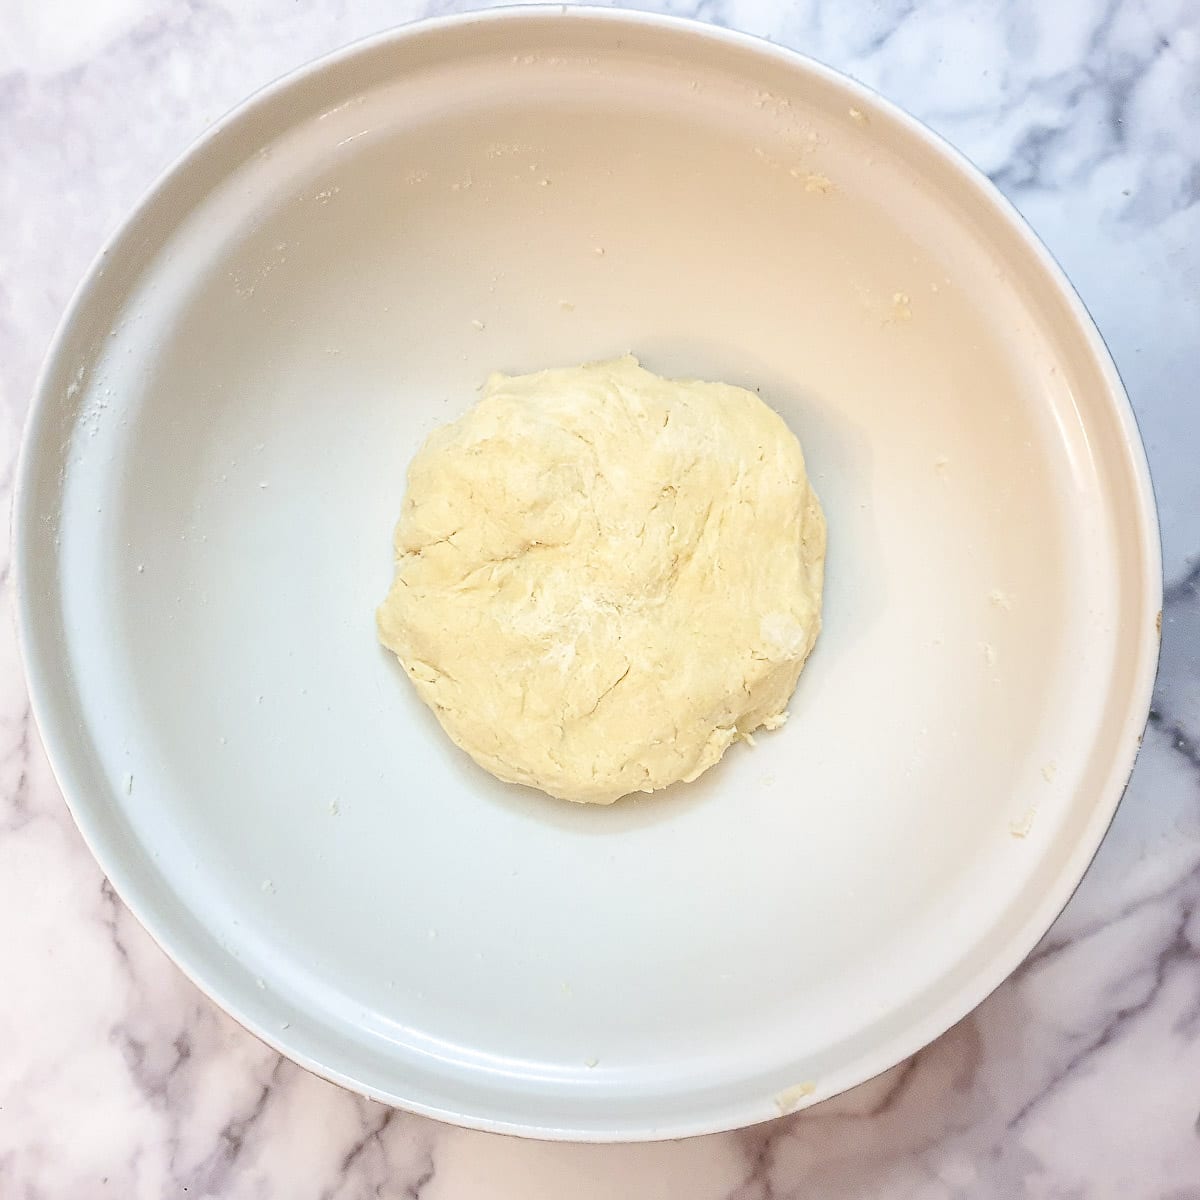
Step 4: Gently press the dough together into a ball. It should hold together without feeling wet or sticky. Do not knead.
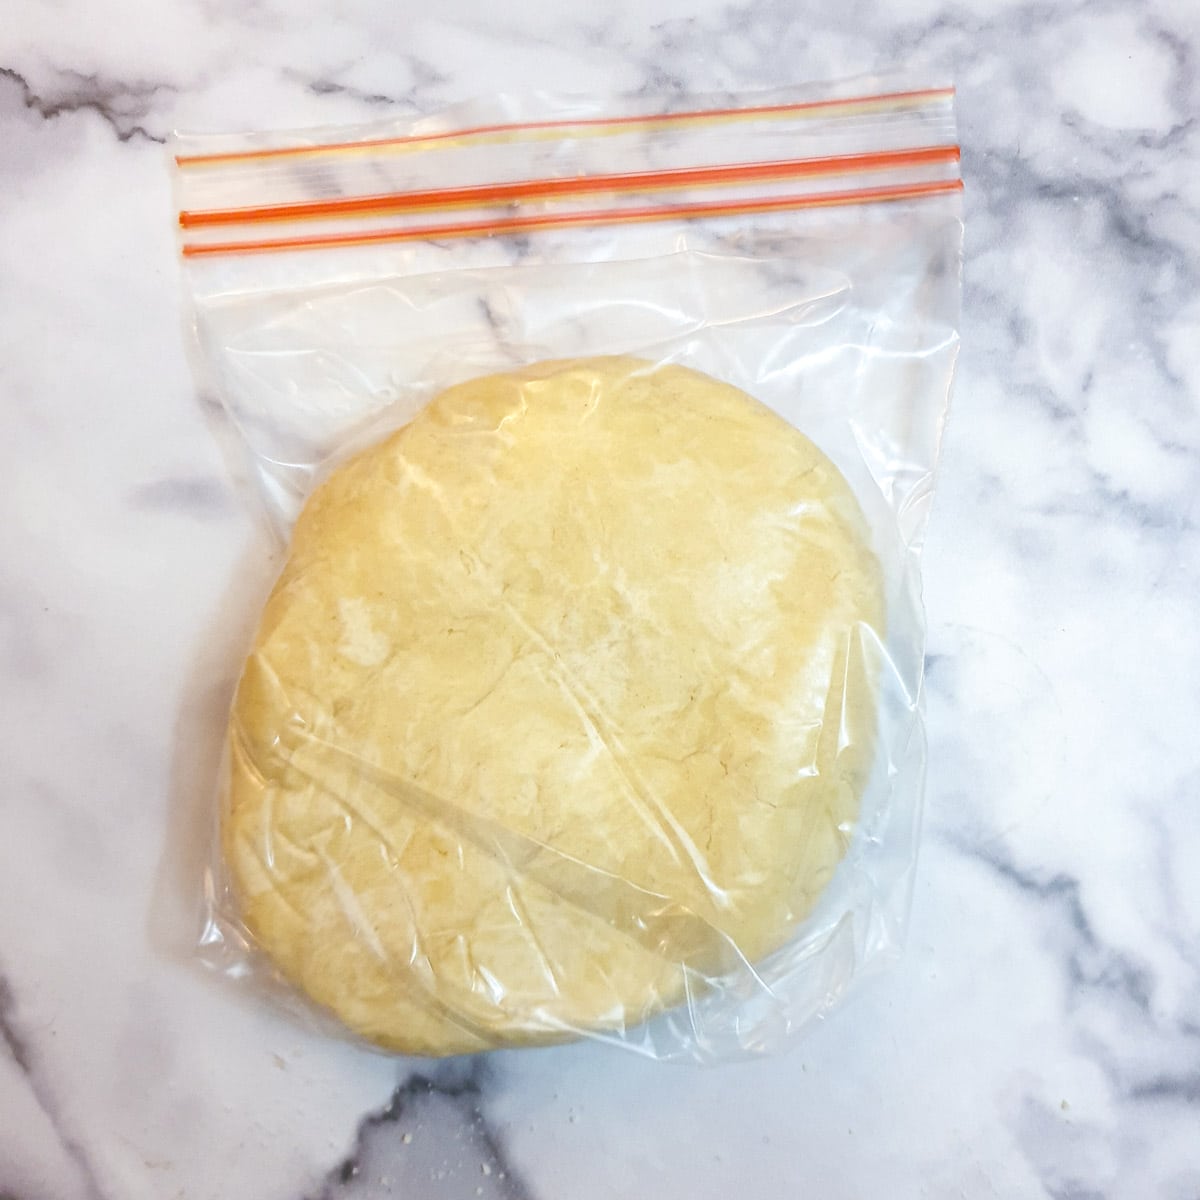
Step 5: Wrap the dough in cling film or put it into a resealable plastic bag. Refrigerate for 30 minutes before rolling.
In a food processor
Making shortcrust pastry in a food processor is even easier.
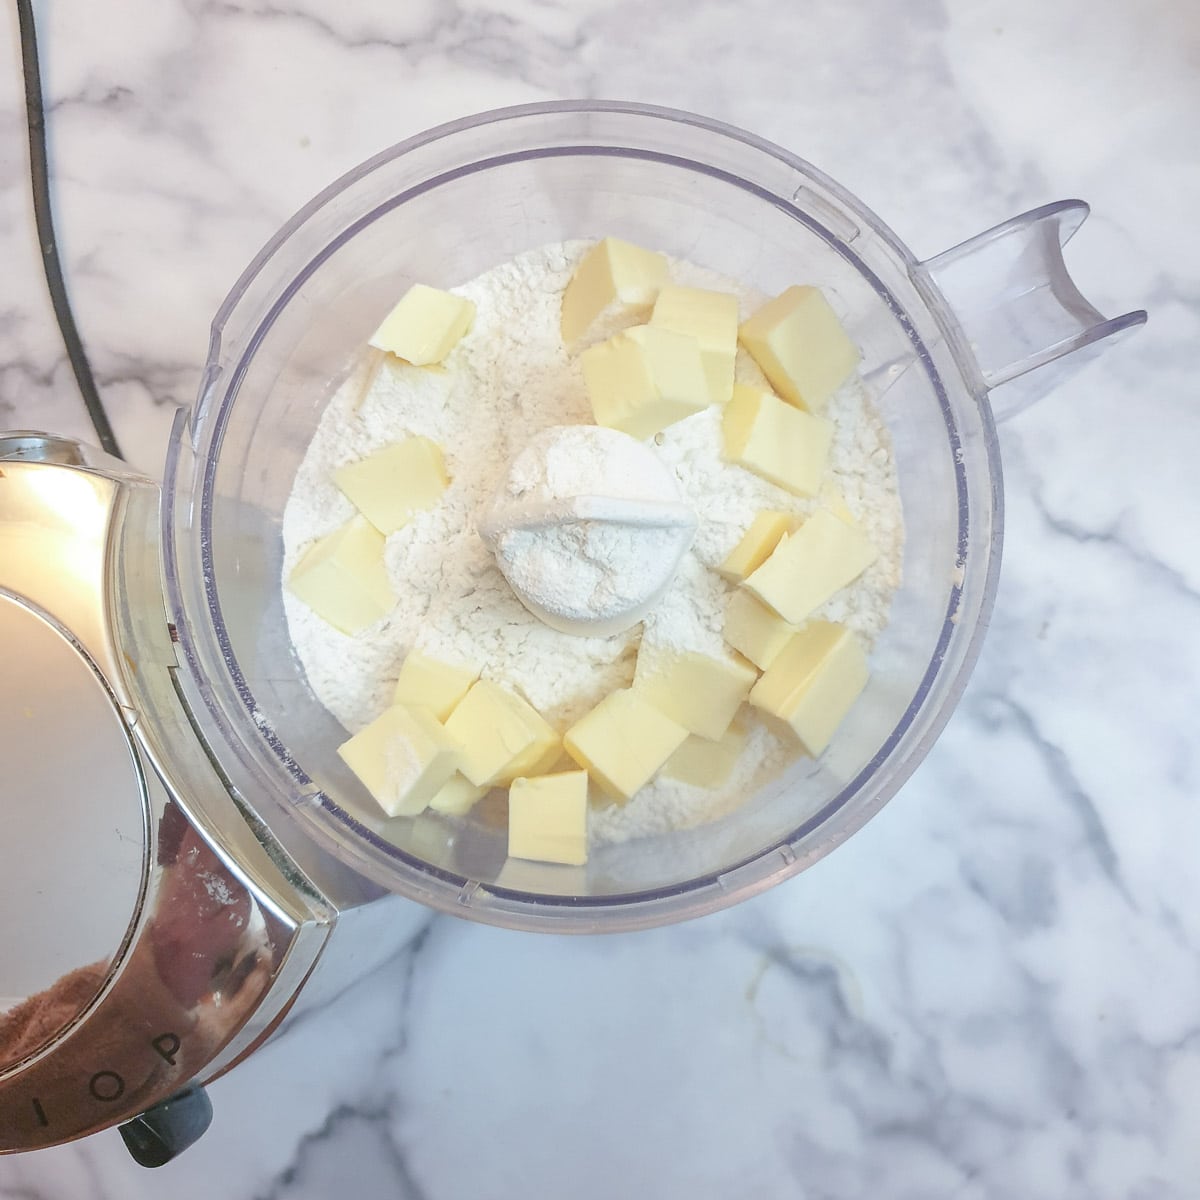
Step 1: Place the flour, salt (if using) and cubed butter into the bowl of a food processor fitted with the pastry blade.
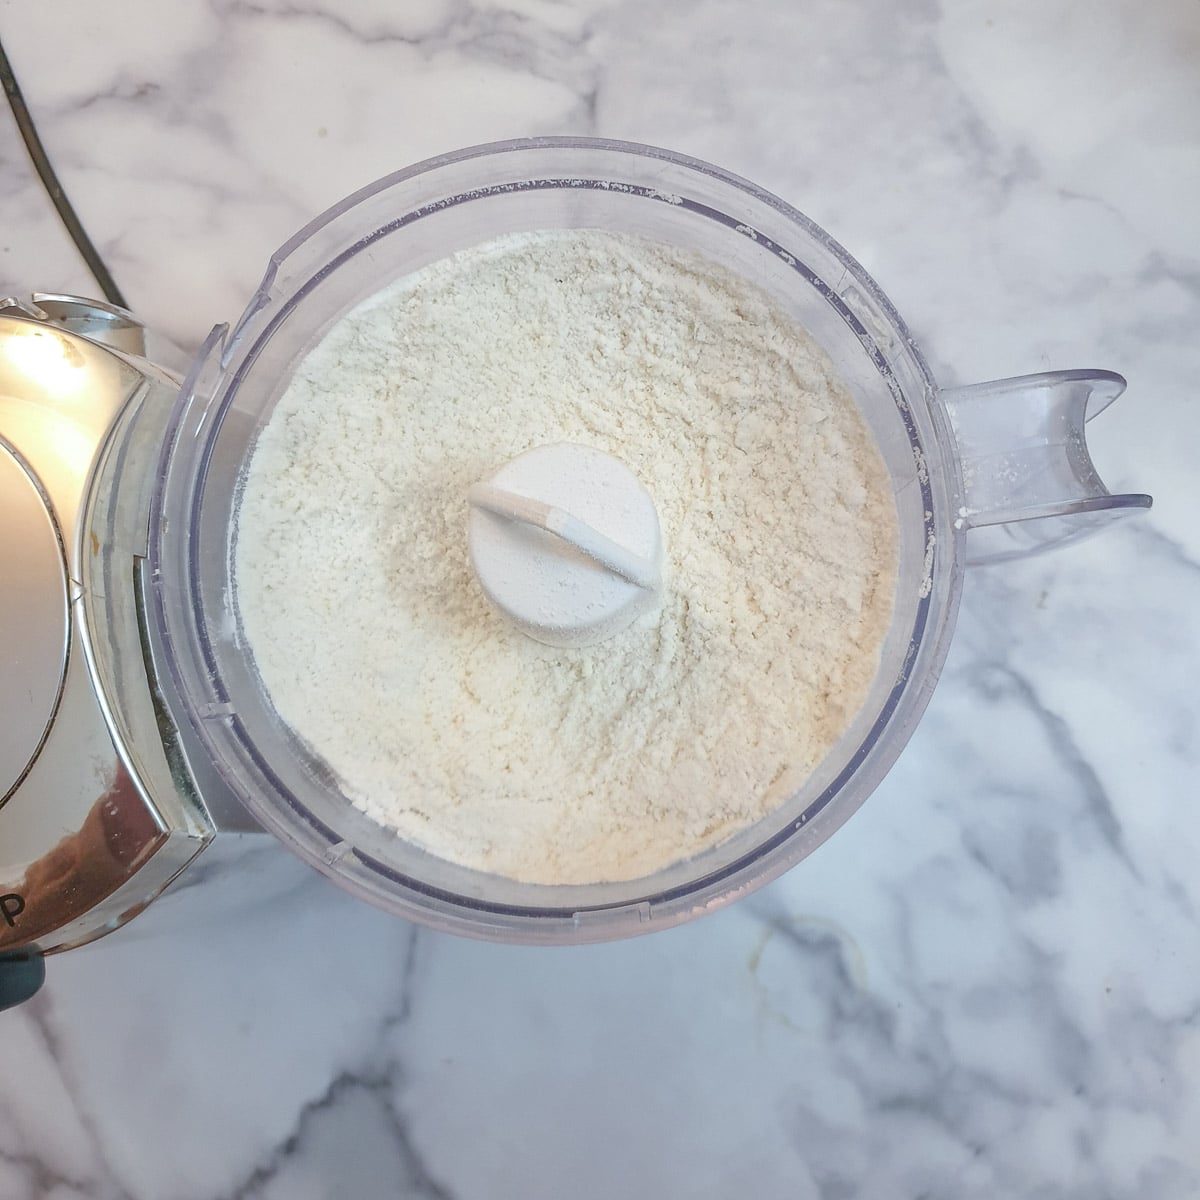
Step 2: Pulse briefly until the mixture resembles fine breadcrumbs. Avoid processing it for longer than necessary.
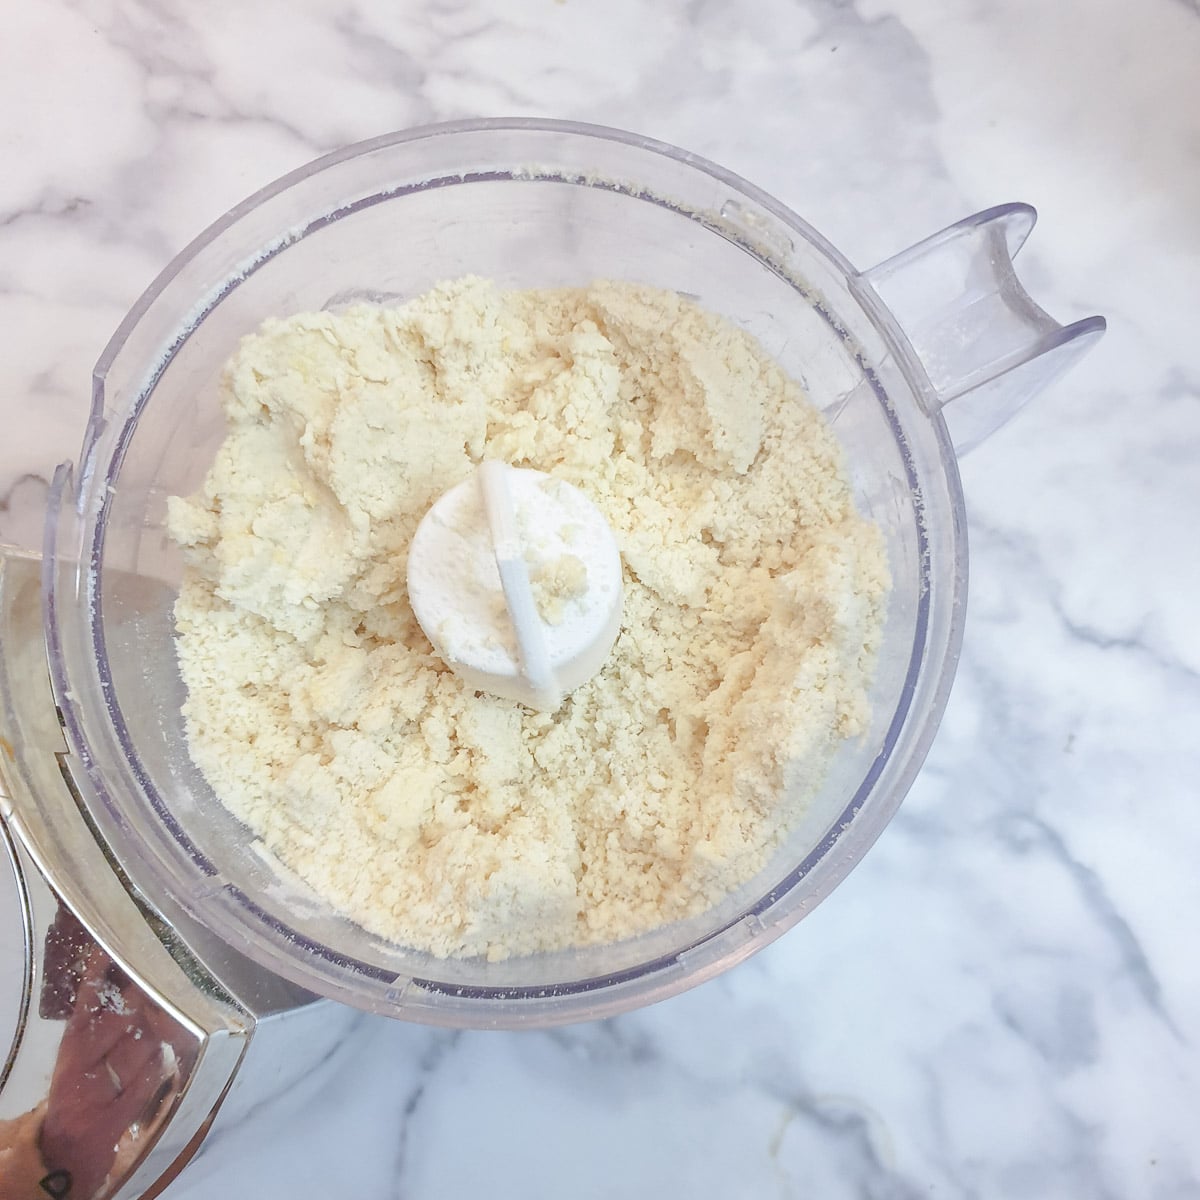
Step 3: Add most of the cold water and pulse briefly. Stop when the mixture starts to clump; add a little more water only if it will not hold together when pressed between your fingers.
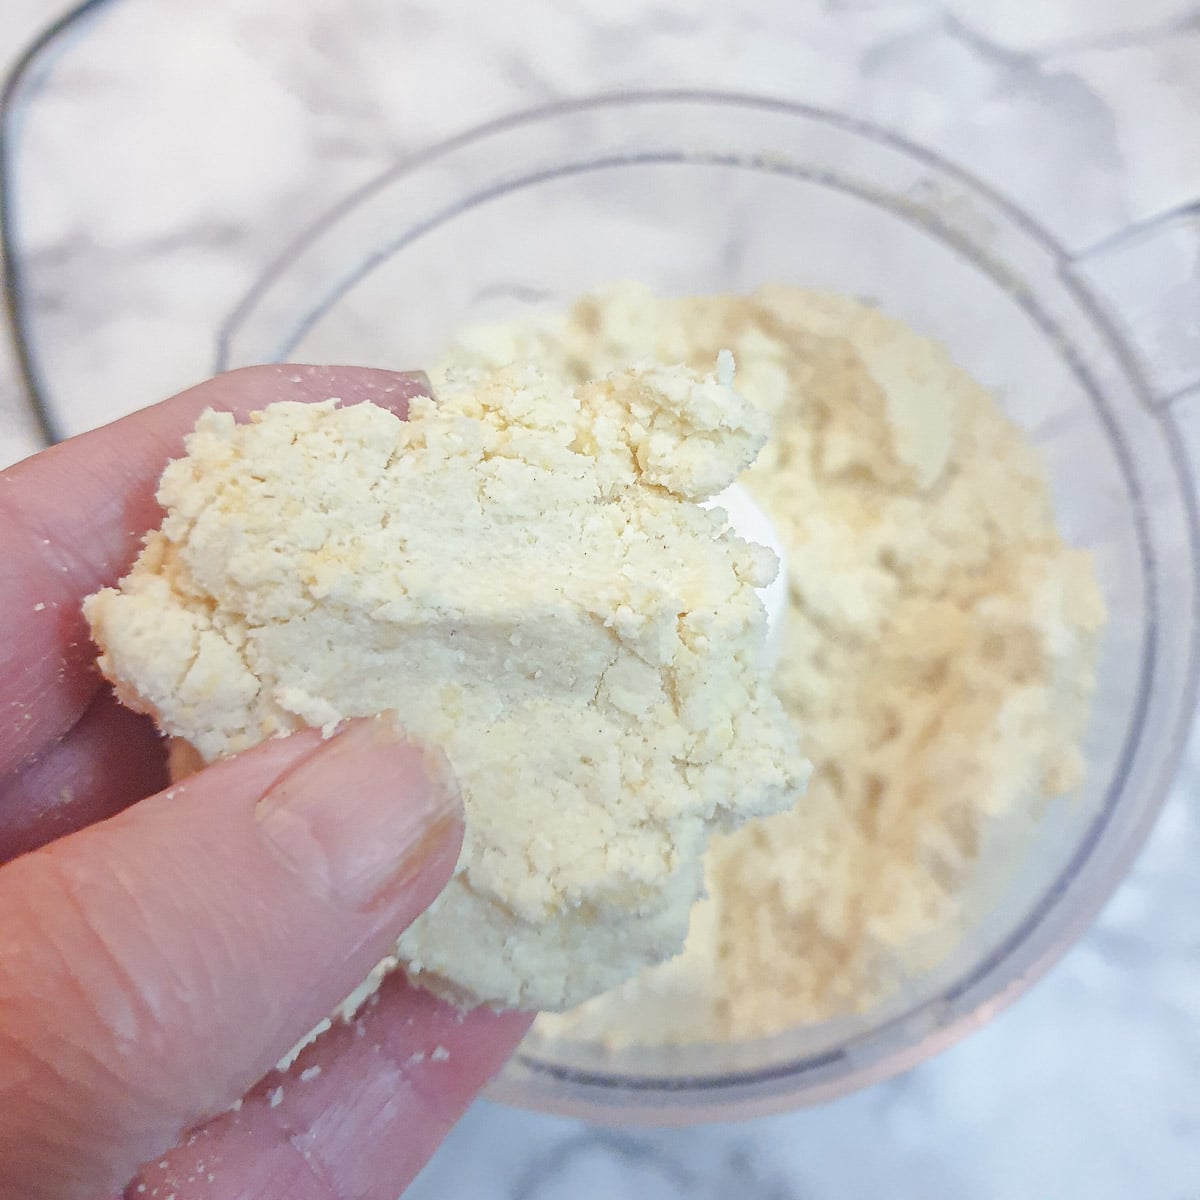
Step 4: When the dough comes together and holds its shape, tip the mixture onto a work surface and gently press together to form a soft ball. Do not knead.
Wrap the dough in cling film or put it into a resealable plastic bag. Refrigerate for 30 minutes before rolling.
Foodle Club tips for perfect shortcrust pastry
- Keep the fat and water cold. Cold fat is easier to rub into the flour without it becoming greasy. If you use an egg, keep that chilled too. If your hands are warm, rinse them in cold water and dry them thoroughly before starting.
- Gather everything before you start. Gather your equipment and ingredients before starting to mix. There is nothing worse than having to search through the cupboards for a missing item when your hands are covered in flour.
- Add the water gradually. Different flours absorb different amounts of liquid. Stop as soon as the dough holds together when pressed; it should not be wet or sticky. Adding lots of flour later to rescue a wet dough can make the pastry tough.
- Handle the pastry as little as possible. Be gentle when mixing the pastry and handle as little as possible. Kneading and over-mixing the dough will cause excessive gluten formation, which will lead to tough pastry. Only mix until everything comes together. Never knead pastry unless the recipe specifically calls for it.
- Leave the pastry to relax in the fridge. Refrigerate it for at least 30 minutes so the gluten can relax and the fat can firm up. This helps reduce shrinkage. If the dough becomes too firm to roll, leave it out for a few minutes until it yields to gentle pressure.
How to roll pastry
Roll pastry on a clean, cool work surface with enough room to reach the size you need. Marble is useful if you have it, but an ordinary worktop works well too.
Lightly flour the surface and rolling pin to prevent sticking. Add only a little more flour if needed; too much can make the pastry dry.
For a covered pie, divide the dough before rolling. As a starting point, allow about two-thirds for the base and sides and one-third for the lid; a deep or sloping-sided dish may need more for the base.
The shortcrust pastry calculator can help you work out the amount of fat and flour you will need for your dish.
Shape the pastry before you roll it
Form the pastry into the shape of your pie dish - if your dish is circular, then form the pastry into a ball; if your dish is square, then push the pastry into a similar shape before starting to roll.
Roll from the centre outwards, lifting and turning the pastry regularly so it doesn't stick, and you can keep it roughly in the right shape. Roll gently and avoid repeatedly working the dough back into a ball.
Transfer pastry to baking dish
When the pastry is large enough to cover the base and sides of the dish, with a little extra for the edge, loosely drape it over the rolling pin to transfer it. Aim for an even thickness of about 3 mm for most tarts and pies; a larger, sturdier pie may need slightly thicker pastry.
Ease the pastry carefully from the rolling pin into the pie dish, so the pastry does not stretch. Stretched pastry tends to shrink during baking.
Use a small piece of leftover dough to help you press the pastry against the sides of the pie dish.
If your pastry has rested and you are sure it won't shrink, you can trim the excess pastry from the edges of the dish with a sharp knife. Otherwise, leave the pastry hanging over the sides of the dish and only trim once it has been baked in the oven. For a covered pie, follow the recipe's instructions for sealing and trimming the lid and base together.
How to blind bake pastry
What is blind baking?
Blind baking simply means baking the pastry shell before adding the filling. This will help to ensure that the filling doesn't soak into the pastry, which could result in a 'soggy bottom', which nobody wants!
When blind-baking, the pastry is lined into the baking tin and then covered with a layer of baking parchment. Ceramic baking beads, or even just plain dried beans, are placed on top to weigh the pastry down and prevent it from rising as it bakes. Keep dried beans used for this purpose separate from those you intend to cook and eat.
You would typically blind-bake your pastry shell if you have a very runny filling that may lead to your pastry becoming soggy, or if the filling takes less time to bake than the pastry needs to cook.
Instructions to blind-bake a pastry shell
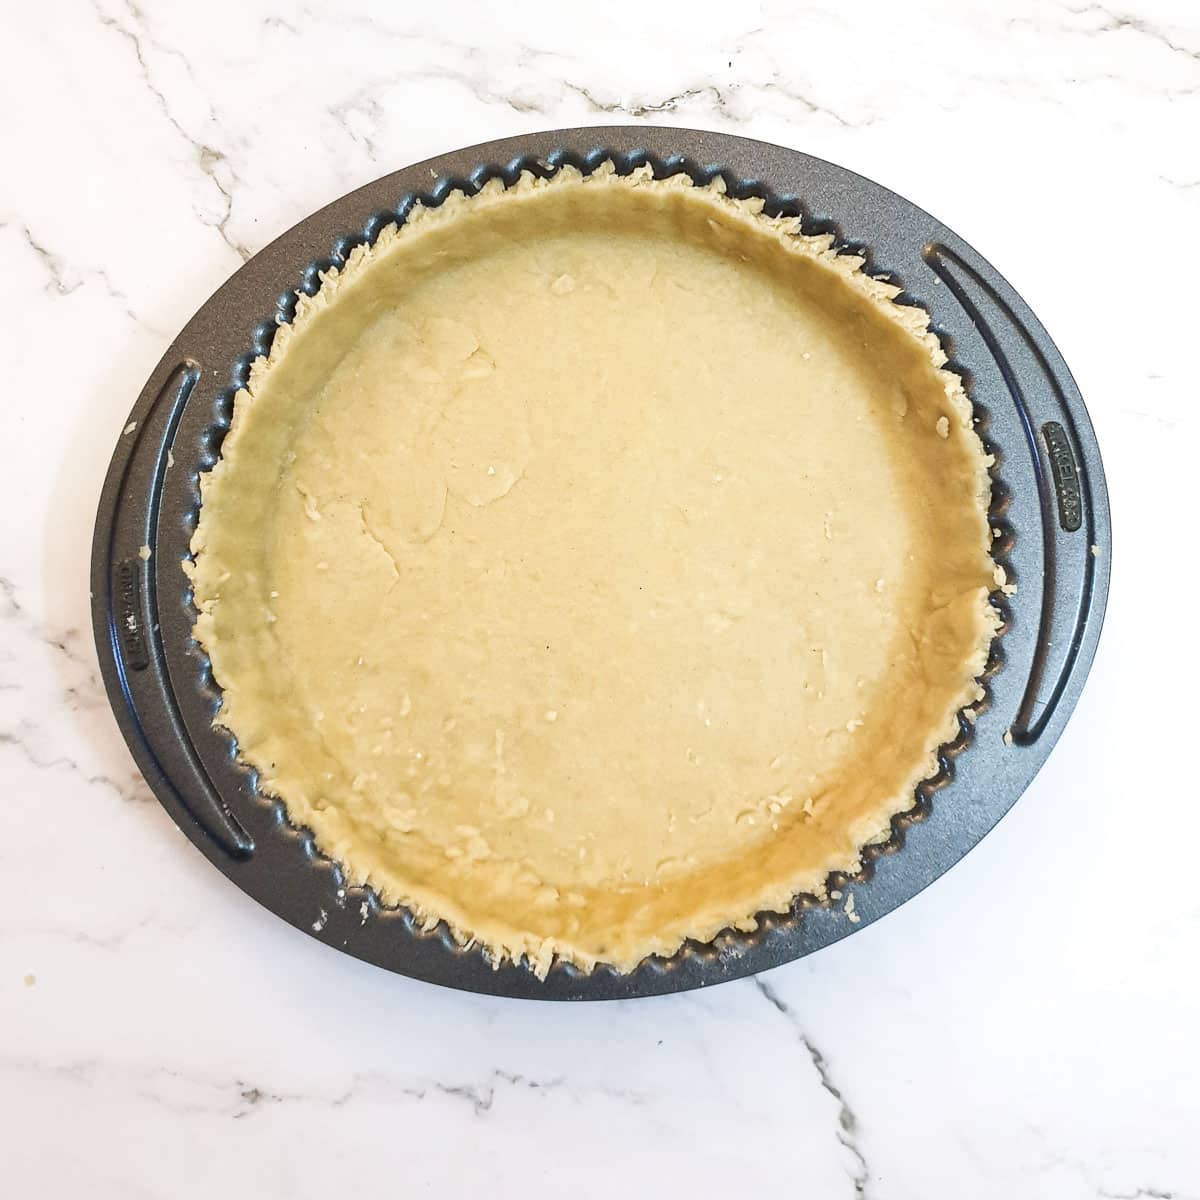
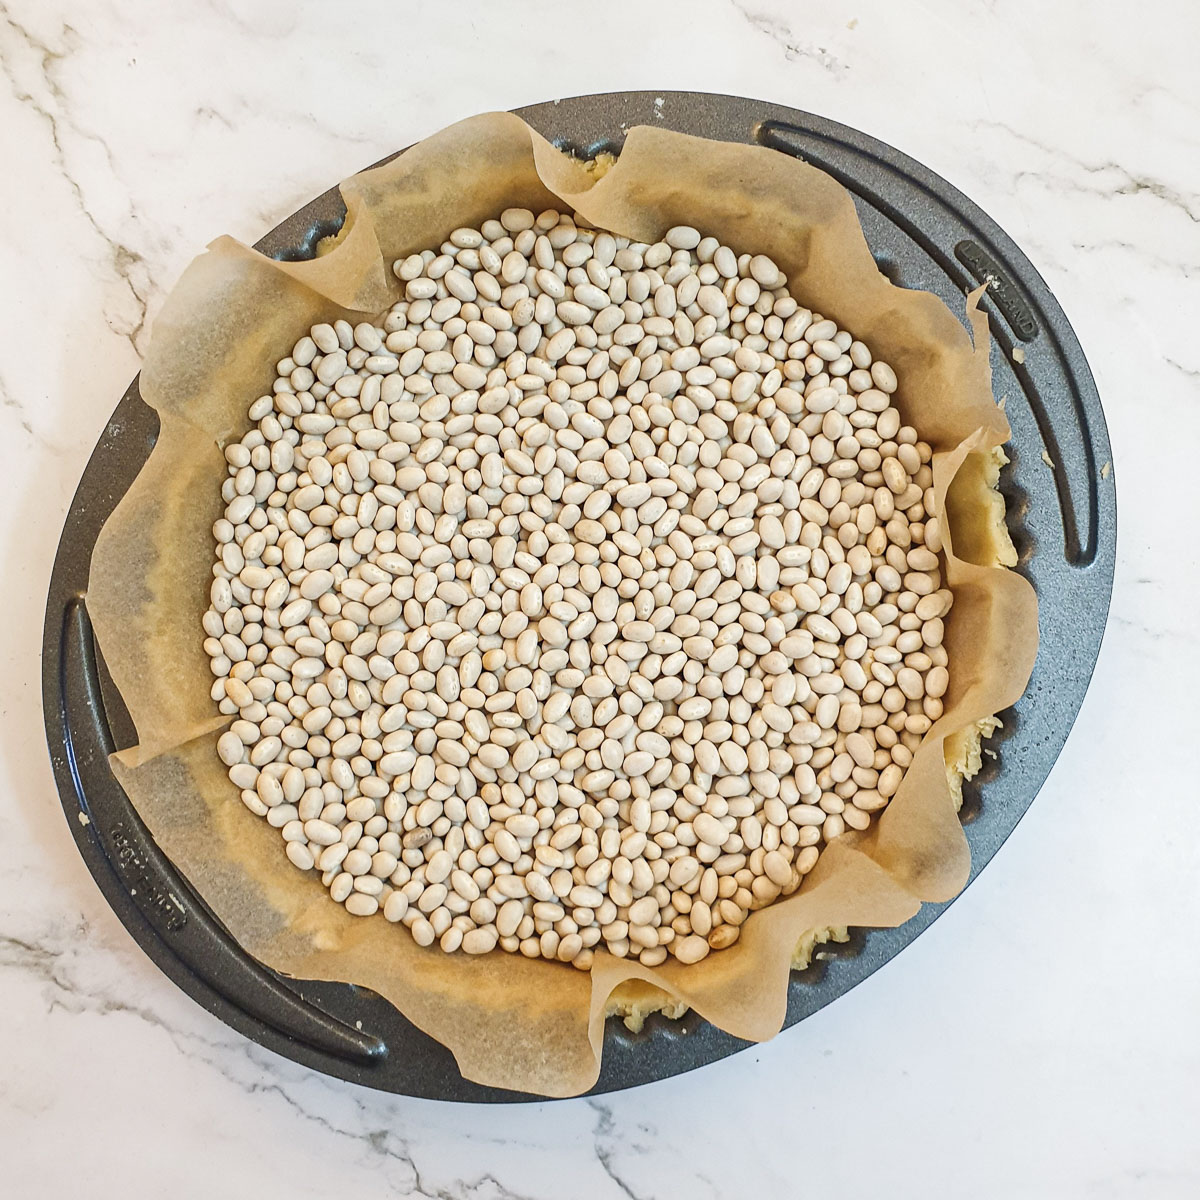
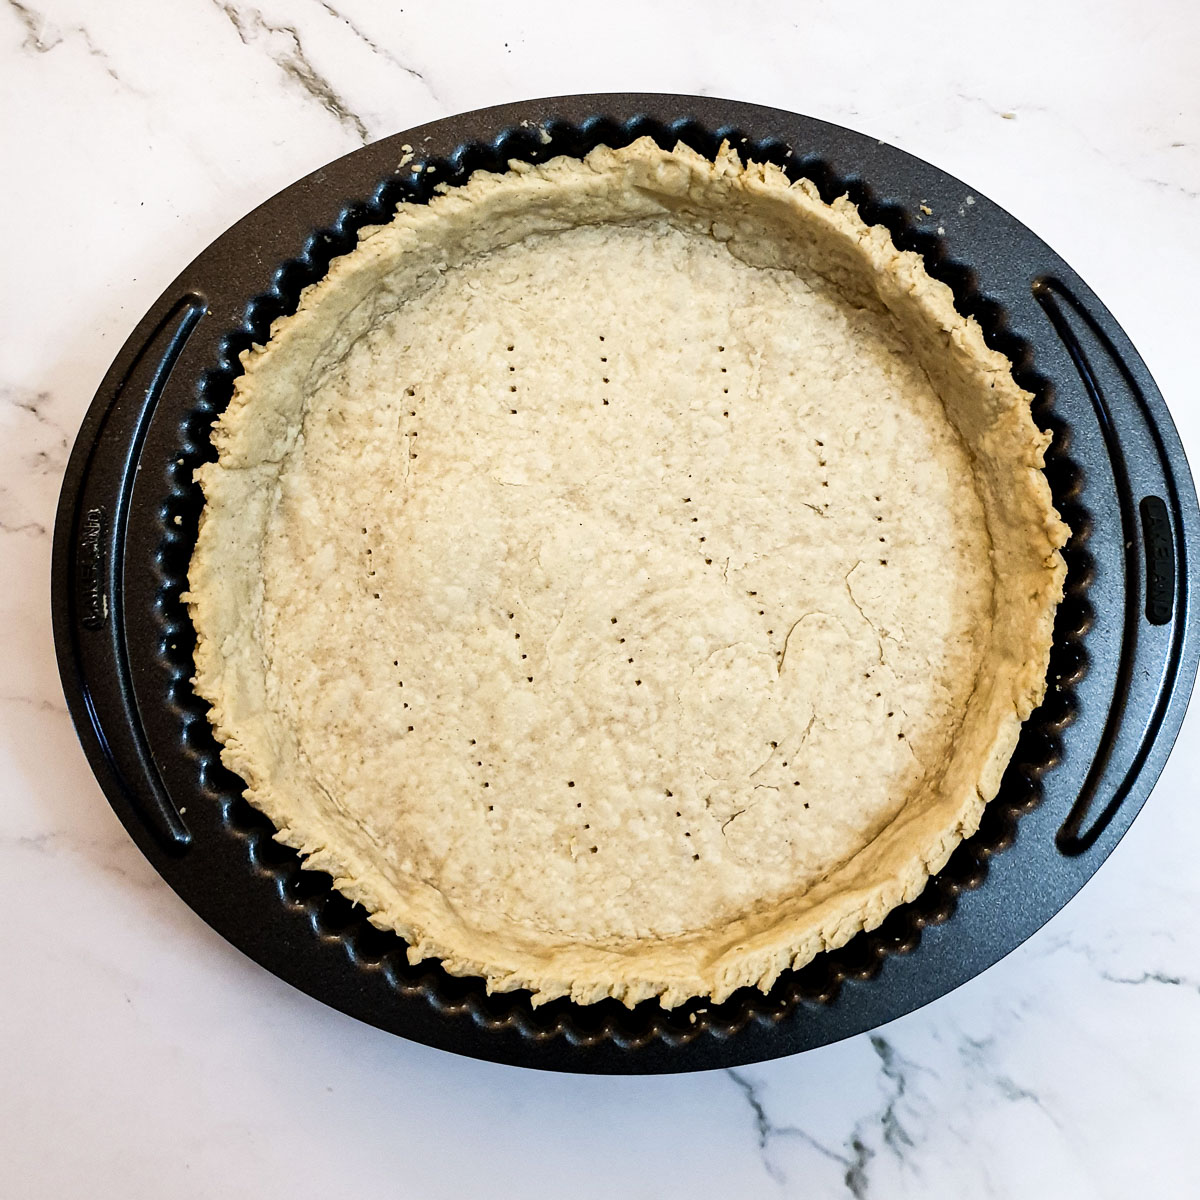
- Preheat the oven to 200C / 400F /Gas 6.
- Line your tin with pastry without stretching it, leaving a little pastry overhanging the edge. Chill the lined tin for 20 to 30 minutes (I would probably only do this if I hadn't chilled the pastry in the fridge first).
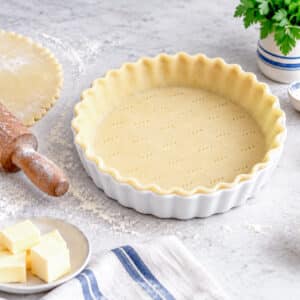
- Prick the bottom of the pastry lightly with a fork. This will help ensure the pastry does not rise.
- Cut a circle of baking parchment larger than the size of your pan so that there is sufficient paper for the edges to overhang.
- Crumple the baking parchment, smooth it out again, and arrange it over the uncooked pastry.
- Fill the lined case with baking beans, taking them right up to the sides.
- Bake for approximately 15 minutes, until the sides look set. Carefully lift out the paper and beans, then return the case to the oven for another 5 to 10 minutes, until the base looks dry and is lightly coloured. Timings vary with the size and thickness of the pastry case.
- Trim the overhanging pastry carefully. If the recipe calls for a filling that will be baked again, follow its instructions for adding the filling; you needn't always cool the shell first. For a filling that will not be baked, continue baking the empty case until it is golden and fully cooked, then let it cool completely.
Variations
Enriched shortcrust pastry
- Add an egg or egg yolk to the pastry before adding the water.
- The egg adds moisture, so use less water and add it only if needed.
Sweet shortcrust pastry
- This is used when making sweet dessert pies and tarts.
- Add sugar or icing sugar with the flour when mixing the pastry.
Savoury shortcrust pastry
- Savoury shortcrust pastry allows you to change the flavour profile of quiches and pies.
- Here are a few suggestions for inspiration:
- Grated cheese.
- Dried herbs, such as thyme, rosemary or oregano.
- Spices and powders such as mustard powder, paprika, garlic or onion powder.
- Seeds or chopped nuts for extra crunch and texture. Take care when adding these; larger pieces may make the pastry difficult to roll.
- Citrus zest.
Equipment
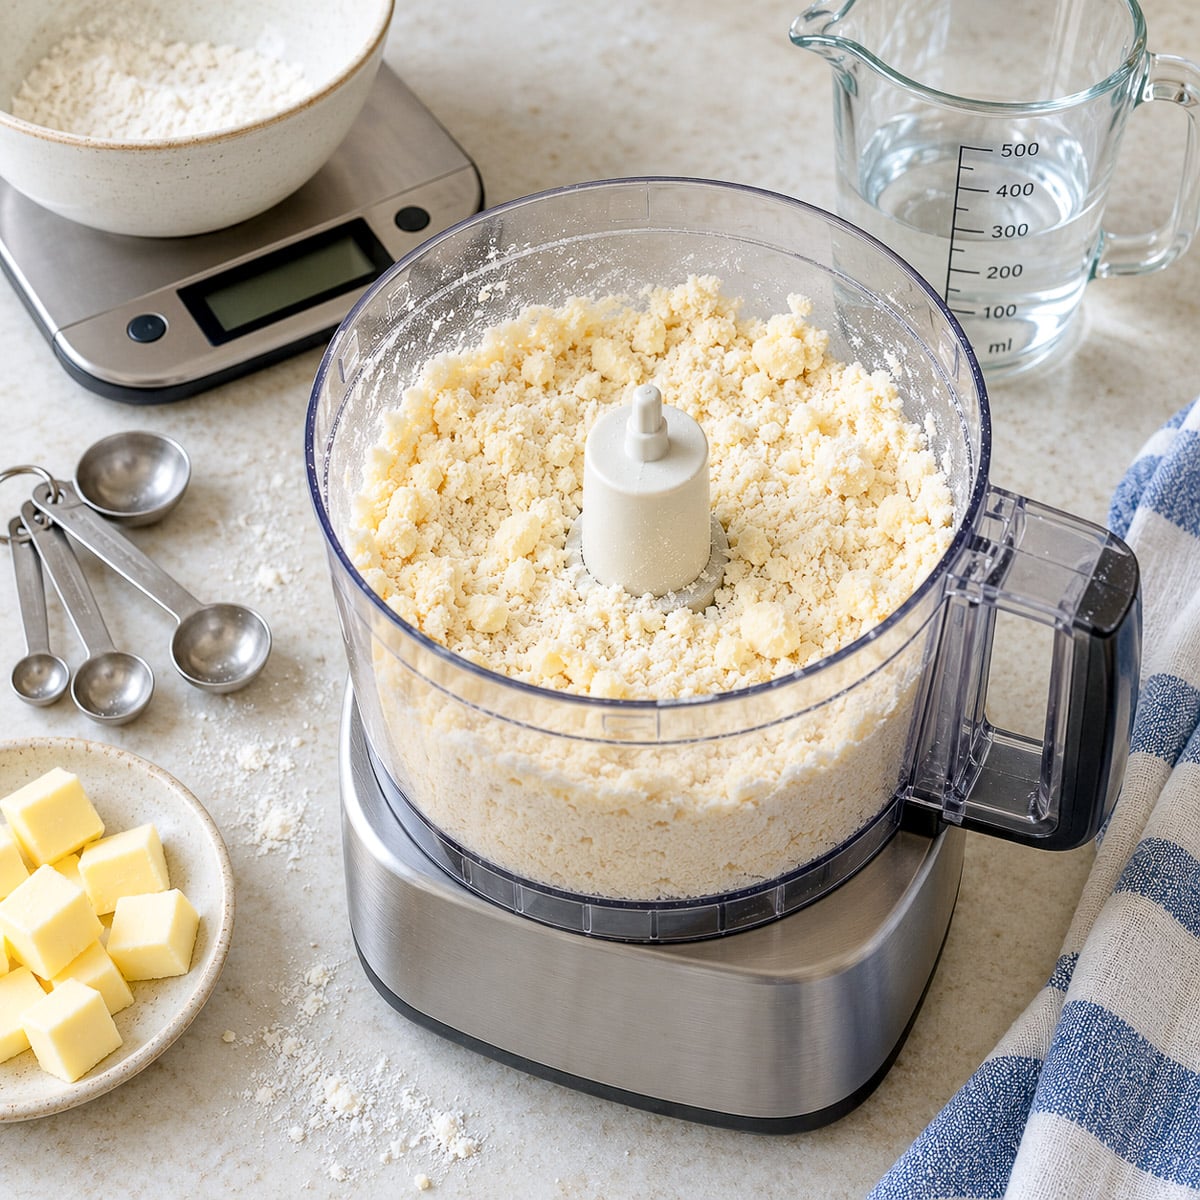
To make pastry, you will need at least some of the following kitchen equipment. I've added some links to Amazon in case you're missing anything. This is by no means an exhaustive list, but I've tried to cover all the basics.
For Measuring
- Measuring cup - my recipes are all based on a standard US cup, which holds 240 millilitres. Please note that a millilitre is a volumetric measurement so a cup of flour will have a different weight to a cup of sugar even though they have the same volume. See my convert grams to cups calculator to help you easily convert ingredients between cups and grams or ounces and vice versa.
- Measuring spoons - these should be calibrated from ⅛ teaspoon to 1 tablespoon. I like this set because they have a spoon shape at either end - a round spoon at one end for liquid ingredients and a longer shape on the other end to fit easily into a spice jar. The centre of each spoon is magnetised so they stay together in your drawer.
- Kitchen scales - Of course, the only way you can be completely sure that your measurements are accurate is by using a scale to weigh your ingredients.
For Mixing
- Food Processor - if you want to speed up the process of rubbing the flour into the fat, then this is a must. I have one similar to this one, and more than twenty years on it's still going strong.
- Hand mixer - invaluable for whipping up batters and egg whites, and for all those little jobs when you don't want to get the food processor out.
- Spatula - for hand mixing. You could also use a wooden spoon.
- Earthenware mixing bowl - I love my earthenware mixing bowl - mainly because it's large enough to get my hands in when I'm mixing pastry.
- Stick blender - great for blending ingredients and whipping up egg whites. This model has quite a few different attachments for chopping and blending.
For Rolling
- Rolling pin - I have a marble rolling pin which works really well, but a wooden one would do the trick just as well. A clean empty wine bottle makes a good makeshift rolling pin.
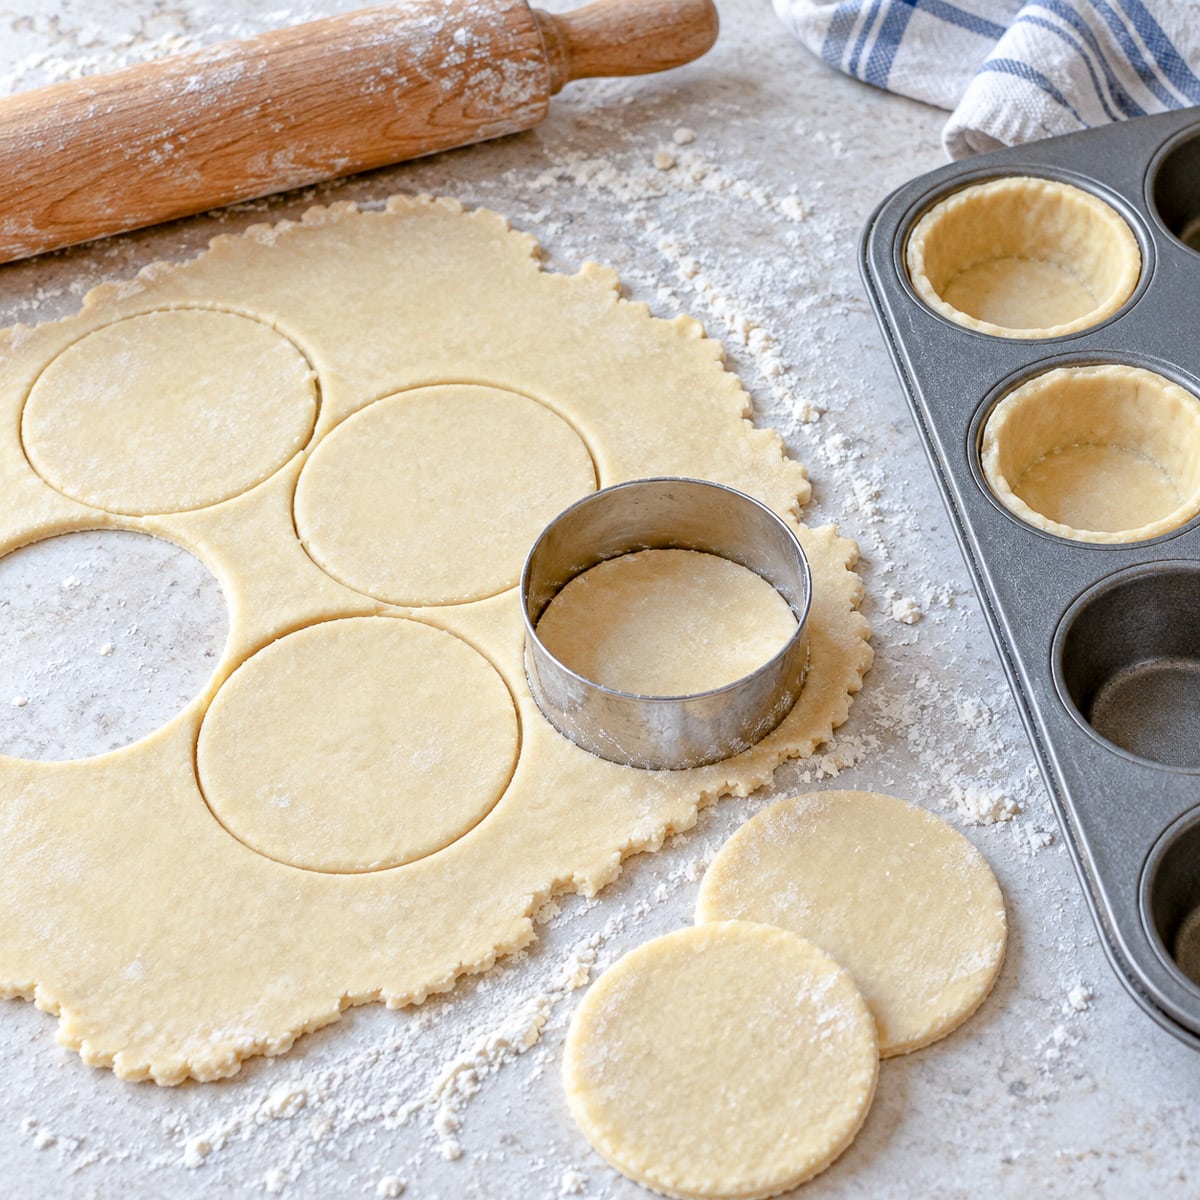
- Pastry cutters - handy when cutting out pastry rounds to line a mini quiche tin and also for cutting out scones and biscuits. (I've been known to use a small bowl or a large cup to do this 🙂
For Baking
- Cake tins and baking dishes - everyone needs a selection of cake tins and baking dishes for baking items such as quiches, flans and pies.
- Pastry brush - for egg washing your pies and sausage rolls before baking, and also for greasing your baking dish with oil or melted butter.
- Baking parchment - used for lining baking trays and pans.
- Baking beans - ceramic baking beans are used for blind baking pastry cases, but if you don't have them, you could keep a packet of dried beans in the cupboard for this purpose.
Storage
Refrigerator. Homemade shortcrust pastry can be kept in the refrigerator for up to 3 days. Allow it to stand on the counter to soften for 15 minutes or so before attempting to roll it.
Freezer. Wrap the dough tightly and freeze it for up to 3 months for best quality. You can flatten it into a disc first, so it thaws more evenly. Thaw it overnight in the fridge, then leave it out briefly if it is too firm to roll. Leftover offcuts can be collected and frozen too; press them together gently rather than kneading them.
Shortcrust pastry FAQ
Both work well. A processor is quicker, but mixing by hand makes it easier to feel when the dough has enough water. Whichever method you use, stop as soon as the dough holds together.
If you only use egg yolks in an enriched pastry, you can make meringues with the whites, or freeze them in a labelled container.
See this post from BBC Good Food on what to do with left-over egg whites.
The dough may have been mixed or kneaded too much, or too much water or extra flour may have been added. Mix only until it holds together and use a light touch when rolling it. Too little fat can also give a less tender result.
Rest the dough before rolling, ease it into the tin without stretching it, then chill the lined tin before baking.
When rolling the pastry, be careful not to stretch it. Do not apply too much pressure to the rolling pin - you need to encourage the pastry to expand, not force it.
Try sprinkling a little flour under the pastry before rolling to prevent it from sticking to the counter. If the pastry sticks to the counter as you are rolling it, it will stretch.
It may be too cold or too dry. Let a very firm dough soften slightly. If it still won't hold together, add a few drops of cold water and gently press it together. Pastry can also crumble if the proportion of fat to flour is too high.
Air may have been trapped underneath, or the baking beans may not have weighed the base down sufficiently. Press the dough gently into the base and sides of the tin, line it with parchment, and fill the case with baking beans when blind baking.
In sweet pastry, coarse sugar that has not dissolved may leave darker spots. Icing sugar or fine caster sugar mixes more evenly into the dough.
For a tart with a wet filling, blind bake the case as directed in the recipe. For a covered pie, a filling that is too liquid can soak into the base; thicken it if the recipe calls for that, and make sure it isn't piping hot when added. Preheat the oven fully. A preheated metal baking tray under the pie dish can help the base cook through, provided the dish is suitable for use on a hot tray. Cut a small steam vent in a covered pie lid.
Save for later
If you would like to save these instructions and keep them handy for the next time you make pastry, why not save this post to one of your Pinterest boards. Simply click on the image below.
Alternatively, you can save the recipe by clicking on the floating heart icon on the right-hand side of the screen.
Related recipes
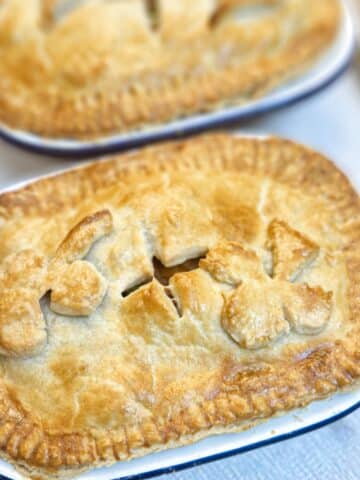
Here are a few recipes using shortcrust pastry that you might like to try:

📋The recipe
How to make shortcrust pastry
(Click the stars to rate this recipe)
Equipment
- Large mixing bowl
- Rolling Pin
- 2 9-inch pie dishes
- Baking beans optional (for blind baking)
Ask a Question
If you have a question about this recipe that has not been answered, please use the box below to ask it.
Use this with care. This is an AI-generated result and may contain errors or inaccuracies. I cannot be held responsible for the information returned.
Ingredients
- 2.6 cups / 360 grams plain, all-purpose flour or cake flour 2.6 cups is roughly 2½ cups plus 1 tablespoon. Do not use self-raising flour.
- ⅘ cup / 180 grams unsalted butter ⅘ cup is 7 ounces. You can use lard or baking margarine.
- 6 - 8 tablespoons ice cold water
- ½ teaspoon salt
- ½ tablespoon butter (at room temperature) for greasing the baking dish
Instructions
Mix the pastry (by hand)
- Cut the butter or shortening into cubes and place in a mixing bowl with the flour and salt (if using).2.6 cups / 360 grams plain, all-purpose flour or cake flour, ½ teaspoon salt, ⅘ cup / 180 grams unsalted butter
- Using your fingertips, rub the butter into the flour until the mixture resembles fine breadcrumbs.
- Add most of the water, and using extended fingers on one hand (pretend you are holding a tennis ball) mix the water into the flour until it starts to come together in a shaggy ball.6 - 8 tablespoons ice cold water
- If you need to add more water, add it 1 tablespoon at a time, but be careful not to add too much.
- Gently press the dough together into a ball. It should hold together without feeling wet or sticky. Do not knead. You may find it easier to tip the dough onto your work surface before pressing it together.
- Wrap the dough with plastic wrap or cling film and place it in the refrigerator for 30 minutes to rest.
Mix the pastry (using a food processor)
- Place the flour, salt (if using) and cubed butter into the bowl of a food processor fitted with the pastry blade.
- Pulse until the mixture resembles fine breadcrumbs. Avoid processing it for longer than necessary.
- Add most of the cold water and pulse briefly. Stop when the mixture starts to clump; add a little more water only if it will not hold together when pressed between your fingers.
- When the dough comes together and holds its shape, tip the mixture onto a work surface and gently press it together into a soft ball. Do not knead.
- Wrap the dough with plastic wrap or cling film and place it in the refrigerator for 30 minutes to rest.
Line the baking dish
- Grease your baking dishes with a thin coating of butter. Make sure you get the butter well into the edges.½ tablespoon butter (at room temperature)
- Cut the rested pastry in half and place one half on a lightly floured surface.
- Roll the pastry into a circle large enough to cover the base and sides of your baking dish.
- Use the rolling pin to help you transfer the pastry to the baking dish.
- Use a small piece of dough to help you press the pastry into the baking dish.
- Using a sharp knife, trim away any excess pastry.
- Repeat with the second half of the dough to line the other baking dish.
Blind bake (this step is optional depending on the filling you will be using)
- Preheat the oven to 200°C / 400°F
- Prick the base of the pastry with a fork. This will help prevent the pastry from rising as it bakes.
- Cut a circle of baking parchment large enough to cover the baking dish, with sufficient paper to overhang the sides of the dish.
- Crumple the baking parchment then smooth it out and place it over the pastry.
- Place a layer of baking beans on the bottom to weigh the pastry down and prevent it from rising.
- Bake for approximately 15 minutes, until the sides look set. Carefully lift out the paper and beans, then return the case to the oven for another 5 to 10 minutes, until the base looks dry and is lightly coloured. Timings vary with the size and thickness of the pastry case.
Notes
-
- grated cheese
- dried herbs, such as thyme, rosemary or oregano.
- spices and powders such as mustard powder, paprika, garlic or onion powder.
- seeds or chopped nuts for extra crunch and texture. Take care when adding these; larger pieces may make the pastry difficult to roll.
- citrus zest.
- Keep the fat and water cold. Cold fat is easier to rub into the flour without it becoming greasy. If you use an egg, keep that chilled too. If your hands are warm, rinse them in cold water and dry them thoroughly before starting.
- Gather everything before you start. Gather your equipment and ingredients before starting to mix. There is nothing worse than having to search through the cupboards for a missing item when your hands are covered in flour.
- Add the water gradually. Different flours absorb different amounts of liquid. Stop as soon as the dough holds together when pressed; it should not be wet or sticky. Adding lots of flour later to rescue a wet dough can make the pastry tough.
- Handle the pastry as little as possible. Be gentle when mixing the pastry and handle as little as possible. Kneading and over-mixing the dough will cause excessive gluten formation, which will lead to tough pastry. Only mix until everything comes together. Never knead pastry unless the recipe specifically calls for it.
- Leave the pastry to relax in the fridge. Refrigerate it for at least 30 minutes so the gluten can relax and the fat can firm up. This helps reduce shrinkage. If the dough becomes too firm to roll, leave it out for a few minutes until it yields to gentle pressure.
Nutrition
I am not a nutritionist. The nutrition information has been calculated using an on-line calculator, and is intended for information and guidance purposes only. If the nutrition information is important to you, you should consider calculating it yourself, using your preferred tool.
If you made this recipe and enjoyed it, I'd love it if you could give me a star rating in the comments below. And if you'd like to get in touch, you can email me at [email protected]. I'd love to hear from you. And don't forget to subscribe to my mailing list so you can grab yourself a copy of my FREE COOKBOOK!
If you'd like to continue browsing, just click on this link to all my recipes.

Did you make this recipe? Let me know!