
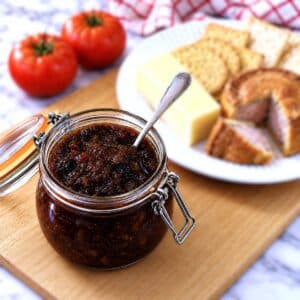
This fruity tomato chutney is packed with tomatoes and sultanas, with apple cider vinegar for tang, and a warming blend of spices and chilli for zing. Sweet, tangy and gently spiced, it's delicious with cheese, cold meats, pork pies or simply spread on a ham or cheese sandwich.
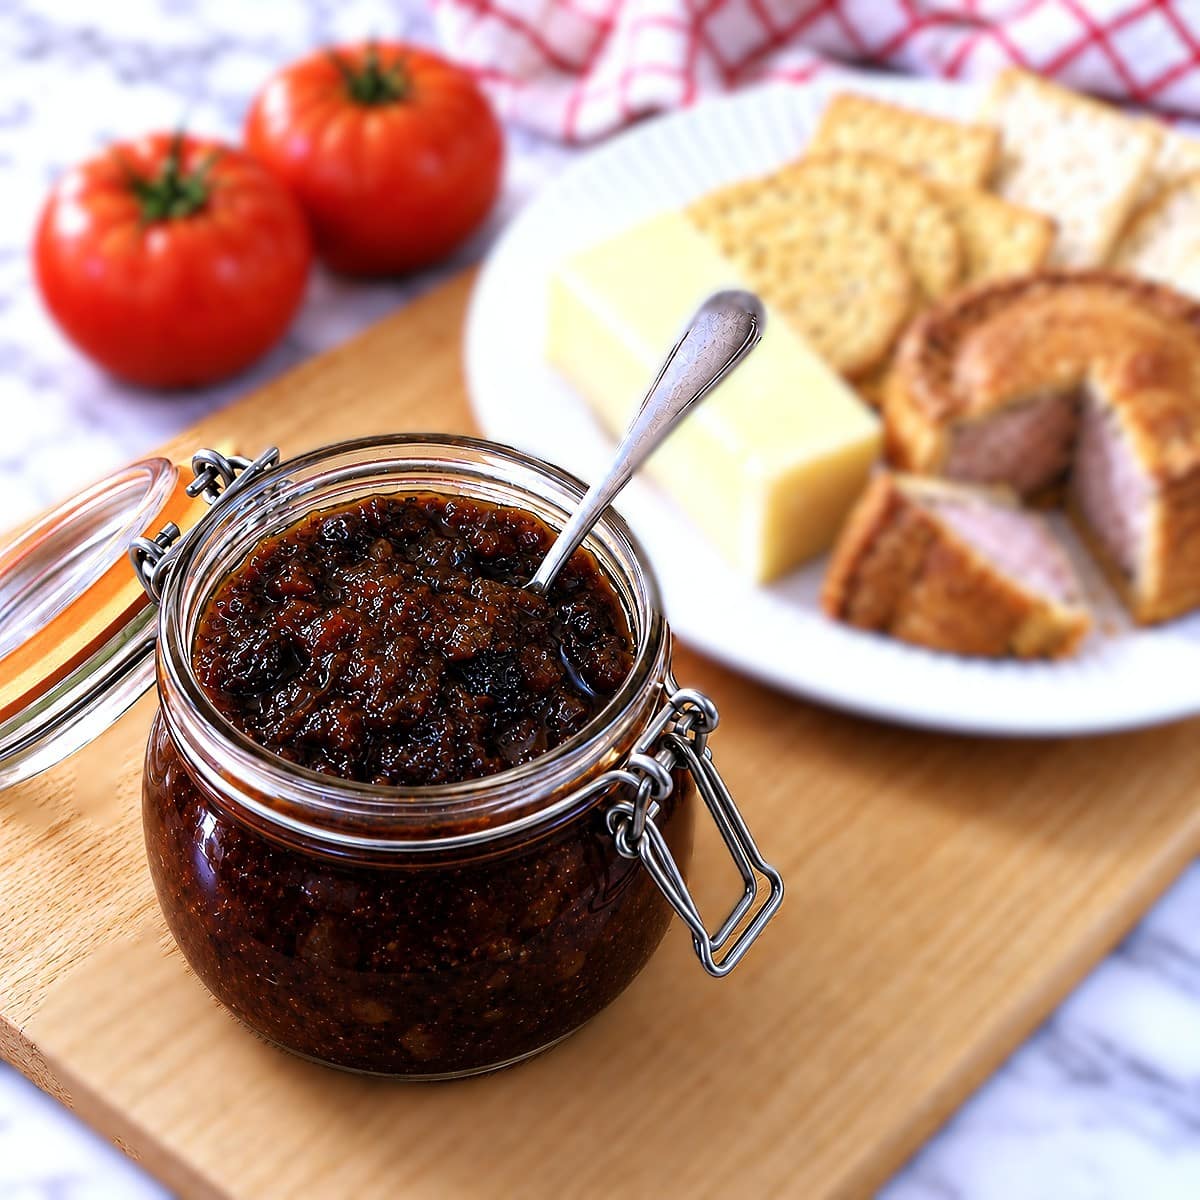
This fruity tomato chutney came about as a way of using a mixed batch of tomatoes from the allotment. Some were still firm, and others were getting a little soft, but they all went into the pan together. It's a useful way to turn a surplus into something you can enjoy alongside all sorts of meals.
There's very little work involved in making this tomato chutney beyond chopping the tomatoes and onions. Everything goes into one pan, then it's simply a matter of letting it simmer, with an occasional stir, until it turns thick and chutney-like. The sultanas add plenty of fruity sweetness, balanced by the tang of apple cider vinegar.
I particularly love the mixed spice in this chutney. It adds that familiar warmth of cinnamon, nutmeg and cloves, which works so well with the tomatoes and brown sugar. Ginger, mustard powder and a little chilli round out the flavour with a gentle heat. Having spent many years enjoying Mrs Balls chutney in South Africa, I think this homemade version gives it a run for its money!
My favourite way to eat this fruity tomato chutney is with a good pork pie, but it's equally at home with cheese, cold meats or in a sandwich. A couple of spoonfuls stirred into a stew or casserole adds a lovely depth of flavour - a little trick from my years in South Africa, where chutney earns its place in the cooking pot as well as on the table.
You might like to try some of my other chutney recipes too:
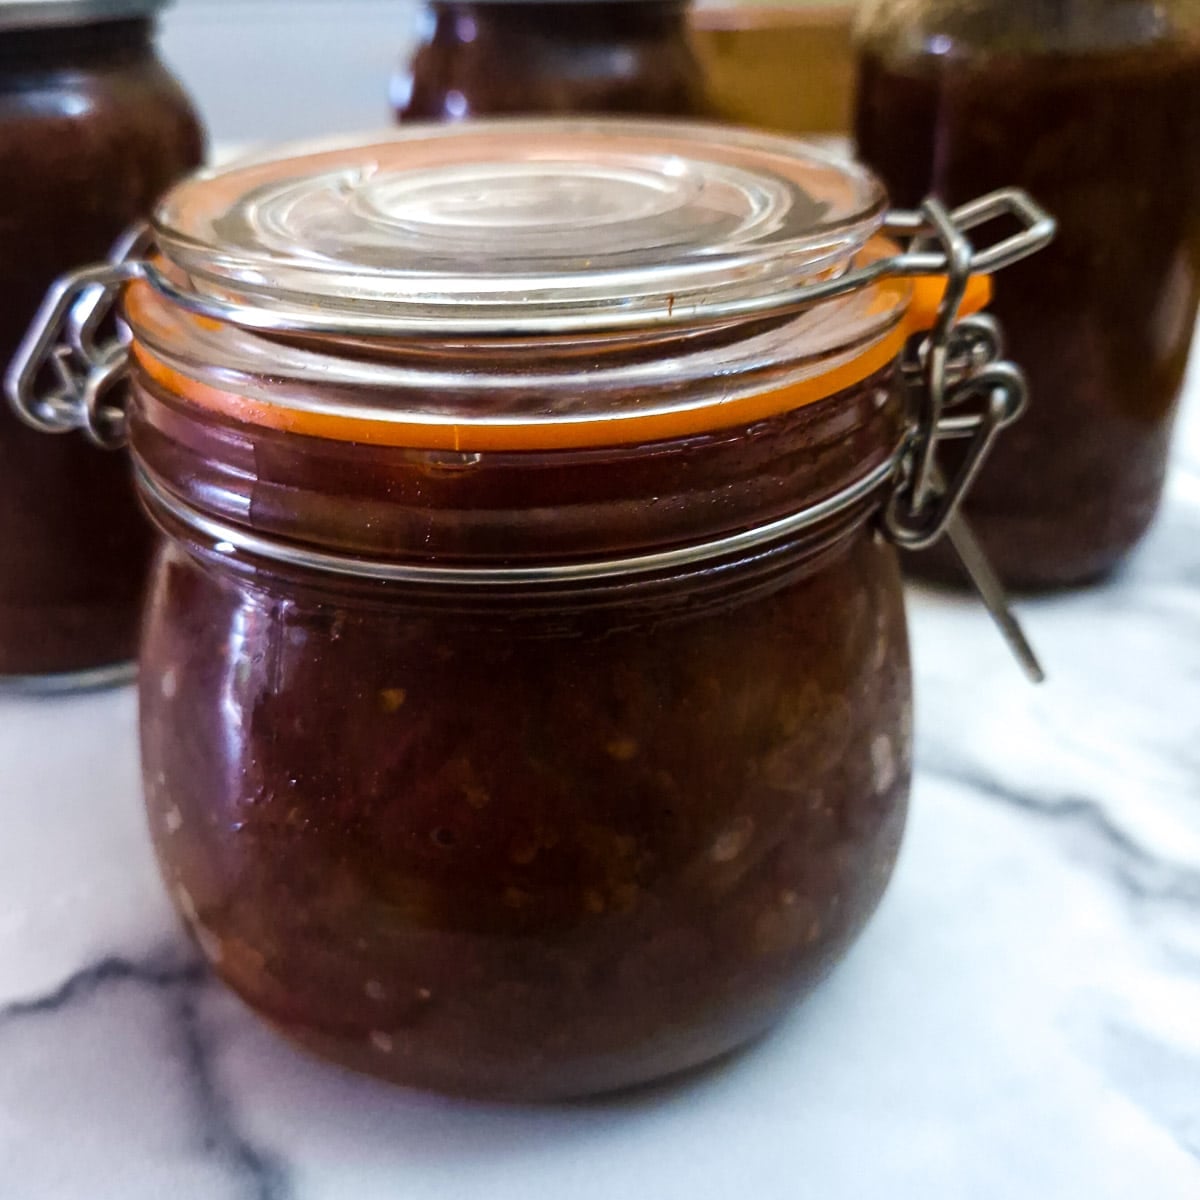
Table of Contents
Homemade tomato chutney at a glance
- How this recipe is made: Chop up the tomatoes and onions, combine them in a pan with the spices, and let them simmer until the chutney has thickened.
- Prep time: About 30 minutes to cut up the tomatoes and onions (there are a LOT of tomatoes 😁).
- Cooking time: About 1.5 hours of simmering. The actual time depends on the amount of liquid released from the tomatoes.
- Yield: Approximately 2 kg chutney or 4 pints, depending on how much liquid evaporates.
- Difficulty: Easy
Why I love this fruity tomato chutney
- Very little hands-on work - once everything is chopped, it all goes into one pan to simmer, with just an occasional stir.
- A useful way to use up tomatoes - a mixture of varieties works well, including ripe tomatoes that are starting to soften.
- Plenty of flavour - sultanas and brown sugar bring sweetness, vinegar adds tang, and mixed spice gives it a lovely warmth.
- As much chilli as you like - leave it out, keep it gently spiced or add a little extra chilli for more heat.
- More than a condiment - serve it with cheese, cold meats or my favourite pork pie, or stir a spoonful into a stew or casserole for extra flavour.
Ingredients for tomato chutney
**This is just an overview to explain why I used a particular ingredient. The complete list of ingredients and the exact measurements are on the printable recipe card at the end of this post.**
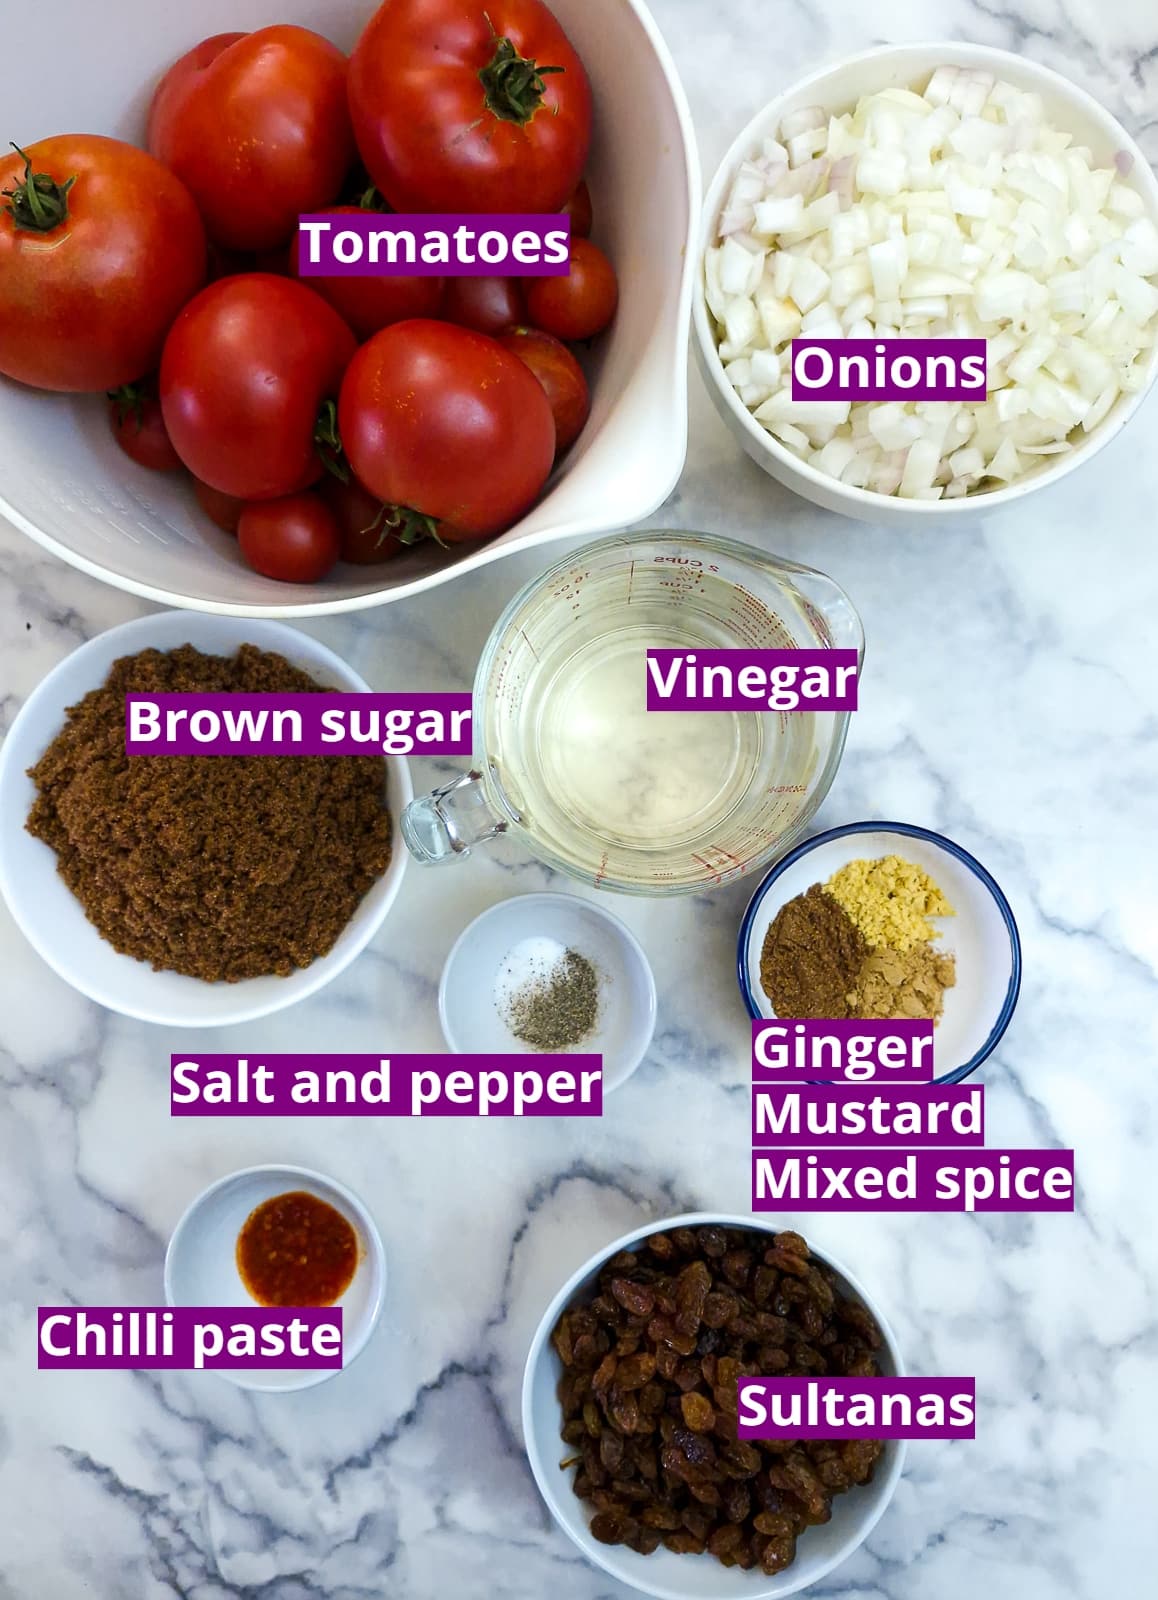
- Tomatoes. I used a mixture of tomatoes that hubby had grown on the allotment. Any variety will work, and you can combine firm, ripe tomatoes with those that are starting to soften. There's no need to peel them, as the skins aren't noticeable in the finished chutney, but if you prefer yours peeled, I've included an easy method below.
- Onions. I like to use white onions, but red onions work too. Peel and finely dice them into pieces approximately 1 cm (just under ½ inch) in size.
- Sultanas. These add fruity sweetness. There's no need to soak them first, as they soften and plump up while the chutney cooks.
- Vinegar. Apple cider vinegar is my preference for its fruity flavour, which complements the tomatoes and sultanas. Use vinegar labelled with 5% acidity. White wine vinegar of the same strength can be substituted.
- Brown sugar. This balances the tang of the vinegar and softens the heat of the chilli and spices. I use dark brown sugar because its molasses adds a deeper flavour and rich, dark colour. Sugar also contributes to preservation by reducing the water available for micro-organisms to grow.
- Ginger, mustard and mixed spice. Use ground ginger and mustard powder so they blend evenly into the chutney. They add a little pungency, while the cinnamon, nutmeg and cloves in the mixed spice bring the warming flavour I particularly love.
- Chilli paste. This is optional, but I like a little for gentle heat. Adjust the amount to suit your taste and the strength of your paste.
- Salt and pepper. Taste the chutney towards the end of cooking and season to your liking. Let a spoonful cool slightly before tasting so you can judge the flavours more easily.
How to make easy tomato chutney
Preparation
- Peel and dice the onions
- Peel the tomatoes - optional; see below for easy instructions if you do want to peel them. Then chop them into small dice.
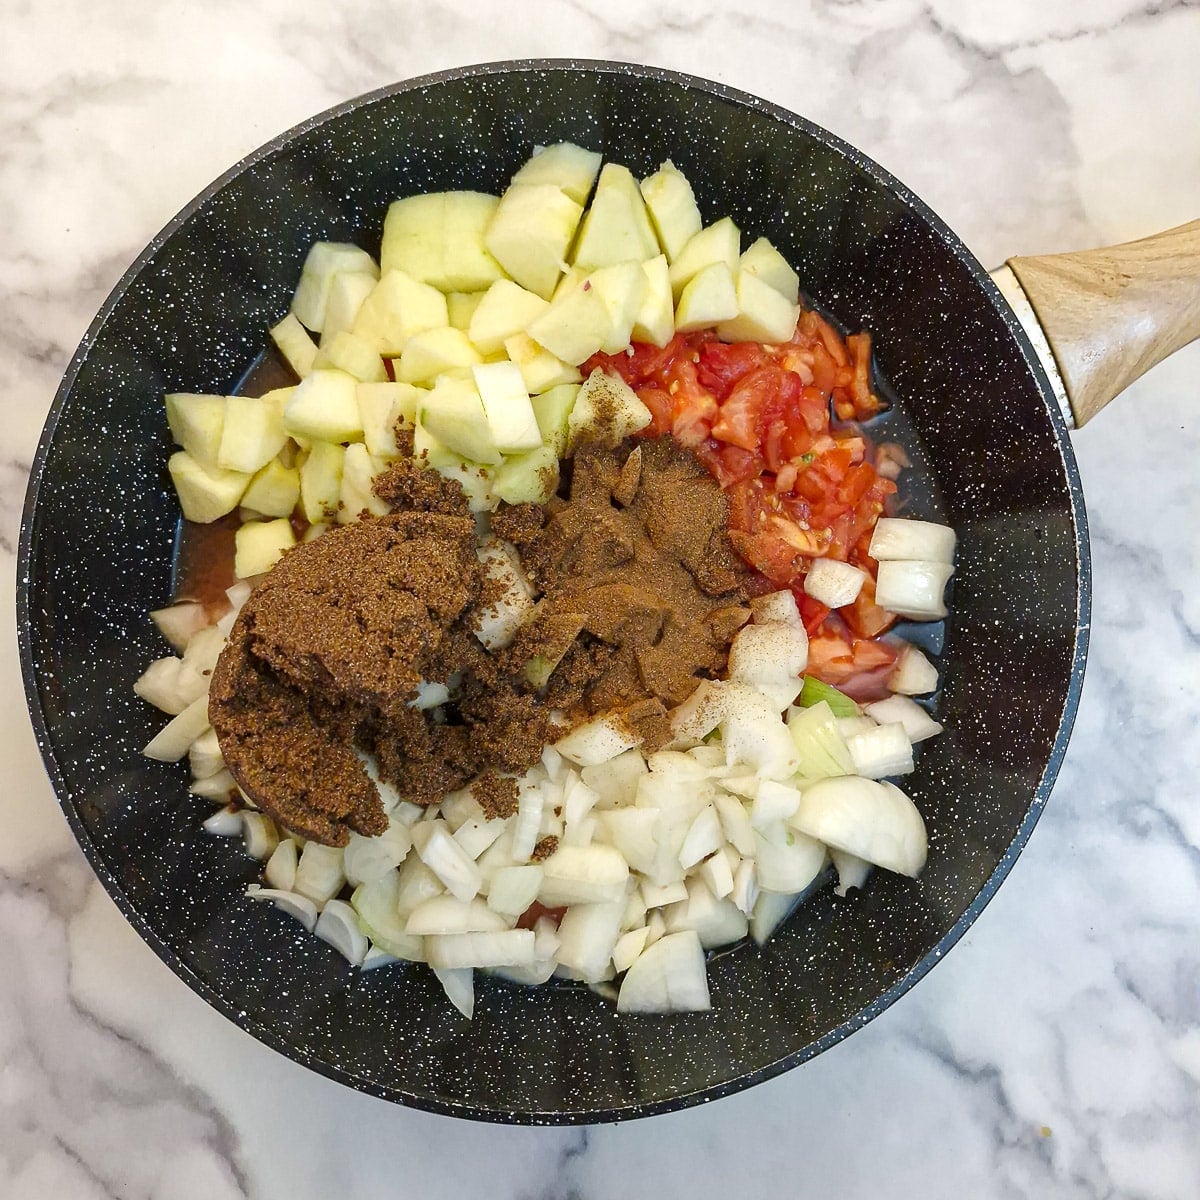
Step 1: Place all the ingredients into a large wok or saucepan.
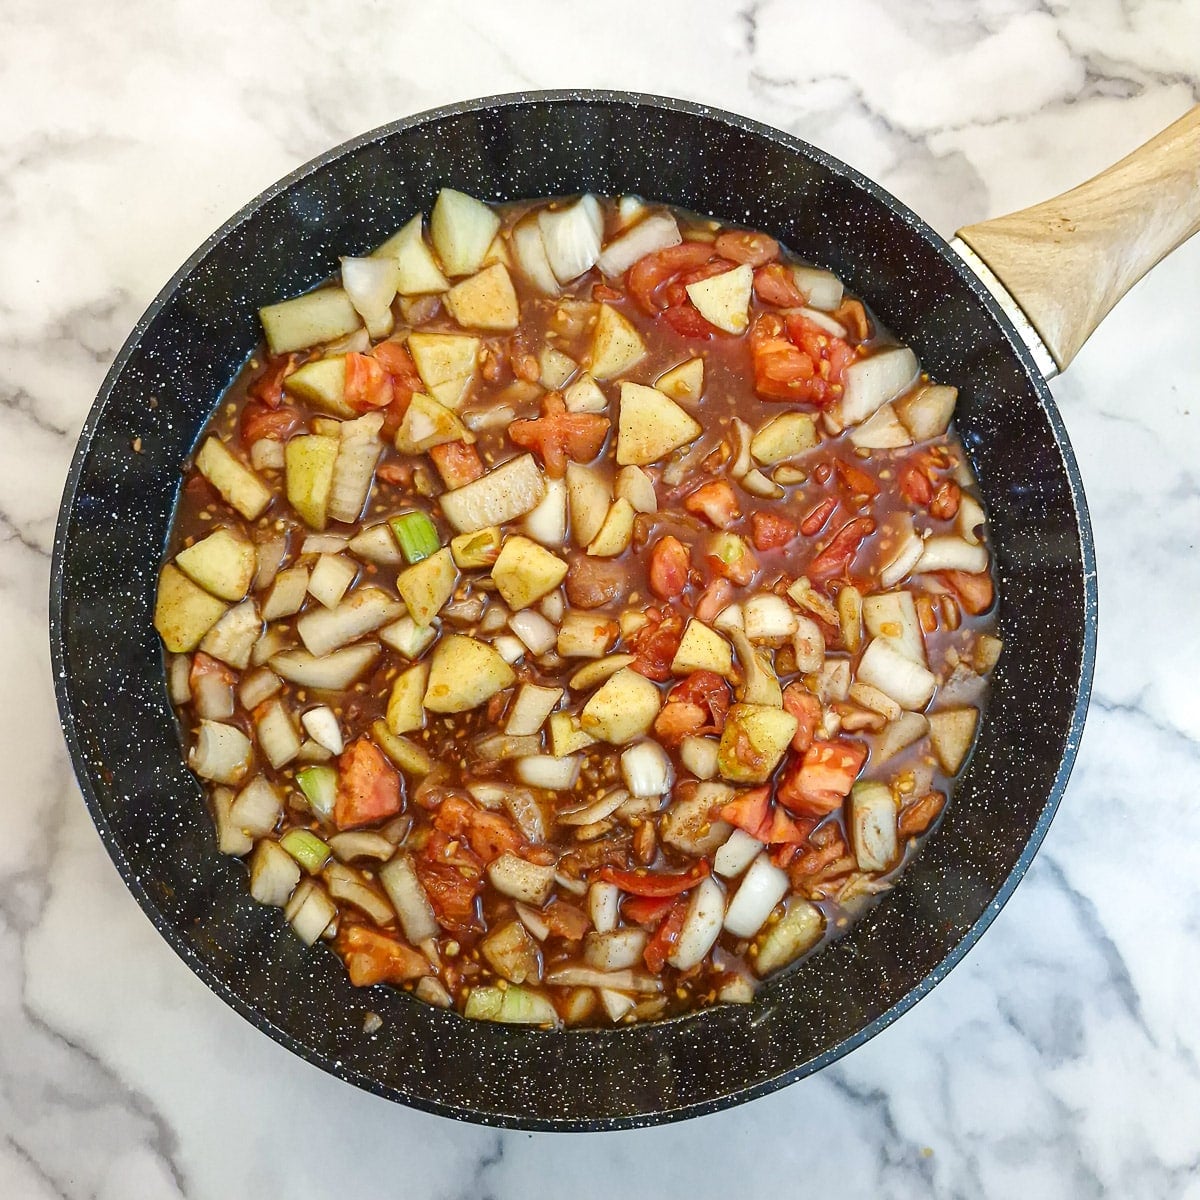
Step 2: Turn the heat to high and bring to a boil, stirring often.
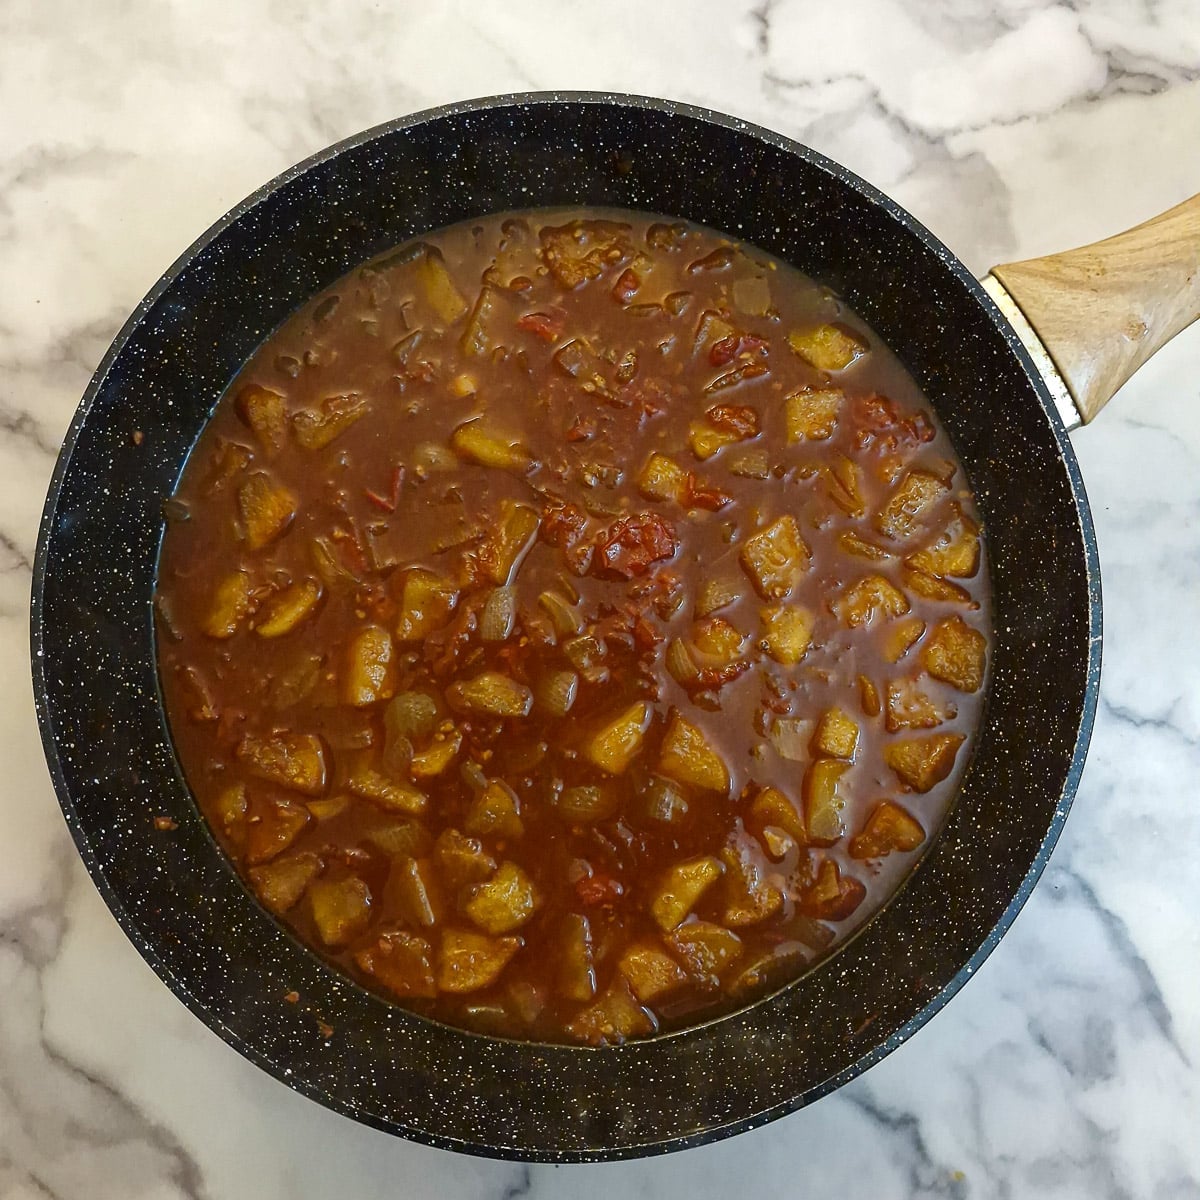
Step 3: Once boiling, turn the heat to a simmer and leave uncovered for an hour to an hour and a half, stirring occasionally. If your chutney is still quite thin, leave it to simmer until it has thickened.
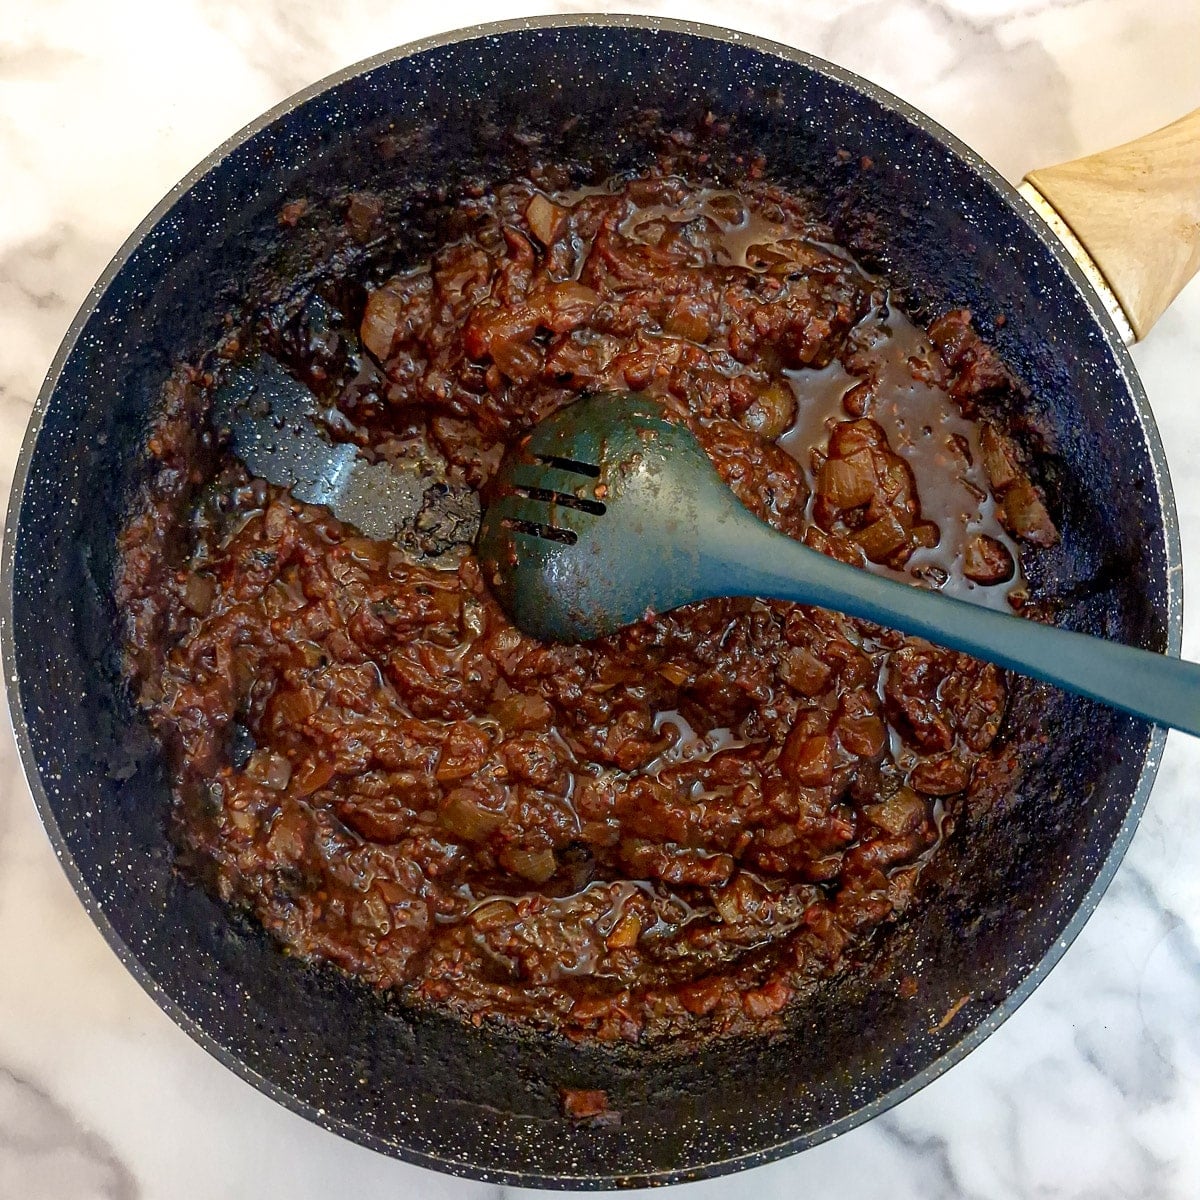
Step 4: The chutney will be ready when it leaves a trail that closes up quite quickly when you draw a spoon through it. It will thicken further on cooling.
Spoon the hot chutney into warm, sterilised jars. If using waxed preserving discs, place one directly onto the surface of the chutney, waxed side down. Wipe the rims clean, seal immediately with vinegar-proof lids and leave to cool. Never put hot chutney into cold glass jars as the sudden temperature change could cause the glass to crack or shatter.
Foodle Club top tips
Follow these handy tips to ensure your fruity tomato chutney always turns out perfectly:
- Treat the cooking time as a guide. Juicy tomatoes release more liquid than firmer, fleshier varieties, so your chutney may need longer to thicken. Go by the consistency rather than the clock.
- Leave the lid off. The liquid needs to evaporate as the chutney simmers. Covering the pan traps steam and slows this down.
- Use a wide, heavy-based pan. A large surface area helps the liquid evaporate faster, while a heavy base distributes heat more evenly and reduces the chance of sticking.
- Chop the vegetables evenly. Small, similar-sized pieces help the tomatoes and onions cook evenly and give the finished chutney a consistent texture.
- Start gently. Stir over a low heat until the sugar has dissolved, then bring to a gentle simmer.
- Stir more often as it thickens. Pay particular attention to the bottom and corners of the pan. Reduce the heat towards the end to prevent the chutney from catching.
- Check for a clear trail. Draw a wooden spoon across the bottom of the pan. When the chutney is ready, it should leave a trail that doesn't immediately fill with watery liquid. Remember that it will thicken further as it cools.
- Taste a cooled spoonful. Let a small sample cool before checking the seasoning and chilli heat - it's easier to judge the flavours, and you won't burn your tongue!
- Use a non-reactive pan. Stainless steel or enamel is ideal. I used a ceramic wok. Avoid aluminium, copper or uncoated cast iron, which can react with the vinegar and affect the flavour.
How to sterilise jars
To sterilise jars in the oven:
- Wash the jars and the lids in hot soapy water, rinse, but do not dry them.
- Stand them upside down on a baking tray while they're still wet.
- Place the tray of clean, wet jars and lids into a preheated oven at 180ºC / 350ºF for 15 minutes.
- Don't place rubber seals in the oven - remove the seals from the lids and place them in a pan of boiling water for 5 minutes.
To sterilise jars in the microwave:
- Wash the jars and the lids in hot soapy water, rinse, but do not dry them.
- Place them in the microwave whilst still wet.
- Microwave on full power for 2 minutes
- If the lids are made of metal, DO NOT MICROWAVE. Instead, place the lids in a pot of boiling water and boil for 5 minutes.
How to peel tomatoes
This is the easy way to peel tomatoes:
- Place the tomatoes into a large bowl and cover them with boiling water. Make sure they are completely submerged.
- Leave them to stand for 2 minutes, then plunge them into ice-cold water.
- Using a sharp knife, make a shallow cross at the base of the tomato and peel the skin away. It should come off easily.
Equipment tips
- As mentioned above, avoid using aluminium, copper or uncoated cast iron, which will react with the vinegar and affect the flavour of the chutney.
- Use a wooden or silicone spoon or spatula to avoid scratching the base of the pan.
- You don't need fancy jars to get started. If you only make chutney occasionally, supermarket jam jars can be an economical option. Use the jam in your baking - this coconut jam slice is a good excuse - then wash and sterilise the empty jars as described above. Choose jars in good condition with well-fitting, undamaged, vinegar-proof lids.
Storage
I store my homemade chutney in sterilised, sealed jars in a cool, dark cupboard. Using this method, I've kept unopened jars for over a year. Once opened, I refrigerate the chutney and always use a clean spoon. I've kept opened jars refrigerated for three to four months, although these keeping times reflect my own experience rather than a formally established shelf life for this recipe.
Fruity tomato chutney FAQ
A waxed preserving disc is a small circle of food-safe waxed paper placed directly onto the surface of hot jam or chutney before sealing the jar. They are optional - I've never used them myself - but provide an extra covering over the surface of the preserve. They are readily available from Amazon - waxed preserving discs <<< affiliate link.
Yes, you can replace the sultanas with the same weight of raisins. They will give the chutney a slightly different flavour, but still provide plenty of fruity sweetness.
Draw a wooden spoon or spatula across the bottom of the pan. It should leave a clear trail that doesn't immediately fill with watery liquid. The chutney should be thick and spoonable, with softened onions and plump sultanas.
Some tomatoes contain more water than others, so cooking times will vary. Keep simmering the chutney uncovered, stirring regularly, until the excess liquid has evaporated. It will also thicken further as it cools.
It's not necessary to peel the tomatoes unless you really want to. I don't do it, and I don't notice the skins in the finished chutney. If you want to remove the skins, you can do this before chopping the tomatoes.
Yes. The chilli is optional, so you can leave it out and still enjoy the fruity flavour and warmth of the mixed spice, ginger and mustard.
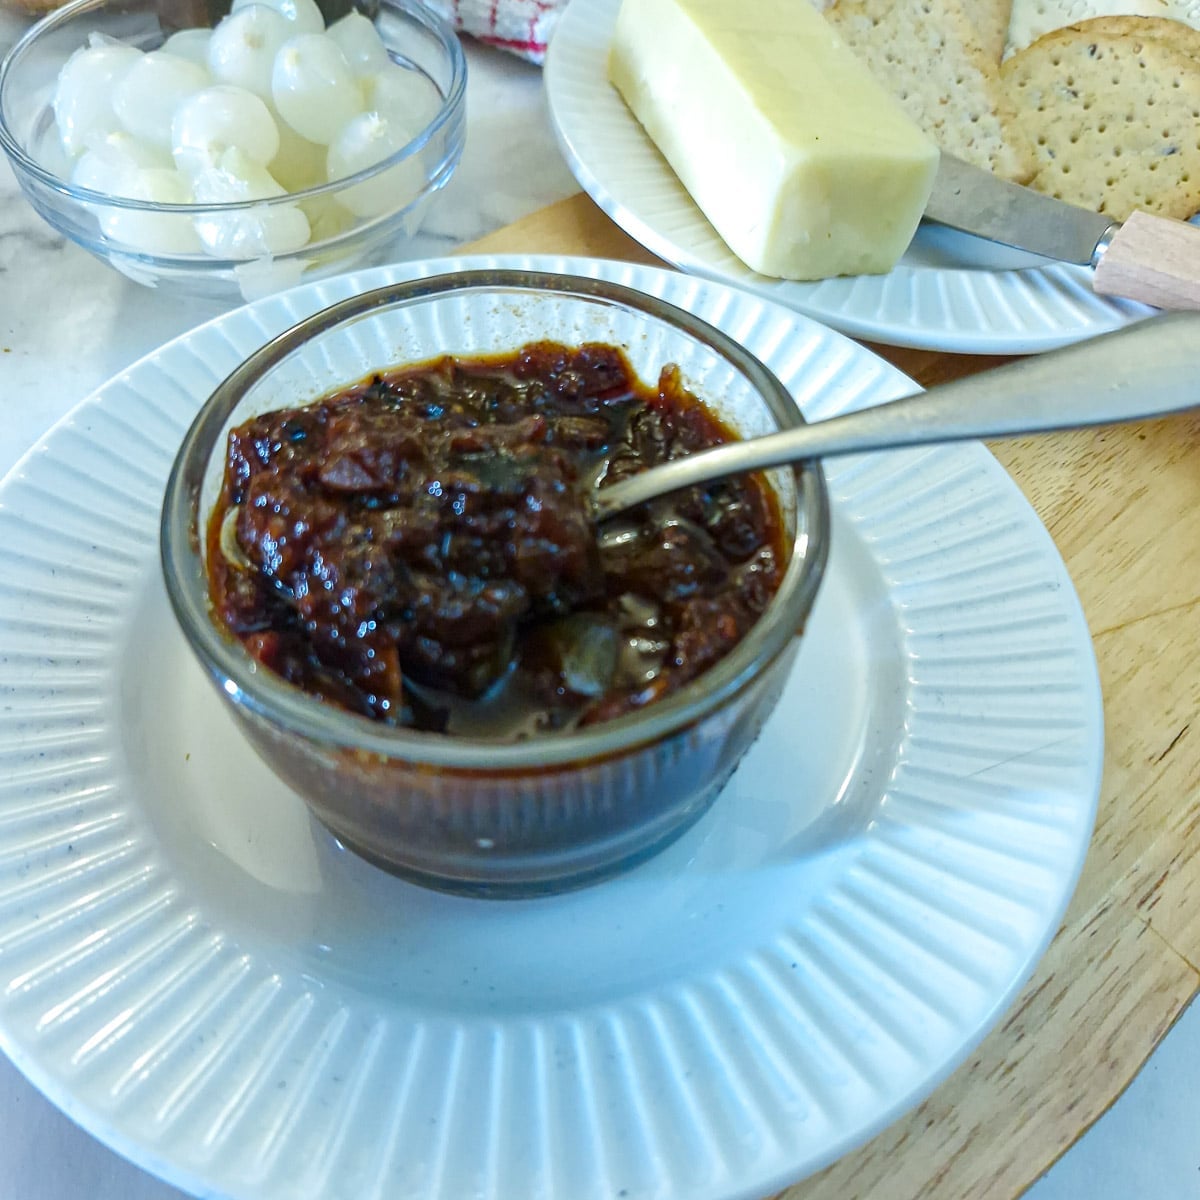
It's delicious with cheese, crackers, cold meats and sausage rolls, and is my favourite accompaniment to a good pork pie. You can also spread it on sandwiches or stir a spoonful into a stew or casserole for extra flavour.
Save for later
If you would like to try this fruity tomato chutney, why not save the recipe to one of your Pinterest boards so you can find it easily? Just click on the image below.
Alternatively, you can save the recipe by clicking on the floating heart icon on the right-hand side of the screen.
Related recipes
View my homemade staples post for a collection of homemade sauces, condiments, spice mixes and pantry staples. These chutney recipes form part of the post:


The recipe
Fruity tomato chutney
(Click the stars to rate this recipe)
Equipment
- Large pan Saucepan, wok, saute pan
- Sharp Knife
- Chopping Board
- Silicone spatula
- Preserving jars (or recycled jam jars or similar)
- Wased preserving disks optional
Ask a Question
If you have a question about this recipe that has not been answered, please use the box below to ask it.
Use this with care. This is an AI-generated result and may contain errors or inaccuracies. I cannot be held responsible for the information returned.
Ingredients
- 3⅓ pounds / 1.5 kg tomatoes washed and finely diced
- 1¾ pounds / 750 grams onions peeled and finely diced
- 8 ounces / 225 grams sultanas
- 1½ cups / 300 grams dark brown sugar
- 2 cups / 480 ml apple cider vinegar
- 1 teaspoon ground ginger
- 1 teaspoon mustard powder
- 1 tablespoon mixed spice
- 1 tablespoon chilli paste or to taste (optional)
- 1 teaspoon salt
- ½ teaspoon black pepper
Instructions
- Place all the ingredients in a large pan.3⅓ pounds / 1.5 kg tomatoes, 1¾ pounds / 750 grams onions, 8 ounces / 225 grams sultanas, 1½ cups / 300 grams dark brown sugar, 2 cups / 480 ml apple cider vinegar, 1 teaspoon ground ginger, 1 teaspoon mustard powder, 1 tablespoon mixed spice, 1 tablespoon chilli paste, 1 teaspoon salt, ½ teaspoon black pepper
- Once boiling, turn the heat to a simmer and leave uncovered for about 1 to 1½ hours, stirring occasionally. If your chutney is still quite thin, leave it to simmer until it has thickened.
- The chutney will be ready when it leaves a trail that closes up quite quickly when you draw a spoon through it. It will thicken further on cooling.
- Spoon the hot chutney into warm, sterilised jars. If using waxed preserving discs, place one directly onto the surface of the chutney, waxed side down. Wipe the rims clean, seal immediately with vinegar-proof lids and leave to cool. Never put hot chutney into cold glass jars as the sudden temperature change could cause the glass to crack or shatter.
Notes
- Treat the cooking time as a guide. Juicy tomatoes release more liquid than firmer, fleshier varieties, so your chutney may need longer to thicken. Go by the consistency rather than the clock.
- Leave the lid off. The liquid needs to evaporate as the chutney simmers. Covering the pan traps steam and slows this down.
- Use a wide, heavy-based pan. A large surface area helps the liquid evaporate faster, while a heavy base distributes heat more evenly and reduces the chance of sticking.
- Chop the vegetables evenly. Small, similar-sized pieces help the tomatoes and onions cook evenly and give the finished chutney a consistent texture.
- Start gently. Stir over a low heat until the sugar has dissolved, then bring to a gentle simmer.
- Stir more often as it thickens. Pay particular attention to the bottom and corners of the pan. Reduce the heat towards the end to prevent the chutney from catching.
- Check for a clear trail. Draw a wooden spoon across the bottom of the pan. When the chutney is ready, it should leave a trail that doesn't immediately fill with watery liquid. Remember that it will thicken further as it cools.
- Taste a cooled spoonful. Let a small sample cool before checking the seasoning and chilli heat - it's easier to judge the flavours, and you won't burn your tongue!
- Use a non-reactive pan. Stainless steel or enamel is ideal. I used a ceramic wok. Avoid aluminium, copper or uncoated cast iron, which can react with the vinegar and affect the flavour.
Nutrition
I am not a nutritionist. The nutrition information has been calculated using an on-line calculator, and is intended for information and guidance purposes only. If the nutrition information is important to you, you should consider calculating it yourself, using your preferred tool.
If you made this recipe and enjoyed it, I'd love it if you could give me a star rating in the comments below. And if you'd like to get in touch, you can email me at veronica@foodleclub.com. I'd love to hear from you. And don't forget to subscribe to my mailing list so you can grab yourself a copy of my FREE COOKBOOK!
If you'd like to continue browsing, just click on this link to all my recipes.


Did you make this recipe? Let me know!