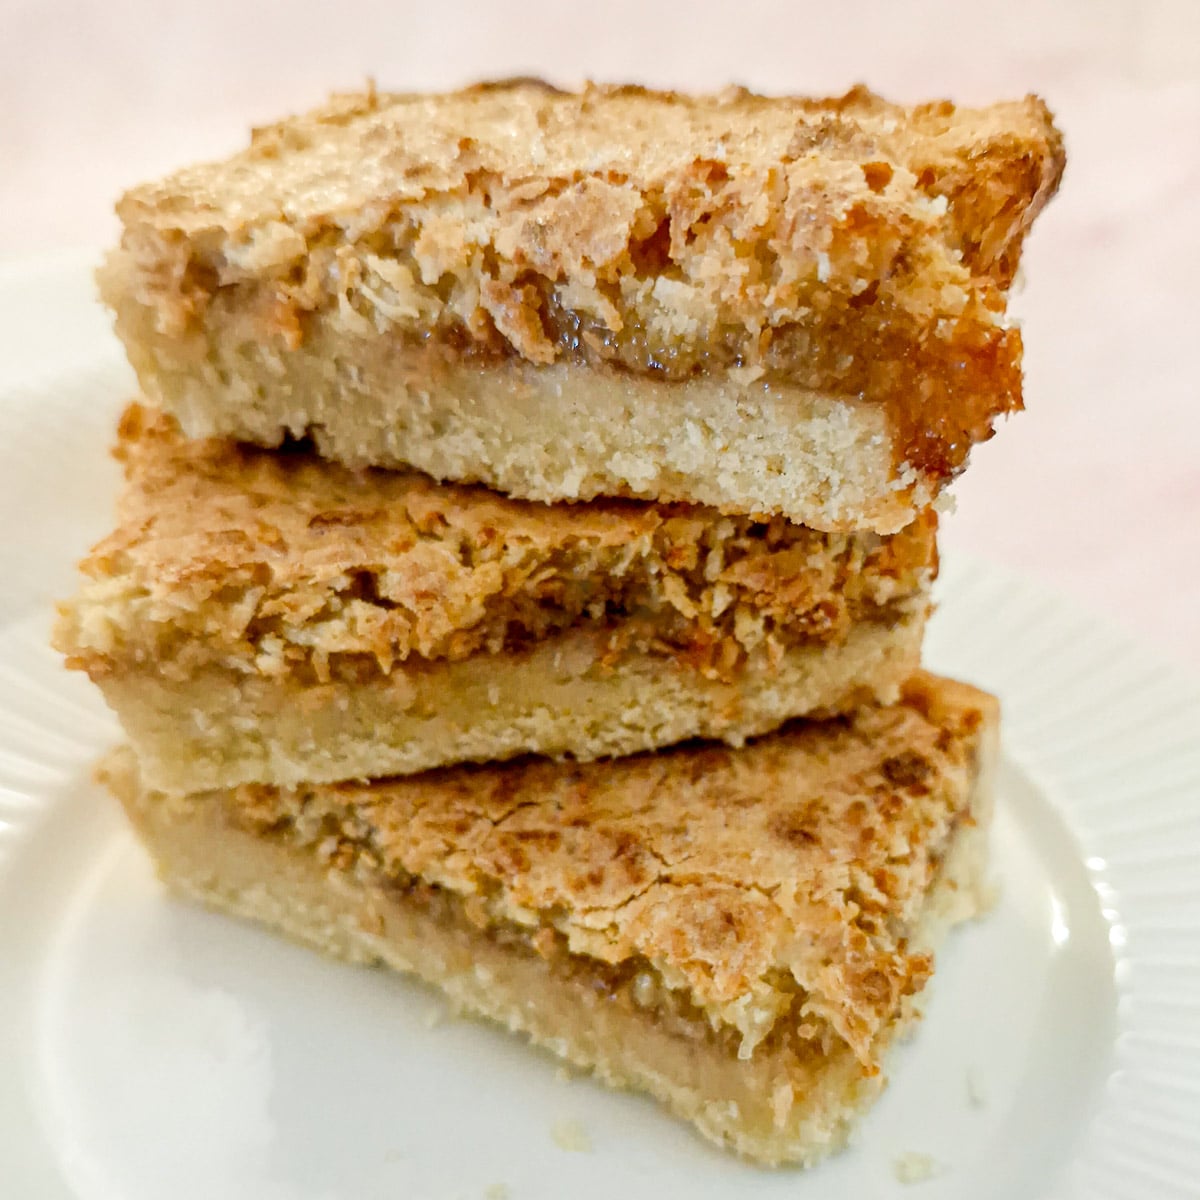
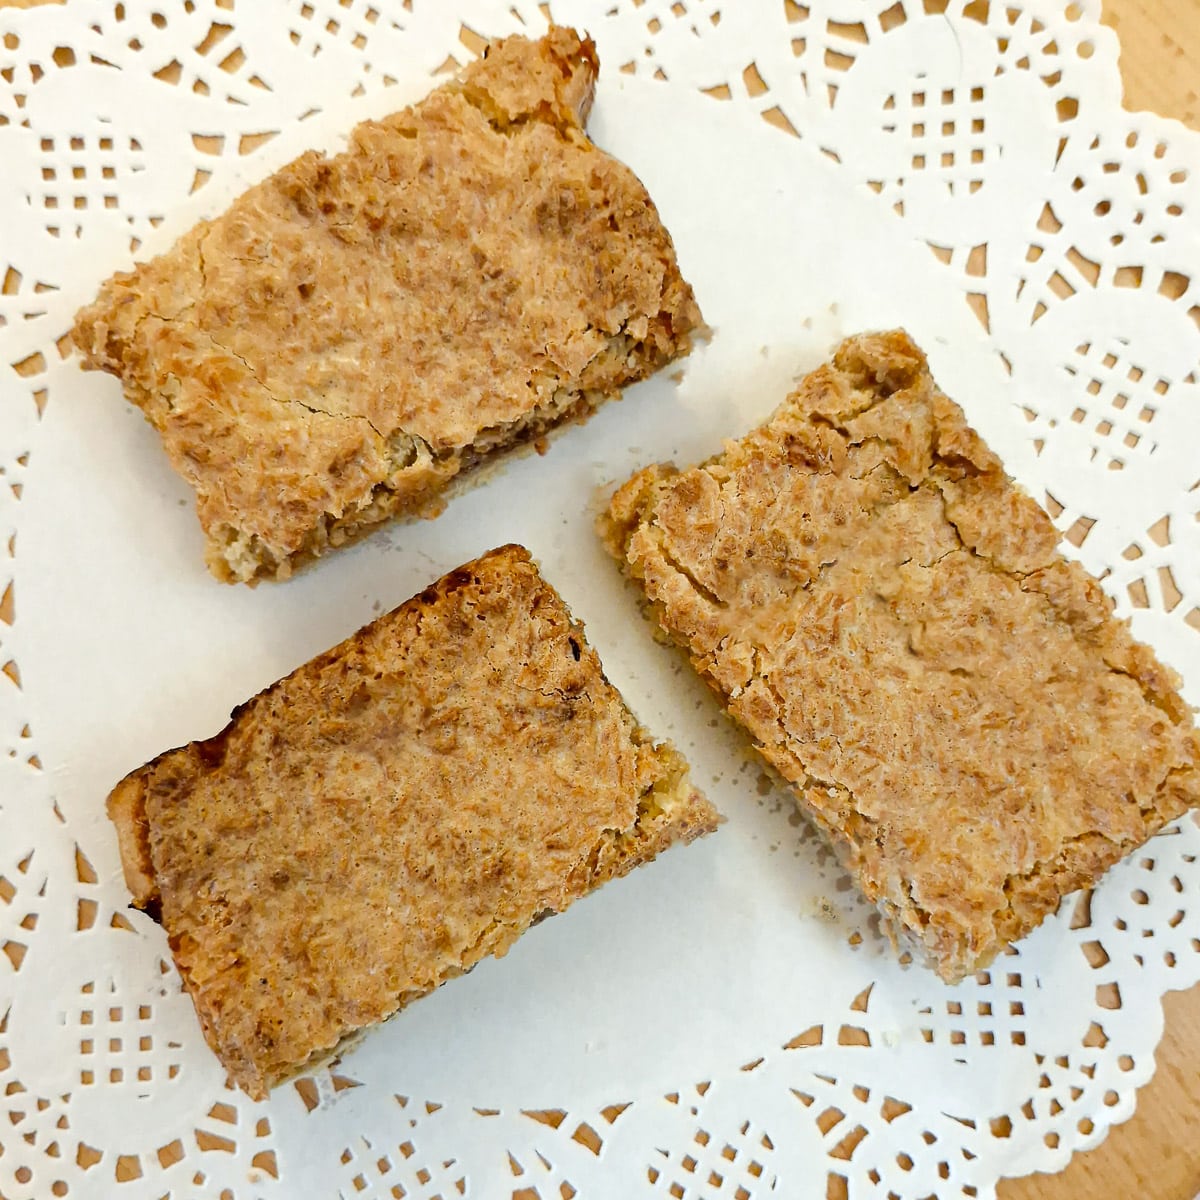
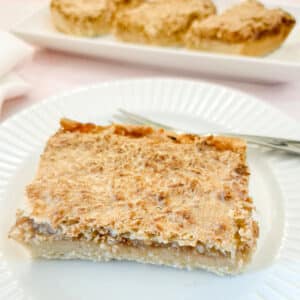
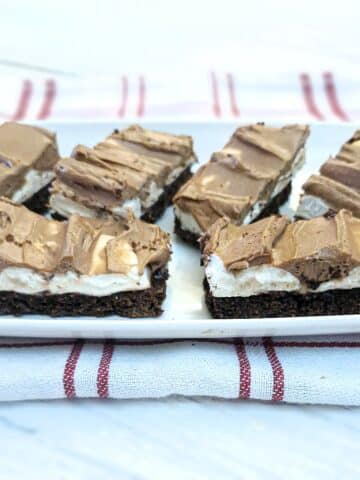
This tasty coconut jam slice has a soft buttery pastry base covered with a layer of fruity jam and topped with crispy coconut meringue. It's perfect for packing into lunch boxes or simply enjoying with your mid-morning cuppa!

This coconut jam slice is an old recipe that I remember my mum making over 60 years ago, and which I duly made for my children when they were younger! But times change, and other recipes become popular and the older recipes get forgotten. Until, that is, you notice a recipe for it on the Internet, and it all comes flooding back!
This is a simple recipe, made with only 6 ingredients, and apart from 25 minutes in the oven, you will only need a quick 20 minutes to put this together.
My mum used to make it with a base of pastry scraps left over from making a blackberry and apple pie. And you can certainly use leftover pastry for the base if you have some. I think the sweet pastry offcuts from this Canterbury apple tart would make a lovely base for this coconut jam slice!
However, for this recipe I decided to make a soft pastry base which takes all of 5 minutes to mix! I prefer soft pastry to regular pasty as it has a softer texture, and is more cake-like. In fact, I think this pastry along with the jam and coconut topping would make a delicious addition to Mr Kipling's range. For those of you who don't know, Mr Kipling is a UK brand of ready-made cakes and pies, and their slogan is 'exceedingly good cakes'.
For the jam layer, I've used seedless smooth strawberry jam. But any jam will be perfect. How about trying black current, or apricot?
The topping is made by simply whisking sugar and an egg together and then adding 'as much coconut as it will hold' (my mum's instructions). I've been a bit more scientific and worked out that you will need one cup of desiccated coconut 🙂 .
The coconut topping sets in the oven to form a crispy coating on top of the jam and is really the 'cherry on top' of this easy coconut slice!
You can see the three layers in this image.
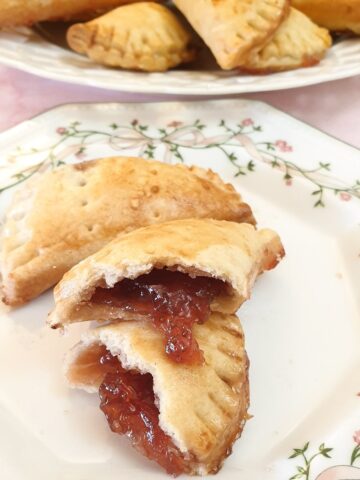
And isn't it funny how different countries have their own version of the same recipe. Take these South African hertzoggies (coconut jam tarts) for example. They are made with similar ingredients, and are slightly more involved to make, but they originated 1000s of miles apart. By the way - if you take a look at that recipe you will see I used the offcuts of the pastry and the remains of the coconut topping to make coconut jam fingers!
Jump to:
Ingredients
This recipe will make one 7" x 10" coconut jam slice (or 18cm x 25 cm).

- Flour - this is plain or all-purpose flour, not self-raising. There is no leavening agent in this recipe.
- Caster sugar - this is used in the pastry and also in the coconut topping. You can use granulated sugar, but it will take longer to dissolve than caster sugar.
- Eggs - once again, used in both the pastry and the topping.
- Butter - this should be at room temperature so that it combines easily with the sugar.
- Jam - this forms the sweet layer between the pastry and the coconut topping. You can use whatever jam you have available.
- Coconut - this is combined with an egg and sugar to form the crispy topping.
**You can get the exact ingredient measurements on the printable recipe card at the end of this post**
Instructions
Soft pastry base
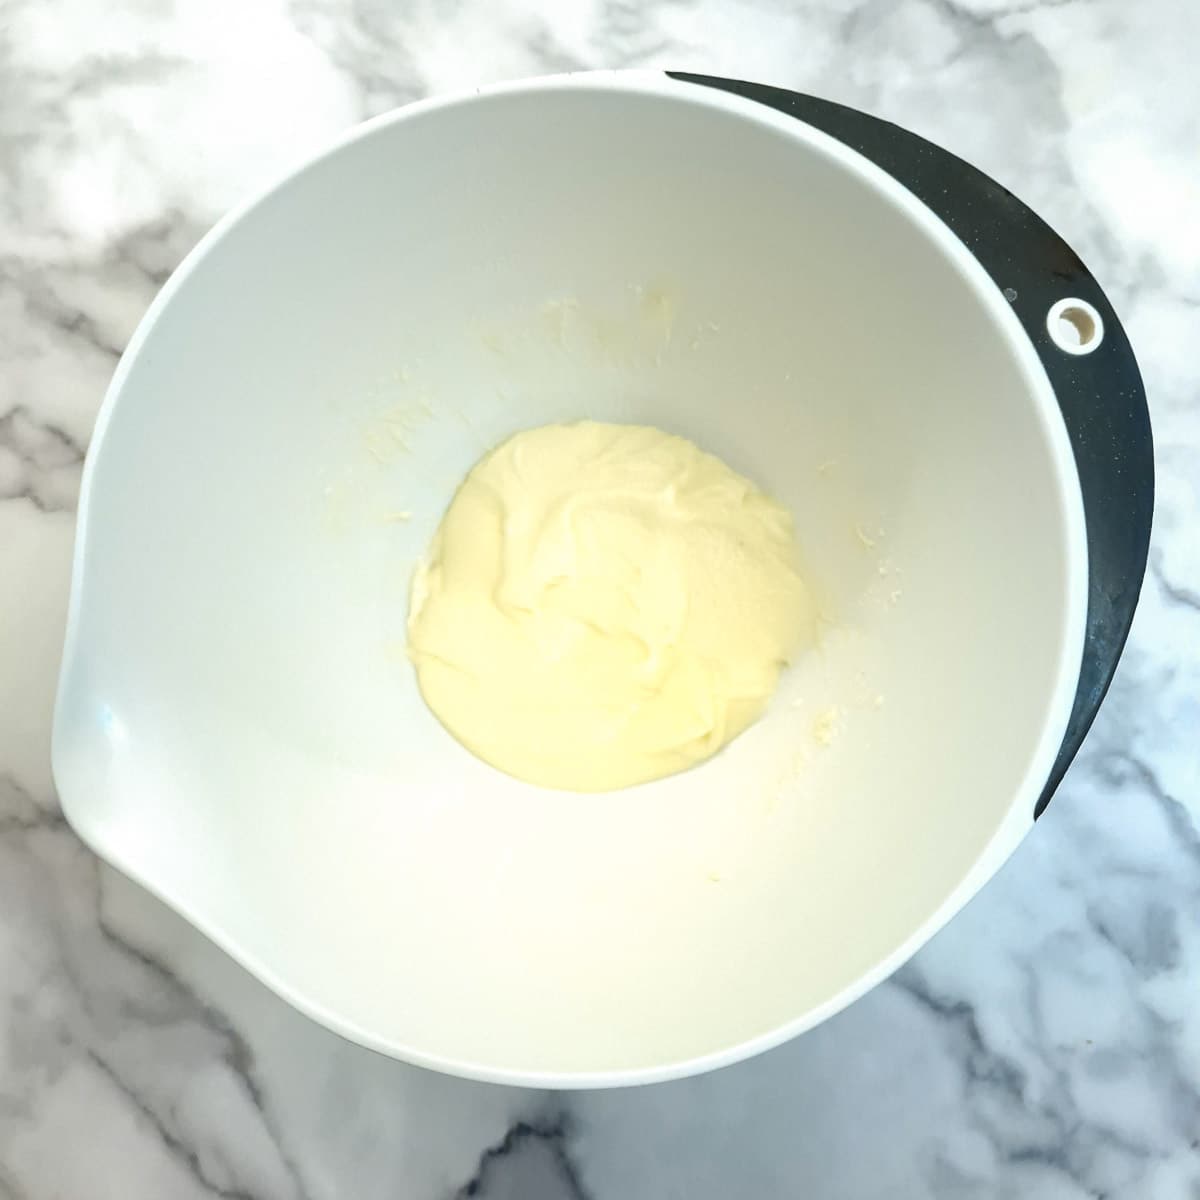
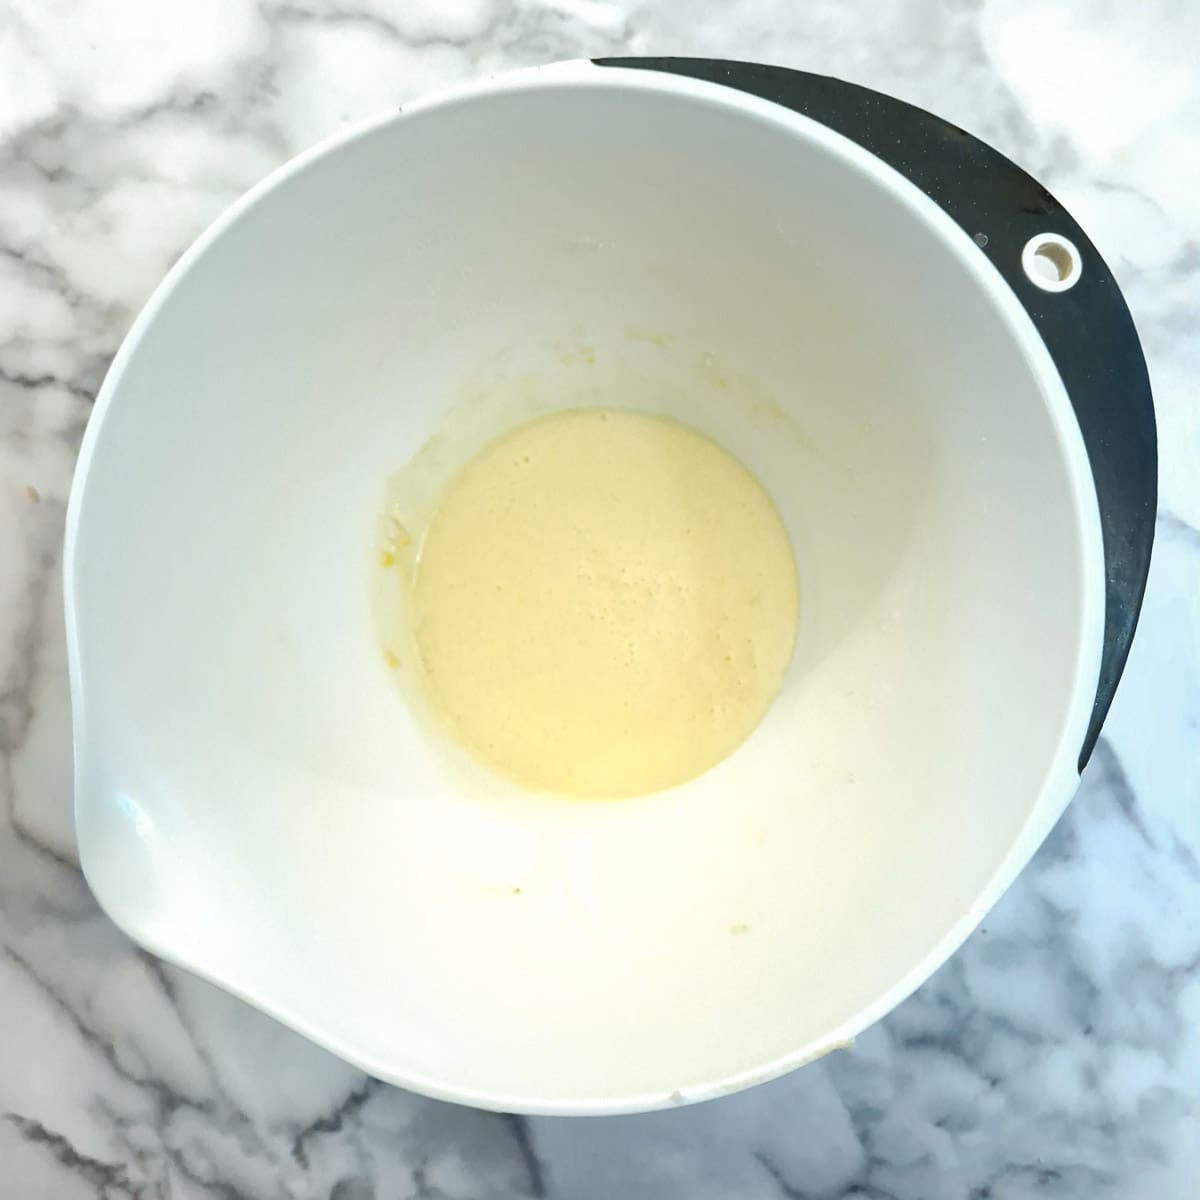
Step 1: Beat the butter and sugar together until light and creamy.
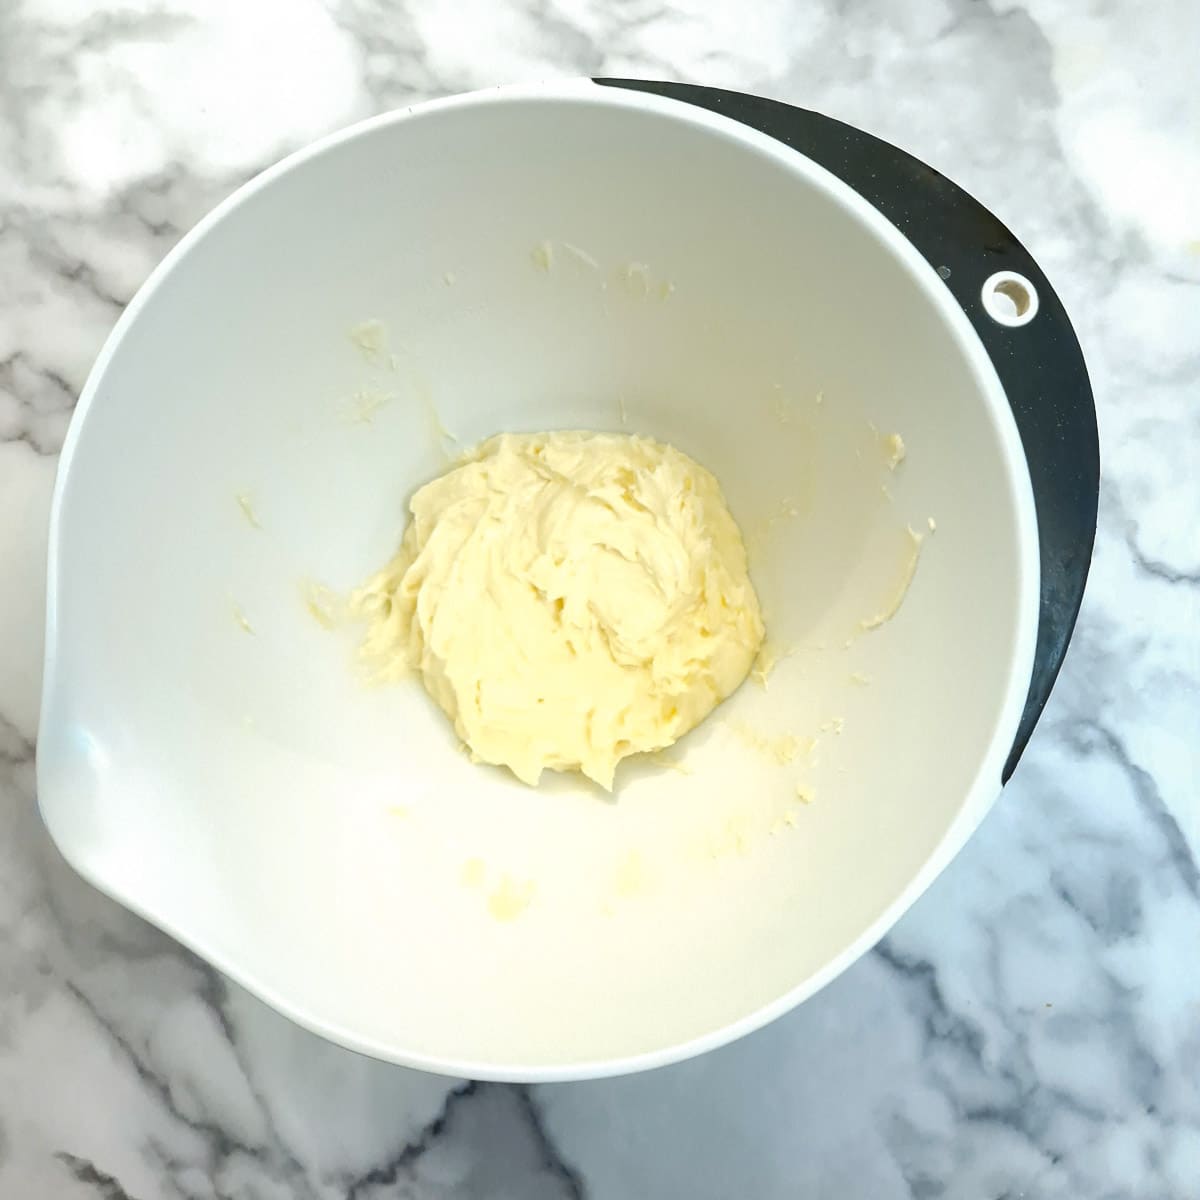
Step 2: Add the egg and continue to beat until well combined.
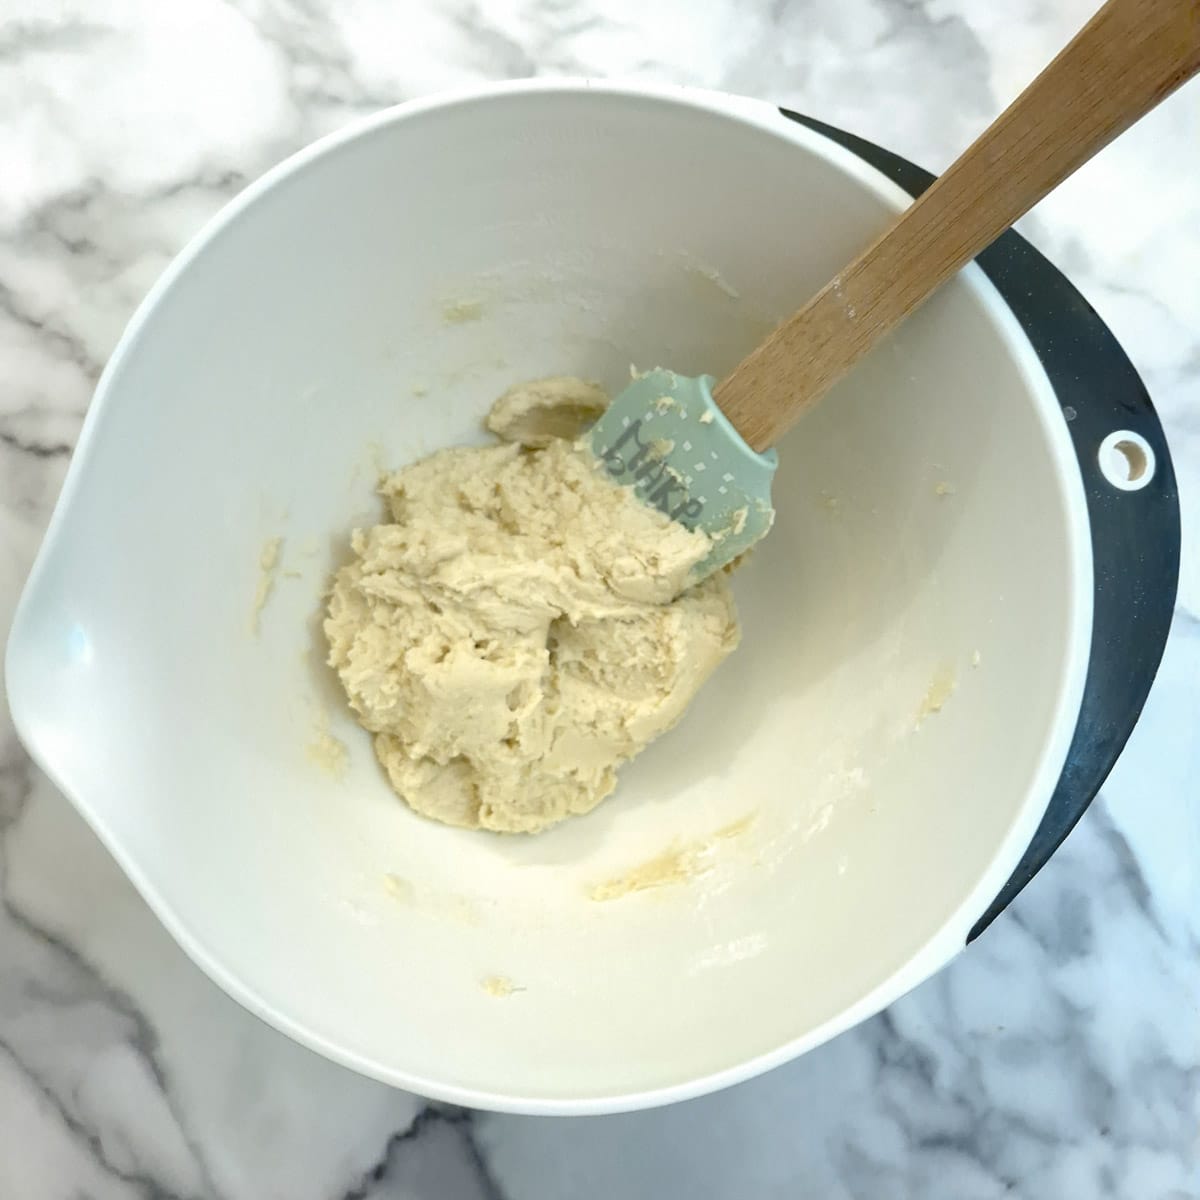
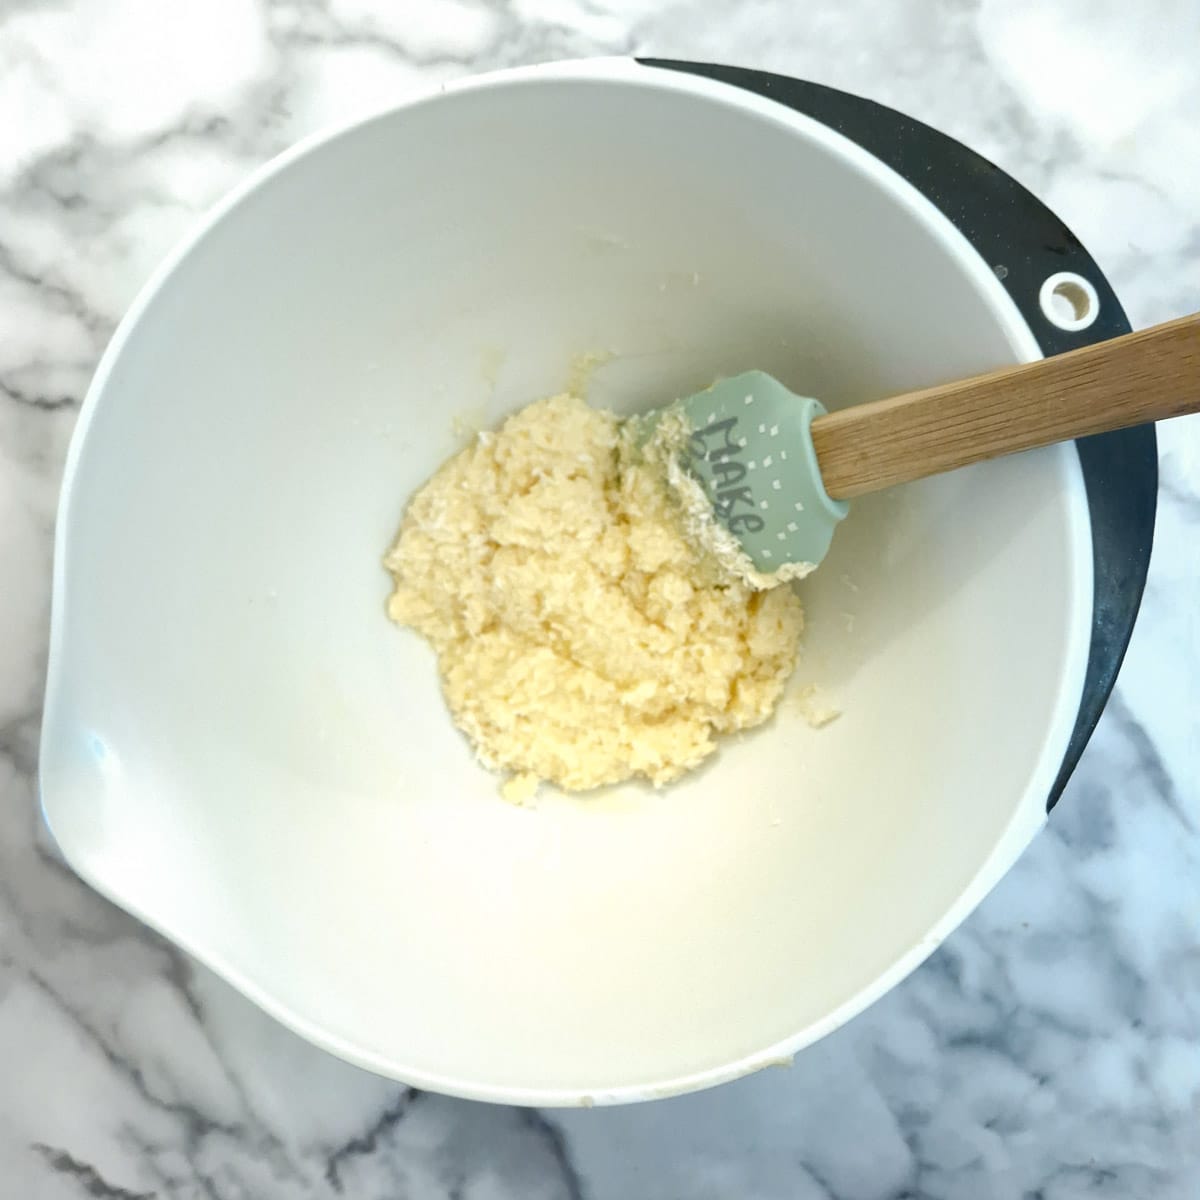
Step 3: Fold in the flour with a spatula until you have a ball of sticky dough.
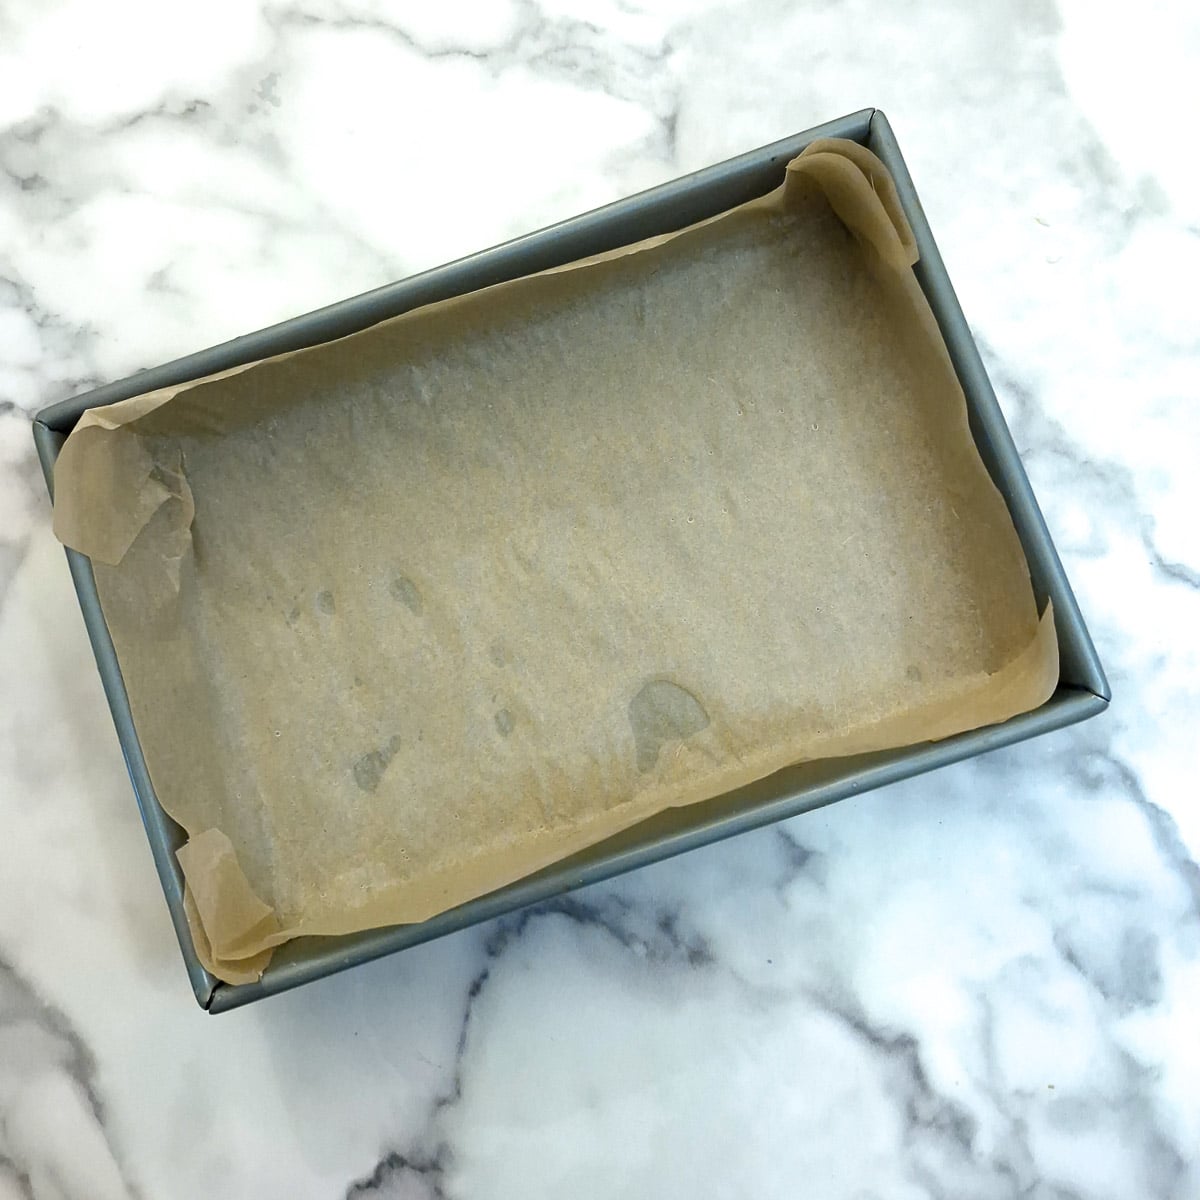
Step 4: Line a 7" x 10" (18cm x 25cm) baking pan with parchment paper.
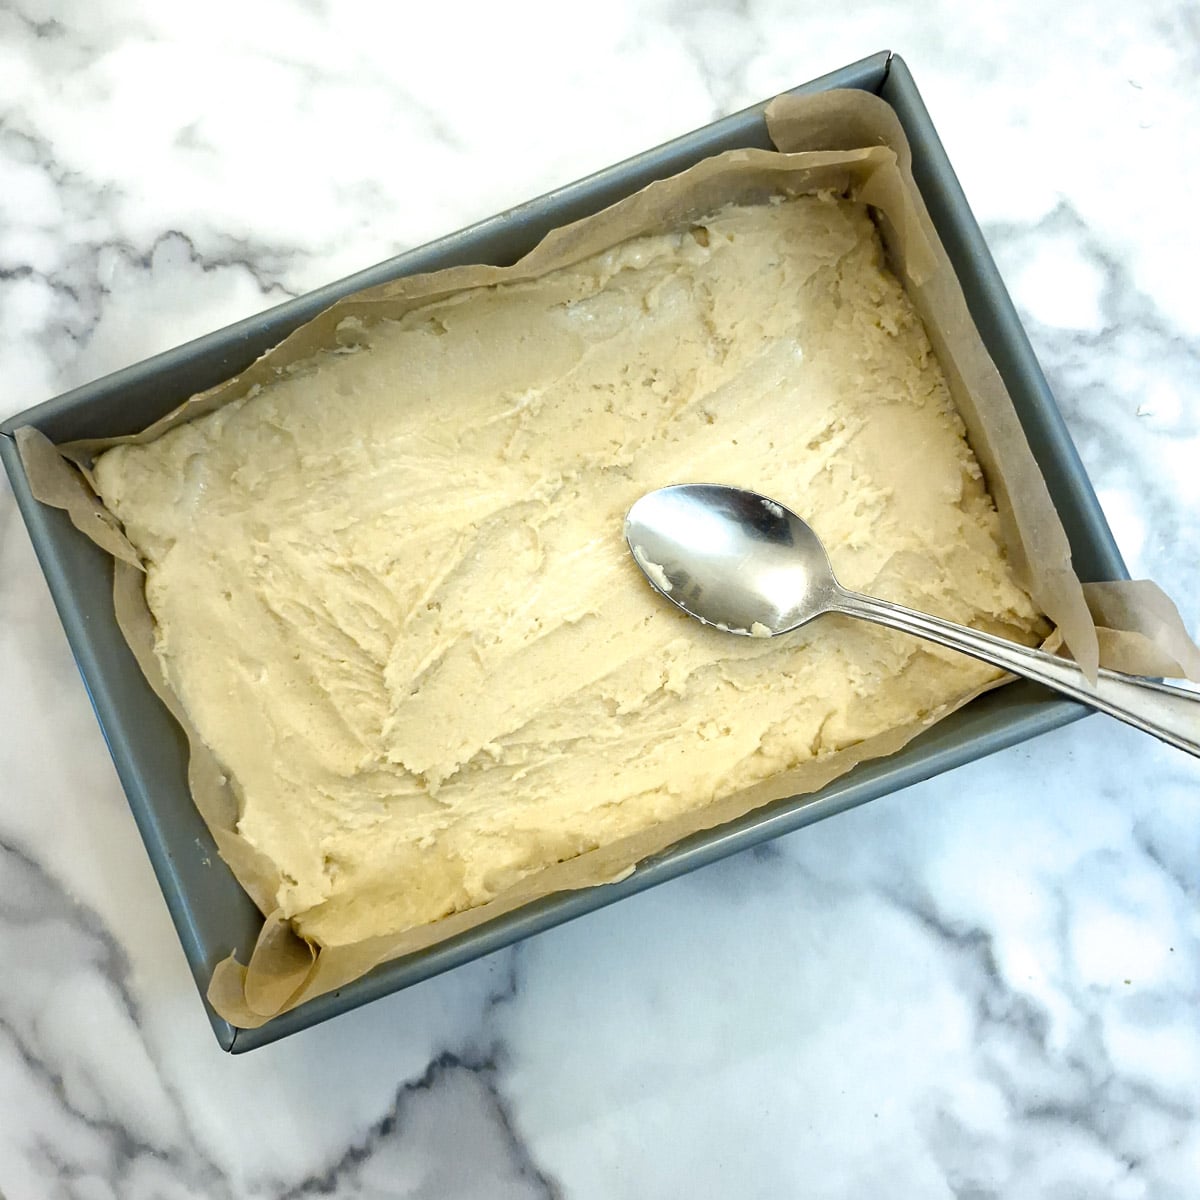
Step 5: Spread the dough evenly into the pan. You can either use the back of a wet spoon or wet hands to press the mixture evenly into the tin.
Please note - the dough is supposed to be sticky. It is not a dough that can be rolled with a rolling pin. Instead, the consistency is that of a very thick cake batter.
Jam
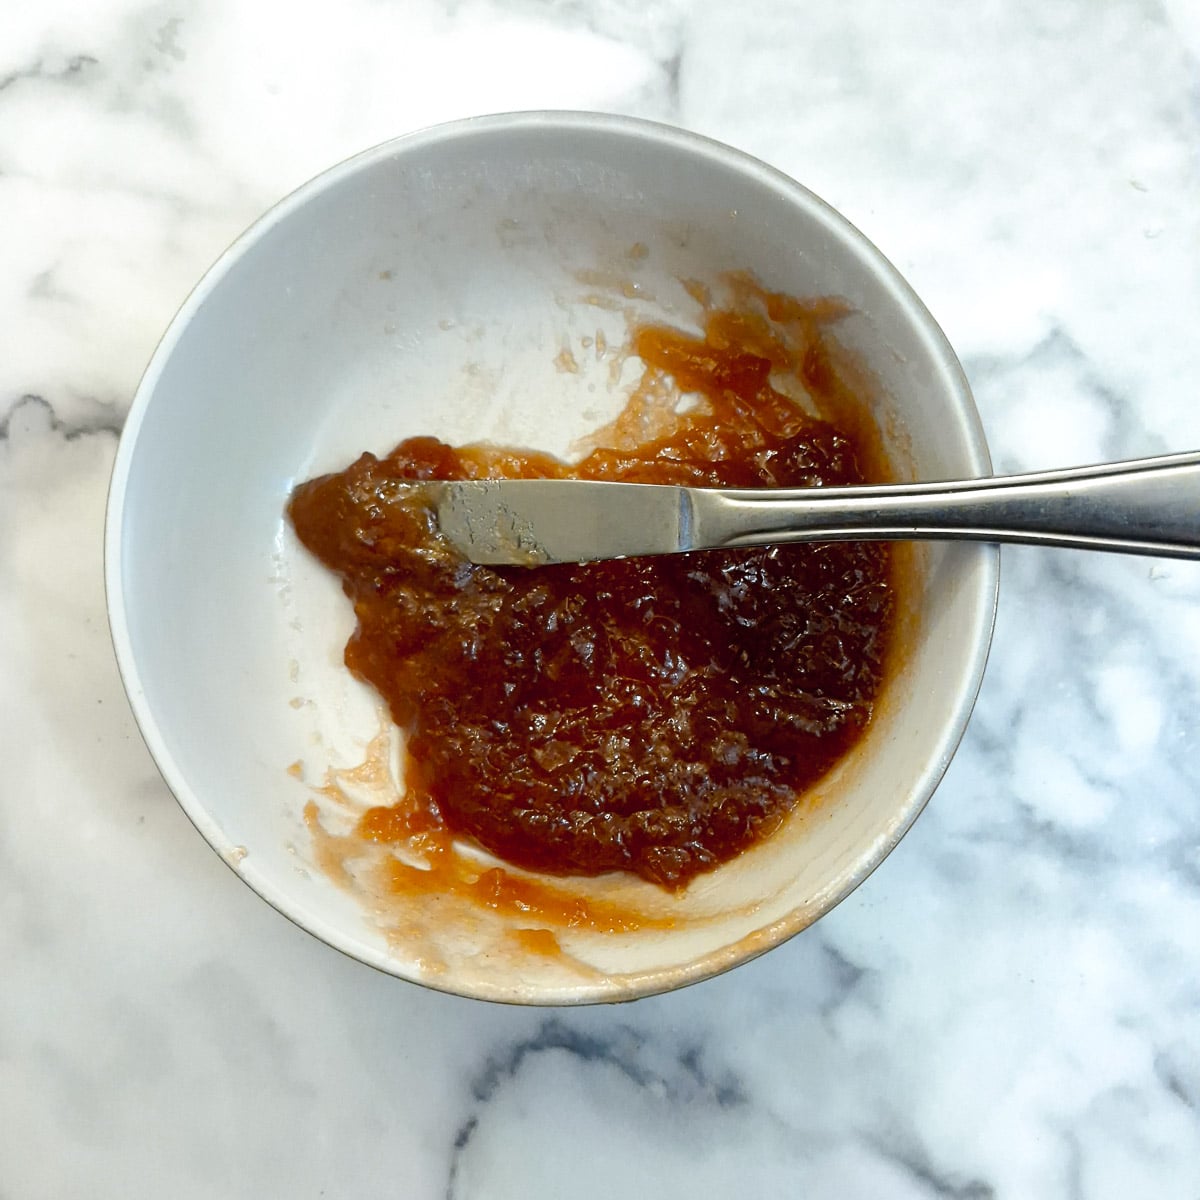
Step 6: If your jam is on the thick side, mix it in a small bowl until it loosens. This will make it easier to spread onto the soft pastry mixture.
Step 7: Spread the jam evenly over the pastry.
Add the topping and bake
Step 8: To make the topping, whisk the egg and sugar together.
Step 9: Mix in the coconut.
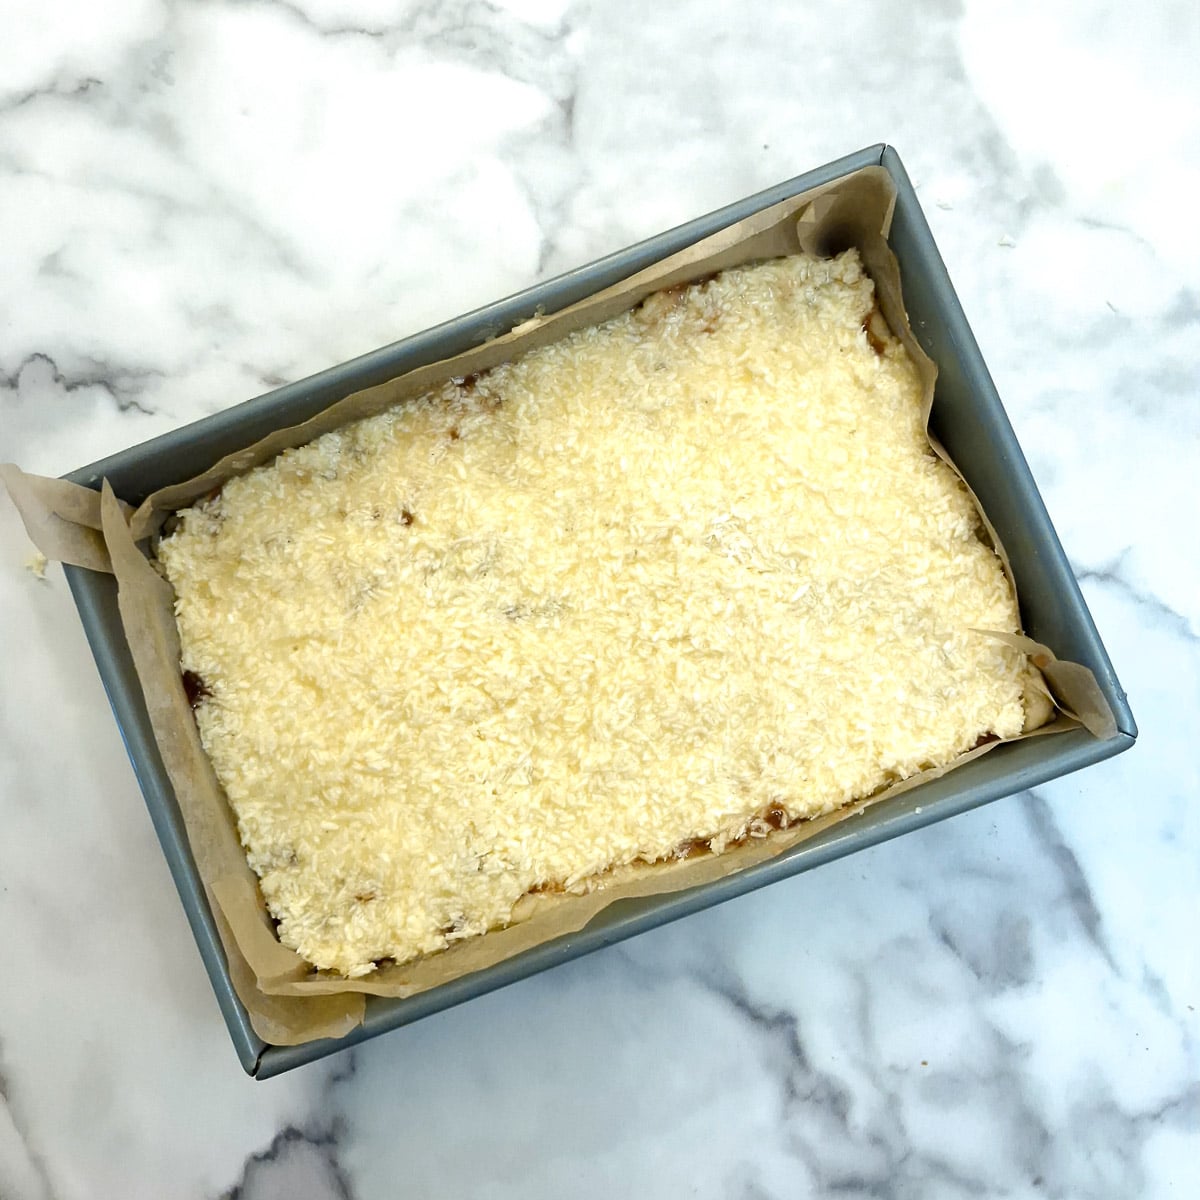
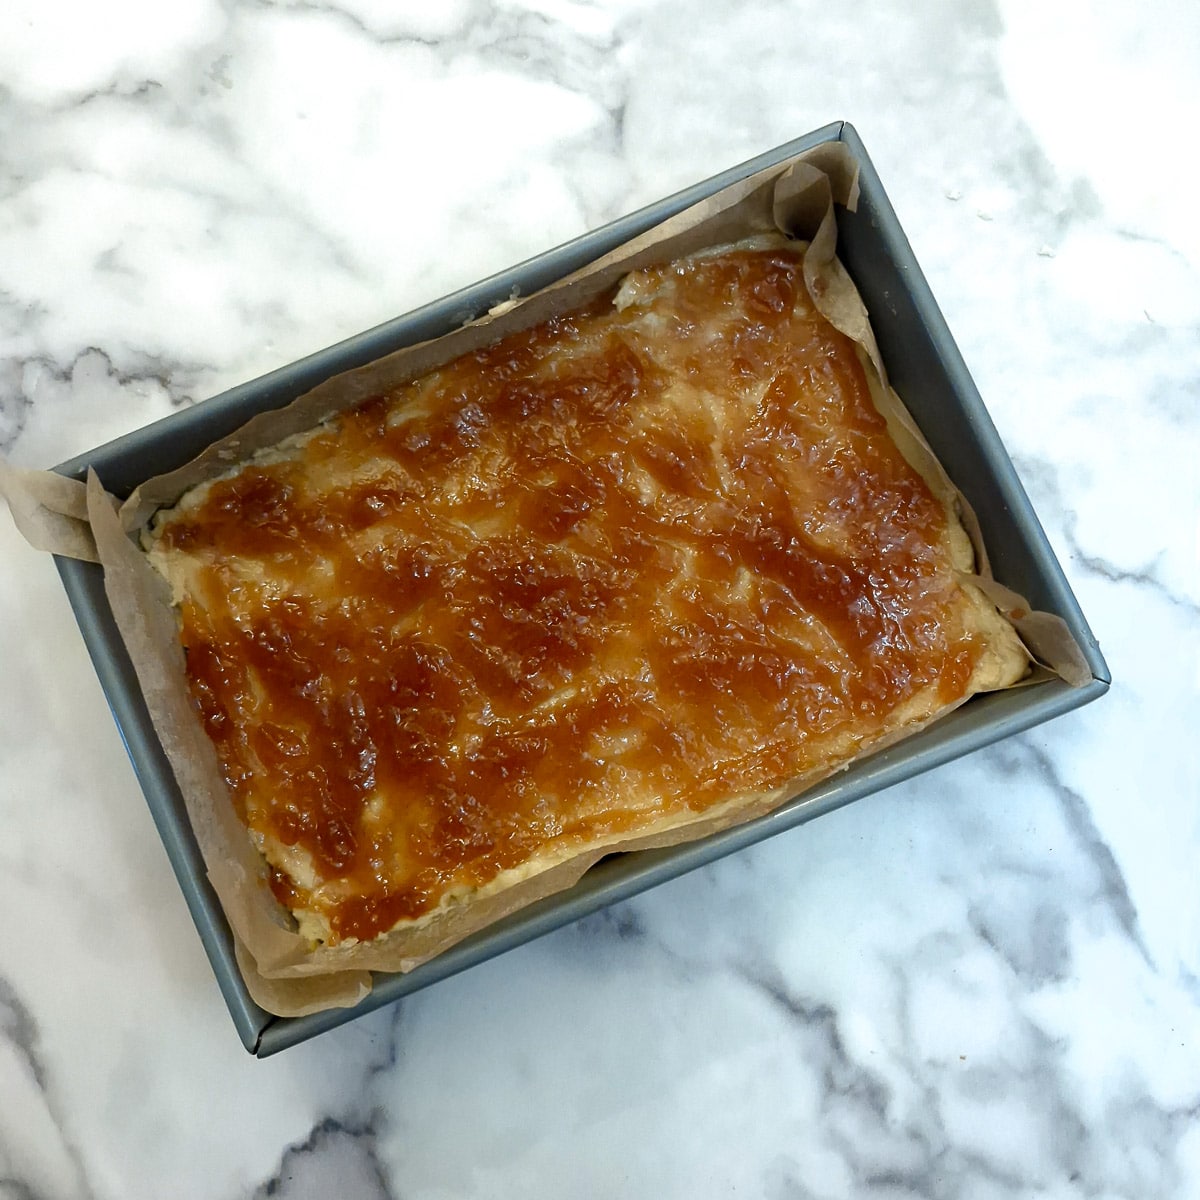
Step 10: Place spoonfuls of the coconut mixture on top of the jam and spread it evenly to cover the jam.
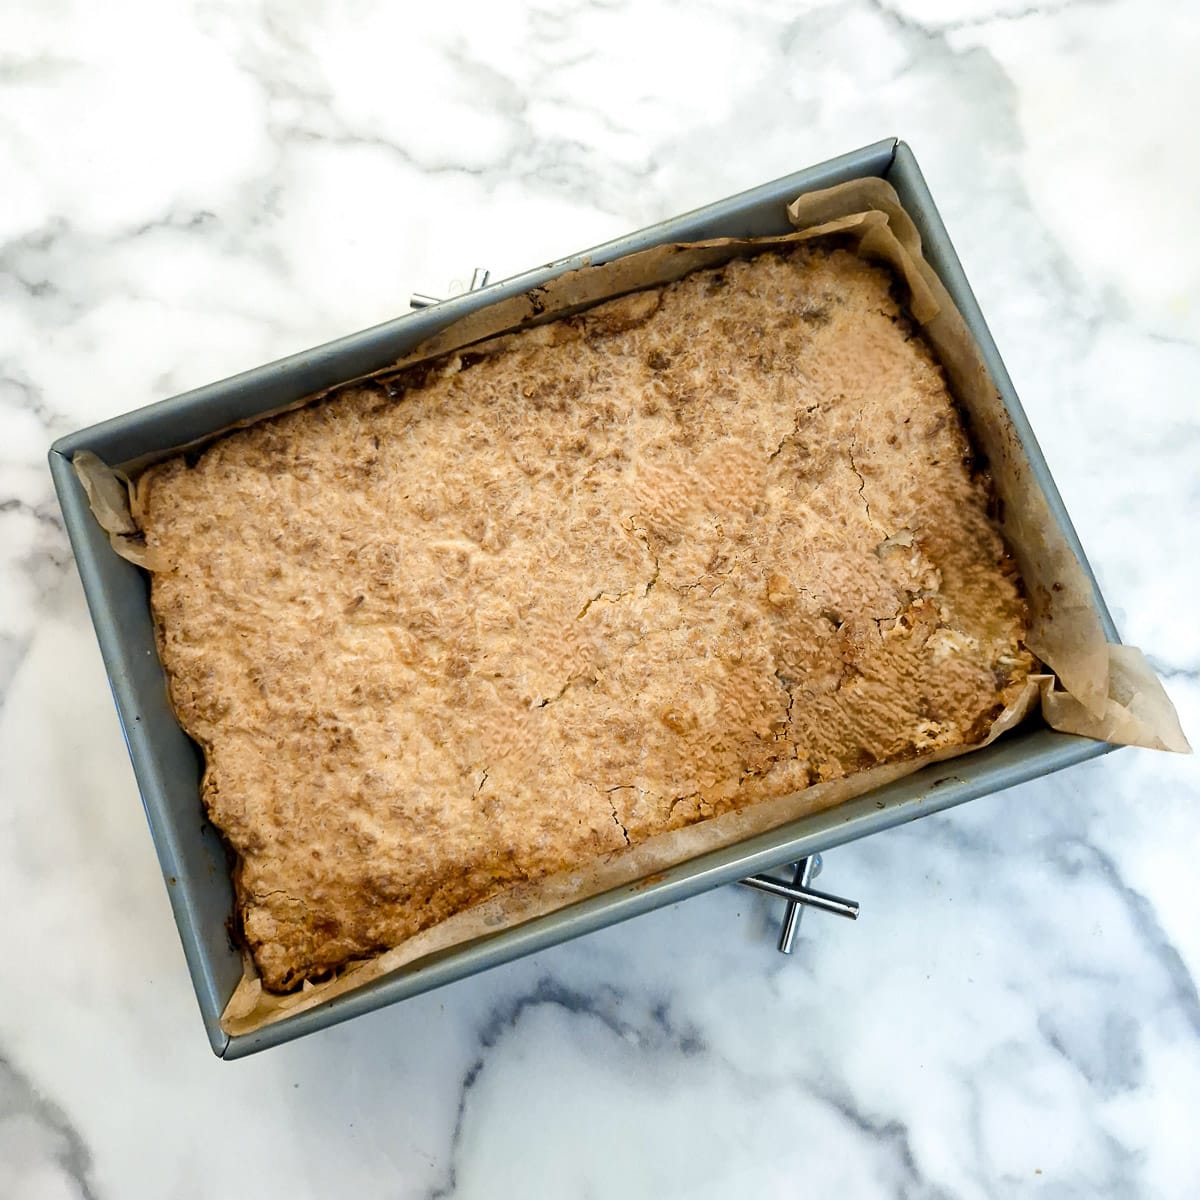
Step 11: Bake in a preheated oven (180C / 355F) for 25 minutes or until golden. Leave to cool before attempting to remove from the tin.
Top tips for a successful result
Here are my top tips to ensure your coconut jam slice always turns out perfectly:
- The base of this coconut tart is made with a sticky dough. You will be unable to roll it with a rolling pin. The best way to get it into the tin is by pressing it gently into the pan using damp hands. If you prefer you can use the back of a wet tablespoon to help you press out the dough.
- The thickness of the dough should be about 1 centimetre, or just less than half an inch if you prefer imperial measurements.
- Line your baking tray with baking parchment to prevent the coconut slice from sticking to the pan. If you sprinkle a few drops of water onto the base of the baking tray the parchment will stay in place.
- The pastry base is very soft, so if your jam is very thick you will have difficulty in spreading it evenly. Soften the jam by mixing it in a small bowl using a flat knife so that it spreads more easily.
- When spreading the coconut topping, place spoonfuls of the topping at intervals on top of the jam. Then use a flat knife to spread it evenly.
- When the coconut slice comes out of the oven it will be very soft. Do not try to remove it from the tray until it has cooled or you will find the coconut topping cracks and breaks. Allow it to cool first.
Variations
The only variation I can think of for this recipe, as I mentioned above, would be to use pastry offcuts leftover from another pie instead of the soft pastry base that I made for this recipe. Although in all honesty, I do recommend that you try my soft pastry recipe!
And, of course, you don't have to use strawberry jam, you can use whatever jam you prefer.
Equipment
You will need a mixing bowl, a balloon whisk and a spatula. If you have an electric hand mixer, by all means, use that instead.
For baking you will need a 7" x 10" (or 18cm x 25 cm) baking tray lined with baking parchment to prevent sticking. You could use a slightly larger baking tray but then your pastry base will not be as deep.
Storage
The coconut slice should be stored in an airtight container in the kitchen - there's no need to refrigerate. It will stay fresh for 3 to 4 days. After that, it will still be edible but the pastry base may start to dry out.
I haven't tried to freeze this coconut slice (I don't have the chance - it gets gobbled up almost immediately) but there is no reason why it wouldn't freeze well.
Once the coconut slice has cooled, remove it from the pan and wrap it in a layer of tin foil covered with a double layer of plastic wrap. Freeze for up to 4 months.
To use, let it defrost on the counter and come to room temperature before eating.
FAQ
If you bake for the time and temperature given in the recipe this shouldn't happen. However not all ovens are created equal so if you find the coconut starts to catch, cover it loosely with a sheet of tin foil towards the end of the cooking time.
Yes, you can, but the topping will have a coarser texture. If you prefer a smoother texture you could pulse shredded coconut briefly in a food processor.
Save for later
If you want to make this coconut jam slice why not save the recipe to one of your Pinterest boards so you can find it easily? Just click on the image below.
Alternatively, you can save the recipe by clicking on the floating heart icon on the right-hand side of the screen.
Related recipes
Visit my cakes, biscuits and dessert recipes page for other delicious bakes. Here are a few you might enjoy:


📋The recipe
Coconut jam slice
(Click the stars to rate this recipe)
Equipment
- Mixing bowl
- Balloon whisk OR
- Electric hand blender
- Spatula
- Shallow baking tray 7" x 10" (18cm x 25cm)
Ask a Question
If you have a question about this recipe that has not been answered, please use the box below to ask it.
Use this with care. This is an AI-generated result and may contain errors or inaccuracies. I cannot be held responsible for the information returned.
Ingredients
Soft pastry base
- 4 ounces / 113 grams butter
- ½ cup / 100 grams caster sugar
- 1 medium egg
- 1½ cups / 210 grams plain or all-purpose flour
Jam filling
- 1 cup / 200 grams strawberry jam enough to cover the pastry
Coconut topping
- 1 medium egg
- ½ cup / 100 grams caster sugar
- 1 cup / 75 grams desiccated coconut
Instructions
- Preheat the oven to 180°C / 355°F
- Beat the butter and sugar together in a mixing bowl until light and creamy.4 ounces / 113 grams butter, ½ cup / 100 grams caster sugar
- Add the egg and continue to beat until well combined.1 medium egg
- Using a spatula, fold in the flour until you have a ball of sticky dough.1½ cups / 210 grams plain or all-purpose flour
- Line a 7" x 10" (18cm x 25cm) baking pan with parchment paper.
- Spread the dough evenly into the pan. You can either use the back of a wet spoon or wet hands to press the mixture evenly into the tin.
Jam filling
- If your jam is on the thick side, mix it in a small bowl until it loosens. This will make it easier to spread onto the soft pastry mixture.1 cup / 200 grams strawberry jam
- Spread the jam evenly over the pastry.
Coconut topping
- Whisk the egg and sugar together (you can use the same bowl you used for the pastry).1 medium egg, ½ cup / 100 grams caster sugar
- Mix in the coconut.1 cup / 75 grams desiccated coconut
- Place spoonfuls of the coconut mixture on top of the jam and spread it evenly to cover the jam.
Bake
- Bake in a preheated oven (180C / 355F) for 25 minutes or until golden. Leave to cool before attempting to remove from the tin.
Notes
- The base of this coconut tart is made with a sticky dough. You will be unable to roll it with a rolling pin. The best way to get it into the tin is by pressing it gently into the pan using damp hands. If you prefer you can use the back of a wet tablespoon to help you press out the dough.
- The thickness of the dough should be about 1 centimetre, or just less than half an inch if you prefer imperial measurements.
- Line your baking tray with baking parchment to prevent the coconut slice from sticking to the pan. If you sprinkle a few drops of water onto the base of the baking tray the parchment will stay in place.
- The pastry base is very soft, so if your jam is very thick you will have difficulty in spreading it evenly. Soften the jam by mixing it in a small bowl using a flat knife so that it spreads more easily.
- When spreading the coconut topping, place spoonfuls of the topping at intervals on top of the jam. Then use a flat knife to spread it evenly.
- When the coconut slice comes out of the oven it will be very soft. Do not try to remove it from the tray until it has cooled or you will find the coconut topping cracks and breaks. Allow it to cool first.
Nutrition
I am not a nutritionist. The nutrition information has been calculated using an on-line calculator, and is intended for information and guidance purposes only. If the nutrition information is important to you, you should consider calculating it yourself, using your preferred tool.
If you made this recipe and enjoyed it, I'd love it if you could give me a star rating in the comments below. And if you'd like to get in touch, you can email me at [email protected]. I'd love to hear from you. And don't forget to subscribe to my mailing list so you can grab yourself a copy of my FREE COOKBOOK!
If you'd like to continue browsing, just click on this link to all my recipes.

Tiffany says
My Grandma use to make this! Thank you for posting so I could enjoy a slice of childhood!
VJ says
You are very welcome!
Marc Faydherbe de Maudave says
Your recipes and cooking instructions/methods are excellent
VJ says
Thank you very much! 🙂