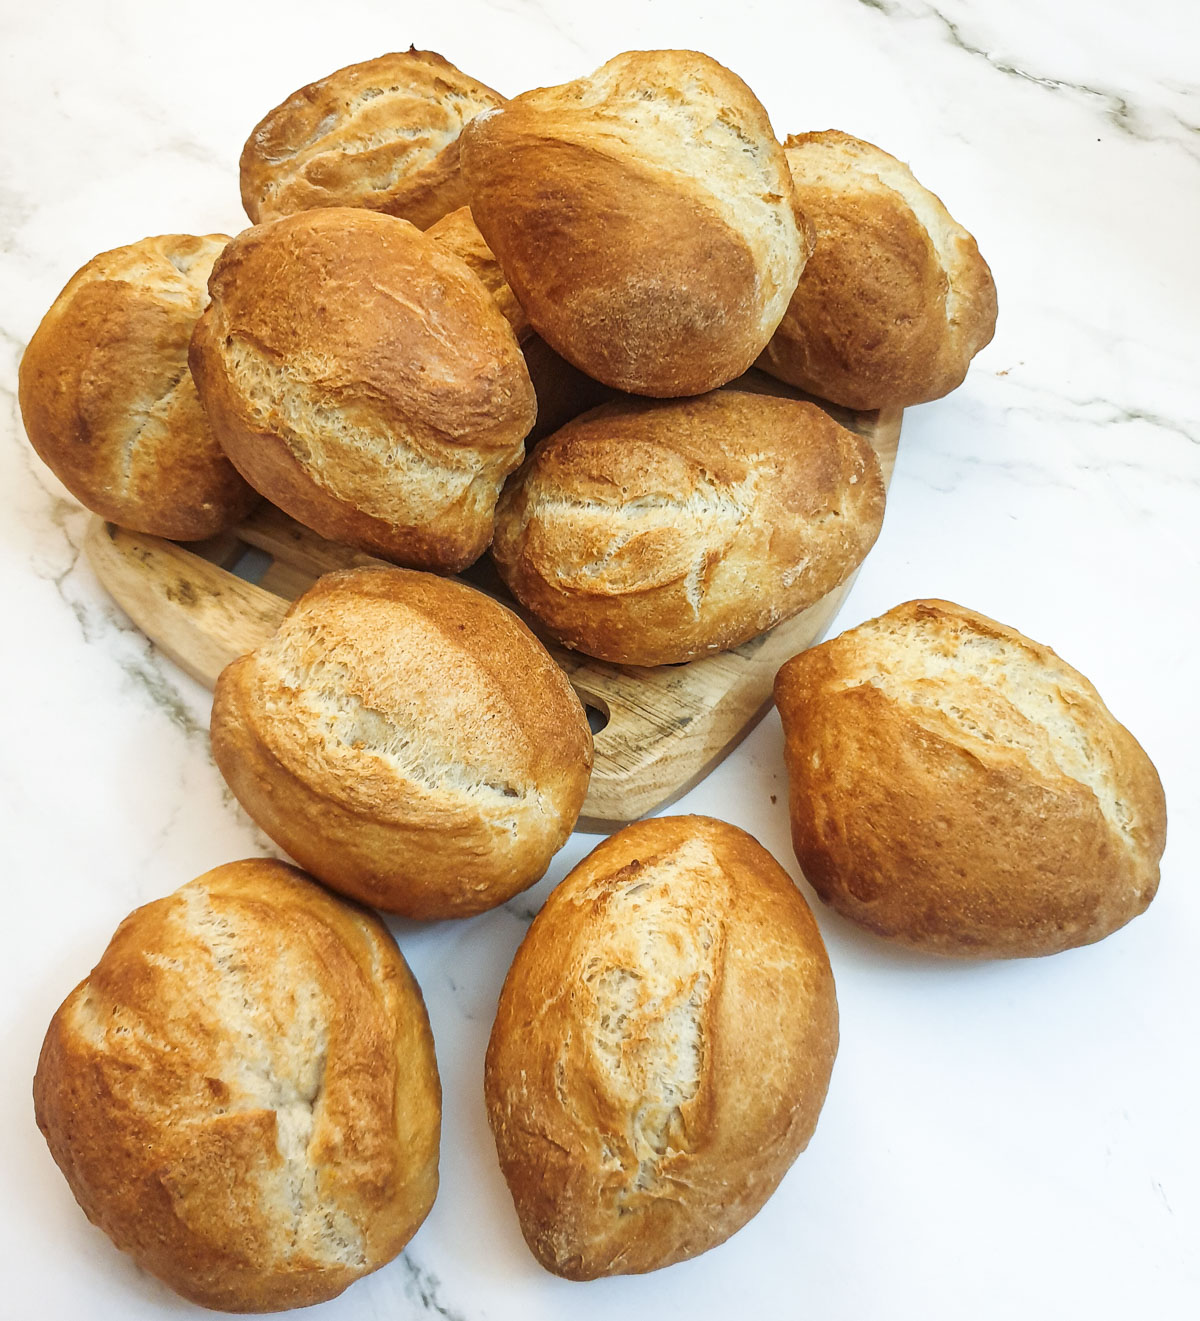
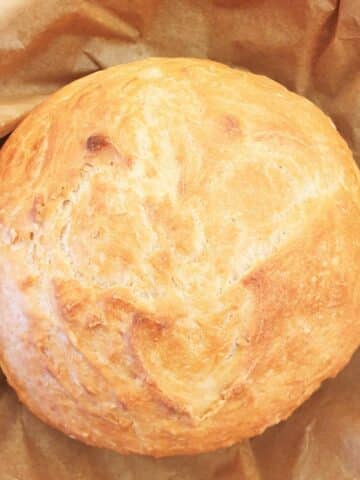
These crusty German bread rolls (brotchen) have a crispy exterior and a soft dense chewy interior. These German bread rolls are so versatile. You can eat them smothered with jam or cheese for breakfast, with a slice of ham or other cold meat for lunch, or even serve them as a dinner roll for mopping up sauces and gravy.
Jump to:
The best German bread rolls
When I was still working (before I was lucky enough to retire), one of my assignments was a 6-week stint at a company in Cologne, Germany. I've mentioned before (in my post for paprika pork goulash) that I had to stay in a hotel for the duration of the assignment, from Monday to Friday.
To my mind, one of the best things about staying in a hotel is the breakfast! Call me greedy if you like, but I do like a breakfast that has been cooked for me. However, on this occasion, there was a lot more to the breakfast than dishes of greasy bacon, sausages and eggs. There was also an entire section of the breakfast buffet, literally groaning under the weight of different freshly baked crusty bread rolls (collectively known as brotchen in Germany), and plates of various cold meats and cheeses.
I have to admit it - the Germans really do know how to make a bread roll!
There were rolls with toasted oats on top, poppy seeds, sesame seeds, twisted rolls, long thin rolls, and round rolls. During the course of my 6-week stay, I tasted each and every one, and they were all equally delicious. The bacon and eggs didn't get a second glance!
Make them yourself
The crusty German bread roll recipe I am sharing today is a basic recipe for a plain round roll - but not just any old plain round roll. This bread roll has been given the addition of a dough-enhancer in the form of barley malt flour, which acts not only to improve the rise of the dough, but also gives a softer texture, helps the crust to brown, and extends the shelf-life of the bread.
You can get away without using it, but if you would like to try it, here is a link to barley malt flour on Amazon.
These crusty German bread rolls have a crispy exterior, and a wonderfully dense, chewy interior. You can eat them still warm from the oven, dripping with butter, or layer them with ham or cheese (or both!)
You can also freeze the unbaked rolls so that you have a ready supply in your freezer to pop into the oven in the mornings for freshly baked bread. They will cook from frozen in only 20 minutes so there's no excuse for not treating the family to warm crusty bread for breakfast.
So without further ado, let's get on to the recipe.

What you will need
Equipment
First and foremost, to make life easier, you will need a stand mixer for kneading the dough. I've had a similar one for over twenty years, and it's still going strong. If you don't have a stand mixer don't worry, you can knead the dough by hand - it will just take you a bit longer - and of course, you will need a mixing bowl.
A set of kitchen scales will help you weigh the dough so that you can make evenly-sized rolls. But once again, don't worry too much if you don't have a set, you can divide the dough by sight into 12 roughly evenly-sized balls.
Finally, you will need a baking sheet and some baking parchment for baking the rolls.
Ingredients
**You can get the complete list of ingredients and full instructions for making these German bread rolls on the printable recipe card at the end of this post**
This recipe makes 12 rolls.
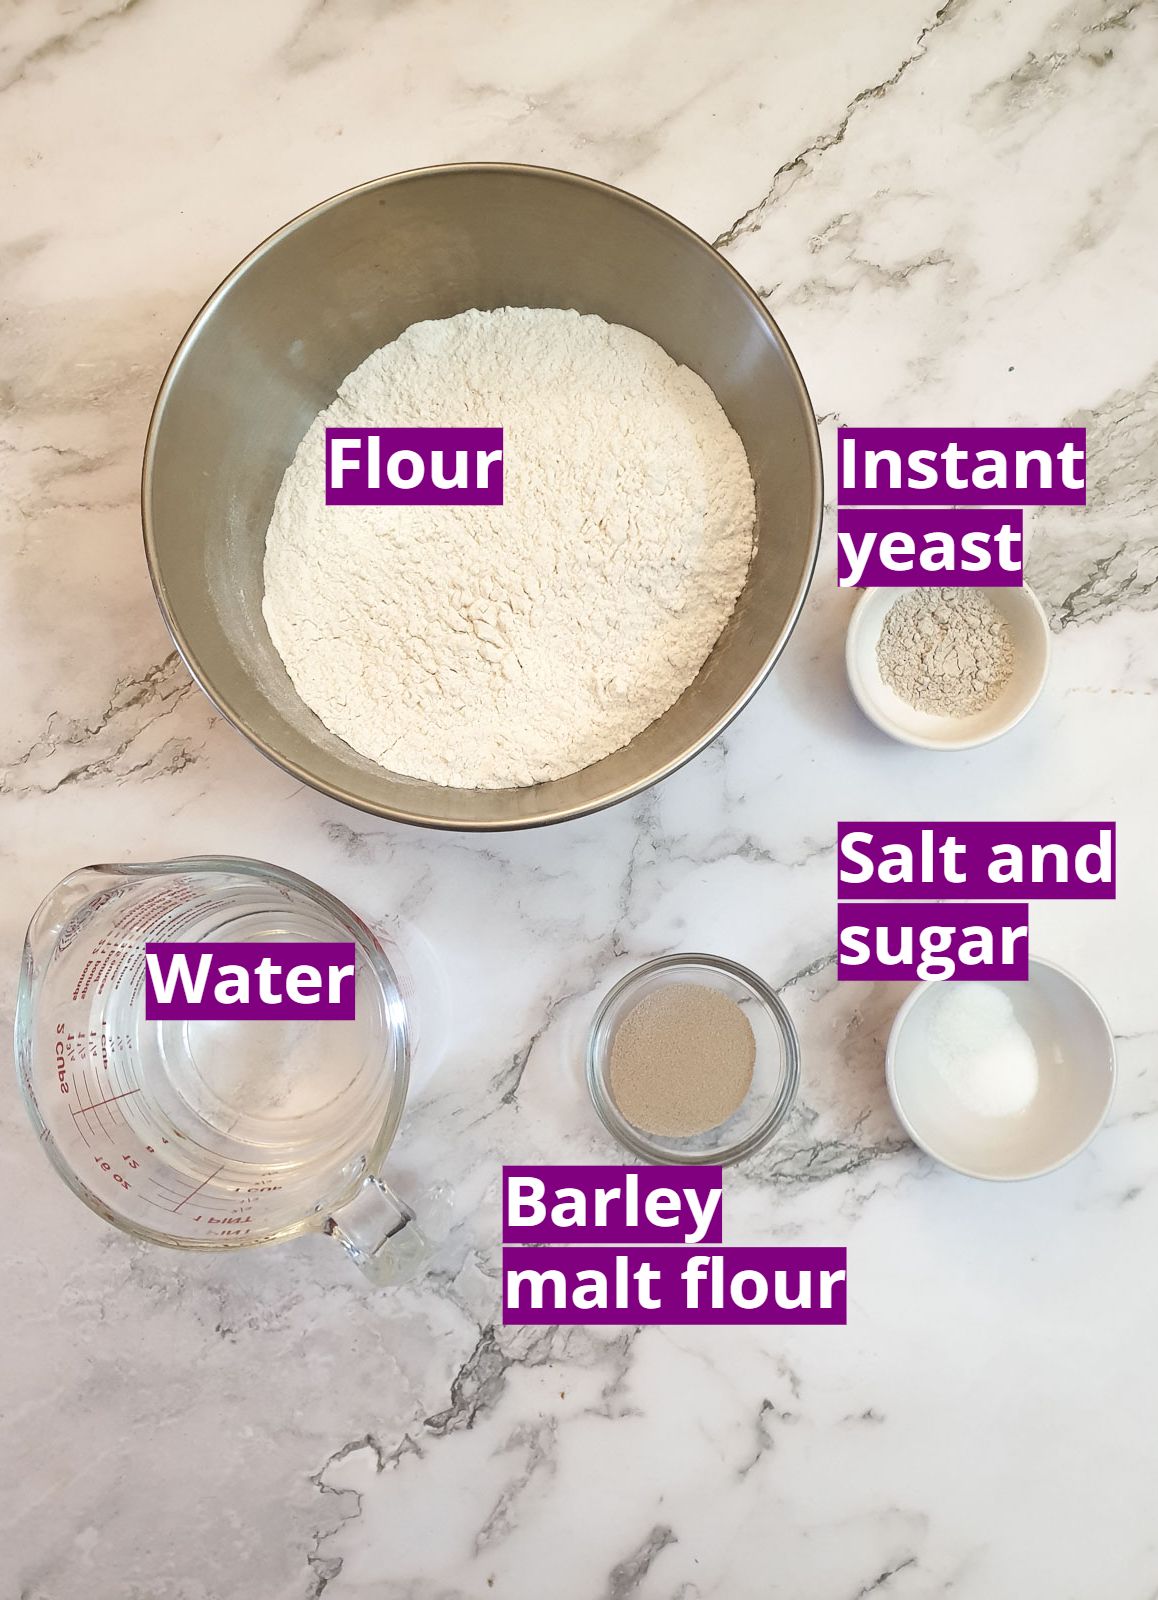
Flour - this is strong white bread flour. The gluten in the bread flour is much stronger than that of all-purpose plain white flour and produces a chewy dense texture.
Yeast - I use instant yeast granules. Do remember to check the expiry date of your yeast granules and don't use them if they are out-of-date. Your rolls won't rise properly if the yeast is old (believe me, I've learned from hard experience).
Barley malt flour - as I've mentioned this is a bread enhancer and you can leave it out if you don't have any. If you leave it out, you will have to proof the dough for at least an hour, as opposed to the half-hour called for in the recipe. See the FAQ section below for a full description of what barley malt flour does.
Salt - for extra taste (optional if you are on a salt-free or salt-restricted diet).
Sugar - this helps activate the yeast.
Water - should be lukewarm. Yeast likes warmth to grow and ice-cold fridge water won't do it any favours. If you prefer you can use a mixture of ⅔ water with ⅓ milk.
What to do
These are the easy step-by-step instructions.
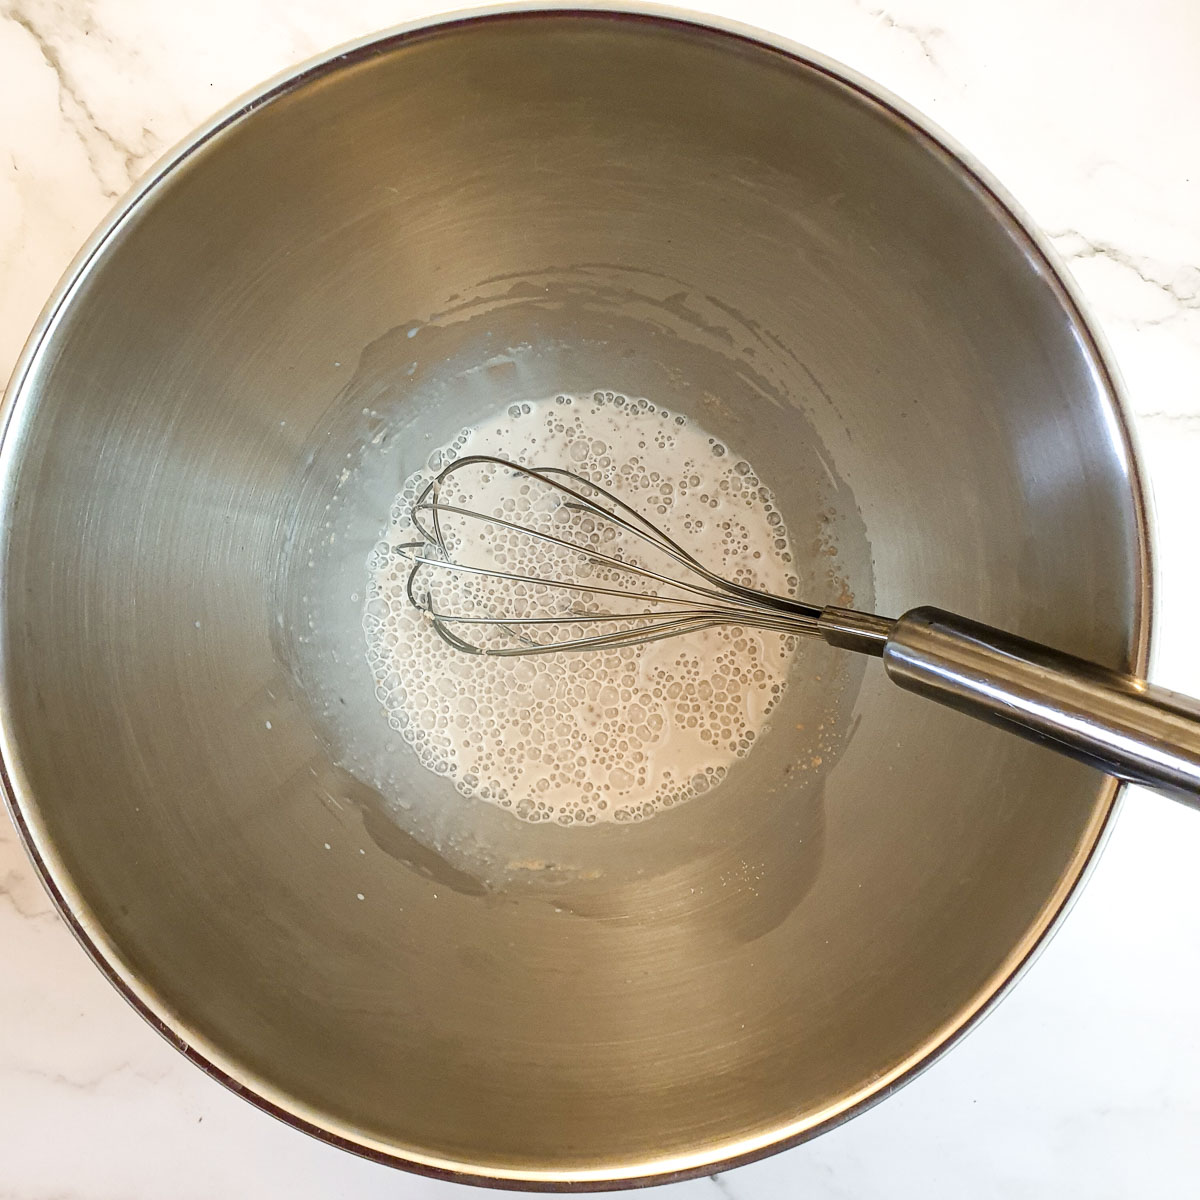
Start by pouring half of the water (or all of the milk) into a mixing bowl or the bowl of your stand mixer. Add the yeast and stir until the yeast starts to dissolve.
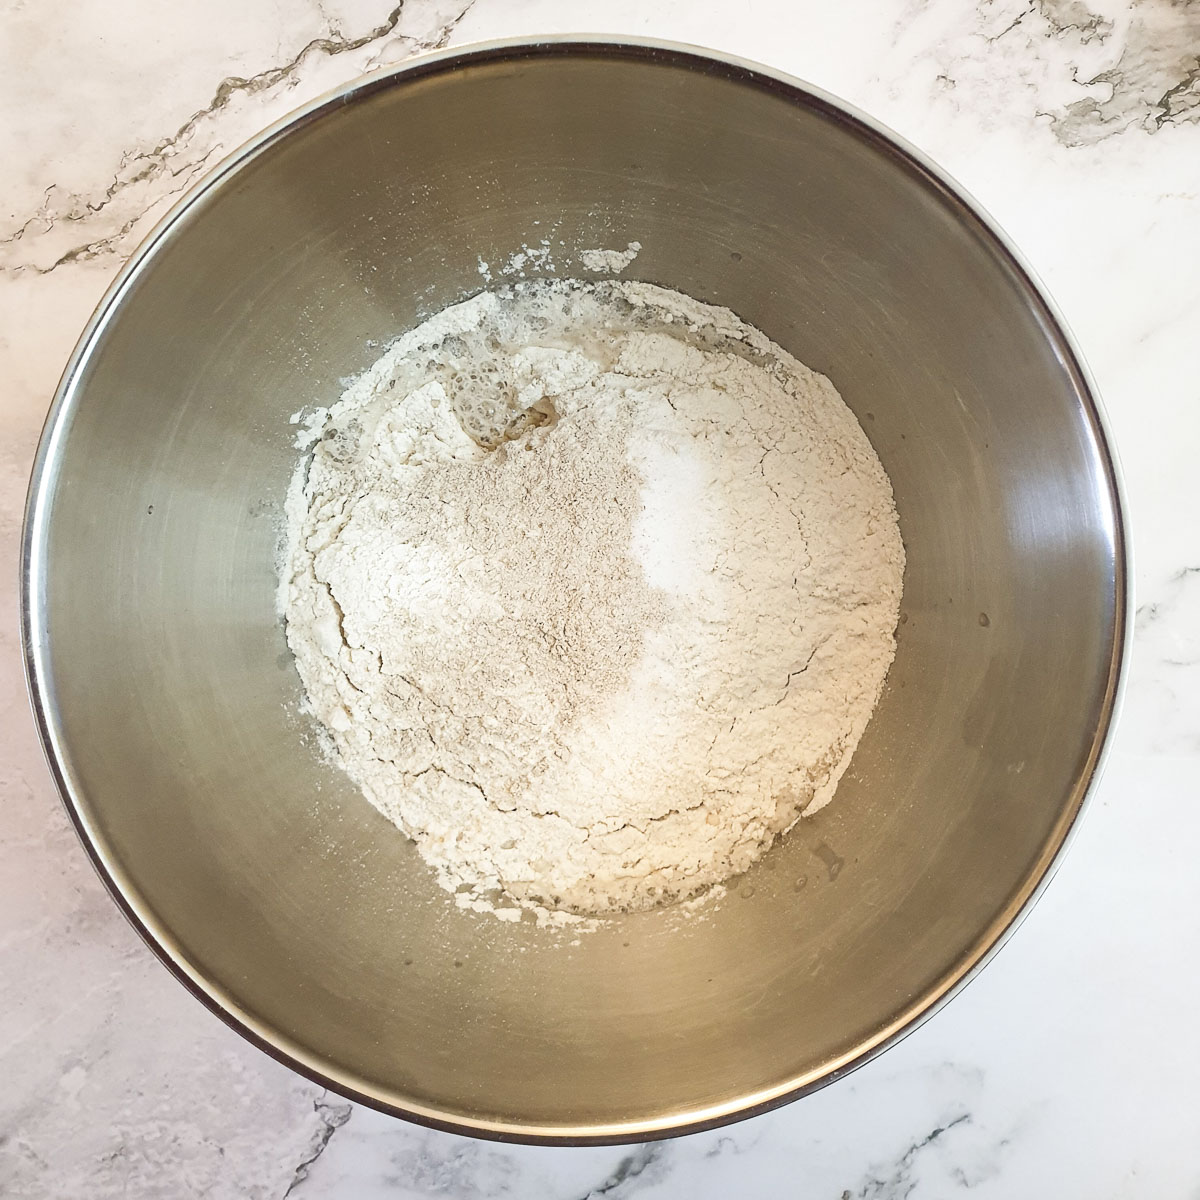
Add the flour, salt, sugar, barley malt, and most of the remaining water. Don't add all of the water now, you may not need it all and we don't want the dough to become sticky. Keep 2 to 3 tablespoons of water aside.
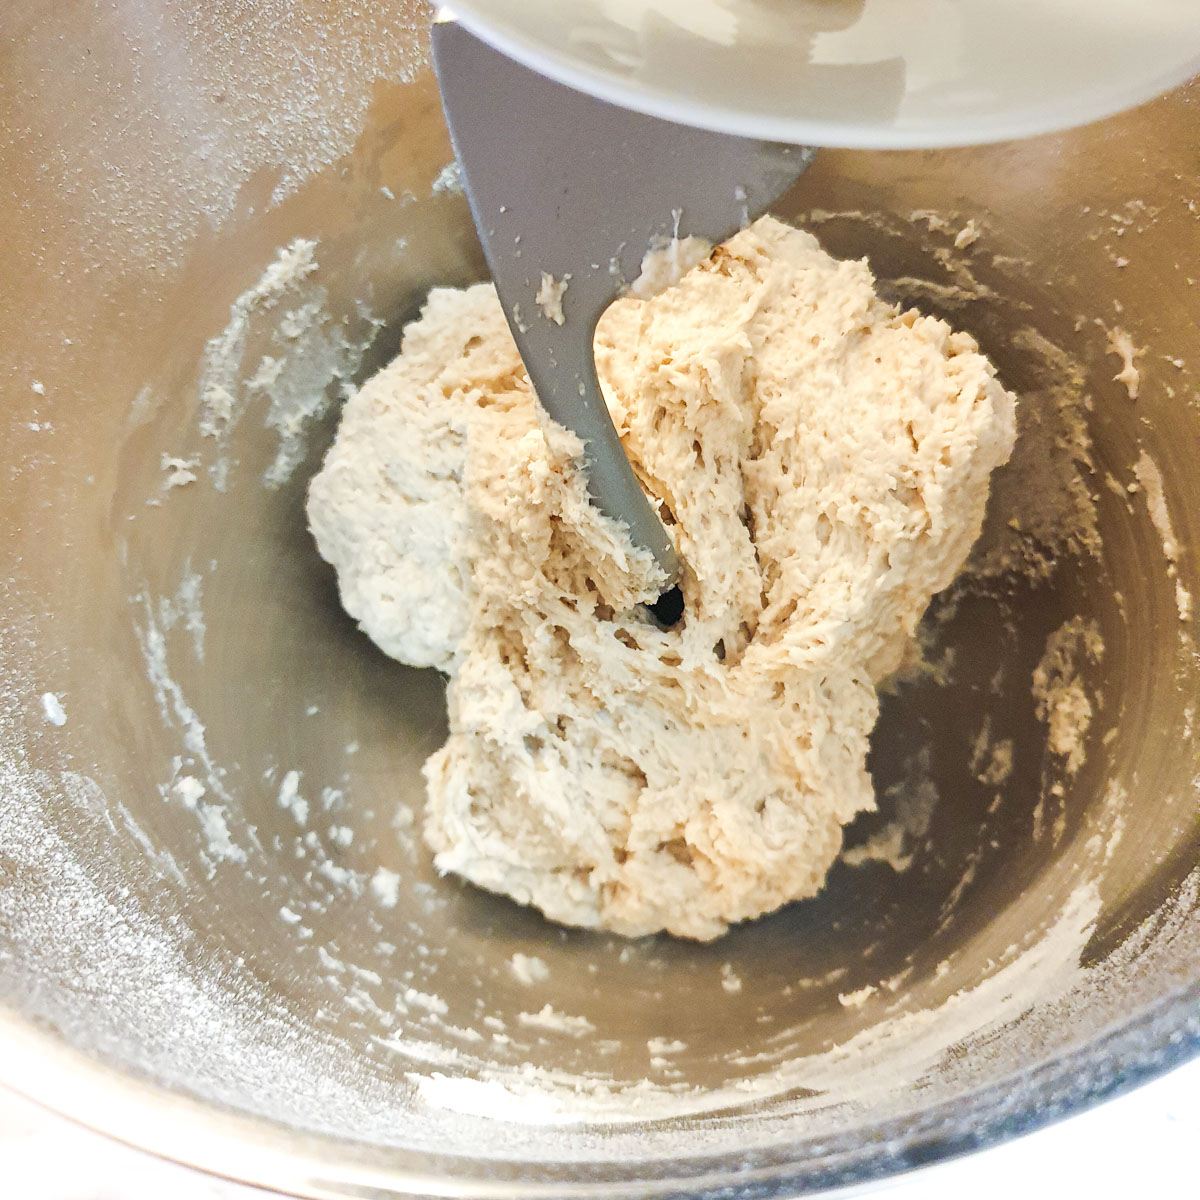
If you have a stand mixer, switch it on and let it work its magic for 12 minutes. The dough should come cleanly away from the sides of the bowl.
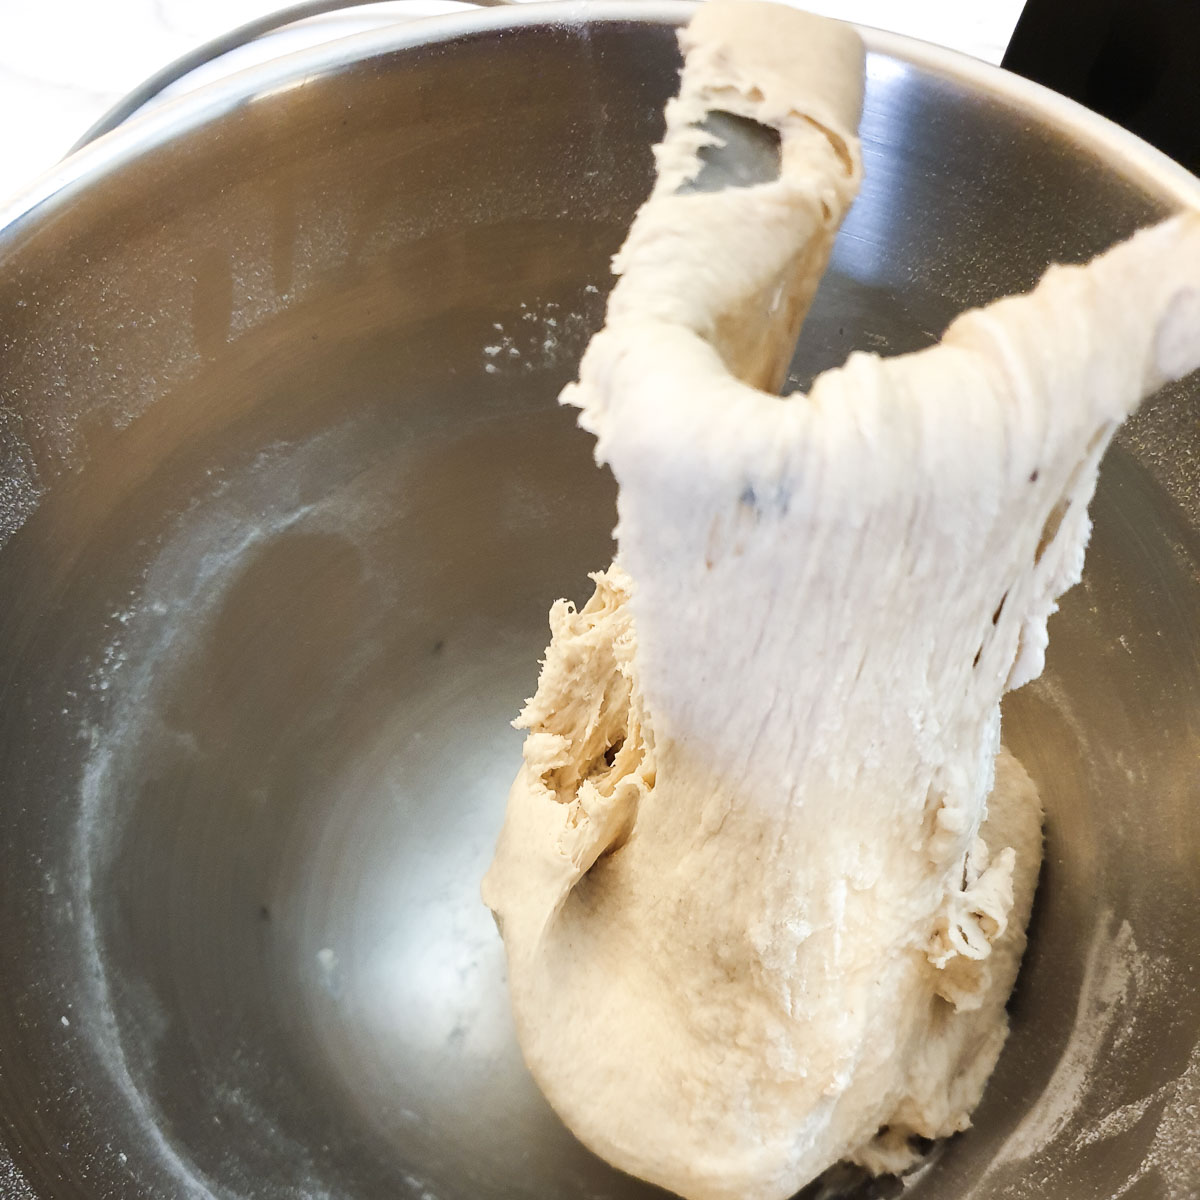
After 12 minutes the dough will be smooth and elastic and will drop slowly from the dough hook.
If you don't have a stand mixer, mix all the ingredients to combine, and then knead the dough for about 20 minutes. If the dough is too sticky you can add a little extra flour, but don't add too much or you will upset the ratio of flour to water.
In both cases, add the remaining water a tablespoon at a time if you think the dough is too dry.
The dough should be smooth and elastic. You can test this by stretching a small ball of dough between your fingers. It should stretch out without forming any holes.
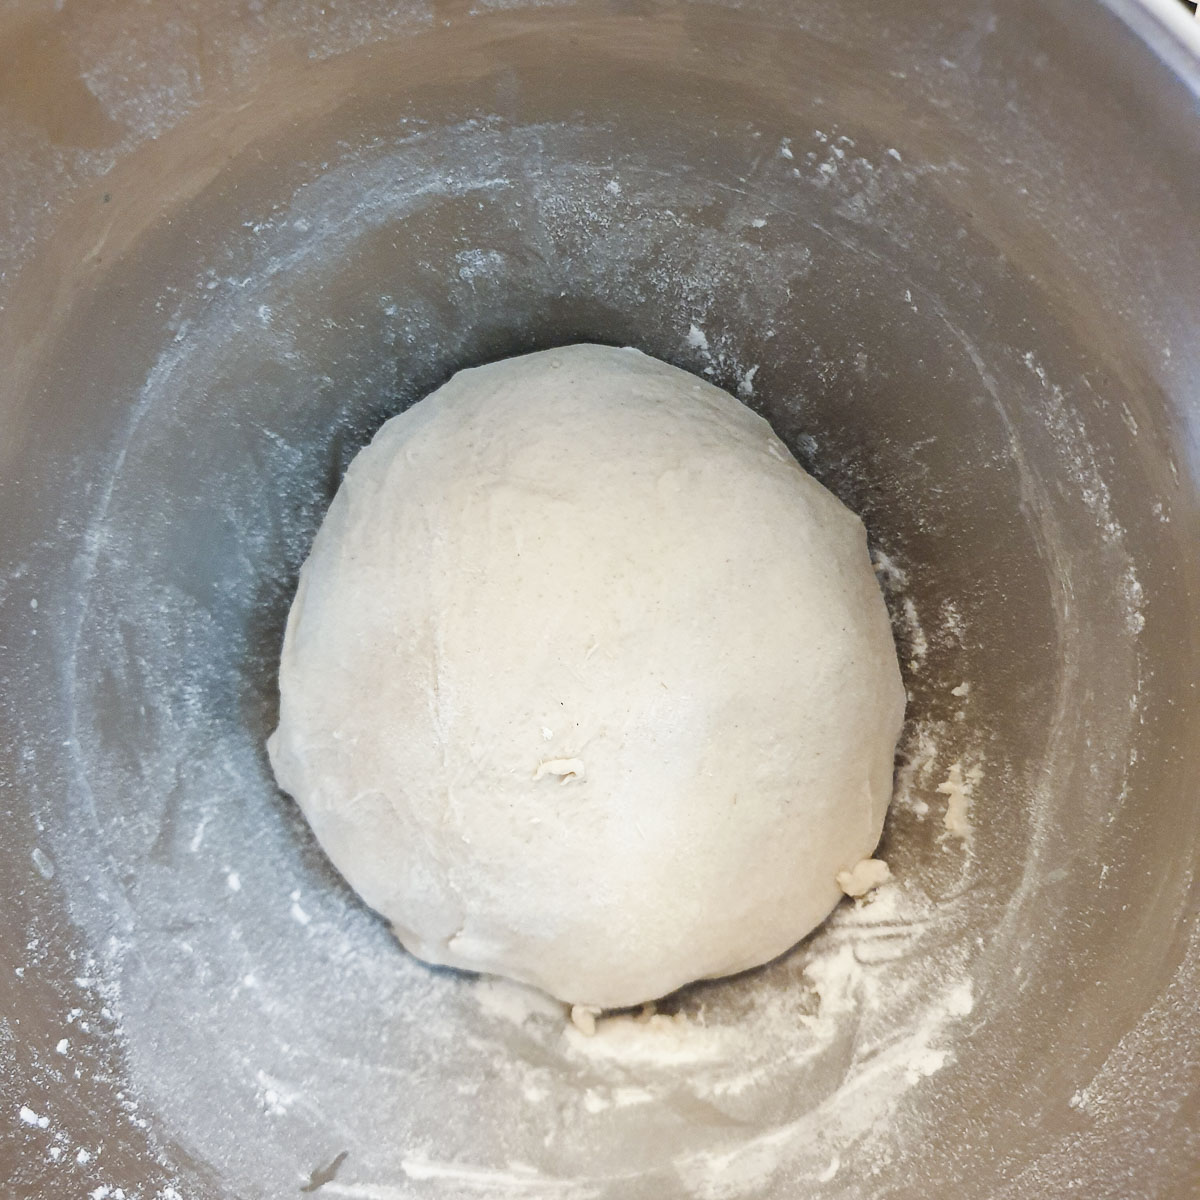
Once the dough has been kneaded, leave it in the bowl, cover the bowl with a clean cloth and leave it to rise for 30 minutes.
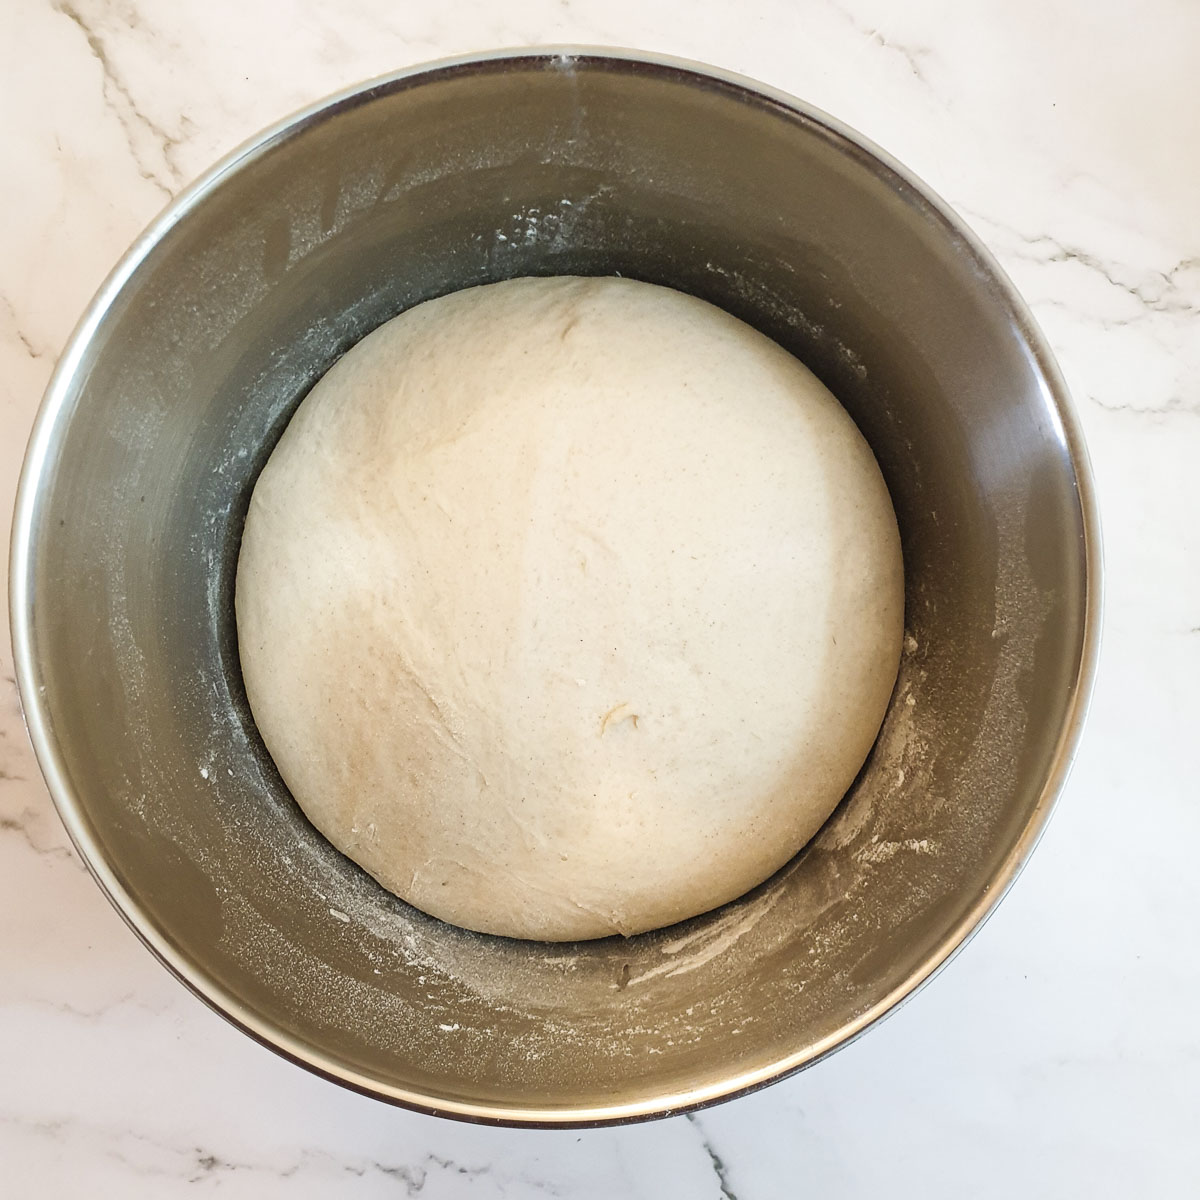
The dough should have doubled in size and have a spongy texture.
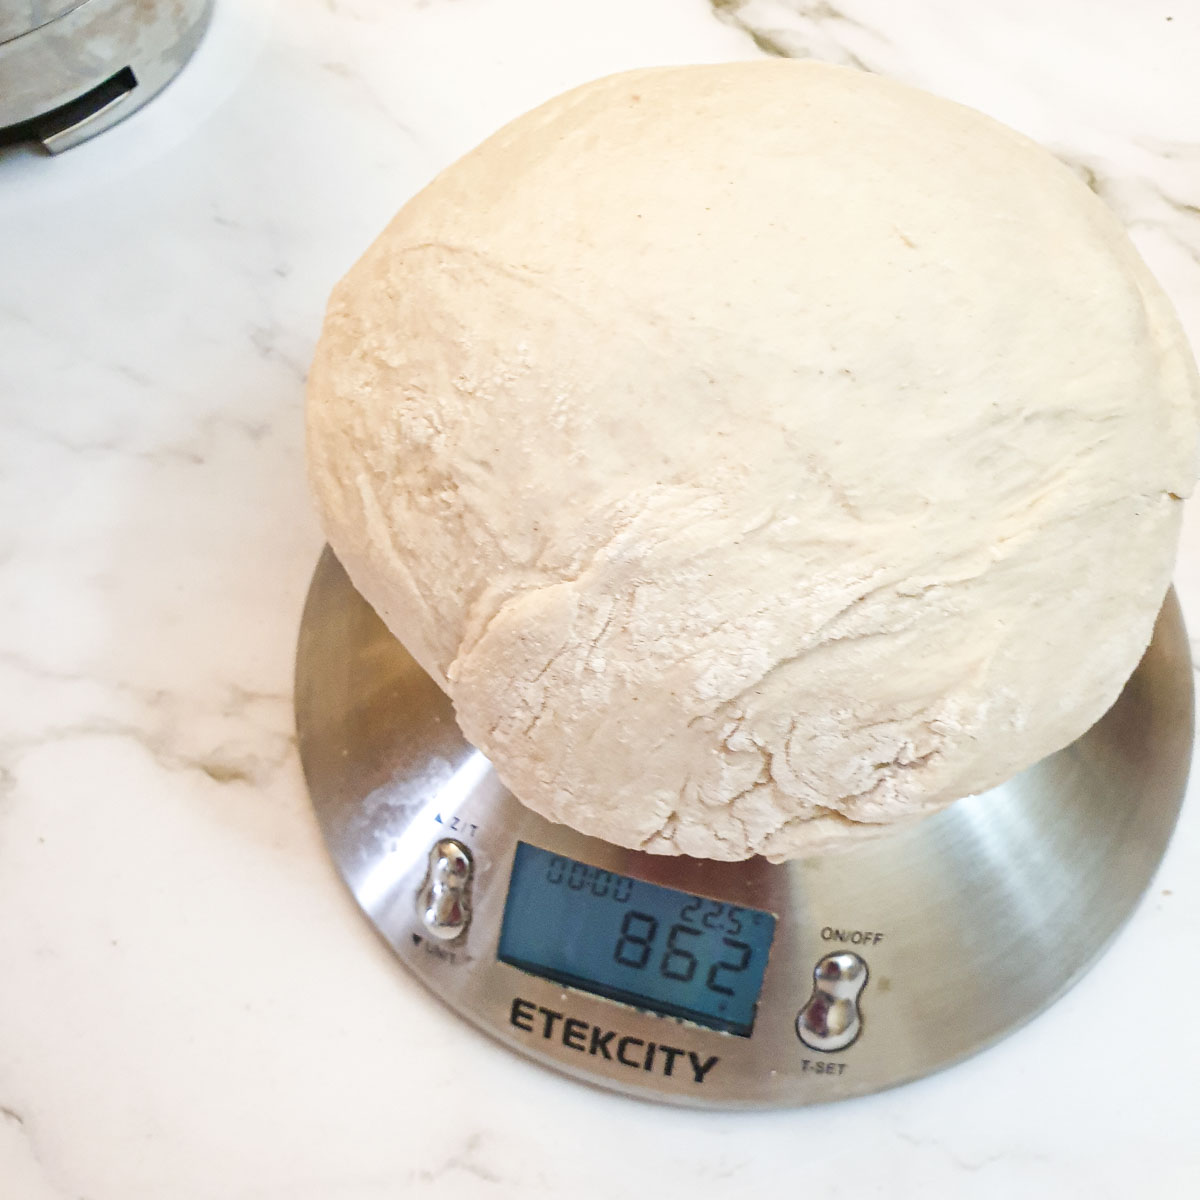
Remove the risen dough from the mixing bowl and punch it down gently. Form it into a ball and weigh it. My dough weighed 862 grams which is 71.8 grams when divided by 12.
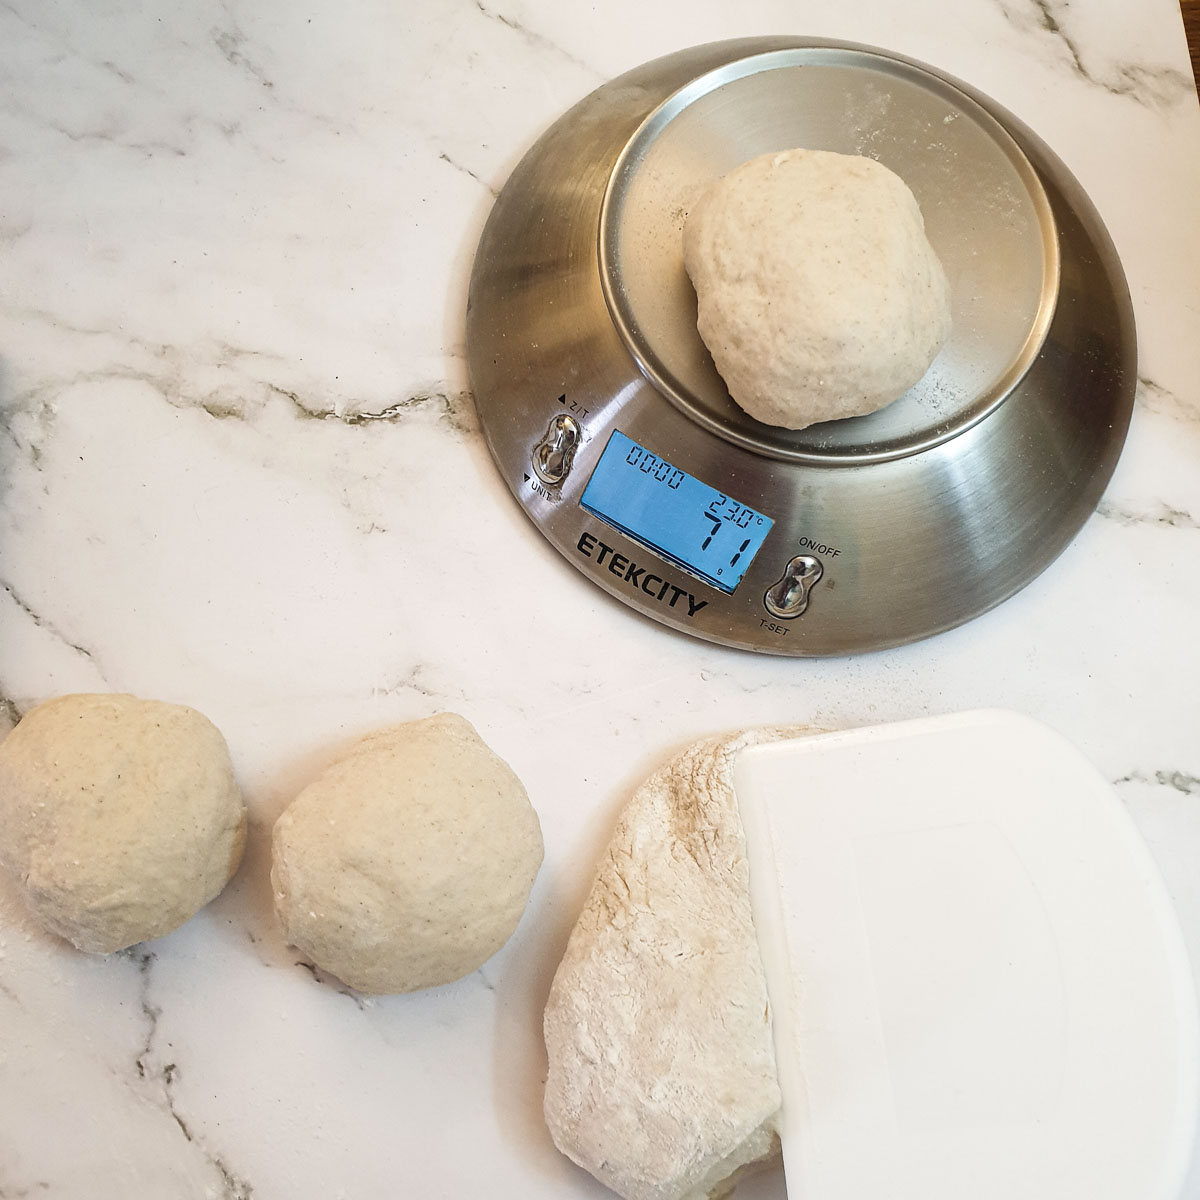
Divide the dough into 12 equally-sized balls, each weighing 71 or 72 grams.
If you don't have a set of kitchen scales, just try and divide the dough as equally as possible.
How to form the bread rolls
The next step is to form the bread rolls into their distinctive shape.
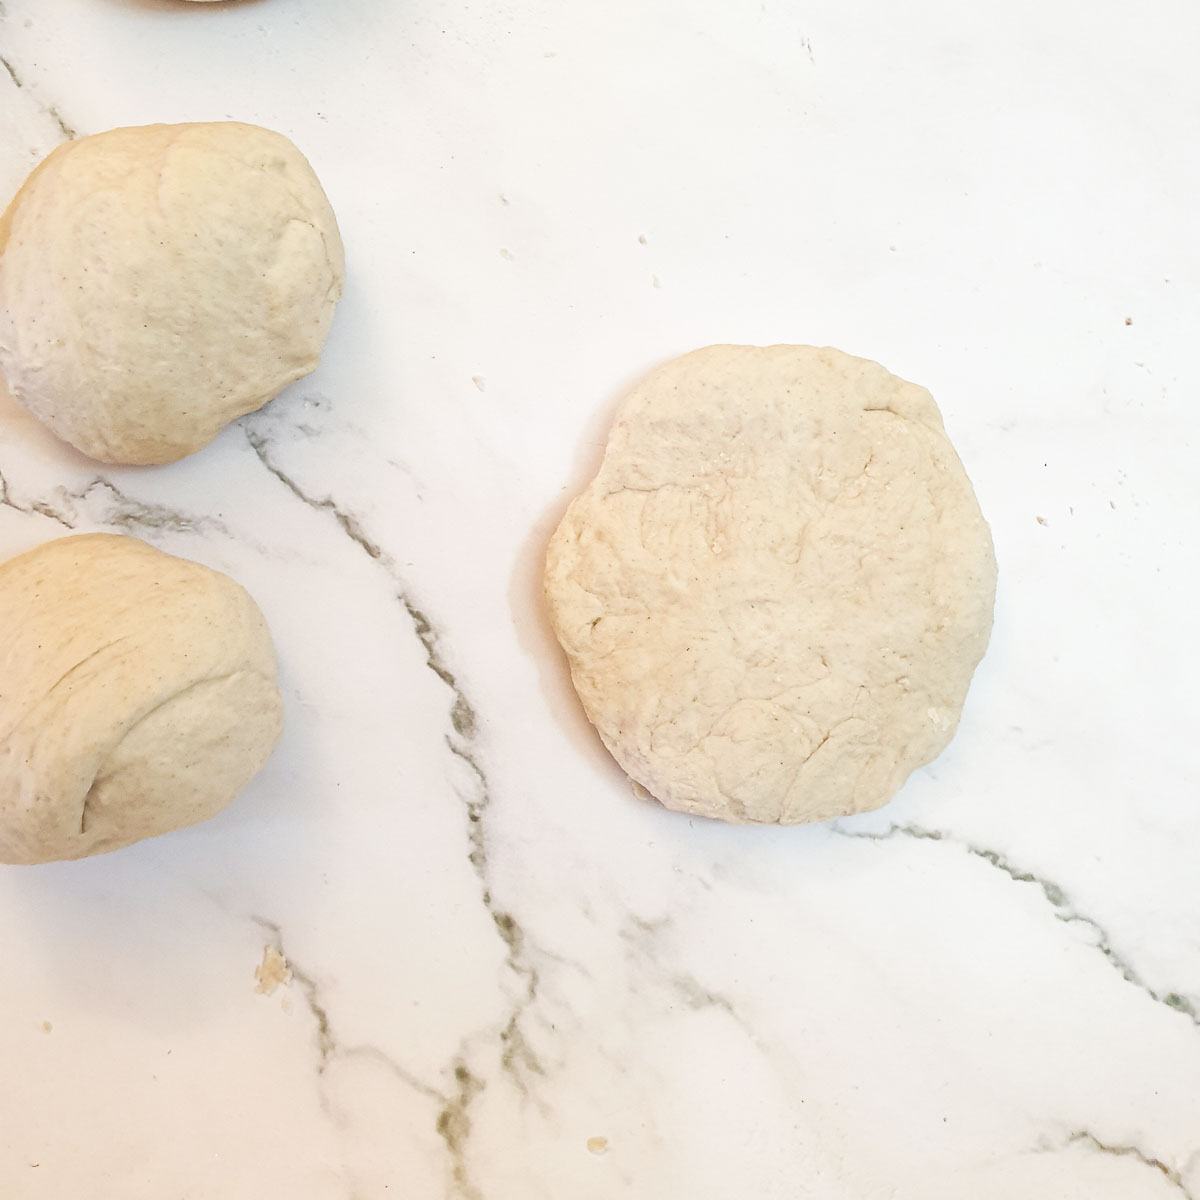
Flatten each of the balls into a circular shape.
Fold the dough in half.
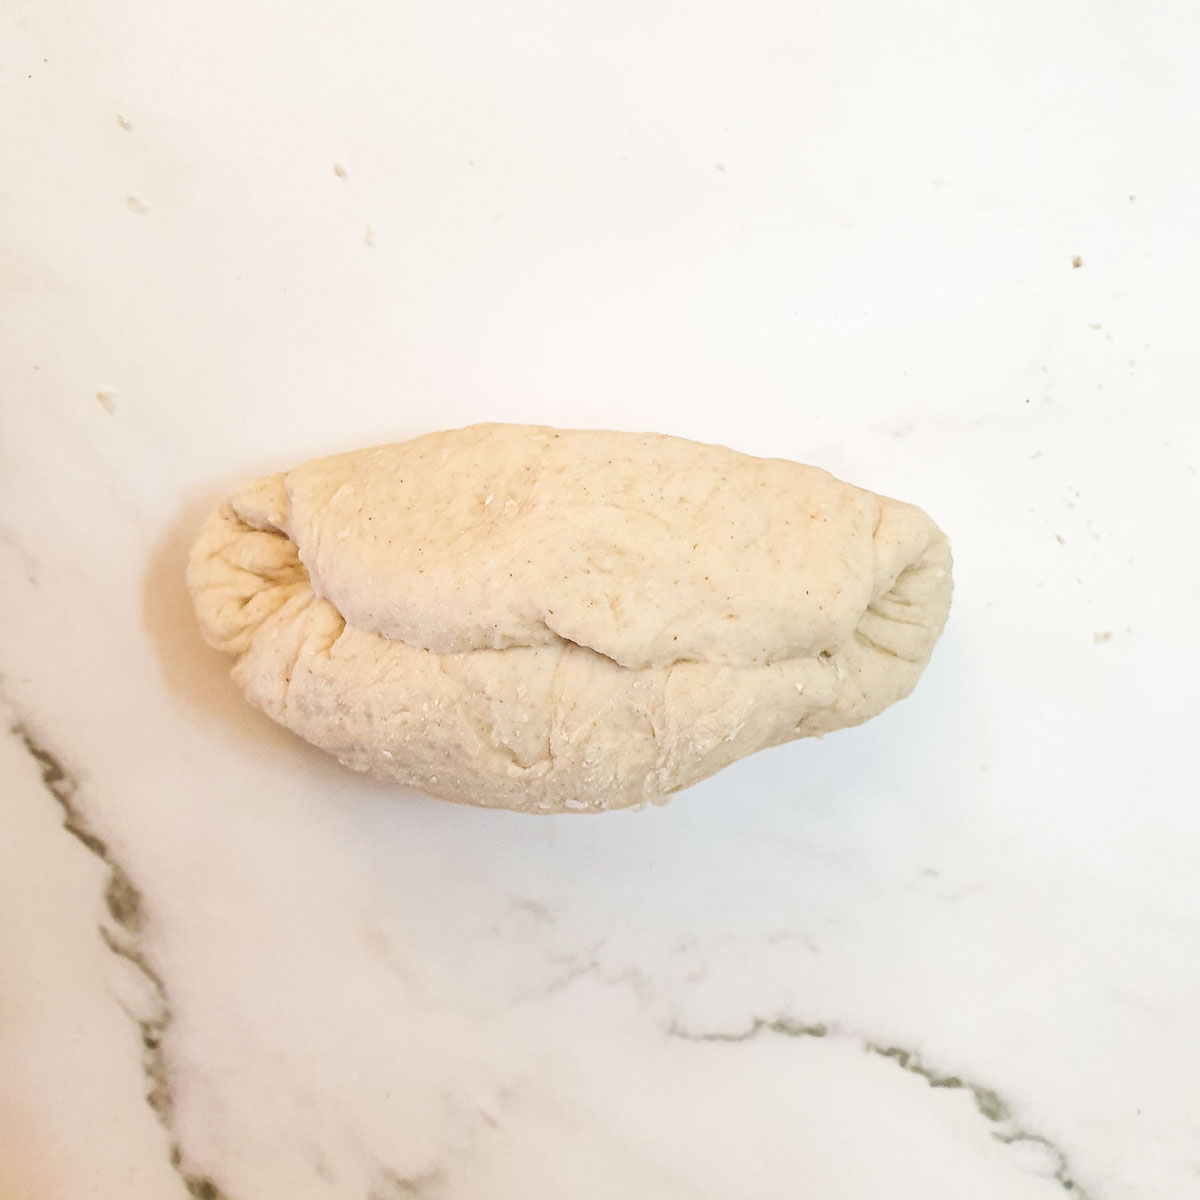
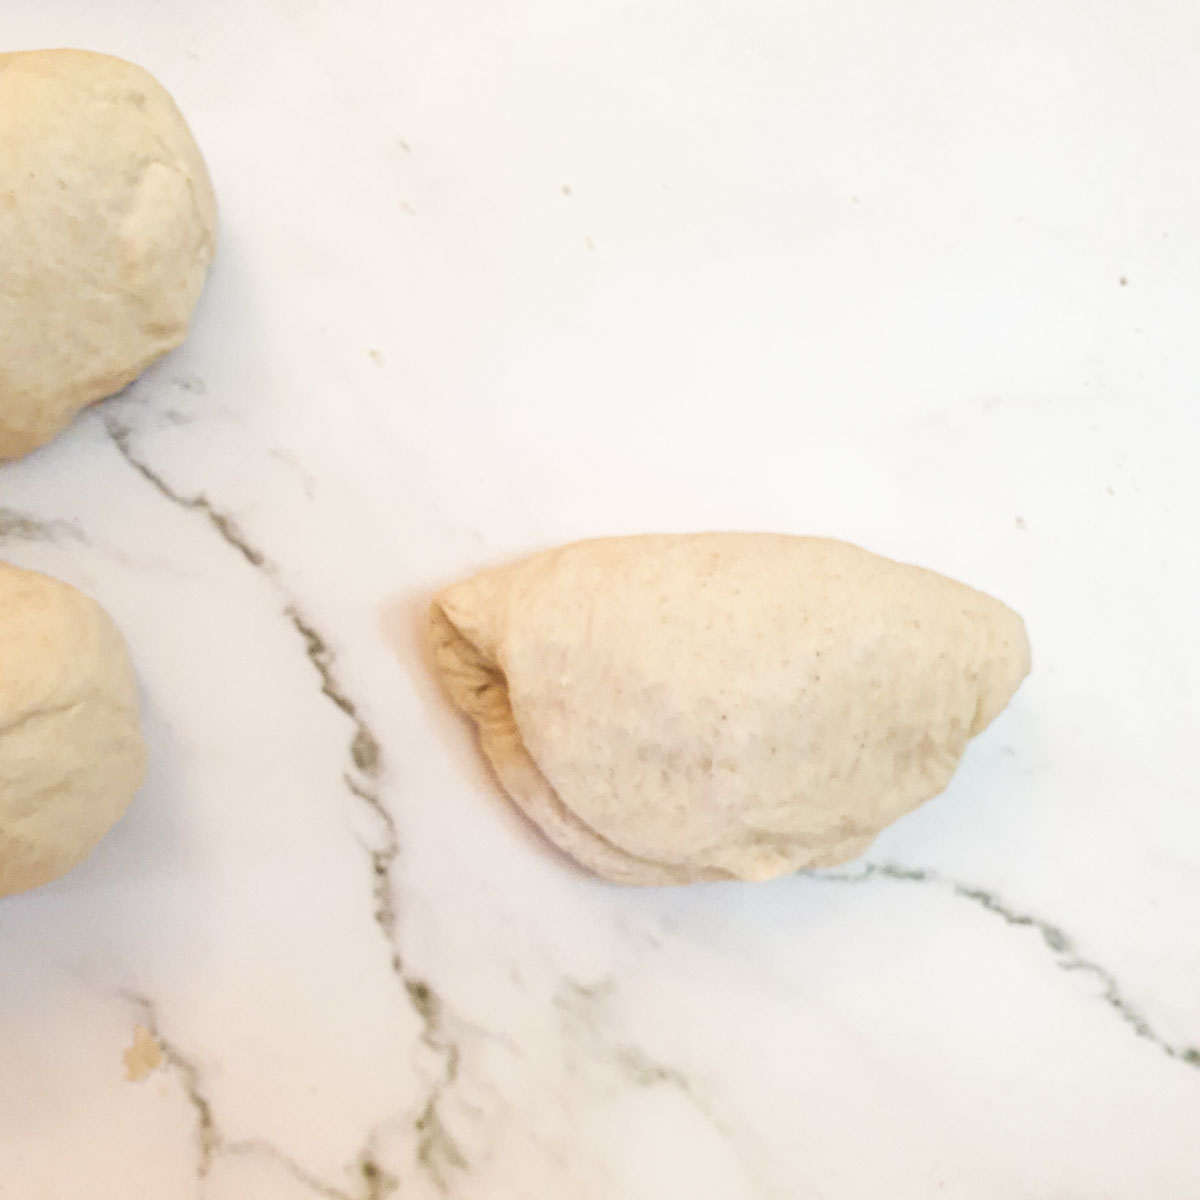
Roll the dough lightly under your hand to form a fat short sausage-shape
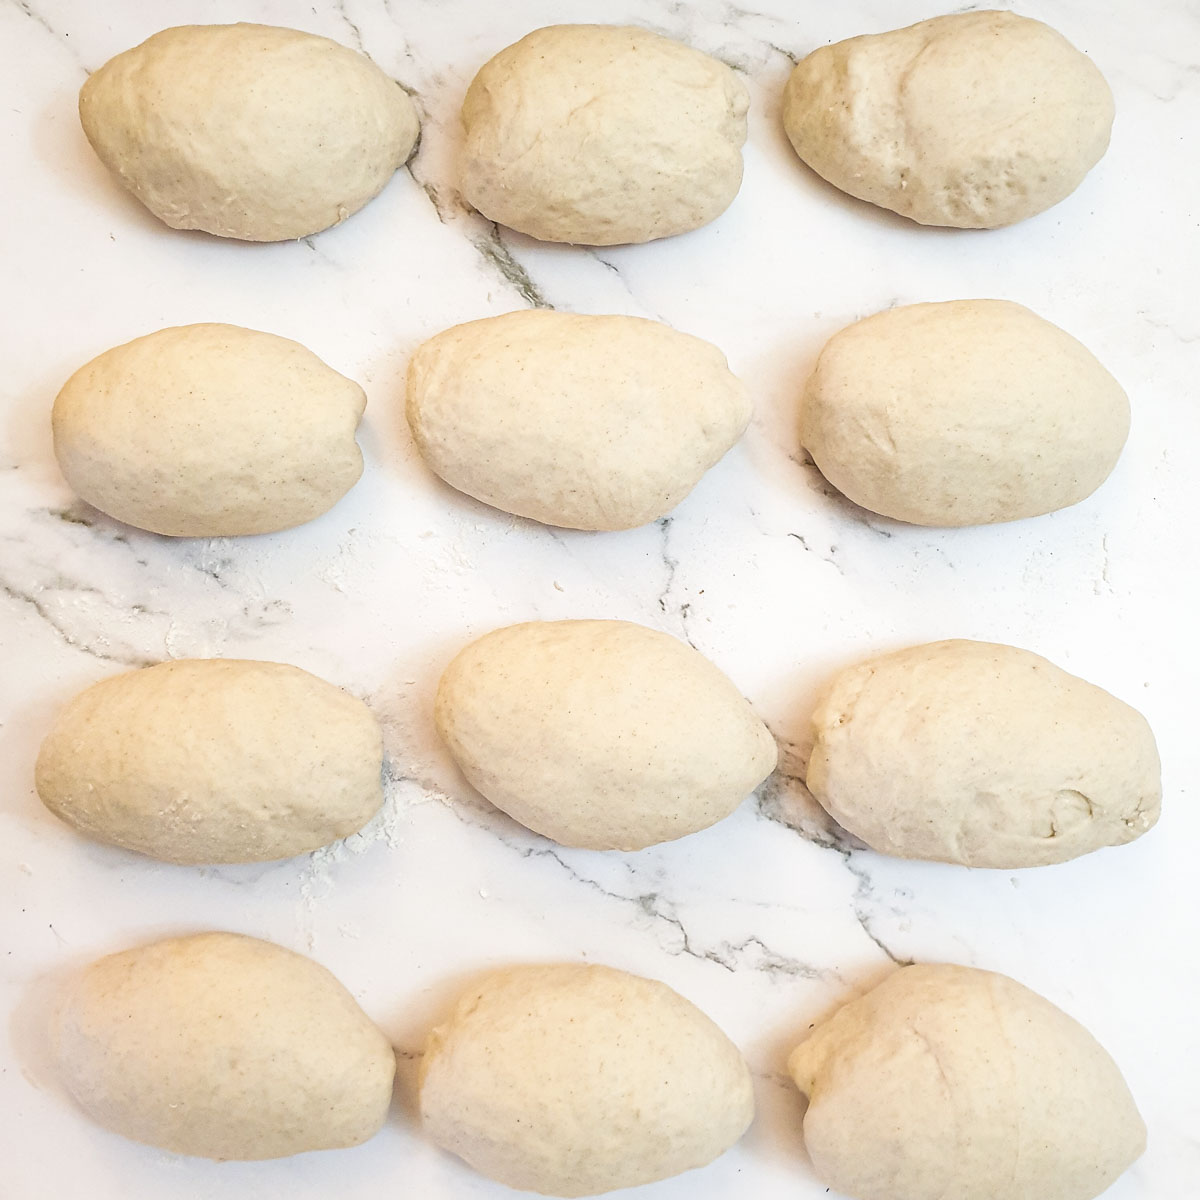
Arrange the rolls seam-side down, cover them with a clean tea towel or a sheet of plastic wrap and leave to rise for 20 minutes.
While the rolls are rising, preheat the oven to 220C / 430F. Add one cup of water to an ovenproof dish and place this on the bottom shelf of the oven. The water will produce steam as the oven heats up, which will help to form the crispy exterior on the rolls.
Once the oven has preheated, place the bread rolls on a baking tray that has been lined with baking parchment. Make sure that the rolls are seam-side up. This will allow the rolls to split when they bake and form their distinctive shape. Unfortunately, I forgot to take a picture of the rolls on the baking tray, but I'm sure you'll get the idea.
Leave plenty of room between the rolls because they will spread and you don't want the rolls to touch each other as they bake. I made 2 batches of 6 rolls each - I probably could have done 8 so if you have a really large baking sheet you will more than likely be able to get all 12 on at once.
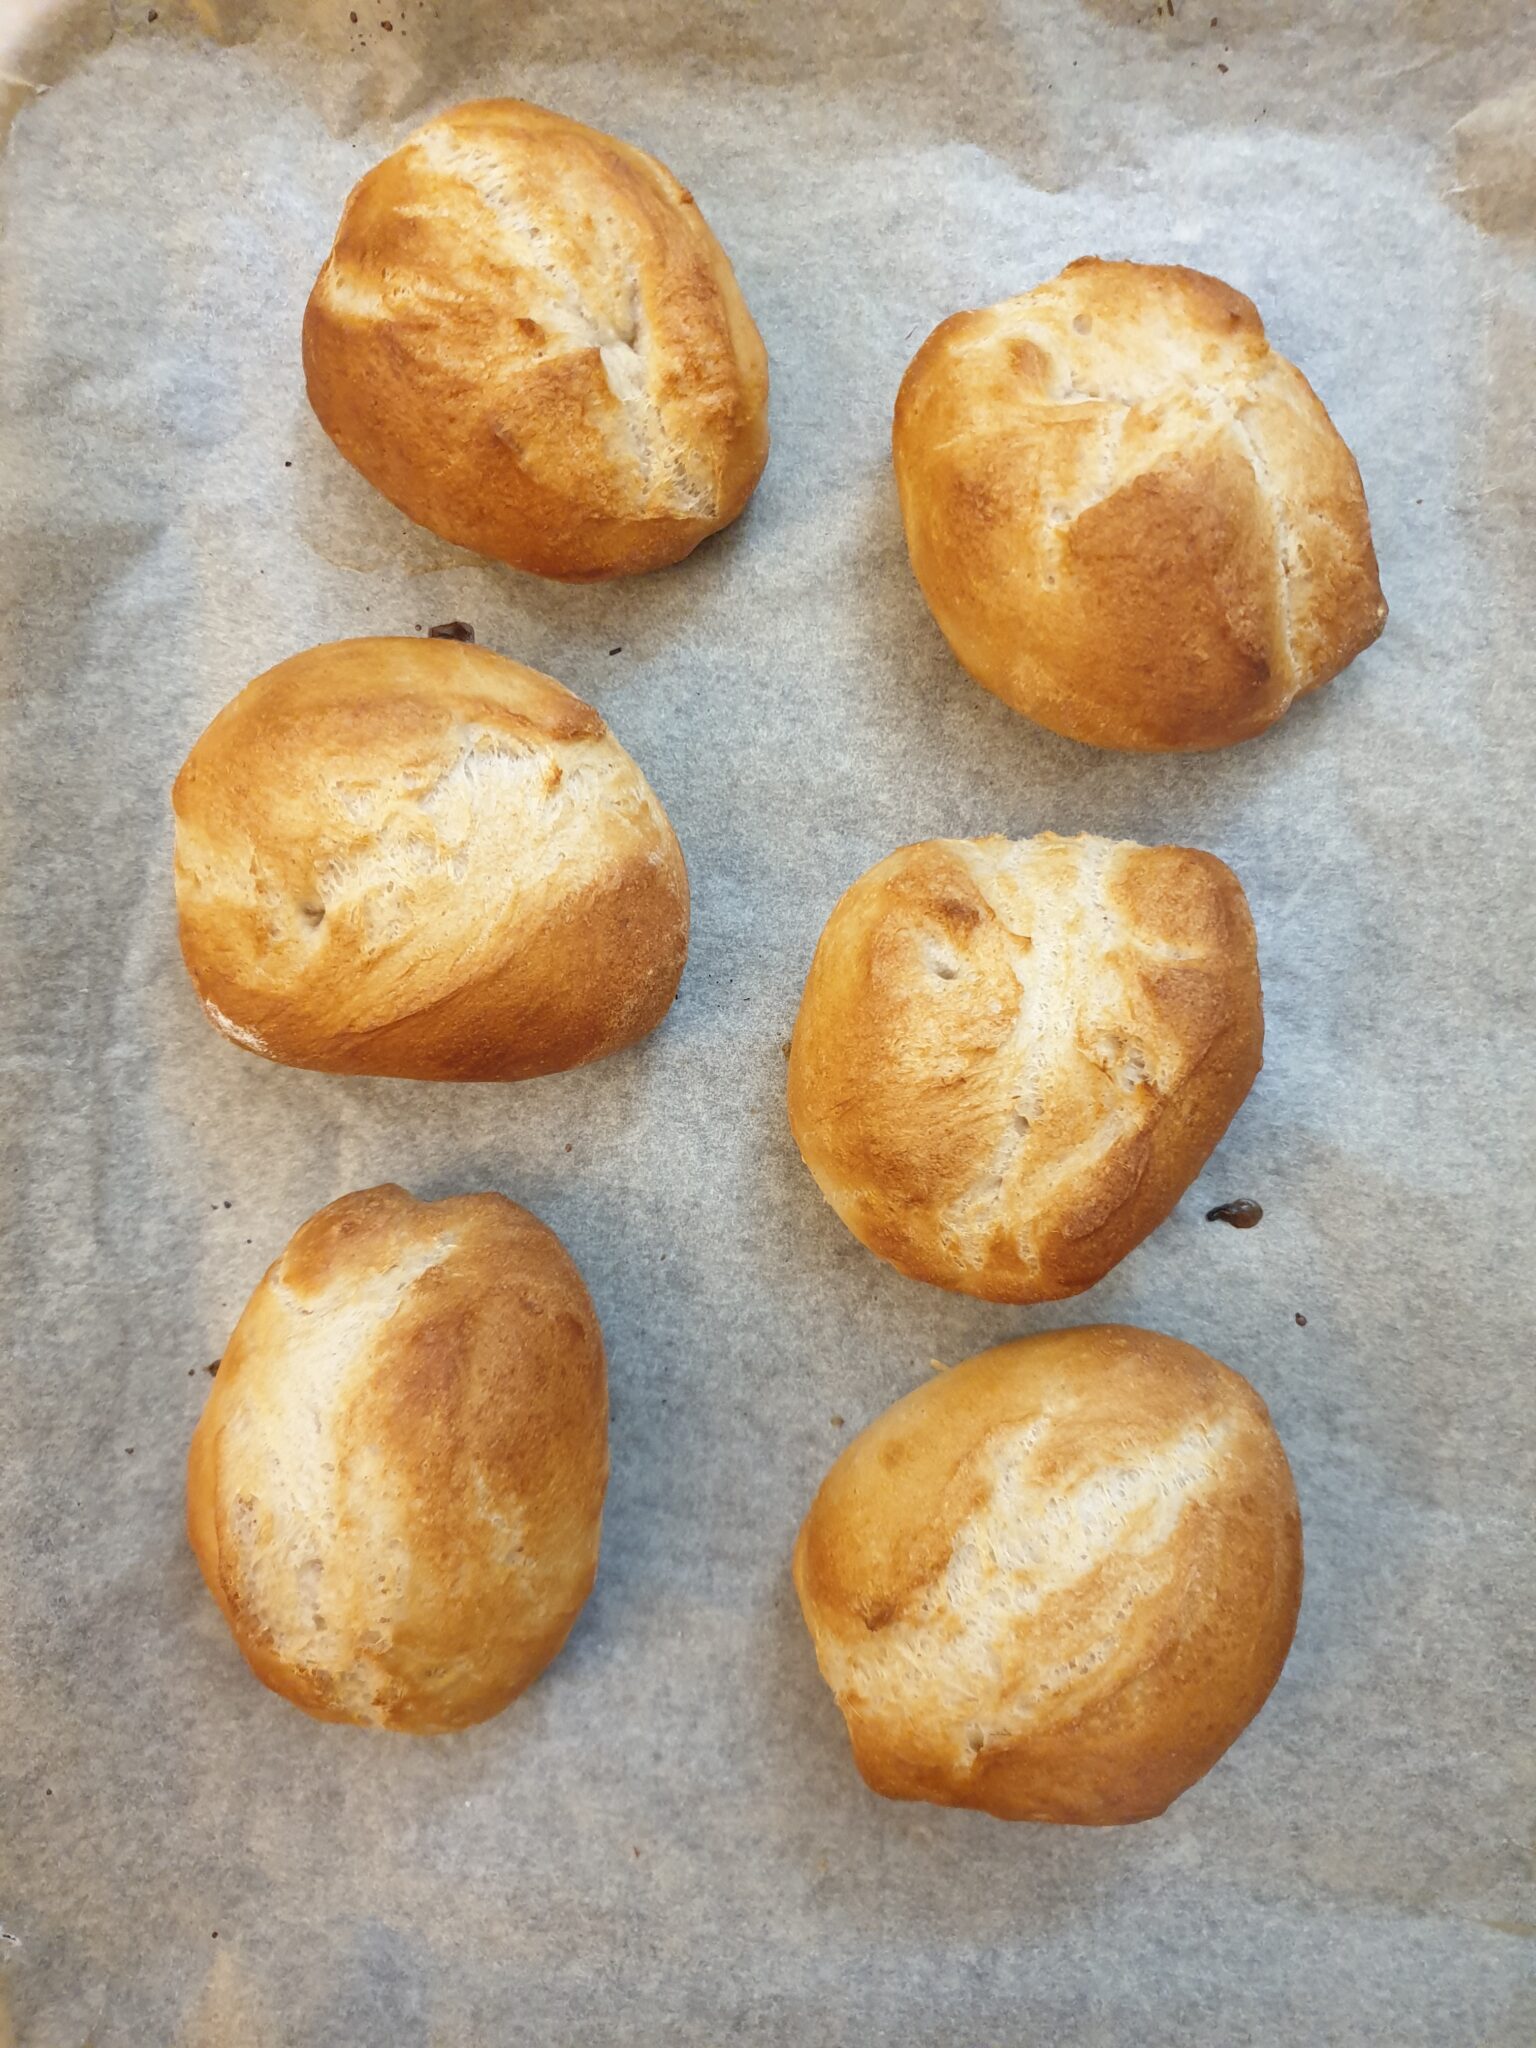
Place the baking tray in the oven (be careful when you open the oven door, the steam will be hot), and bake the rolls for 18 minutes. After 18 minutes remove the dish of water from the oven and leave the rolls for 2 minutes longer to crisp up.
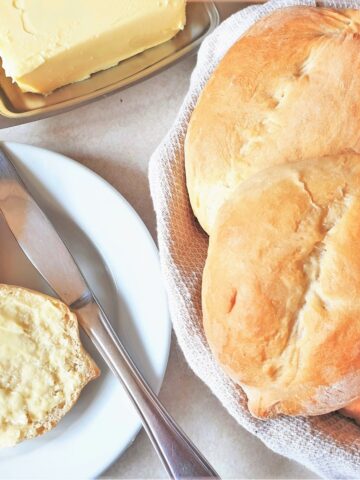
Remove the rolls from the oven and let them cool on a wire rack.
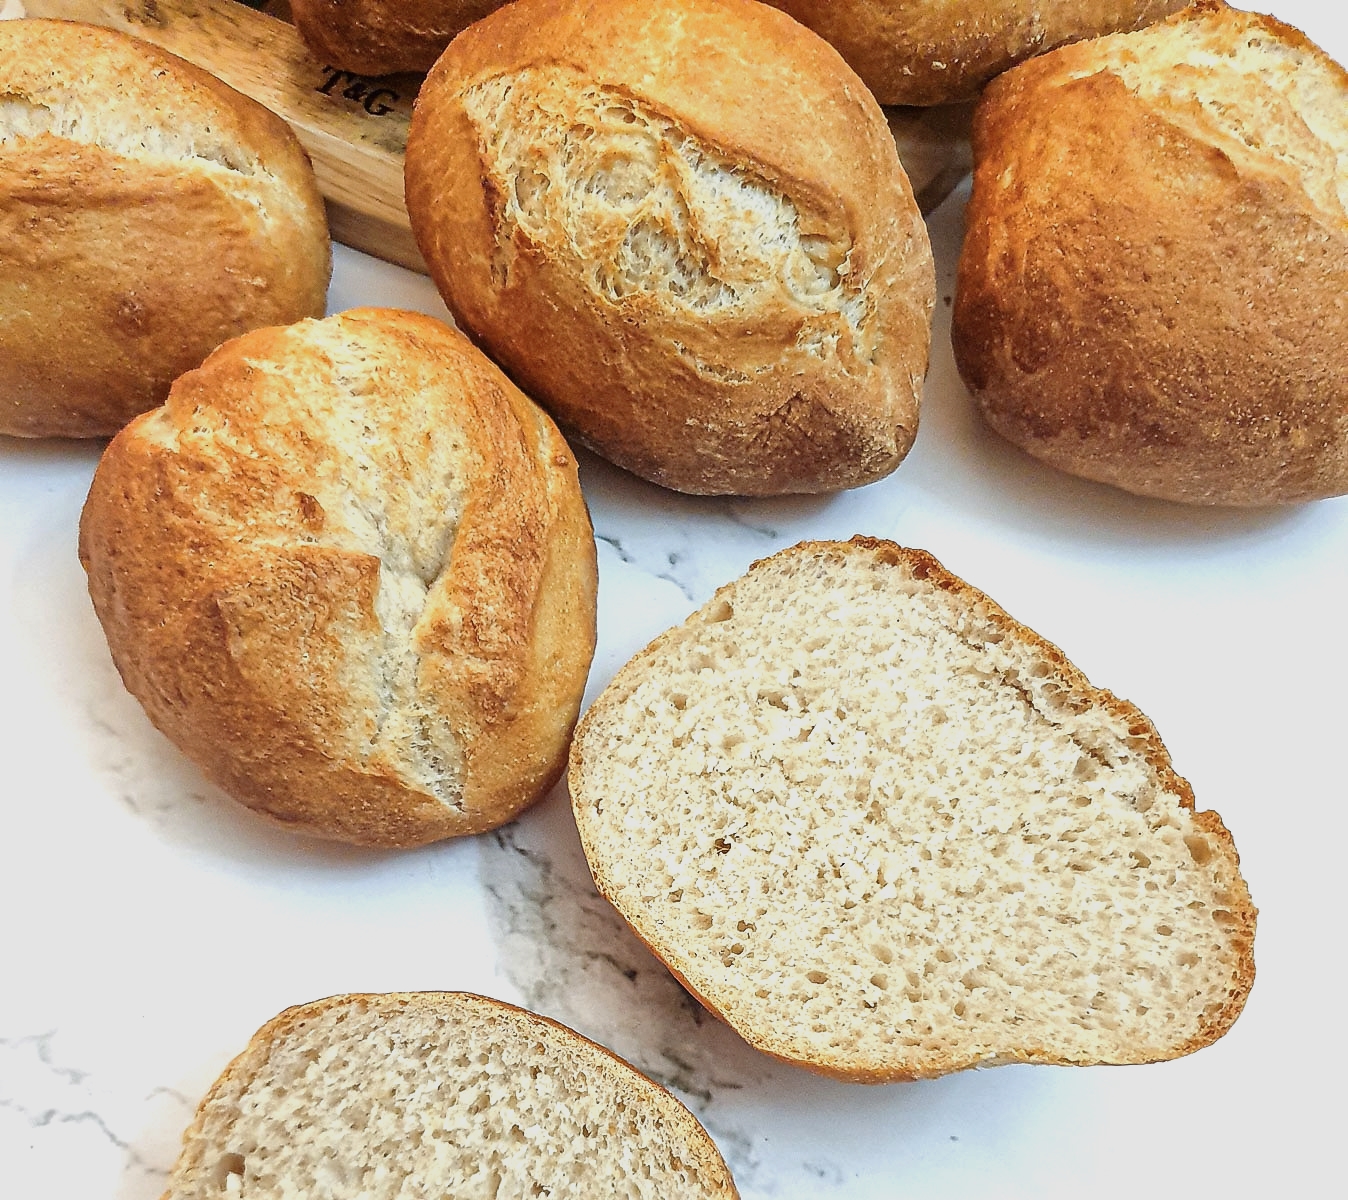
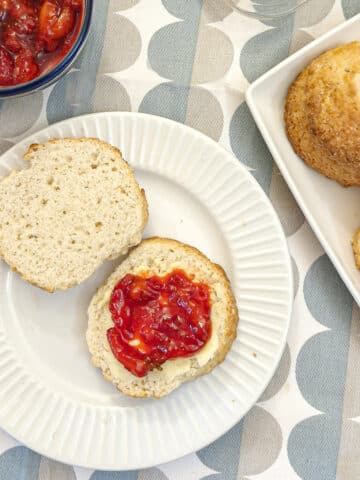
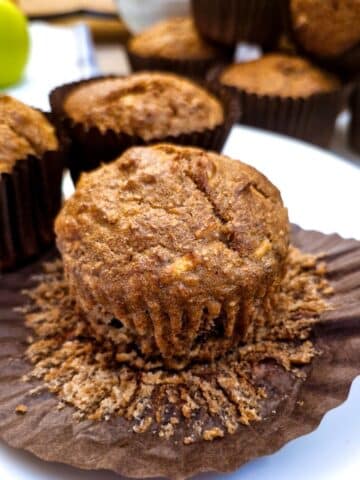
As you can see from the photo below, the rolls have a dense chewy interior with a thin crispy crust. The colour of the dough is slightly off-white. This is due to the barley malt that was added.
If you'd like to be notified of new recipes, why not subscribe to my newsletter? To say thank you, you will receive a free recipe e-book containing some of my most popular cakes and desserts.
Hints, tips and FAQ
Barley malt flour is made from barley that has been allowed to germinate (or sprout), and then dried in hot air to stop the germination process. It is then ground into a very fine flour which can be combined with normal bread flour in baking.
When the barley germinates it produces an enzyme called amylase which breaks down the starch and sugars in the dough, making them easier for the yeast to feed on. For this reason, the addition of a small amount of barley flour to your bread dough will make the dough rise faster.
Adding a small amount of barley malt flour to bread will make the dough rise faster, improve the texture of the crumb and extend the shelf-life. It will also help to produce a browner, crispier crust.
There are actually two types of barley malt flour:
Diastatic - which is the one normally used in breadmaking, as this is the type that contains the active enzyme (amylase).
Non-diastatic - this has had the active enzyme removed and is used more for flavouring, such as in malted milk or in a malt loaf.
Barley malt flour is not used by itself for baking. It is only used as a supplement to normal wheat flour. You will only need to add a very small amount to your flour to get the benefits from it - half a teaspoon per cup of flour is normally sufficient.
These bread rolls are best served on the day they are made. However, you can revive them on the following day by sprinkling them with a few drops of water and placing them on a baking tray in a hot oven (200C / 400F) for 5 to 7 minutes.
Once the rolls have cooled down, you can store them in a plastic bag in the breadbin.
The rolls can be frozen either baked or unbaked.
To freeze from baked, allow them to cool and then place them in a freezer bag and freeze for up to 3 months.
When you are ready to bake them, put the frozen rolls in a hot oven, (200C / 400F) for 5 to 7 minutes until they are heated through.
To freeze unbaked rolls, shape the rolls, place them on a baking tray and allow them to rise then place the baking tray in the freezer until the rolls are frozen and solid. You can freeze them for up to three months.
To use, place the frozen rolls on a baking tray, seam-side up, and bake according to the recipe instructions. You will have to add 2 to 3 minutes to the baking time if you are baking the rolls from frozen.
If you would like to have fresh rolls for breakfast, you can prepare these German bread rolls ahead of time.
Shape the rolls and place them seam-side down on a baking tray, then place the baking tray in the refrigerator and leave overnight. The cold temperature in the refrigerator will slow down the rising process and the rolls will be perfectly fine to bake the following morning.
Next morning bake the rolls according to the recipe instructions.
Save for later
If you would like to make these crusty German bread rolls yourself, why not pin the recipe to one of your Pinterest boards so you can find it easily? Just click on the image below.
Alternatively, you can save the recipe to your Grow Me account by clicking on the floating heart on the right-hand side of the screen.
Related recipes
If you tried this recipe and enjoyed it, you may like to try some of my other bread and bread roll recipes:


Click this link to go directly to my bread and scone recipes where you can find all my bread and scone recipes in one place.
📋The recipe

Crusty German bread rolls (brotchen)
(Click the stars to rate this recipe)
Equipment
- Stand mixer if you don't have one you can knead by hand
- Mixing bowl
- Kitchen scales optional
- Large baking sheet
- Baking parchment
Ask a Question
If you have a question about this recipe that has not been answered, please use the box below to ask it.
Use this with care. This is an AI-generated result and may contain errors or inaccuracies. I cannot be held responsible for the information returned.
Ingredients
- 3½ cups / 500 grams strong white flour (bread flour)
- 3 teaspoons / 10 grams instant yeast granules
- 1¼ cups / 300 ml lukewarm water or ½ cup (120 ml)milk and ¾ cup (180 ml) water
- 1½ teaspoons / 6 grams barley malt flour optional but double proofing time if you don't use it.
- ½ teaspoon sugar
- ½ teaspoon salt
Instructions
- Pour half of the water (or all of the milk) into a mixing bowl or the bowl of your stand mixer and add the yeast. stir until the yeast starts to dissolve.1¼ cups / 300 ml lukewarm water, 3 teaspoons / 10 grams instant yeast granules
- Add the rest of the ingredients and most of the remaining water. Keep 2 to 3 tablespoons of water aside - you may not need all the water.3½ cups / 500 grams strong white flour (bread flour), 1½ teaspoons / 6 grams barley malt flour, ½ teaspoon sugar, ½ teaspoon salt
- If you are using a stand mixer, fit the dough hook and knead for 12 minutes on a medium speed.If you are kneading by hand, knead for 20 minutesIn either case, add the extra water 1 tablespoon at a time if the dough seems too dry.
- Once the dough has been kneaded, place it in the mixing bowl and cover the bowl with a layer of plastic wrap and a clean cloth and leave it in a draught-free place for 30 minutes. If you don't use the barley malt flour, leave the dough for at least one hour.The dough should double in size.
- Knock down the dough and divide it into 12 equal pieces. Roll each piece into a ball.
- Shape the rolls as follows:- Flatten each ball of dough in your hand to form a circle and then fold it over to form a semi-circle.- Roll this lightly to form a fat sausage shape.- Place it seam-side down on a lightly floured surface.Repeat with the remaining 11 balls of dough.
- Cover the rolls with a clean towel and leave to rise for 20 minutes.
- While the rolls are rising, preheat the oven to 220°C/430°F. Add one cup of water to an ovenproof dish and place this on the bottom shelf of the oven. This will create a steamy environment in the oven to help crisp the rolls.
- Place the bread rolls on a baking tray that has been lined with baking parchment. Make sure that the rolls are seam-side up. This will allow the rolls to split when they bake and form the distinctive shape. Leave plenty of room between the rolls because they will spread and you don't want the rolls to touch each other as they bake.
- Place the baking tray in the oven (be careful when you open the oven door, the steam will be hot), and bake the rolls for 18 minutes. After 18 minutes remove the dish of water from the oven and leave the rolls for 2 minutes longer to crisp up.
- Remove the rolls from the oven and let them cool on a wire rack.
Notes
Once the rolls have cooled down, you can store them in a plastic bag in the breadbin. To freeze from baked, allow them to cool and then place them in a freezer bag and freeze for up to 3 months.
To use, put the frozen rolls in a hot oven, (200C / 400F) for 5 to 7 minutes until they are heated through.
To freeze unbaked rolls, shape the rolls, place them on a baking tray and allow them to rise then place the baking tray in the freezer until the rolls are frozen and solid. You can freeze them for up to three months.
To use, place the frozen rolls on a baking tray, seam-side up, and bake according to the recipe instructions. You will have to add an additional 2 to 3 minutes to the baking time if you are baking the rolls from frozen. Nutrition - calculated per roll.
Nutrition
I am not a nutritionist. The nutrition information has been calculated using an on-line calculator, and is intended for information and guidance purposes only. If the nutrition information is important to you, you should consider calculating it yourself, using your preferred tool.
If you made this recipe and enjoyed it, I'd love it if you could give me a star rating in the comments below. And if you'd like to get in touch, you can email me at [email protected]. I'd love to hear from you. And don't forget to subscribe to my mailing list so you can grab yourself a copy of my FREE COOKBOOK!
If you'd like to continue browsing, just click on this link to all my recipes.

Kari says
When shaping did you just fold and roll? I actually stitched the seam & they didn’t split open. I’m excited to cut into them.
VJ says
Kari, I just folded the dough in half and rolled it lightly - I didn't pinch it together.
Hope this helps
VJ
Susan says
These rolls are amazing, and exactly as I remember German hard rolls tasting like when I was young. I always double the recipe and freeze what we are using right away after they have risen. They come out great!
VJ says
That's good to hear Susan - thank you for taking the time to let me know! Much appreciated 😁
Rita Johns says
Easy peasy! I didn’t use barley flour but turned out fantastic.
VJ says
Yay! Way to go!!!!
Susan says
I have looked everywhere for a recipe like this. These rolls are amazing, and freeze well.
VJ says
Glad you enjoy them Susan. ~Thanks for taking the time to let me know!
J says
300 ml of water added to the yeast at first? Or half of 300 ml at first?
You made it seem like 600 ml of water altogether, which is exactly what I did Ava the mix came out very wet, so I added another 170 g of flour, then while kneading I had to add more…
Not easy following your directions…
VJ says
Sorry you find the recipe difficult to follow, but I clearly state use half the water in the first step and say add the remaining water in the subsequen step. I'll revisit the recipe and try and word it differently.
Margie says
I haven't made this recipe.
I definitely will be making these this weekend.
Thank you so much.
Margie
VJ says
Love to know how they turn out Margie.
Nunya says
Way too confusing trying to understand how much water to as, when to add it, and what the dough should be like. Don’t say “half of the water” which is 1 1/4 cup, then list 1 1/14 cup of water for that step. The ads glitching my phone was not worth the frustration, and I’m a seasoned cooked.
VJ says
Sorry you find the ads frustrating. Unfortunately running a web site is a full time job and takes a fair amount of expense from my side for hosting, domain fees, and various other computer-related tools, not to mention ingredients to make and test the recipes. The ads are a way of covering those expenses, and also provide me a means of making a small income. If you don't enjoy reading the free recipes, I would suggest you spend a little money and buy an actual cookbook which of course will come without any ads.
Harald Feiersinger says
hi Veronica, this recipe is a hit. Verry good and professional recipe. i hope i could send you a photo of the rolls i made from yorv recipe. i just had to change the hytration for 2 % because of our flower hie in Botawana., but this is not the recipes fault. Well done Veronica
VJ says
I'd be delighted to see a photo of the rolls. I'm so pleased they turned out well. It's sometimes difficult to take different countries' ingredients into account when writing up a recipe. Thank you for taking the time to let me know how they turned out!
Sister T says
I made these tonight, they are delicious. I use fmf so my tweak was 400g hard white and 105g rye. I will need to work on the grain combination, as they didn't taste exactly has I remember (thats on me, not your recipe) but the closest I’ve come across. Thank you for the recipe, it’s a keeper & one I will use often!
VJ says
That's good to know! Hope you manage to tweak the recipe to your liking. I'd love to know!
Diana says
These were awesome! I need to work on my technique, as they didn't look the greatest, but the taste was spot on!
VJ says
Thanks for taking the time to comment Diana - and if they tasted good, that's what counts. Looks are secondary 🙂
Ursula says
I used 150 gm Semolina and 350 gm All Purpose flour.
Also added 1/4 c of my sourdough, almost all of the 1/2 c warm milk and 3/8 c warm water plus 1 tsp of salt. Kneading took about 15 minutes. My dough was a little denser, so I let it rise almost a whole hour.
Results were the best I have made so far. Tender and a nice crackly crust when you bite into it.
Thank you for your lovely recipe.*****
VJ says
Thanks for the tips Ursula. I'm so pleased these worked out well for you. I must admit I love the crispy crust!
Heather Contois says
The recipe is really good, but my rolls won't split. What am I doing wrong?
VJ says
Hi Heather
I'm not sure I quite know what you mean when you say your rolls won't split. Do you mean that they don't split when they are baking or that they are too hard to cut? If it's the first case, have you read through the instructions in the post for how to form the rolls? If it's the second case, it could be that you used too much flour, or you left them in the oven for too long. If you can get back to me with more details I might be able to help you a bit more.
VJ x
Mary says
Yes! It turned out great! Instructions were precise and it was easy to make!!
VJ says
That's good to hear. Thanks for letting me know!
Daphne says
Hockey Pucks !
VJ says
Sorry you feel that way Daphne. Mine always turn out perfectly. Perhaps your yeast was dead or you didn't let them rise sufficiently. I guess the outcome of a recipe depends onthe technique of the baker and the quality of the ingredients.
Sandra says
Look I am German. And one single simple Brötchen costs about 50 cents right now. One single Brötchen. With this recipe I can make 12 for the price of one.
And on top of it this is the best recipe for Brötchen that I could find anywhere on the internet.
One of the few that use the barley malt and let me tell you: the barley malt makes all the difference in the world. It's the only way they get this think crunchy crust and nice colour without being hard and chewy.
I make these 2 times a week. Thank you for sharing <3
Janis says
Huge fan of these rolls. However mine are more dense and less crusty than those in Germany. Any ideas?
VJ says
Having not seen how yours turned out, I'm not sure. Mine always turn out quite dense but I'm happy with that. I like the chewy texture.
You could try the following:
- make sure your yeast is not out of date - old yeast will not rise as much as fresh new yeast.
- make sure the mixture is properly kneaded. I used a stand mixer - if you kneaded by hand you may have to knead for a bit longer.
- don't let the yeast come into contact with the salt when you add the dry ingredients - yeast and salt aren't good friends.
- try leaving the shaped rolls to rise for longer than 20 minutes before putting them in the oven.
- to get the crusty exterior you do need to have a pan of water in the bottom of the oven which you should remove for the final couple of minutes.
- Try leaving the rolls in the oven for an extra minute or two to see if that gives them a better crust.
Hope these suggestions help.
Katherine says
Thanks for sharing this recipe, VJ! I usually struggle forming Kaiser rolls. Seeing your recipe for Brotchen reminded me of the 8 years of living in West Germany!
Trying to find an authentic bakery here in Middle Tennessee is difficult, so I have resorted to making my own breads and rolls....there is no going back to store bought again!!!
I really enjoy getting your recipe updates!
Kind Regards,
Katherine
VJ says
Thank you for your lovely comment. I hope you enjoy the rolls. And I'm really happy that you like getting my updates. 🙂
Katherine says
VJ, you're welcome Having spent many years overseas from the USA, i can respect different tastes and recipes. BTW, I have a South African (dutch) daughter in-law and her cooking is fantastic! Many varied tastes...