How to roast peppers (capsicums) and preserve them by either freezing or storing them in a vinegar and oil marinade. Never waste a bell pepper again!
If you've ever found yourself with a glut of red peppers (capsicums / bell peppers / Romano peppers) and are not quite sure what to do with them, this guide is for you. Roasting peppers is one of the simplest ways to bring out the natural sweetness of the peppers, deepen their flavour, and even enhance the taste with a touch of smokiness. Once roasted, they can be used straight away or prepared for storing, so you always have them on hand when needed.
In this post, I'll show you how to roast peppers properly so you get that soft blistered skin that peels away easily, leaving you with tender strips of pepper ready for use. From there, you've got 2 great options depending on how you want to store them and how quickly you plan to use them.
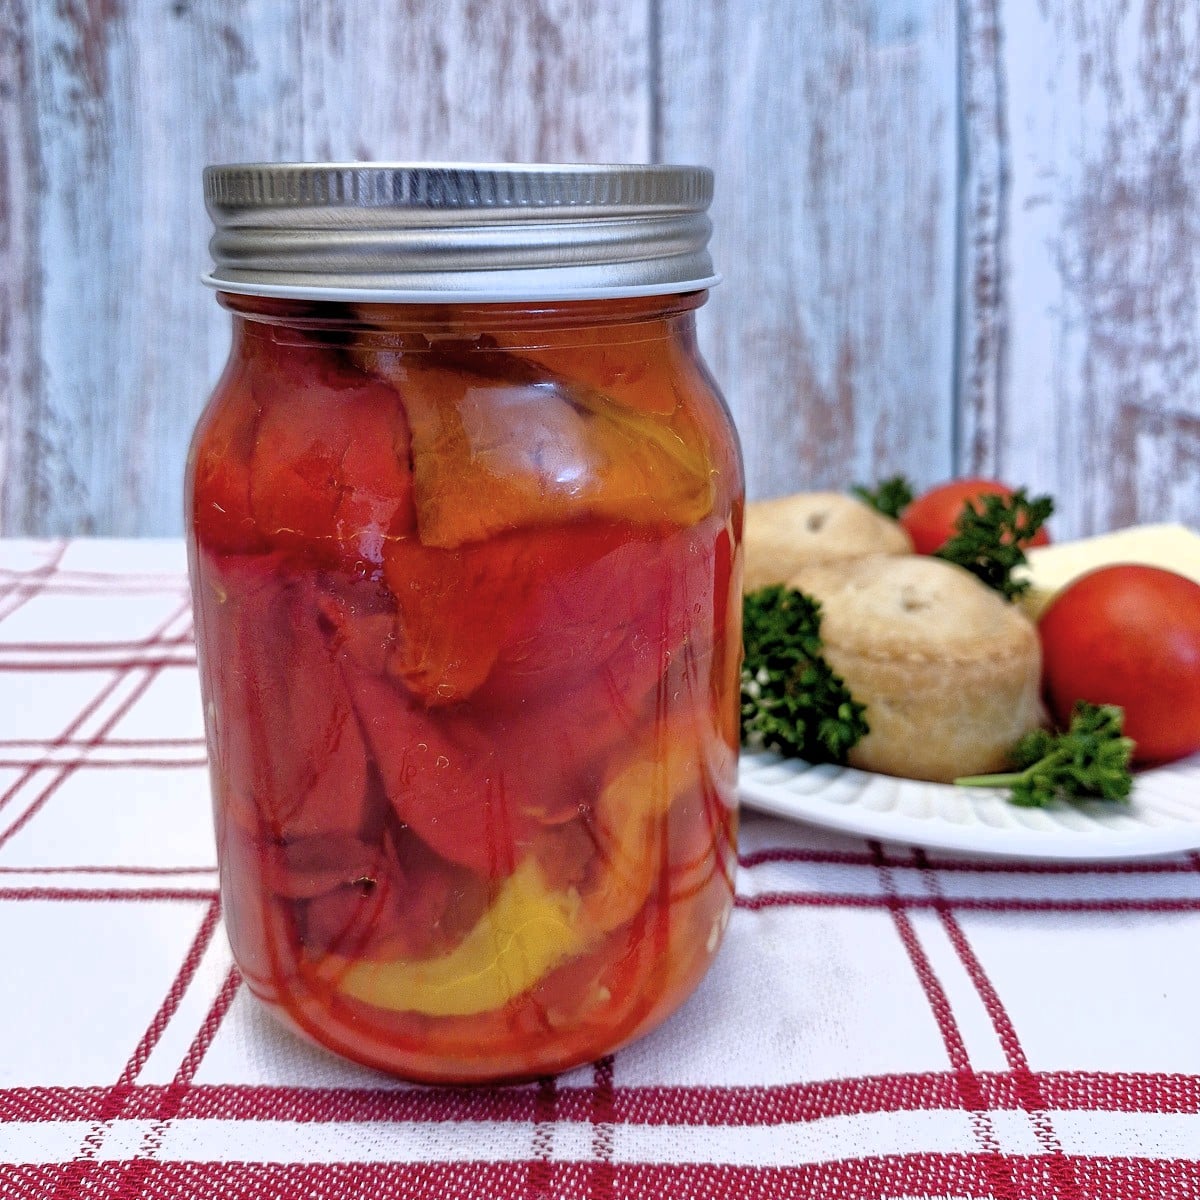
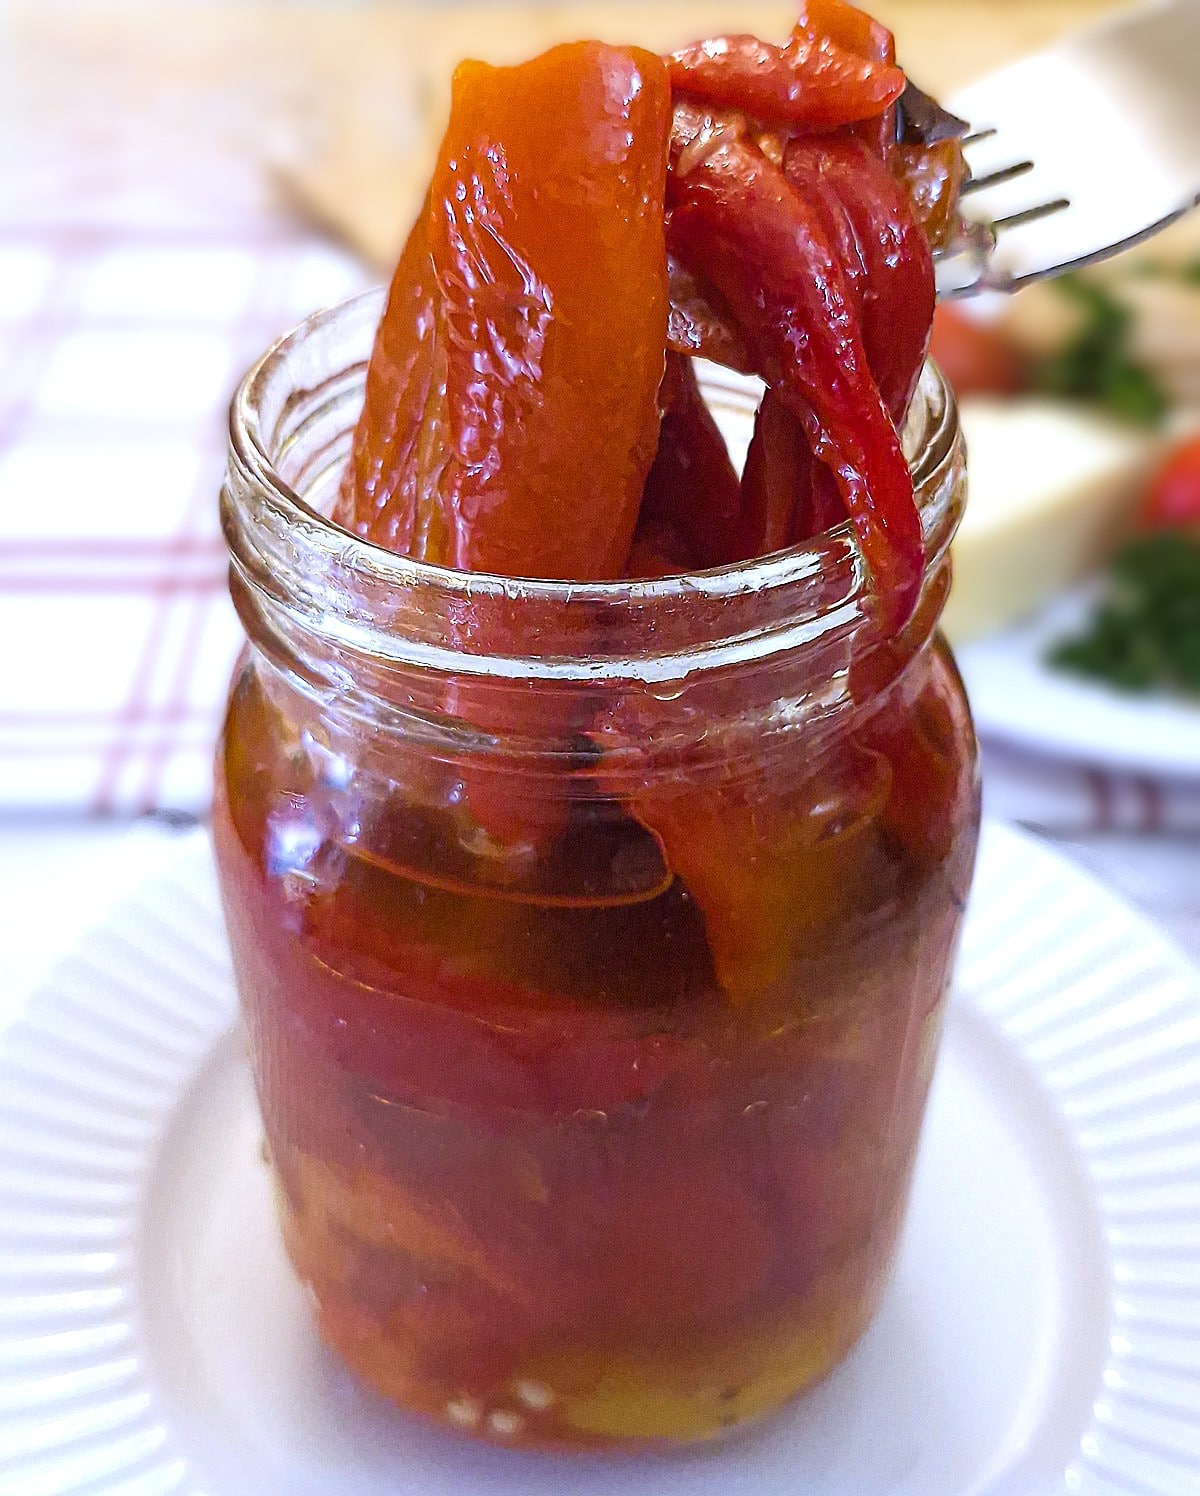
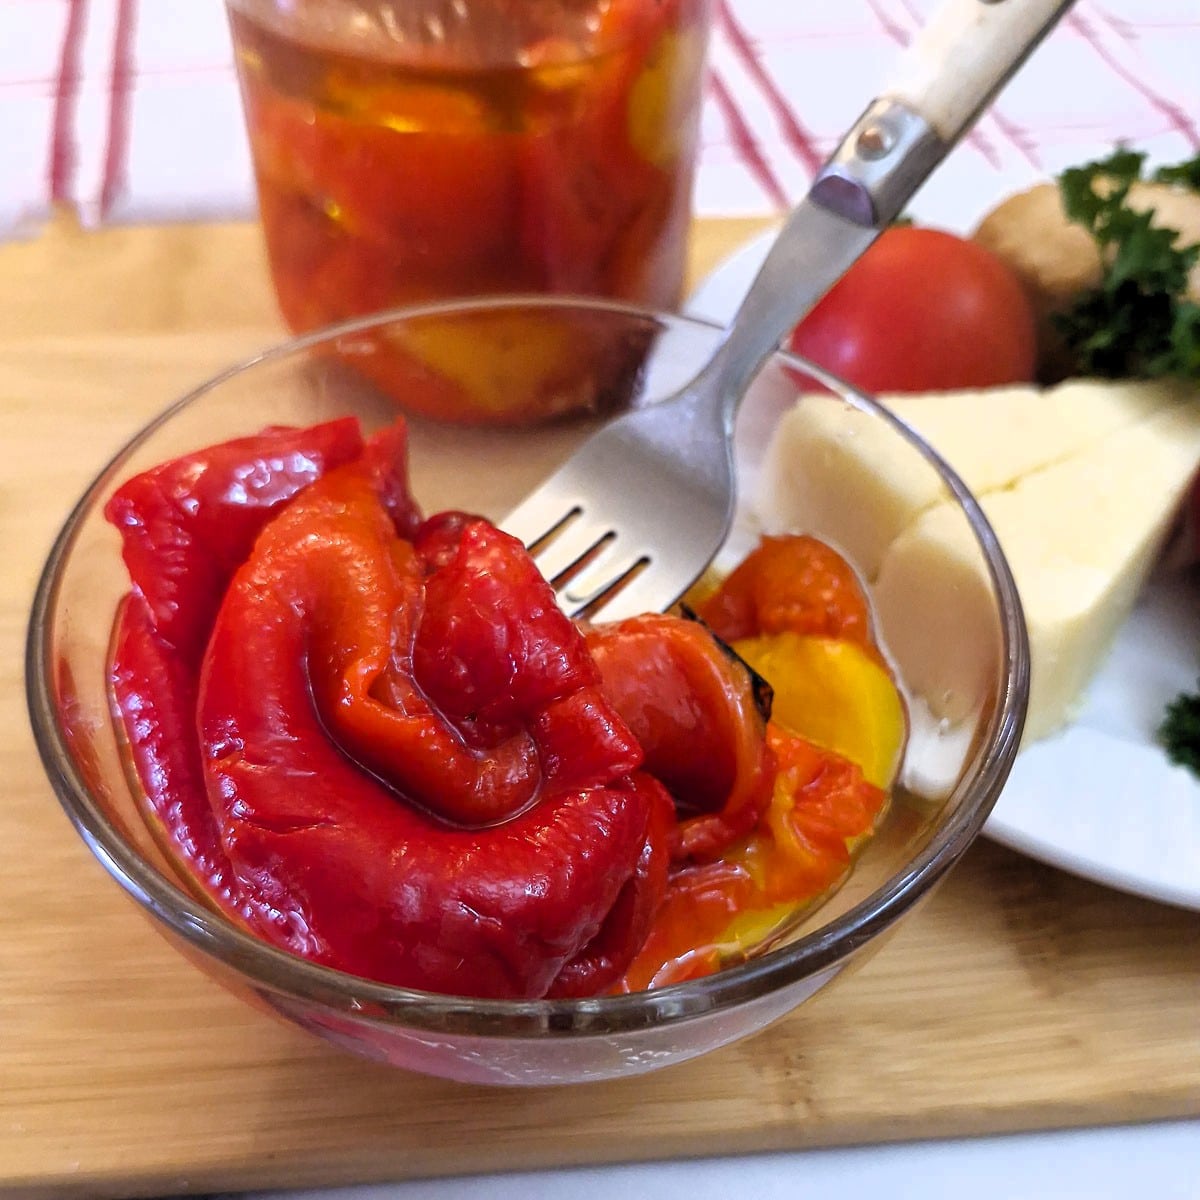
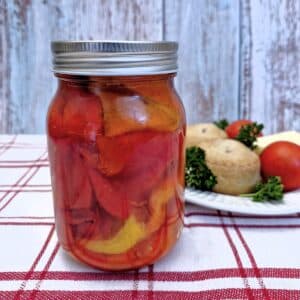
For short to medium-term storage, the roasted peppers can be packed into jars and covered with a simple oil-and-vinegar marinade. The peppers can be stored in the refrigerator for 2 weeks and used in sandwiches, antipasti platters, salads and pasta dishes. The vinegar helps to preserve them while the oil adds richness and a smooth texture.
If you've got more peppers than you can realistically use within 2 weeks, freezing is the better option. Once roasted and peeled, the peppers freeze well and can be portioned out for use in cooking. They lose a little firmness once thawed, but they're perfect for sauces, soups, stews and pasta dishes where the softer texture actually works in your favour.
My current favourite sauce is this red pepper and tomato sauce - it goes perfectly with chicken, fish and pasta, and with a pack of roasted red peppers from the freezer, you can whip it up in minutes!
Jump to:
Preserved peppers at a glance
- Preserving peppers in a nutshell: Roast the peppers on a baking tray at a high temperature for 20-25 minutes, turning once halfway through, until the skins are blistered and lightly charred. Transfer the roasted peppers to a bowl, cover with a plate and leave to cool before removing the skins and seeds.
- Main ingredients: Peppers (also known as capsicums, bell peppers, or Romano peppers)
- Prep time: 5 minutes
- Steaming/cooling time: 15 minutes
- Cooking time: 20 - 25 minutes
- Yield: As many peppers as fit on the baking tray. 5 peppers should be sufficient to fill a 1-pint (or 500 ml) jar
Why you should preserve peppers
- Avoid waste when peppers are in season. Even though you can buy peppers year-round (thanks to food imports), it's still cheaper to buy homegrown when they are in season, and it's easy to end up with more than you can use before they soften and spoil.
- Capture peak flavour. Peppers are at the peak of their flavour when fully ripe and in season, so preserving them locks in that quality.
- Save money. Buying in bulk during peak season and preserving them yourself is far cheaper than buying them a few at a time all year round. Plus, roasting them in bulk saves on electricity.
- Convenient for quick meals. Having a jar of roasted peppers in the refrigerator, or a pack in the freezer, means you can add instant flavour to pasta, sandwiches, salads and more.
- Reduces food waste. It's a simple way to ensure nothing goes to waste if you've bought a big bagful or grown your own.
Ingredients
**This is just an overview to explain why I used a particular ingredient. The complete list of ingredients and the exact measurements are on the printable recipe card at the end of this post.**
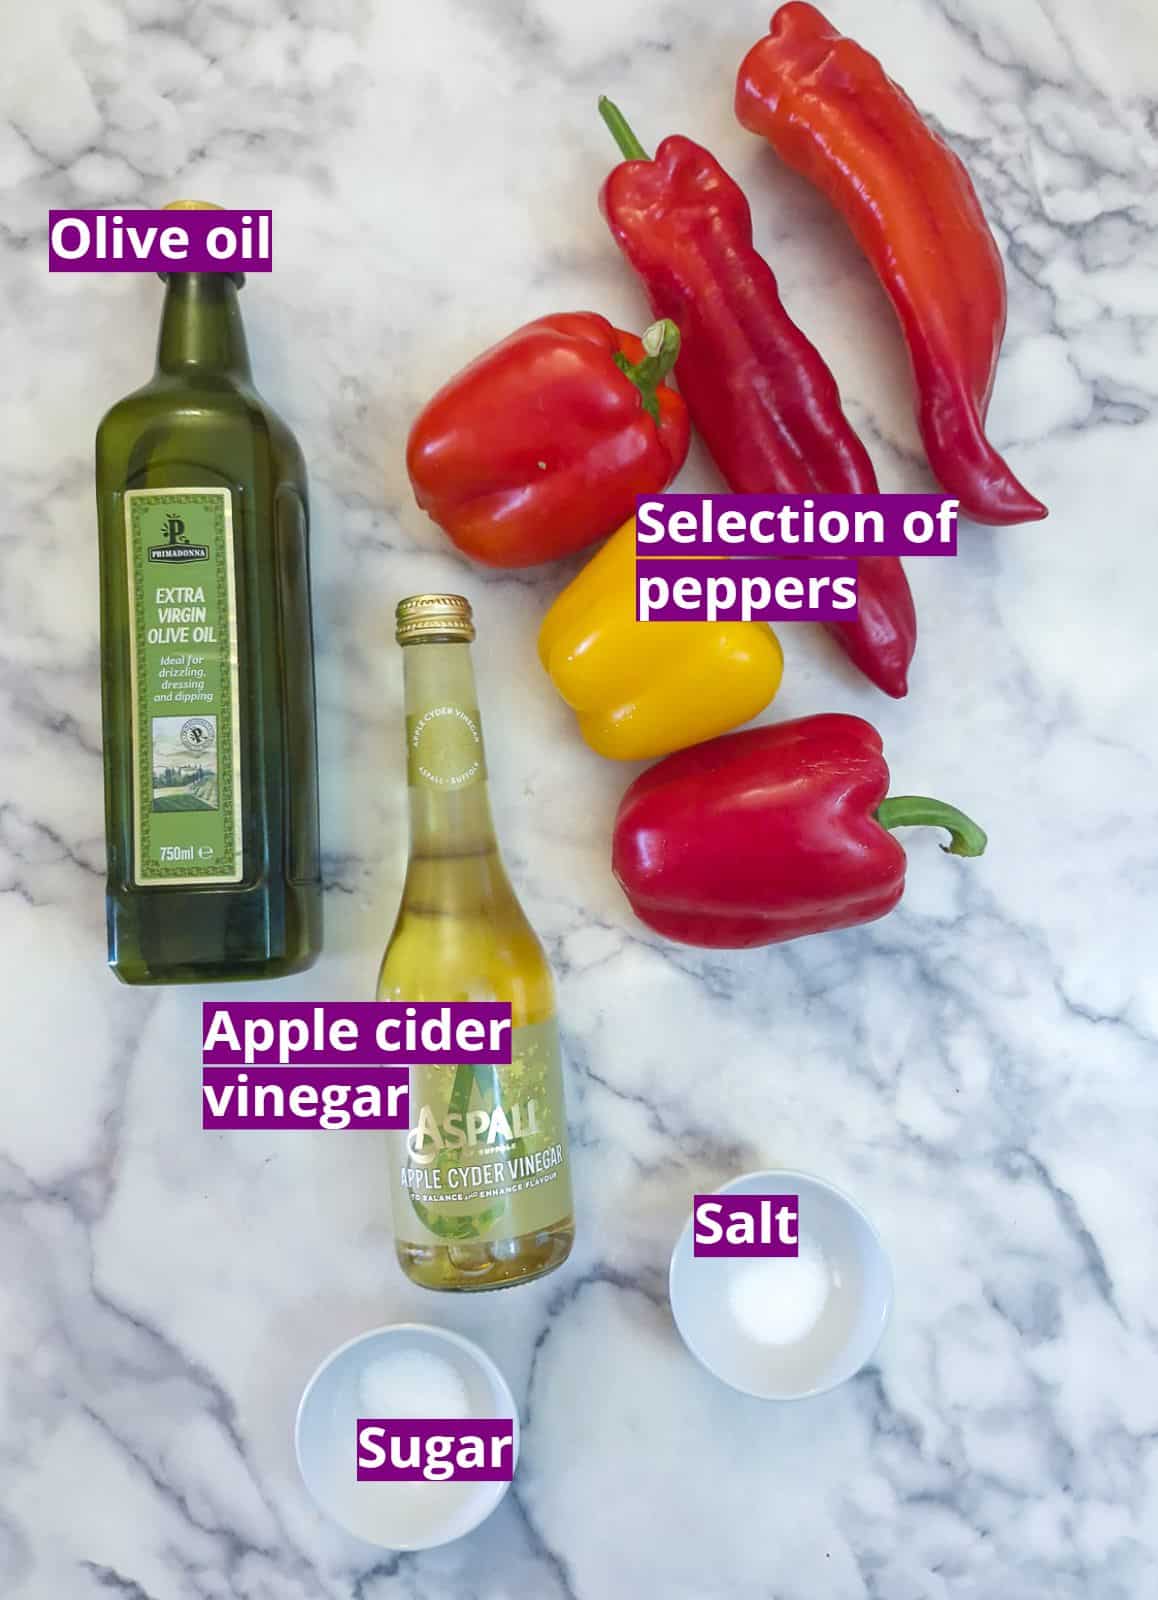
- Selection of peppers. You can use whatever peppers you like - red, green or yellow bell peppers (capsicum or bell pepper). You can also use the long pointy sweet red peppers (known as Romano or Ramiro in Italy and Spain).
- Olive oil. Helps preserve the flavour and texture of the peppers. If you prefer you can leave out the olive oil and just use a brine solution of vinegar, water, salt and sugar.
- Apple cider vinegar. The vinegar in the marinade not only helps preserve the peppers, but also balances their natural sweetness, enhances their flavour, and gives them their characteristic deli-style tang.
- Salt. This is optional and used for seasoning. I like to add a quarter to half a teaspoon of salt to the marinade.
- Sugar. Sugar is also optional. You may find the peppers are sweet enough without any additional sugar.
- Water. Water is added to the marinade to dilute the vinegar, creating a milder flavour that allows the natural sweetness of the roasted peppers to shine through. It also helps keep the peppers tender and prevents them from tasting overly pickled.
How to roast peppers
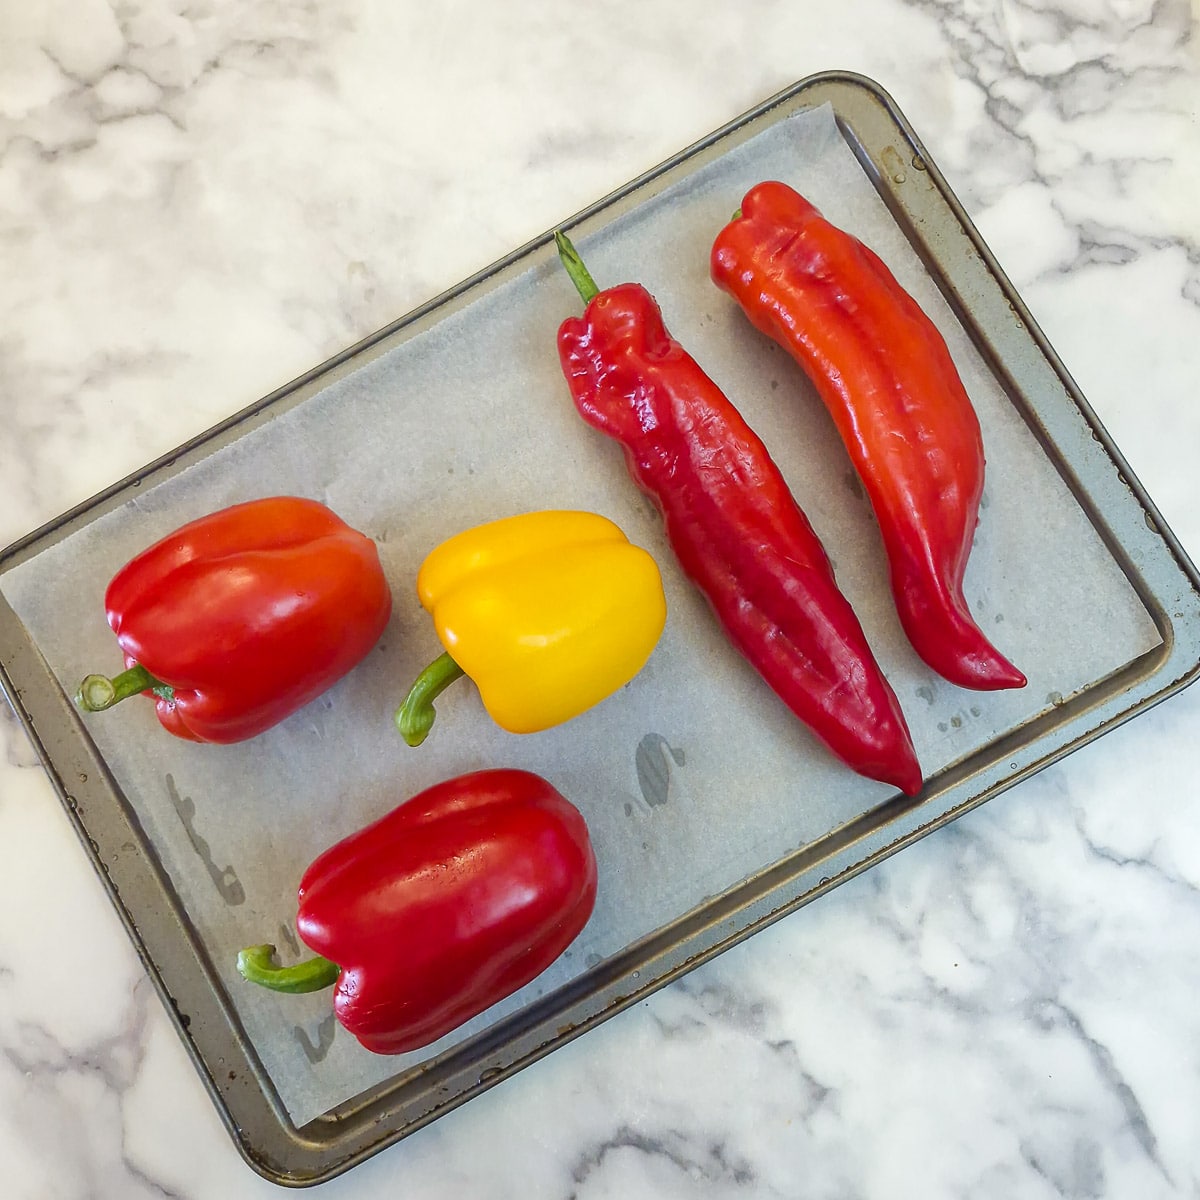
Step 1: Wash the peppers and place them on a baking tray. You could line the tray with baking parchment or tin foil for easier cleanup afterwards.
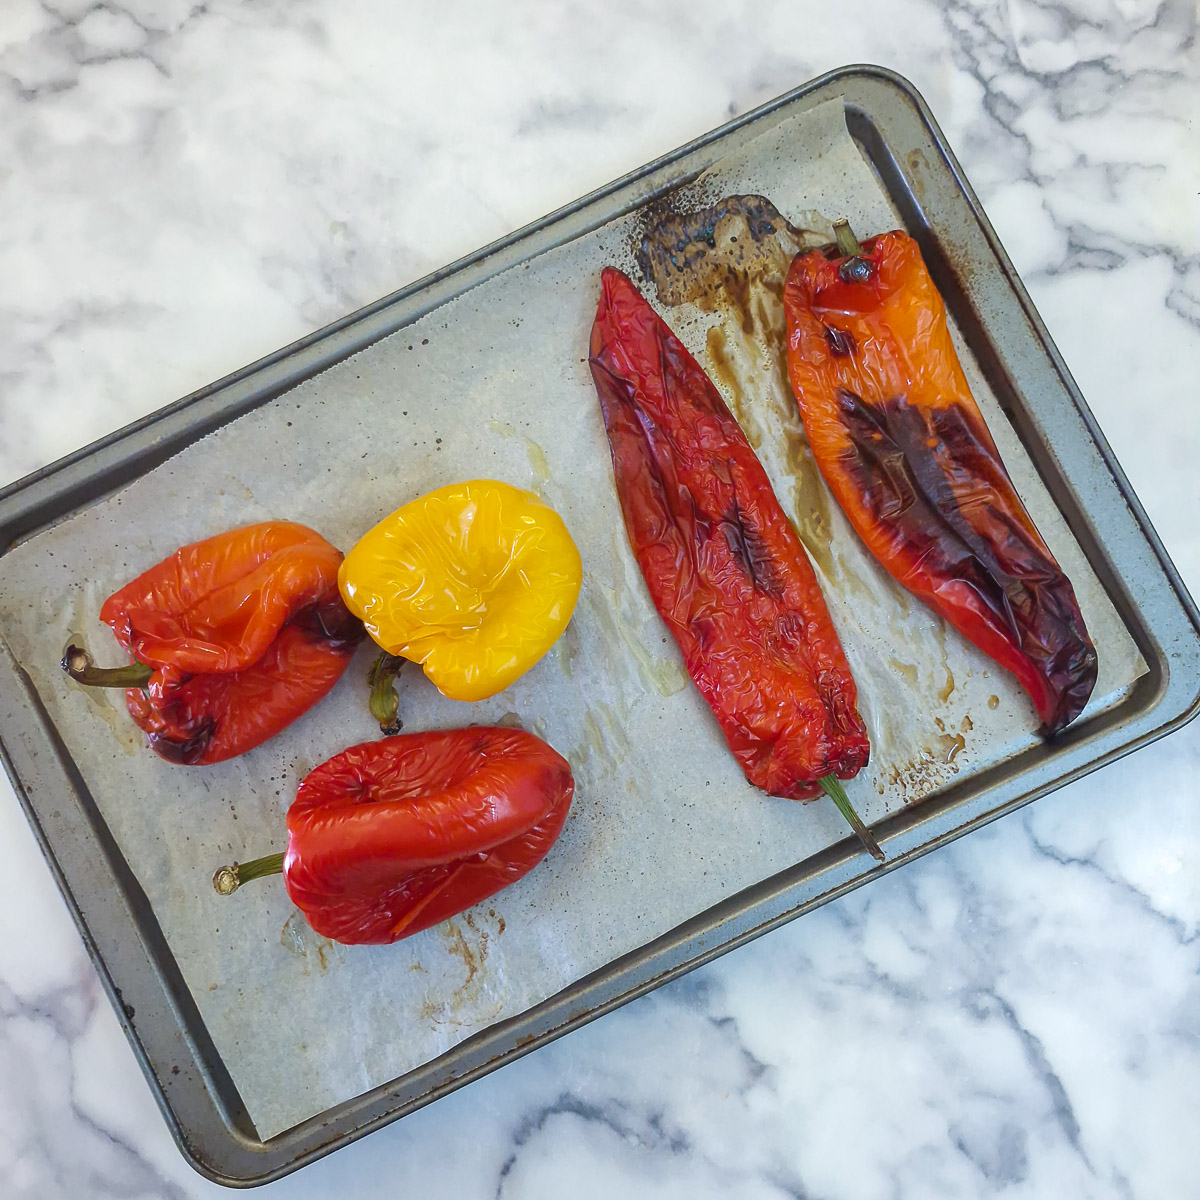
Step 2: Place them into a preheated oven (220C (200C fam) / 440F / 400F(fan) ) for 20 minutes. Use a pair of tongs to turn the peppers halfway through so they can char all over.
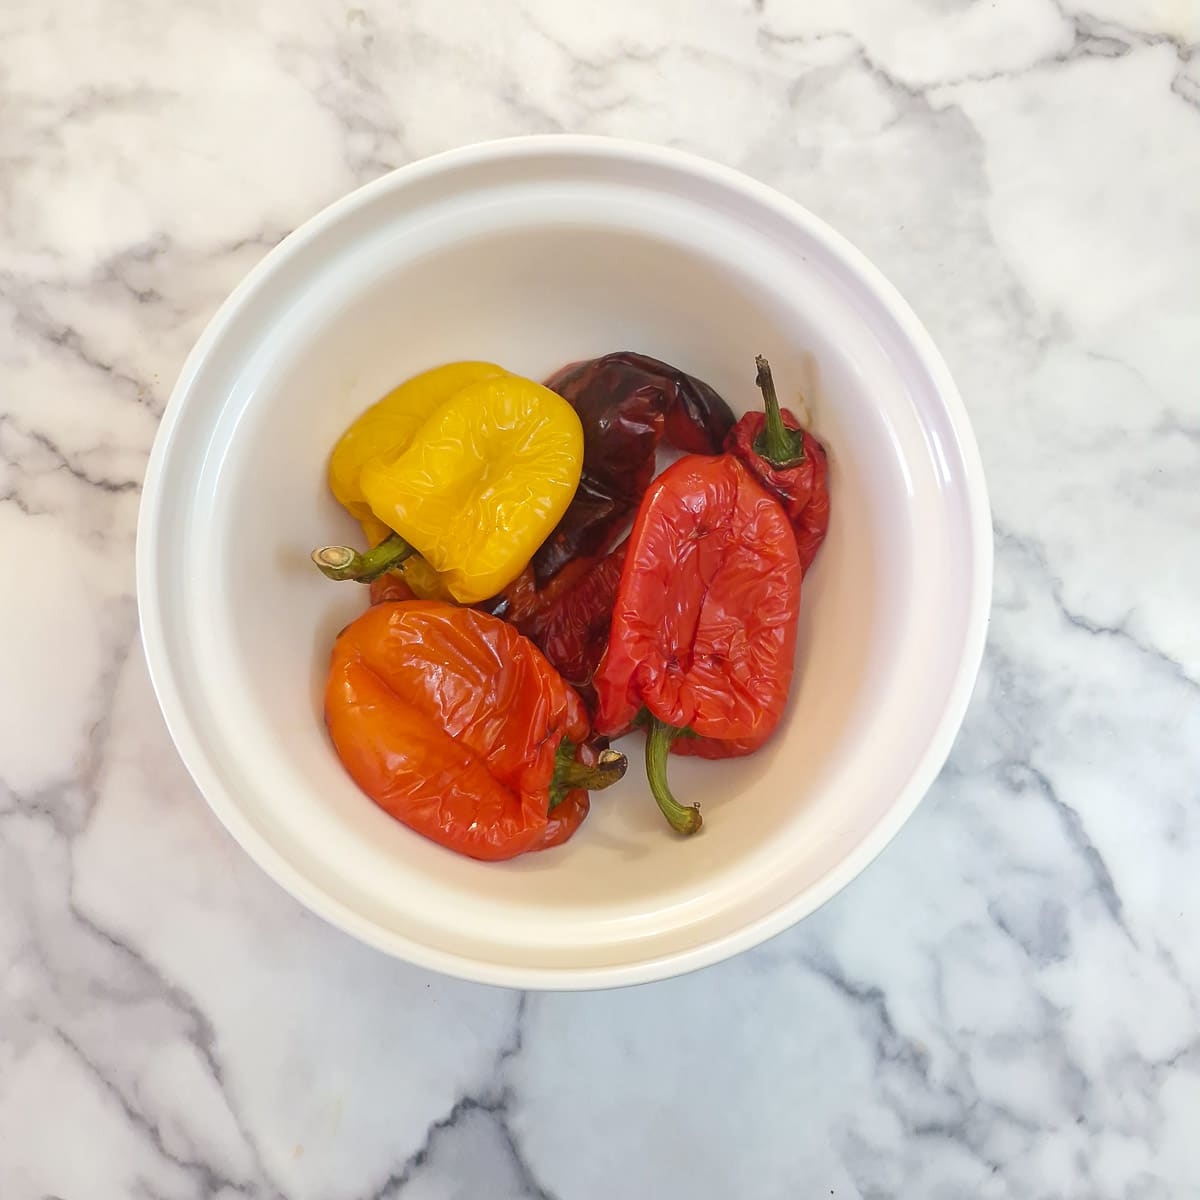
Step 3: Remove the peppers from the oven and place them into a bowl (while still hot). Cover the bowl with a plate or cling wrap and leave to stand and steam for 15 minutes, or until the peppers are cool enough to handle.
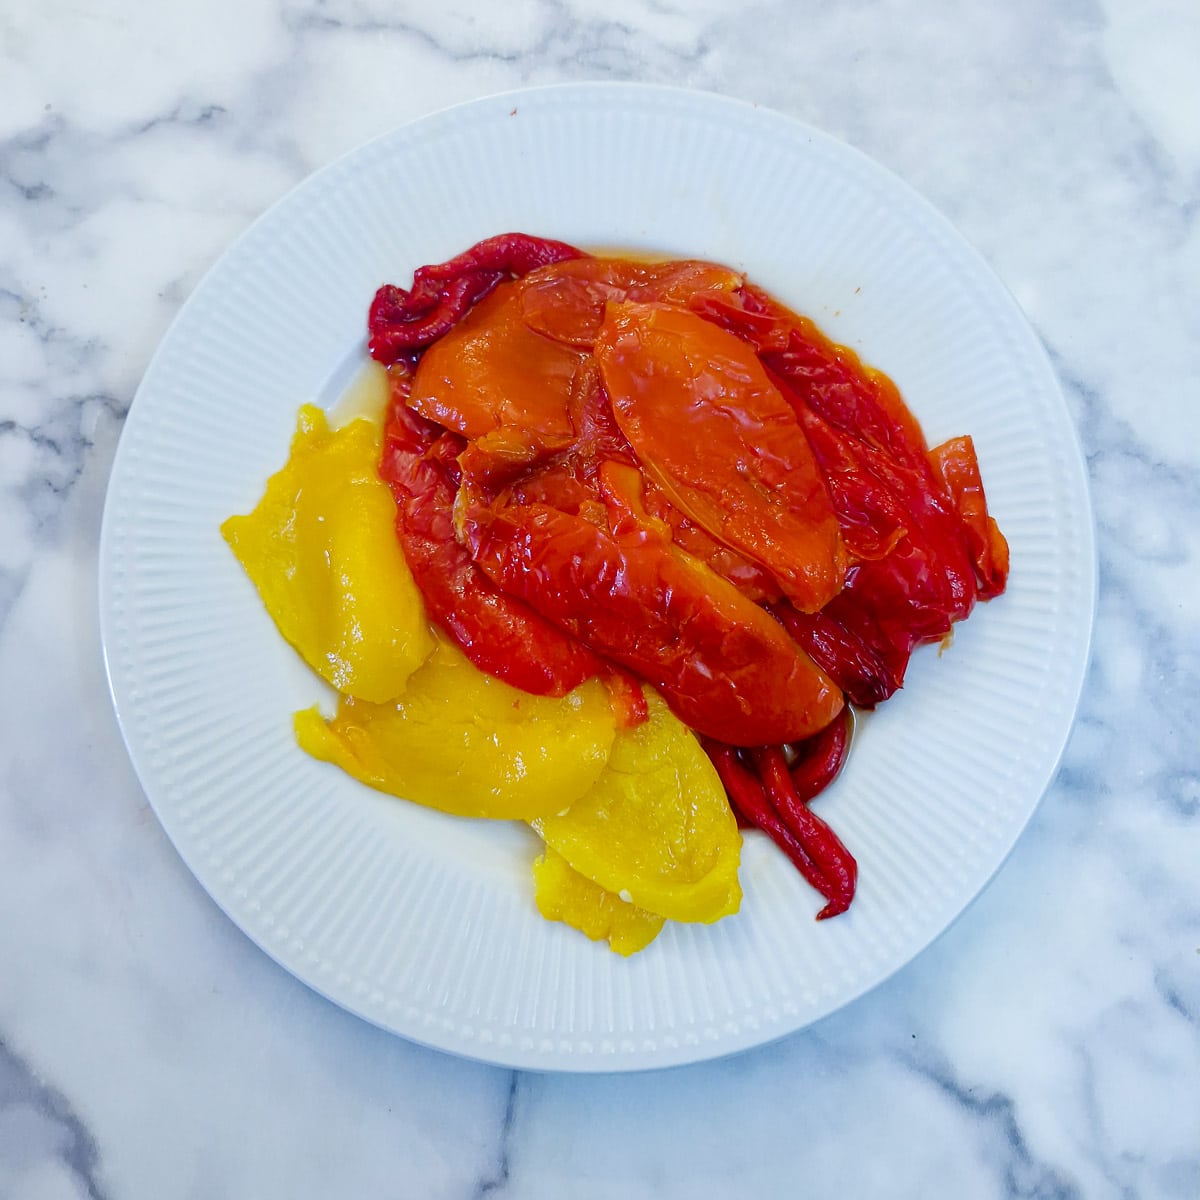
Step 4: Pull the skin away and remove the seeds and discard. Cut the peppers into thick slices. Reserve any liquid that the peppers have left in the bowl.
How to store peppers in a jar

Step 5: Combine the marinade ingredients (and any reserved liquid from the peppers) in a jug and stir until the sugar has dissolved.
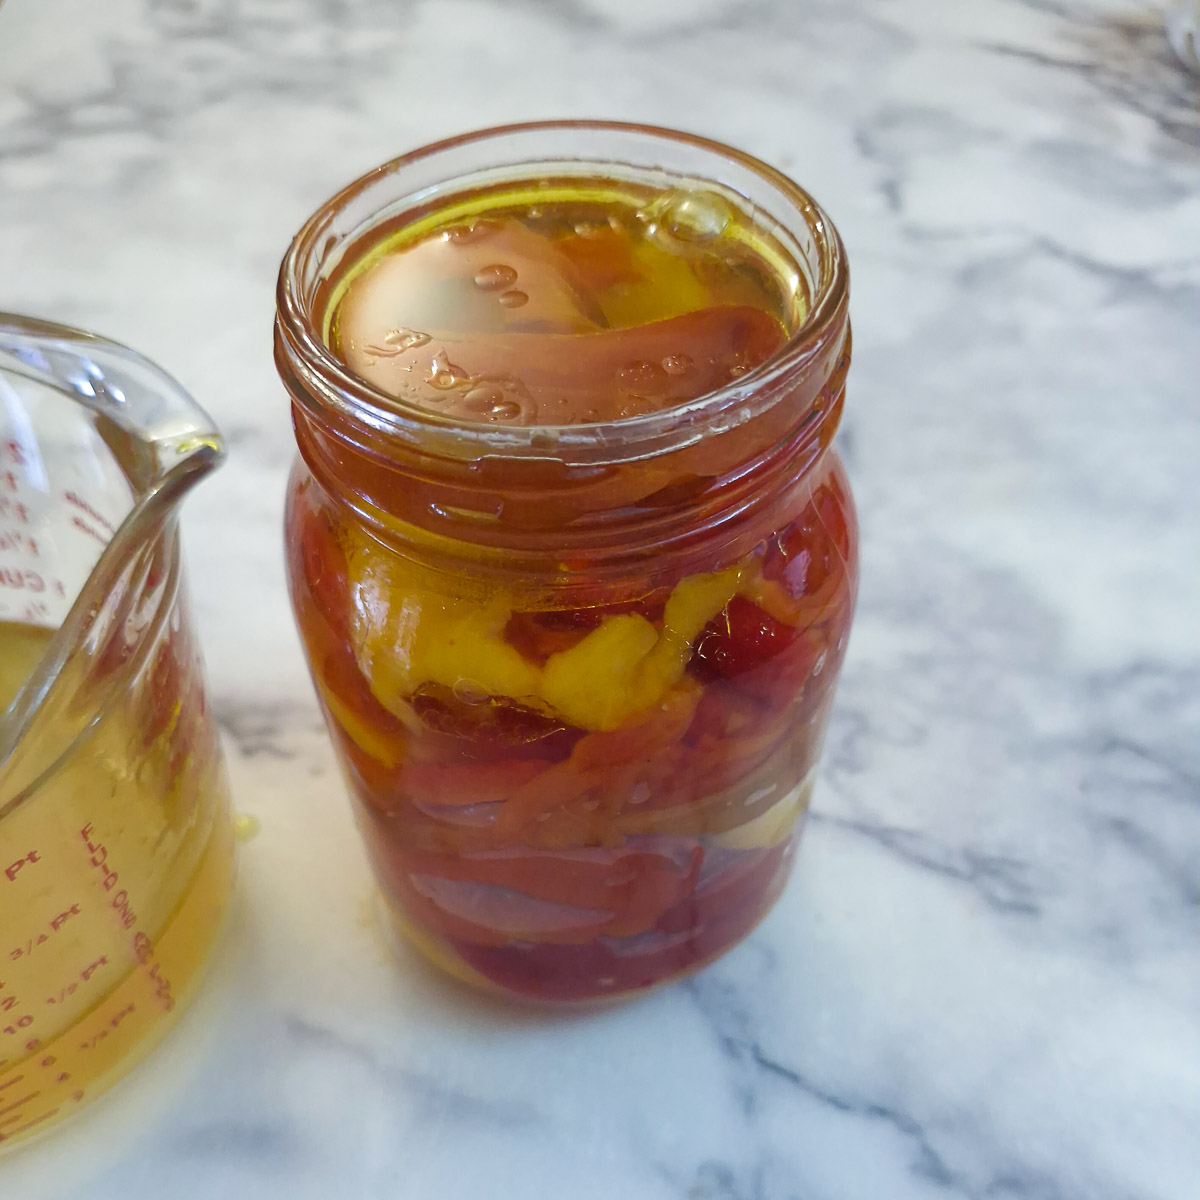
Step 6: Layer the peppers into a sterilised jar and pour in the marinade until the peppers are completely submerged. Use a wooden skewer or chopstick to release any trapped air bubbles.
Seal the jar and refrigerate until you are ready to use. Peppers stored in this way should be good at least 2 weeks.
How to freeze roasted peppers
- Roast the peppers as described in the previous section and allow them to cool.
- Peel, clean and slice the peppers as described in the previous section.
- Pack slices of peppers into freezer bags, arranging them as flat as possible to allow for easy storage. Remove as much air as possible from the bags and seal them.
- I like to freeze the equivalent of 2 peppers per bag - if you have a larger family you might like to freeze more.
- Freeze the peppers for up to 6 months.
- Allow them to defrost in the refrigerator before using.
Tips for a successful outcome
Bear these tips and hints in mind when roasting and preserving your peppers:
- Don't put any oil on the peppers when roasting them. It's not necessary! The natural moisture of the peppers steams and softens the flesh from the inside, while the heat from the oven causes the skin to char on the outside.
- Allow the peppers to steam in a covered container once you've removed them from the oven. Leaving the peppers to steam ensures the skin will pull away easily and the seeds can be easily removed.
- Don't rinse the peppers while removing the skins and seeds. There is a lot of flavour on the flesh of the pepper; rinsing them will remove it and you'll lose a lot of goodness and flavour.
- Don't discard the juices from the peppers once they've cooled. Add the juices to the marinade - the juices are packed with flavour.
- If storing the peppers in jars, pack individual slices firmly into the jar, then cover them with the marinating liquid until they are fully submerged.
- If freezing the peppers, pack the slices of pepper into ziploc bags (or similar), ensuring the pack stays as flat as possible for easy storage.
Food Safety
Unlike chutneys, jams or properly heat-processed preserves, roasted peppers in a vinegar-and-oil marinade are not designed for long-term shelf storage.
They are not fully sterilised or sealed, and the oil component in particular is not a reliable preservative on its own. Over time, especially at room temperature, low-acid or poorly sealed conditions can create an environment where spoilage may develop.
For this reason, these peppers should always be stored in the refrigerator and consumed within 2 weeks for best quality and safety. Following these food safety and storage practices will hlep you enjoy your preserved peppers with confidence.
- Always use clean jars and containers, and although it is not strictly necessary to sterilise the jars, I've included instructions on how to do it should you wish to.
- Keep jarred red peppers refrigerated (whether the jar has been opened or not). The peppers are not shelf-stable at room temperature and should always be stored in the refrigerator.
- Ensure the peppers are fully submerged in the liquid. This helps reduce exposure to air and slows spoilage.
- Use fresh, good-quality peppers. Avoid any that are bruised or starting to soften, as preserving will not improve their condition.
- Avoid adding high-risk ingredients to help the peppers remain safe to eat for longer. Fresh garlic and soft herbs can be used for short-term flavour, but for longer keeping, it's safer to add them when serving.
- Date and label your containers. This makes it easier to keep track of how long they've been stored for.
- Follow the recommended storage times. Aim to use within 2 weeks. For longer storage, you can freeze them for up to 6 months.
How to sterilise jars
To sterilise jars in the oven:
- Wash the jars and the lids in hot soapy water, rinse, but do not dry them.
- Stand them upside down on a baking tray while they're still wet.
- Place the tray of clean, wet jars and lids into a preheated oven at 180ºC / 350ºF for 15 mins.
- Leave them in the oven until they are cool enough to handle.
To sterilise jars in the microwave:
- Wash the jars and the lids in hot soapy water, rinse, but do not dry them.
- Place them in the microwave whilst still wet.
- Microwave on full power for 2 minutes
- If the lids are made of metal DO NOT MICROWAVE. Instead, place the lids in a pot of boiling water and boil for 5 minutes.
- Take care when removing the jars from the microwave - THEY WILL BE HOT!
Serving suggestions
Roasted peppers are incredibly versatile and can be used straight from the jar or freezer. Here are some of my favourite ways to enjoy them:
- Add them to sandwiches and wraps for a burst of sweet yet tangy flavour. I like to layer them with a slice of cheddar cheese.
- Serve them as part of an antipasti platter or ploughman's lunch alongside olives, cheeses, cured meats, pork pies, crusty bread, cherry tomatoes ... whatever takes your fancy really!
- Toss them into pasta dishes. Try this roasted red pepper and prawn pasta salad or this salmon and red pepper pasta salad with corn.
- Pile them onto homemade pizzas with other toppings before baking. See this post for how to make your own pizza dough.
- Serve them alongside grilled meat or fish as a simple vegetable side dish. They would pair exceptionally well with this Fish Milanese recipe.
Variations
Even a simple recipe such as this can be tweaked with a few variations to suit your own taste:
- Add one or two cloves of chopped garlic to the oil and vinegar marinade. After standing in the refrigerator for a day or two, the garlic flavour will become more pronounced.
- Woody herbs such as thyme, rosemary, or oregano can be added to the jar for extra flavour. These herbs infuse well into the vinegar and oil marinade, while softer herbs like basil and parsley are best added fresh when serving. Don't add too much - a small sprig or two is plenty.
- A mix of red, yellow, orange, and green peppers makes a vibrant, colourful jar that looks especially attractive when served.
Equipment
- A large roasting tray (or two) - to roast the peppers. The size is obviously dependent on how many peppers you will be roasting at one time. I like to line my roasting tray with baking parchment.
- A mixing bowl - to allow the peppers to steam, and cling film or a large plate to cover it.
- Glass jars. You can use proper Mason (or Kilner) jars, which can be pretty expensive, or simply buy jars of cheap jam in the supermarket, discard the jam (or make jam tarts with it - try these South African hertzoggies or my popular coconut jam slice) and keep the jars. It's far cheaper and they work just as well. I find that I can fit 5 peppers into a 1-pint or 500-ml jar.
FAQ
Yes, the recipe as written is gluten-free. However, take care when serving them with other ingredients (such as pasta or bread-based dishes) as these may contain gluten.
Yes, there are no animal products in any of the ingredients used in this recipe.
It's not strictly necessary as the recommendation is to only store the roasted peppers in the refrigerator for 2 weeks. Just ensure the jars are thoroughly washed and dried before use.
Yes, the skins should be peeled off after roasting and being allowed to steam. This gives the best texture and flavour.
Save for later
|If you would like to preserve your own roasted peppers, why not save this guide to one of your Pinterest boards so you can find it when you need it? Just click the image below.
Alternatively, you can save the recipe by clicking on the floating heart icon on the right-hand side of the screen.
Related posts
Visit my How To Guides page for other handy recipes. Here are a few of them:

📋The recipe
How to roast and preserve peppers
(Click the stars to rate this recipe)
Equipment
- Glass jars As many as needed. A 1-pint jar should hold 5 peppers.
- Baking tray
- Parchment paper optional
- Large mixing bowl to hold cooked peppers for steaming
- Cling film to cover bowl
Ask a Question
If you have a question about this recipe that has not been answered, please use the box below to ask it.
Use this with care. This is an AI-generated result and may contain errors or inaccuracies. I cannot be held responsible for the information returned.
Ingredients
- 5 peppers bell pepper / capsicum/Roma (your choice)ro
- ½ cup apple cider vinegar
- ¼ cup olive oil
- ¼ cup cold water
- ½ teaspoon salt optional
- ½ teaspoon sugar optional
Instructions
Preparing and roasting the peppers
- Wash the peppers and place them on a baking tray. You could line the tray with baking parchment or tin foil for easier cleanup afterwards.5 peppers
- Place them into a preheated oven (220C (200C fam) / 440F / 400F(fan) ) for 20 minutes. Use a pair of tongs to turn the peppers halfway through so they can char all over.
- Remove the peppers from the oven and place them into a bowl (while still hot). Cover the bowl with a plate or cling wrap and leave to stand and steam for 15 minutes, or until the peppers are cool enough to handle.
- Pull the skin away and remove the seeds and discard. Cut the peppers into thick slices. Reserve any liquid that the peppers have left in the bowl.
To store peppers in a jar
- Combine the marinade ingredients (and any reserved liquid from the peppers) in a jug and stir until the sugar has dissolved.½ cup apple cider vinegar, ¼ cup olive oil, ¼ cup cold water, ½ teaspoon salt, ½ teaspoon sugar
- Layer the peppers into a sterilised jar and pour in the marinade until the peppers are completely submerged. Use a wooden skewer or chopstick to release any trapped air bubbles.
- Seal the jar and refrigerate until you are ready to use. Peppers stored in this way should be good at least 2 weeks.
To freeze peppers
- Follow the steps under Preparing and Roasting the Peppers above.
- Pack slices of peppers into freezer bags, arranging them as flat as possible to allow for easy storage. Remove as much air as possible from the bags and seal them.
- Freeze the peppers for up to 6 months and defrost in the refrigerator before using.
Notes
- Don't put any oil on the peppers when roasting them. It's not necessary! The natural moisture of the peppers steams and softens the flesh from the inside, while the heat from the oven causes the skin to char on the outside.
- Allow the peppers to steam in a covered container once you've removed them from the oven. Leaving the peppers to steam ensures the skin will pull away easily and the seeds can be easily removed.
- Don't rinse the peppers while removing the skins and seeds. There is a lot of flavour on the flesh of the pepper; rinsing them will remove it and you'll lose a lot of goodness and flavour.
- Don't discard the juices from the peppers once they've cooled. Add the juices to the marinade - the juices are packed with flavour.
- If storing the peppers in jars, pack individual slices firmly into the jar, then cover them with the marinating liquid until they are fully submerged.
- If freezing the peppers, pack the slices of pepper into ziploc bags (or similar), ensuring the pack stays as flat as possible for easy storage.
- Add one or two cloves of chopped garlic to the oil and vinegar marinade. After standing in the refrigerator for a day or two, the garlic flavour will become more pronounced.
- Woody herbs such as thyme, rosemary, or oregano can be added to the jar for extra flavour. These herbs infuse well into the vinegar and oil marinade, while softer herbs like basil and parsley are best added fresh when serving. Don't add too much - a small sprig or two is plenty.
- A mix of red, yellow, orange, and green peppers makes a vibrant, colourful jar that looks especially attractive when served.
Nutrition
I am not a nutritionist. The nutrition information has been calculated using an on-line calculator, and is intended for information and guidance purposes only. If the nutrition information is important to you, you should consider calculating it yourself, using your preferred tool.
If you made this recipe and enjoyed it, I'd love it if you could give me a star rating in the comments below. And if you'd like to get in touch, you can email me at [email protected]. I'd love to hear from you. And don't forget to subscribe to my mailing list so you can grab yourself a copy of my FREE COOKBOOK!
If you'd like to continue browsing, just click on this link to all my recipes.


Did you make this recipe? Let me know!