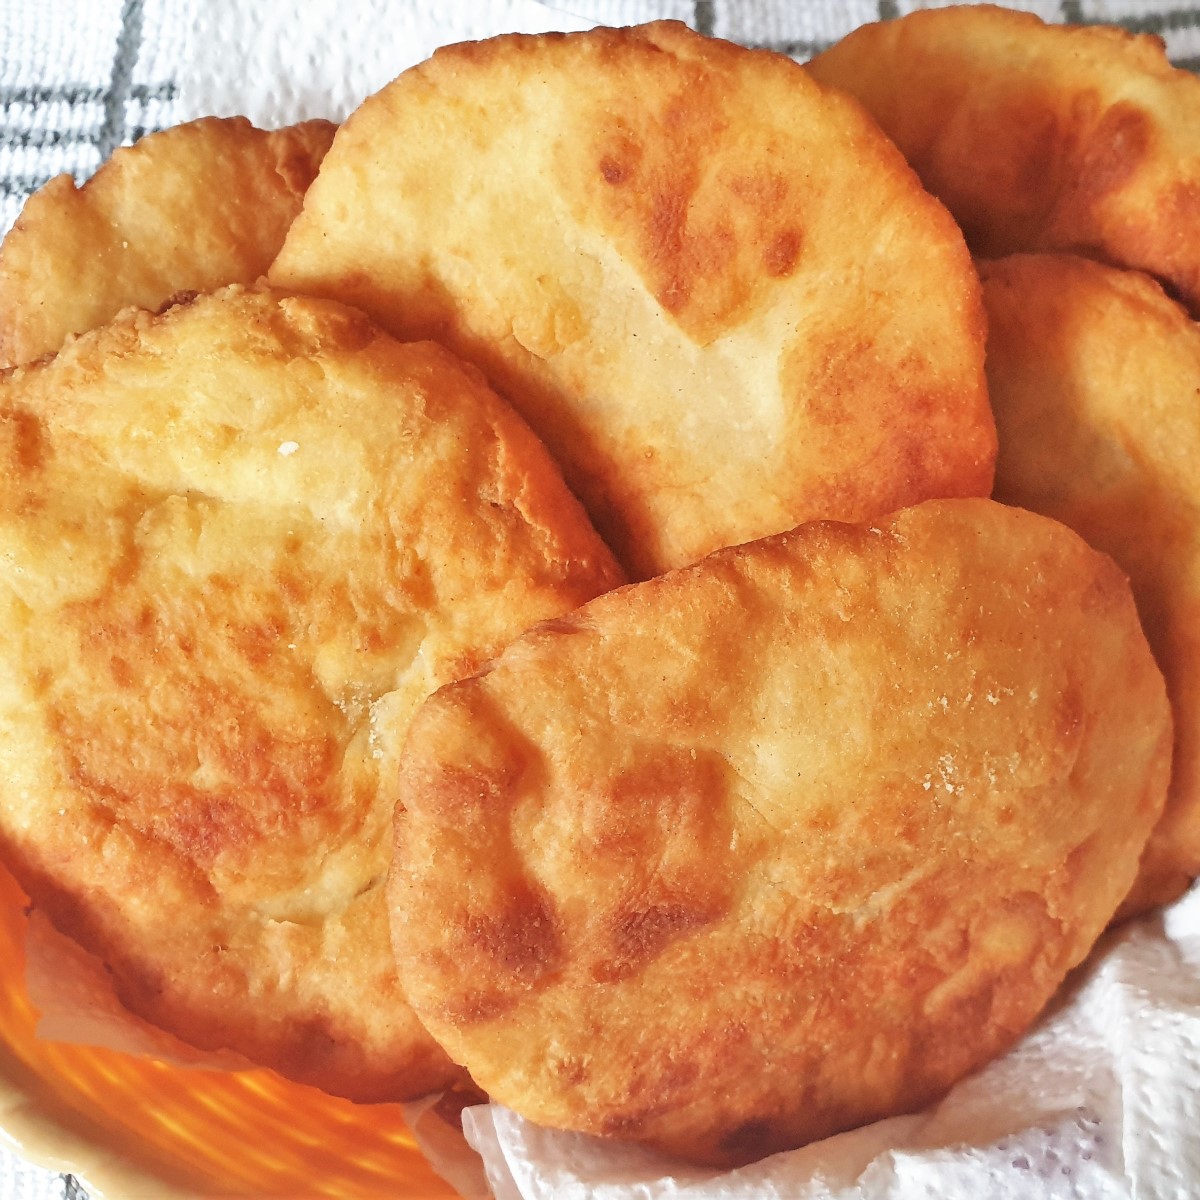
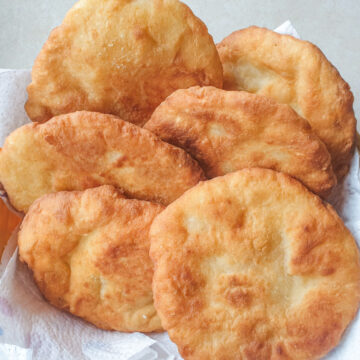
Delicious, golden brown and chewy. These quick and easy vetkoek are unbelievable. They taste just like the original version made with yeast, but these are mixed in just 5 minutes with a 2-ingredient dough recipe. No yeast, kneading or rising time required. Just mix and fry for the tastiest, chewiest vetkoek ever - you won't believe how quick and easy these are to make!
Jump to:
2-ingredient vetkoek
Ever since the success of my easy koeksisters with 2-ingredient dough recipe, I've been meaning to try out the same concept to make vetkoek. The only reason it's taken so long is because I didn't really believe it was possible to make delicious, chewy vetkoek without yeast.
But oh boy, I wish I'd tried this years ago. I would have saved hours of my life spent mixing and kneading the dough, and then waiting around for it to rise in order to get the perfect vetkoek.
This recipe is amazing. All you need is some self-raising flour and Greek yoghurt, and you can have these perfect vetkoek on the table in less than half an hour. And these vetkoek have all the texture and taste of the real deal - but with none of the effort involved.
Of course, you can still make vetkoek in the original way if you have loads of time on your hands. I have a recipe on my site for Vetkoek and Curried Mince that you can try. But why would you want to do this, when you can make these quick and easy vetkoek in the time that it will take you to read this post?
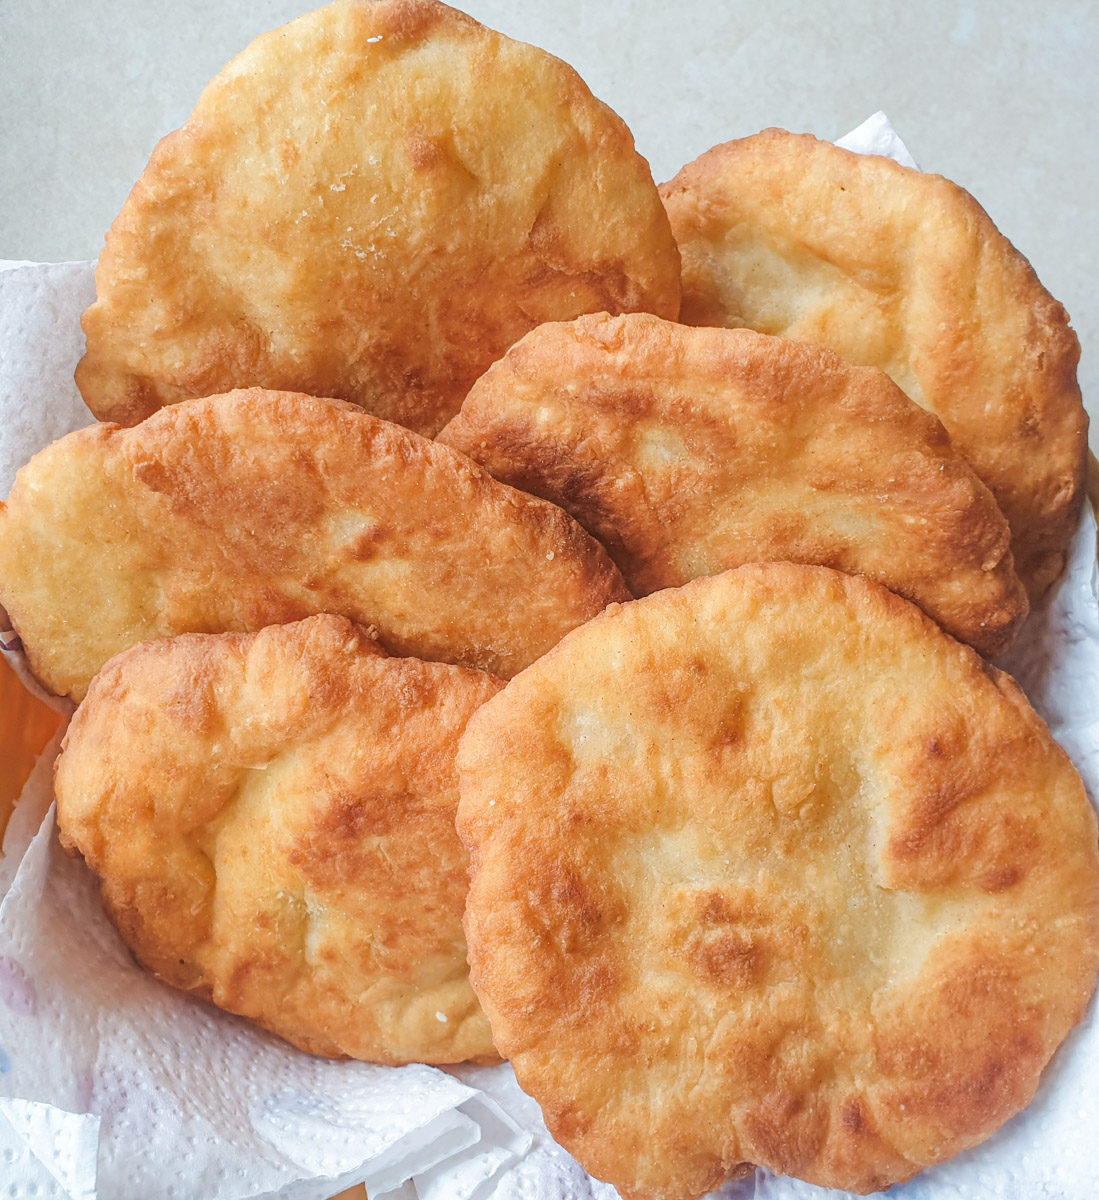
Just look at the texture of these perfectly cooked vetkoek and then try them for yourself. You won't be disappointed. They are not QUITE as puffed up as traditional vetkoek, made with yeast, but they come very close!!!
Recipe notes
- Prep time - 5 minutes
- Cooking time - 20 minutes
- Calories - 130 per vetkoek (depending on how big you make them)
- Main equipment
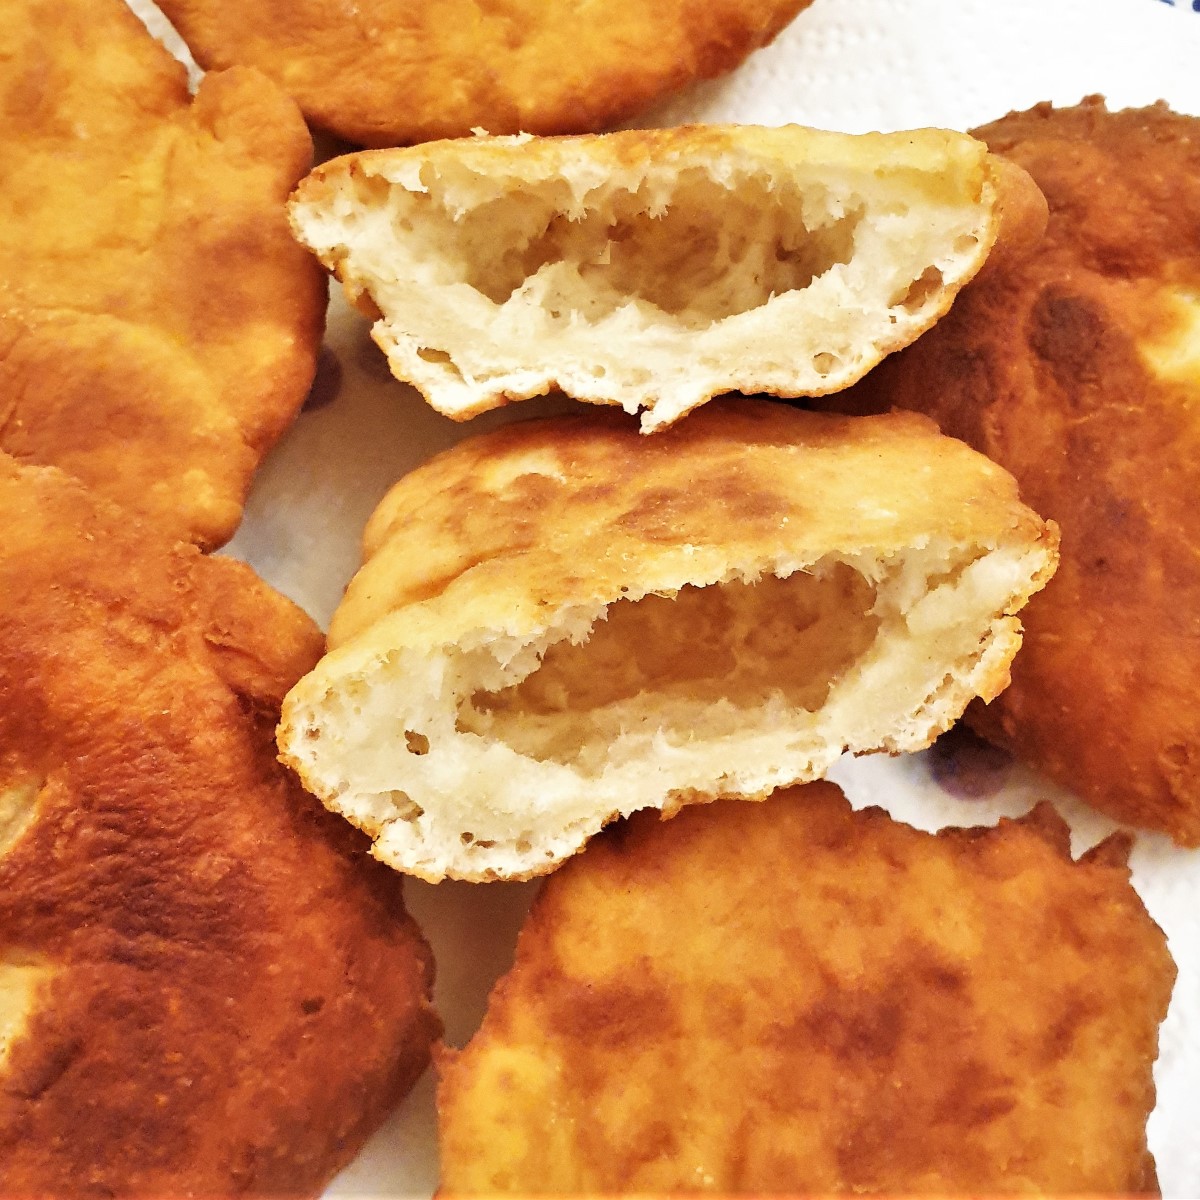
And this is what they look like on the inside!
How to make quick and easy vetkoek
This recipe makes 6 medium-sized vetkoek. To make a larger batch you can double up on the ingredients. The complete list of ingredients and full instructions for making 2-ingredient vetkoek can be found on the printable recipe card at the end of this post.
To make these vetkoek you will need equal quantities of self-raising flour and Greek yoghurt. If you can't get hold of Greek yoghurt, you can use thick natural yoghurt instead. Just don't use the fruit-flavoured yoghurt that you can get in the supermarkets - you need the very thick unflavoured type of yoghurt.
If you don't have self-raising flour you can use plain all-purpose flour (or cake flour) and add one teaspoon of baking powder per cup of flour.
The final ingredient is optional. I like to add 1 teaspoon of salt to the mixture to add a little extra flavour. If you have issues with using salt you can leave it out.
For frying the vetkoek you will need sunflower, canola or any neutral-flavoured oil. Don't use olive oil as it won't get hot enough to fry the vetkoek properly, and will also alter the taste.
Mix the dough and shape the vetkoek
For this recipe, I have used the standard US measuring cup. For those of you who like to measure by weight or metric, rather than volume, this is the equivalent of 140g or 240 ml of flour and 240 ml of yoghurt.
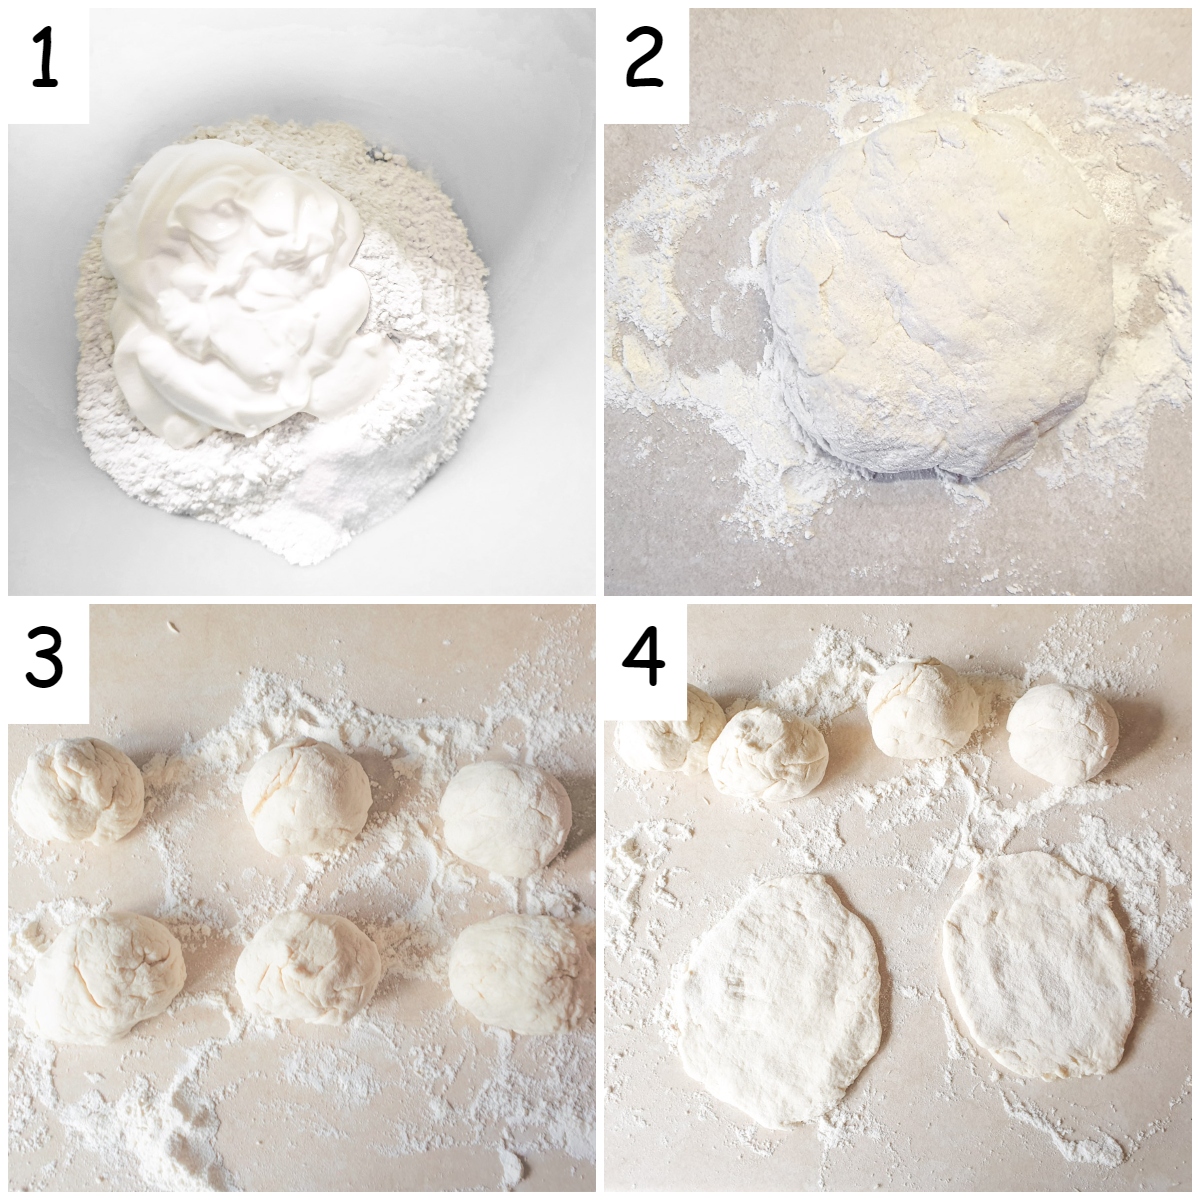
Measure the self-raising flour into a mixing bowl and add the Greek yoghurt and salt (if using). Use a flat-bladed knife, mix the yoghurt into the flour, then get your hands in and press the dough together until it forms a smooth ball.
The basic recipe is for one cup each of flour and yoghurt. If the yoghurt is a little on the thin side, you may find that the dough becomes too sticky to form into a ball. If this happens, add another tablespoon of flour. This is a very forgiving recipe, and a little extra flour won't hurt.
Once the dough has been formed into a ball, tip it out of the mixing bowl onto a floured surface and divide it into 6 equal pieces. Press each piece into a flat oval shape, approximately ½cm (or about a quarter of an inch) thick.
Fry the vetkoek
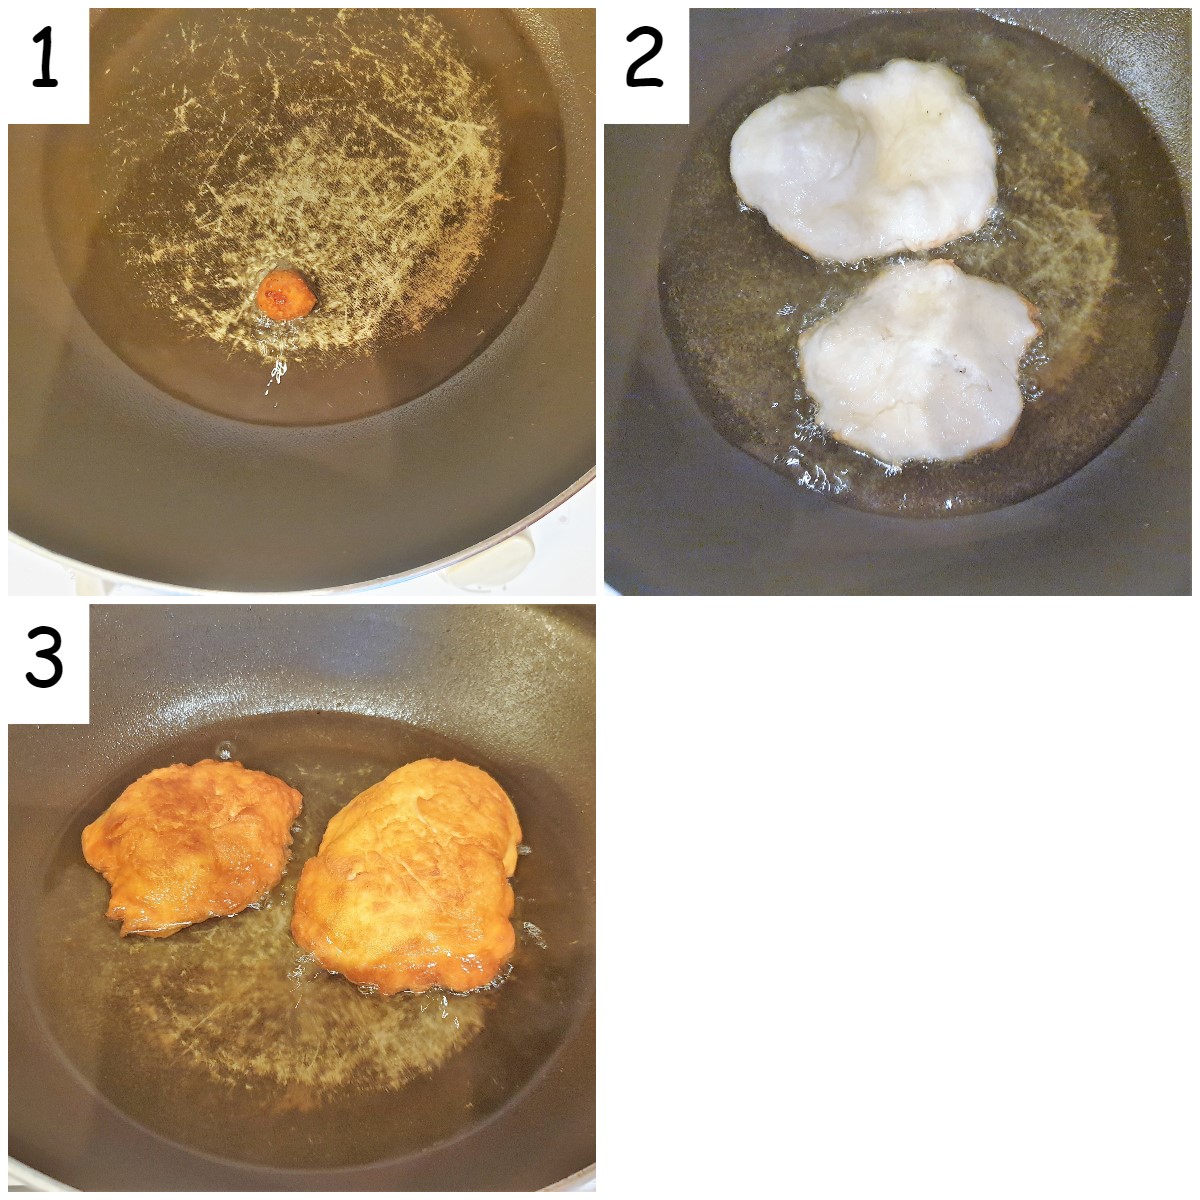
For frying the vetkoek I like to use my wok. As you will see in the above photos this is a very old wok that I've had for years. You can use a large frying pan instead.
There's no need to deep-fry these vetkoek. You will only need about an inch of oil in the bottom of the pan.
Heat the oil until a small piece of dough dropped into the hot oil sizzles and turns brown in about 15 seconds. Then carefully lower as many pieces of dough as your pan will take into the hot oil. Don't overcrowd the pan - the vetkoek will puff up as they fry and you will need room to turn them over easily.
Allow the vetkoek to brown on one side, turn them over and brown the other side. Fry them slowly - you may need to adjust the heat down slightly. If the oil is too hot, they won't cook through in the centre and there is nothing worse than uncooked batter in the middle of your vetkoek! I leave them in the oil, turning often until they are done. You will probably find that they will be cooked through in less than 5 minutes.
Once the vetkoek are done, remove them from the oil and place them on a paper kitchen towel to drain.
If you'd like to be notified of new recipes, why not subscribe to my newsletter? To say thank you, you will receive a free recipe e-book containing some of my most popular cakes and desserts.
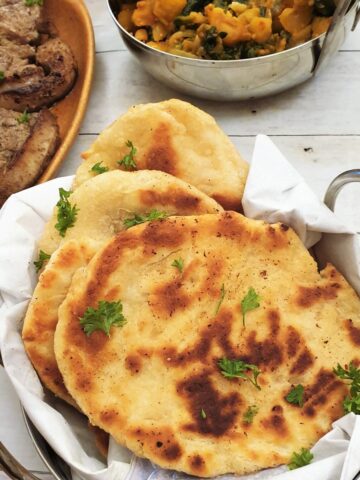
What to serve with vetkoek
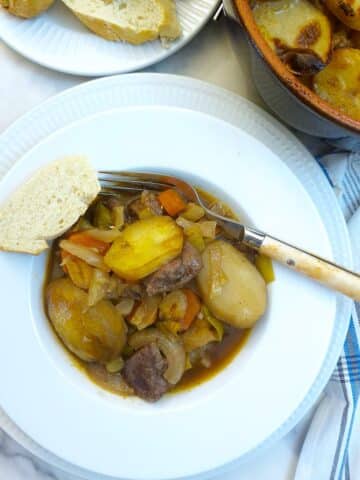
I like to serve fresh hot vetkoek with curried mince or chilli con carne. They are also good served alongside my beef vegetable winter soup instead of bread.
If you have any vetkoek left over, they make a lovely chewy sandwich with just a slice of ham or cheese (or both). I find you don't even need to spread them with butter first - just add the filling.
And if you have a sweet tooth, try spreading them with apricot jam or honey.
How do I store vetkoek?
Leftover cooled vetkoek can be stored in a plastic bag in the breadbin. They will stay fresh like this for a day, but after that, they will tend to go stale.
Can I freeze them?
Technically you can freeze the cooled fried vetkoek in a plastic bag in the freezer, and then place them on a baking tray in a hot oven until they are warmed through.
Practically - they take such a short time to make that I wouldn't bother. I prefer to make them fresh as I need them.
Can I make them in advance?
You can make the pastry up to 3 days in advance. Just store the ball of pastry in the fridge wrapped in lightly greased clingfilm. When you are ready to use it, tip the pastry onto a floured surface, shape it into vetkoek and fry as per the recipe.
Can I double the recipe?
Yes, you can double the ingredients for this recipe. Just keep the ratio of 1:1 for the flour and Greek yoghurt. If you are using salt, adjust the salt to taste. Don't double up on the salt or the vetkoek will become too salty.
Can I use plain flour instead of self-raising?
Yes, you can use plain flour, however it is very important that you add baking powder to the plain flour to enable the vetkoek to puff up properly. Add 1 teaspoon of baking powder for each cup (240/250 grams) of plain flour.
Save for later
Why not pin this recipe to your Pinterest board so you can make it later? Just click the image below.
Alternatively, you can save the recipe by clicking on the floating heart icon on the right-hand side of the screen.
Related recipes
Once you have mastered the art of making 2-ingredient dough, the sky is the limit. Here are a few more recipes:


If you are looking for a recipe for 2-ingredient pizza dough you can find it on the BBC website. On the other hand if you want to make PROPER pizza dough you can find a great recipe on my post on how to make pizza dough.
📋The recipe
Quick and easy vetkoek
(Click the stars to rate this recipe)
Equipment
- Mixing bowl
- Flat-bladed knife or spatula
- Frying pan or Wok
Ask a Question
If you have a question about this recipe that has not been answered, please use the box below to ask it.
Use this with care. This is an AI-generated result and may contain errors or inaccuracies. I cannot be held responsible for the information returned.
Ingredients
- 1 cup self-raising flour (140g)
- 1 cup Greek yoghurt (240ml)
- 1 teaspoon salt
- 2 cups sunflower or canola oil for frying
Instructions
- Measure the flour into a mixing bowl
- Add the Greek yoghurt and salt (optional)
- Mix with a flat-bladed knife until the Greek yoghurt is combined with the flour
- Press together with your hands until the mixture forms a soft ball. Add more flour a tablespoon at a time if necessary.
- Tip onto a floured surface and divide into 6 equally sized balls.
- Flatten each ball to approximately ½ cm thickness
- Heat the oil in a wok or frying pan until a small piece of dough dropped into the oil turns brown in about 15 seconds.
- Carefully lower the flattened vetkoek into the oil, and fry, turning occasionally, until golden brown on both sides and cooked through.
- Drain on paper towel, then serve.
Notes
Nutrition
I am not a nutritionist. The nutrition information has been calculated using an on-line calculator, and is intended for information and guidance purposes only. If the nutrition information is important to you, you should consider calculating it yourself, using your preferred tool.
If you made this recipe and enjoyed it, I'd love it if you could give me a star rating in the comments below. And if you'd like to get in touch, you can email me at [email protected]. I'd love to hear from you. And don't forget to subscribe to my mailing list so you can grab yourself a copy of my FREE COOKBOOK!
If you'd like to continue browsing, just click on this link to all my recipes.

Grieta says
You say 2 INGREDIENTS, but the recipes mentions FOUR ingredients????????????
What now?????
VJ says
If you read the post you would have seen that the vetkoek are made with 2 ingredient dough. The other 2 ingredients are salt for flavouring (which is optional) and oil for frying.
Jason Price says
Love this, my daughter love these with golden syrup and I've made these a few times for the boys when watching the Rugby, with curried mince beef. Lekker
VJ says
Glad you like them! I love them with curried mince too!
Rochelle says
This is even better than normal vetkoek, especially if you dont have time to wait for it to rise. thank you so much for this recipe even my mother in law wants it.
VJ says
My pleasure - glad you enjoyed them 🙂
Lisa says
Tried this last night and it came out AMAZEBALLS! 😁😁
Made mince for the filling aand my partner loved them!
So thumbs up if you're having a lazy day and want a quick meal. ❤️
VJ says
Fantastic! I'm so pleased you enjoyed them 🙂