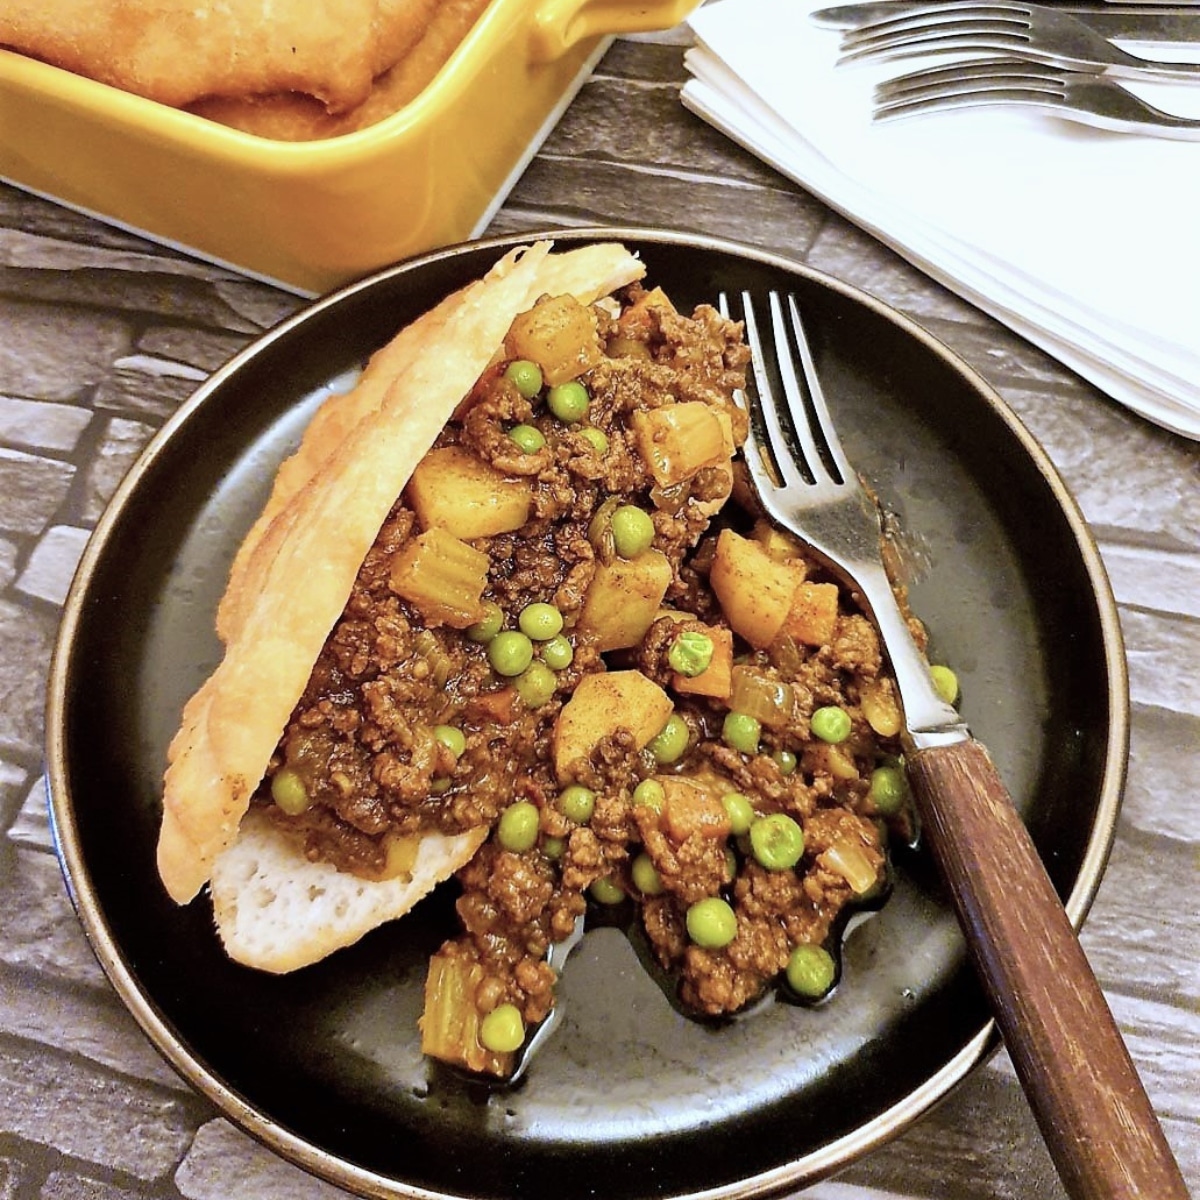
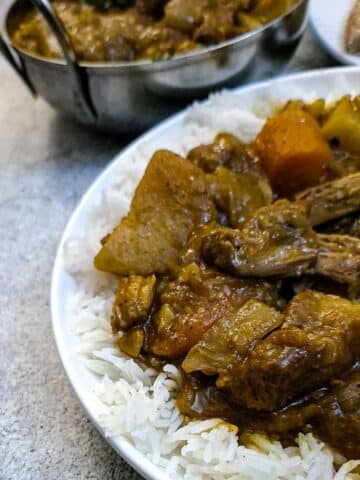
Let me show you how to make South African vetkoek! If you're looking for something different to make for dinner, you can't go wrong with a classic South African dish of vekkoek with spicy curried mince filling. Vetkoek (or deep-fried dough balls), stuffed with curried mince, make a great flavour-packed alternative to the normal curry and rice! Why not try something a little different tonight? You might just love it!
What is a Vetkoek?
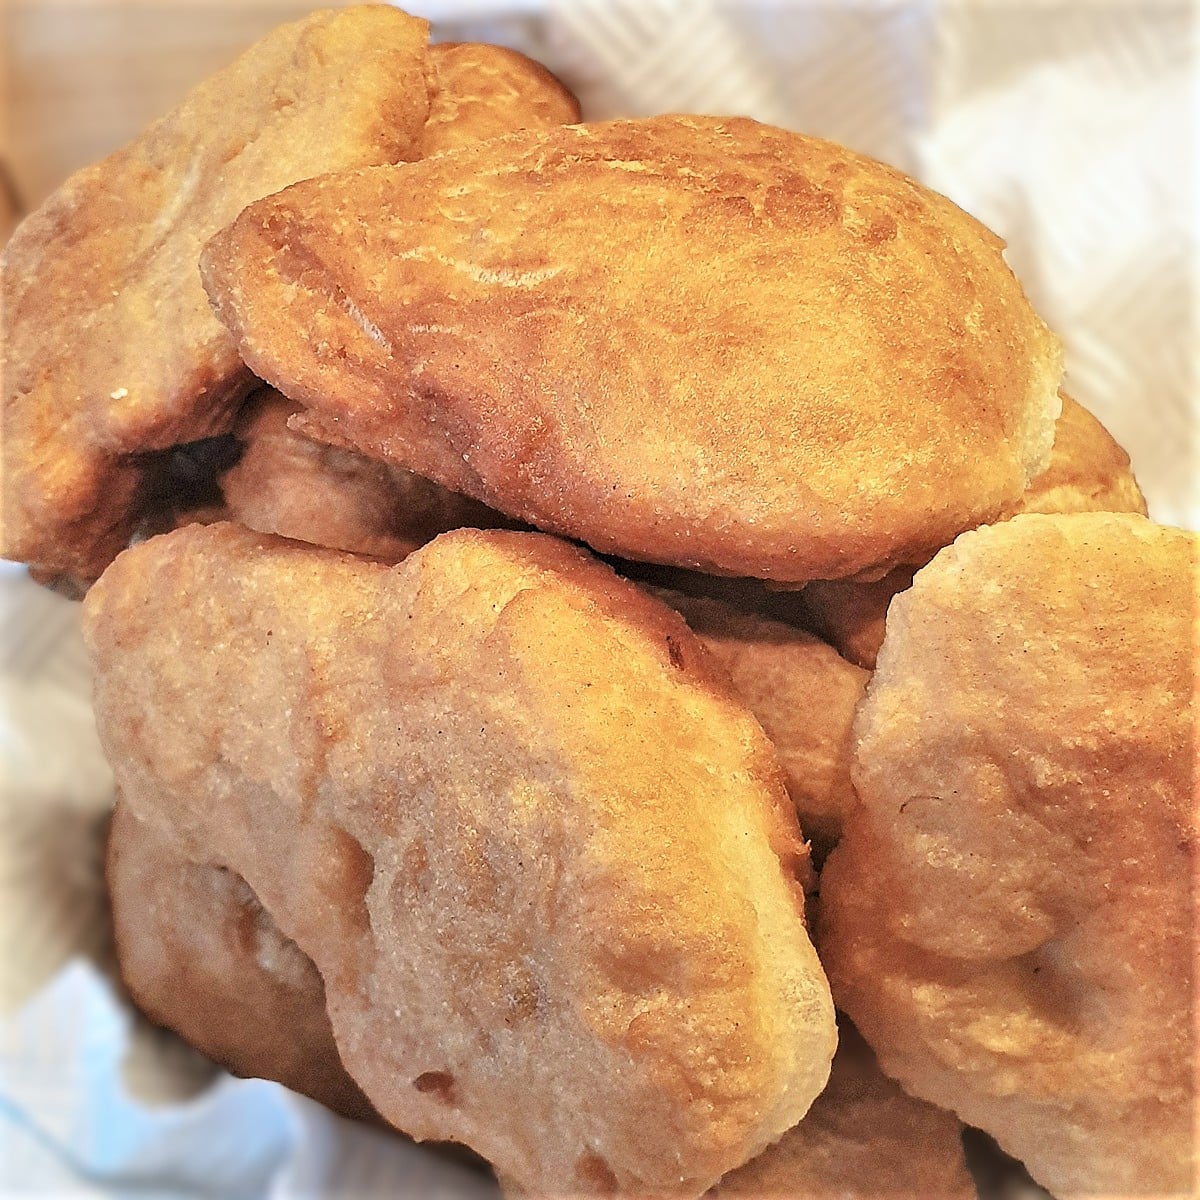
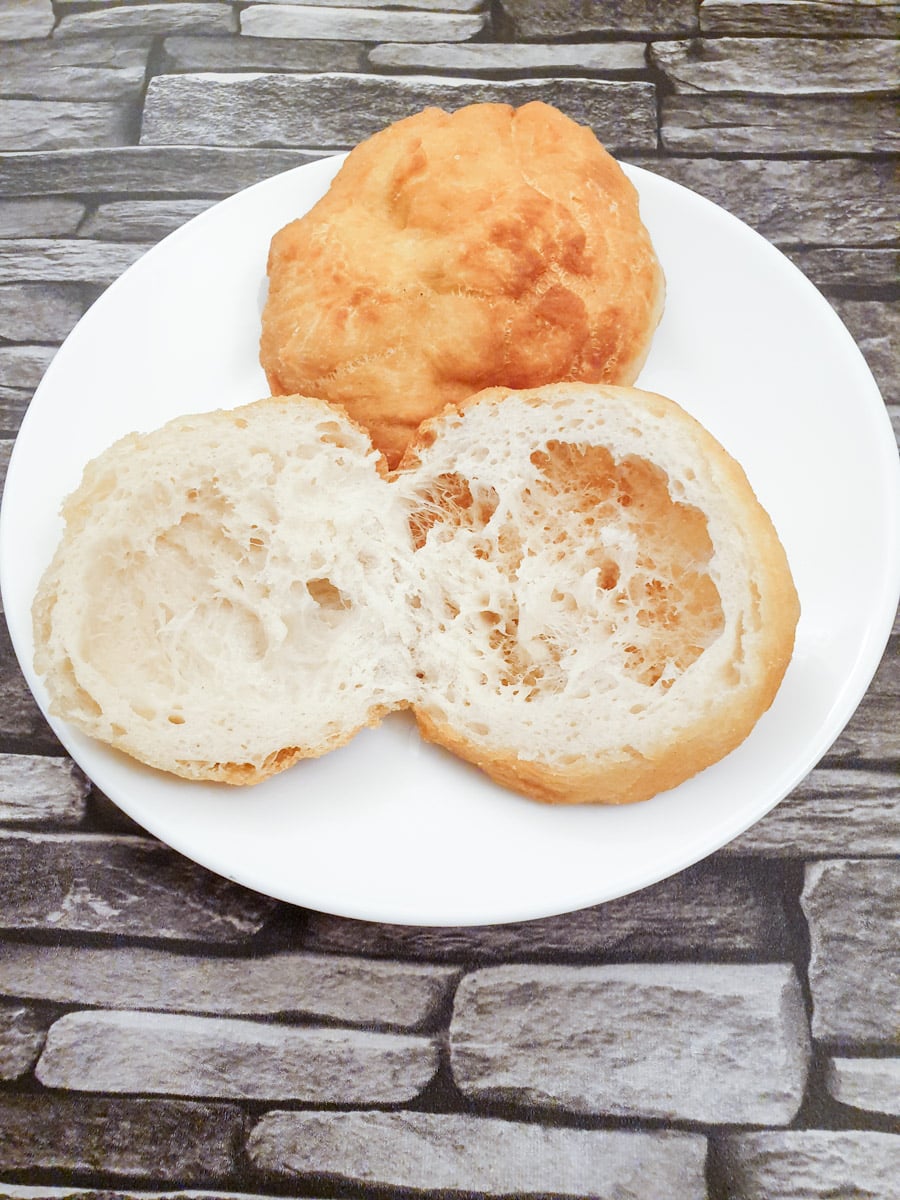
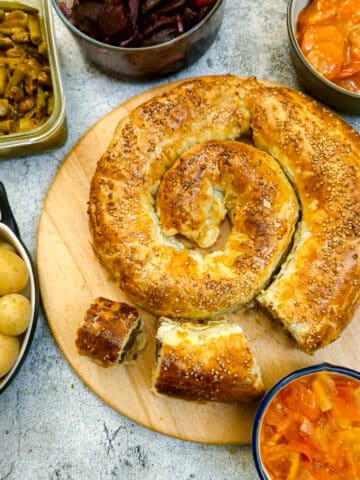
Vetkoek (pronounced fet-cook) is an iconic South African treat. Made from bread dough and deep-fried to a golden, crispy outside, this tasty bread has a soft, slightly chewy centre, full of airy pockets. It is often split open and filled with savoury curried mince, making a satisfying, tasty and saucy meal (you'll definitely need a napkin or two). It is equally delicious when served still warm from frying, and smothered with butter and syrup, jam or honey.
The name vetkoek is Afrikaans for 'fat cake', and it is a familiar sight at school fetes, church bazaars and family gatherings. The vetkoek story goes way back. Originally introduced by the 17th-century Dutch settlers, it was an easy and oven-free way to make bread while travelling inland in wagons. Over time, it has evolved into the much-loved dish we know today.
The vetkoek recipe I am sharing today is made with yeast, just like bread. If you're looking for a shortcut, why not try my recipe for 2-ingredient dough vetkoek, which is made with self-raising flour and Greek yoghurt? It takes only minutes to make, and I've been reliably informed by my South African friend Liz that it's almost as good as the yeast version!
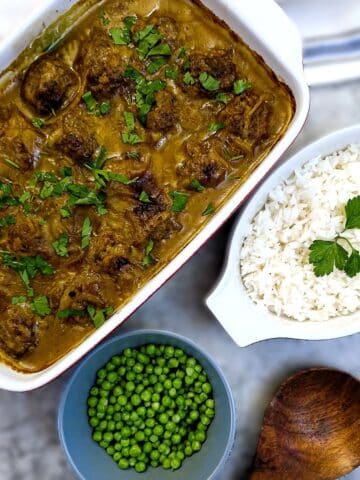
For the minced beef curry filling, you can use your favourite recipe, or try my spicy ground beef curry recipe. You might also like to try the vetkoek stuffed with this North African lamb keema too!
Before I show you how to make South African vetkoek, I'd like to mention another South African classic curry, the Bunny Chow. This is an iconic South African dish made with curried beef or lamb, and served in a hollowed-out half-loaf of bread.
Jump to:
Are Vetkoek unhealthy?
While deep-fried foods often have a bad reputation, vetkoek doesn't absorb as much oil as you might think. The oil should be hot enough to create a crispy shell immediately, preventing it from soaking in. And after frying, they are placed on kitchen paper to absorb any excess oil.
Vetkoek has a satisfying chewy texture that gives your jaw a workout - bonus points there 🙂 . Everything in moderation is key. The occasional vetkoek won't hurt, but eating them every day might be a little too much indulgence!
Recipe information
Prep time: 30 minutes
Rising time: 1 hour (you can use this time to make the curried mince or lamb keema)
Cook time: Each batch of vetkoek will take 5 to 6 minutes to cook, so the actual time will depend on the size of your pan.
Yield: This recipe makes about 10 small to medium-sized vetkoek, but you can easily double up the ingredients to make a double batch.
Ingredients
**You can get the complete list of ingredients and full instructions for how to make vetkoek on the printable recipe card at the end of this post**
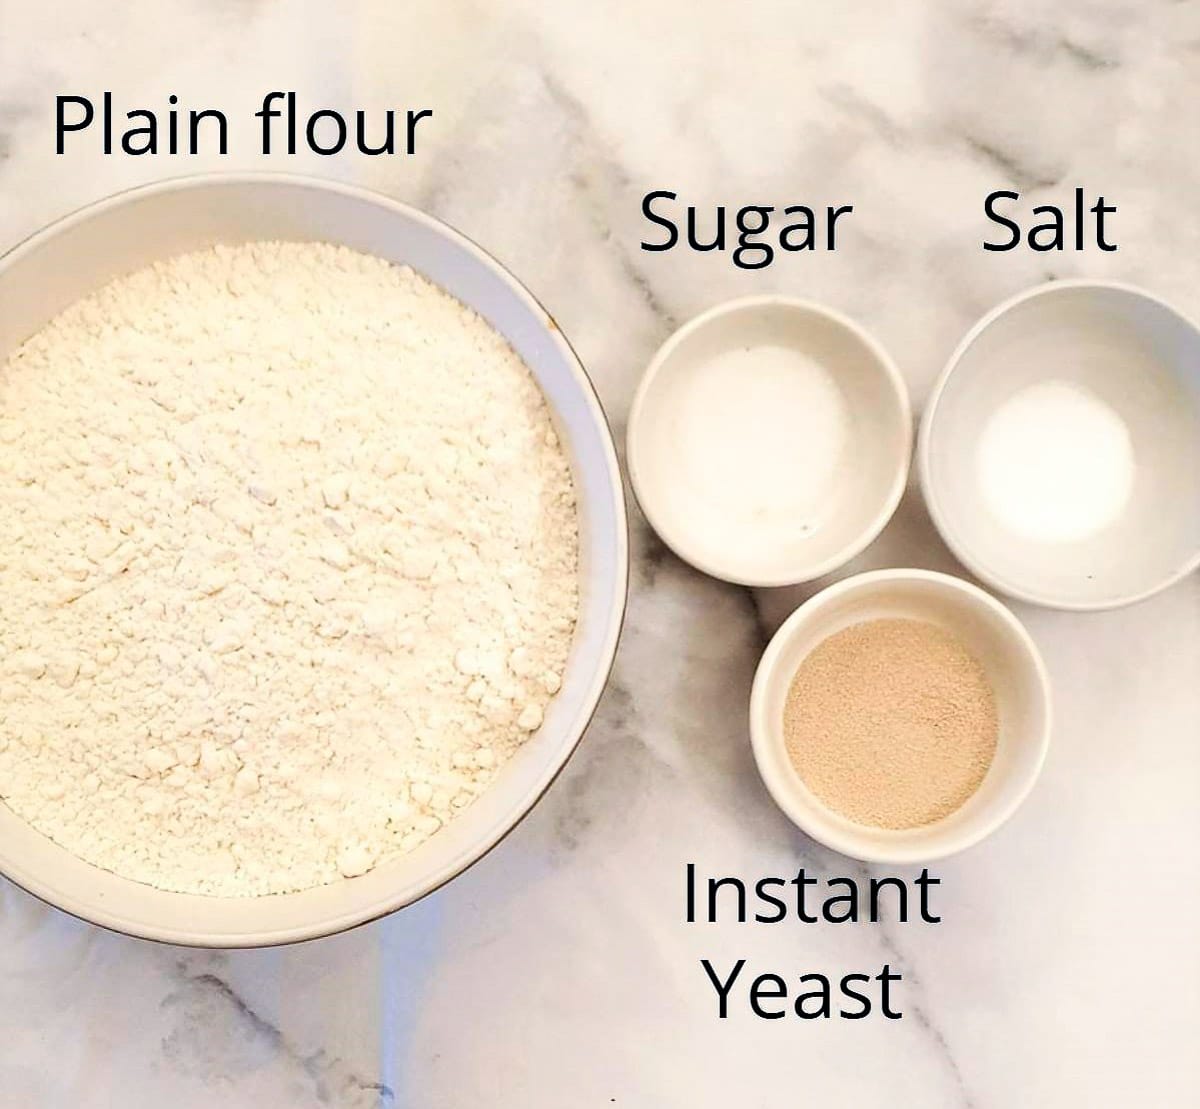
- Plain Flour - you may know it as all-purpose flour. Don't use self-raising flour; the yeast takes care of the rising.
- Dried instant Yeast - you can buy this in packets in the supermarket, and you just tip it into the mixing bowl with the flour.
Update - one of my lovely readers pointed out that the packets of yeast sold in the supermarkets in South Africa contain 10g. In the UK, instant yeast is sold in 7g packets, and that is what I have used for this recipe. Using the larger packets will cause the vetkoek to rise too much, and consequently, the vetkoek may have large pockets of air. Make sure you only use 7g of instant yeast (that's 2 teaspoons).
- Water (not pictured) - you should use lukewarm water as this will assist in activating the yeast.
- Salt - this is optional, but it does make the vetkoek taste better.
- Sugar - there is an old wives' tale that says yeast will not activate without the addition of sugar. This is not strictly true. All the sugar does is help the yeast activate more quickly. If you prefer, you can leave the sugar out and let the dough rise for a few minutes longer.
- Sunflower oil (not pictured) - this is used to fry the vetkoek, and you need an oil with a high smoke point. Olive oil will not be suitable for this, so you will need to use sunflower or another neutral-flavoured vegetable oil. I like to use rapeseed.
How to make South Afrian vetkoek
Make the dough
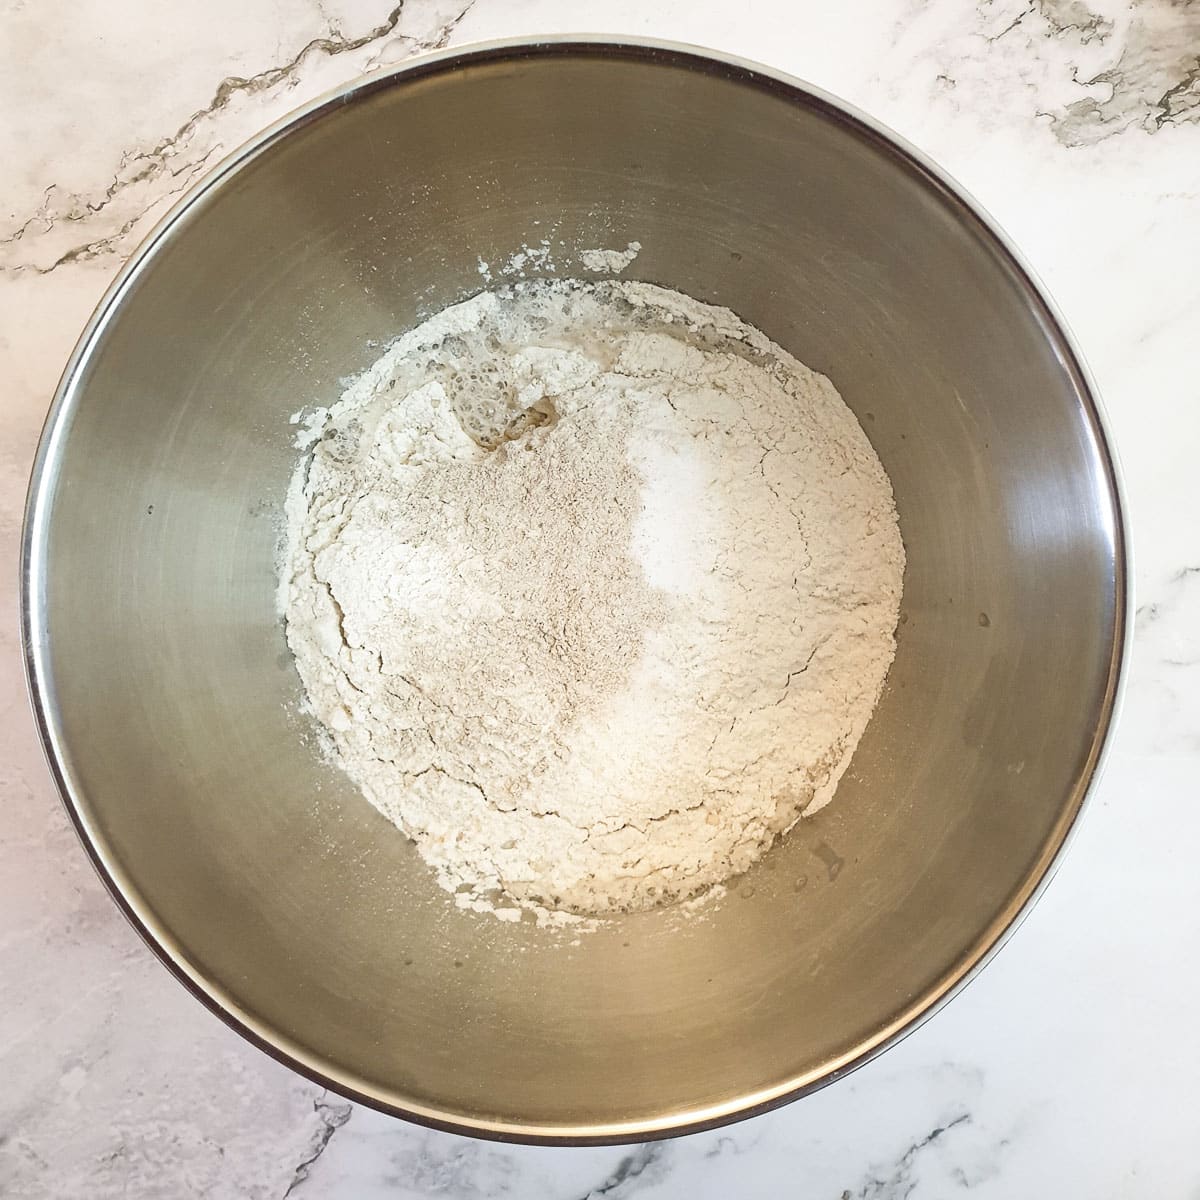
Step 1: Tip the flour into a large mixing bowl, sprinkle the yeast on top and give it a bit of a mix. Then add the salt and sugar. Don't let the yeast come into direct contact with the salt.
Step 2: Add most of the water, give it a good stir until it all comes together, then knead for 10 to 15 minutes until you have a nice smooth elastic dough. You can use a food mixer with a dough hook to take all the hard work out of this. Add the reserved water only if necessary to form a soft dough.
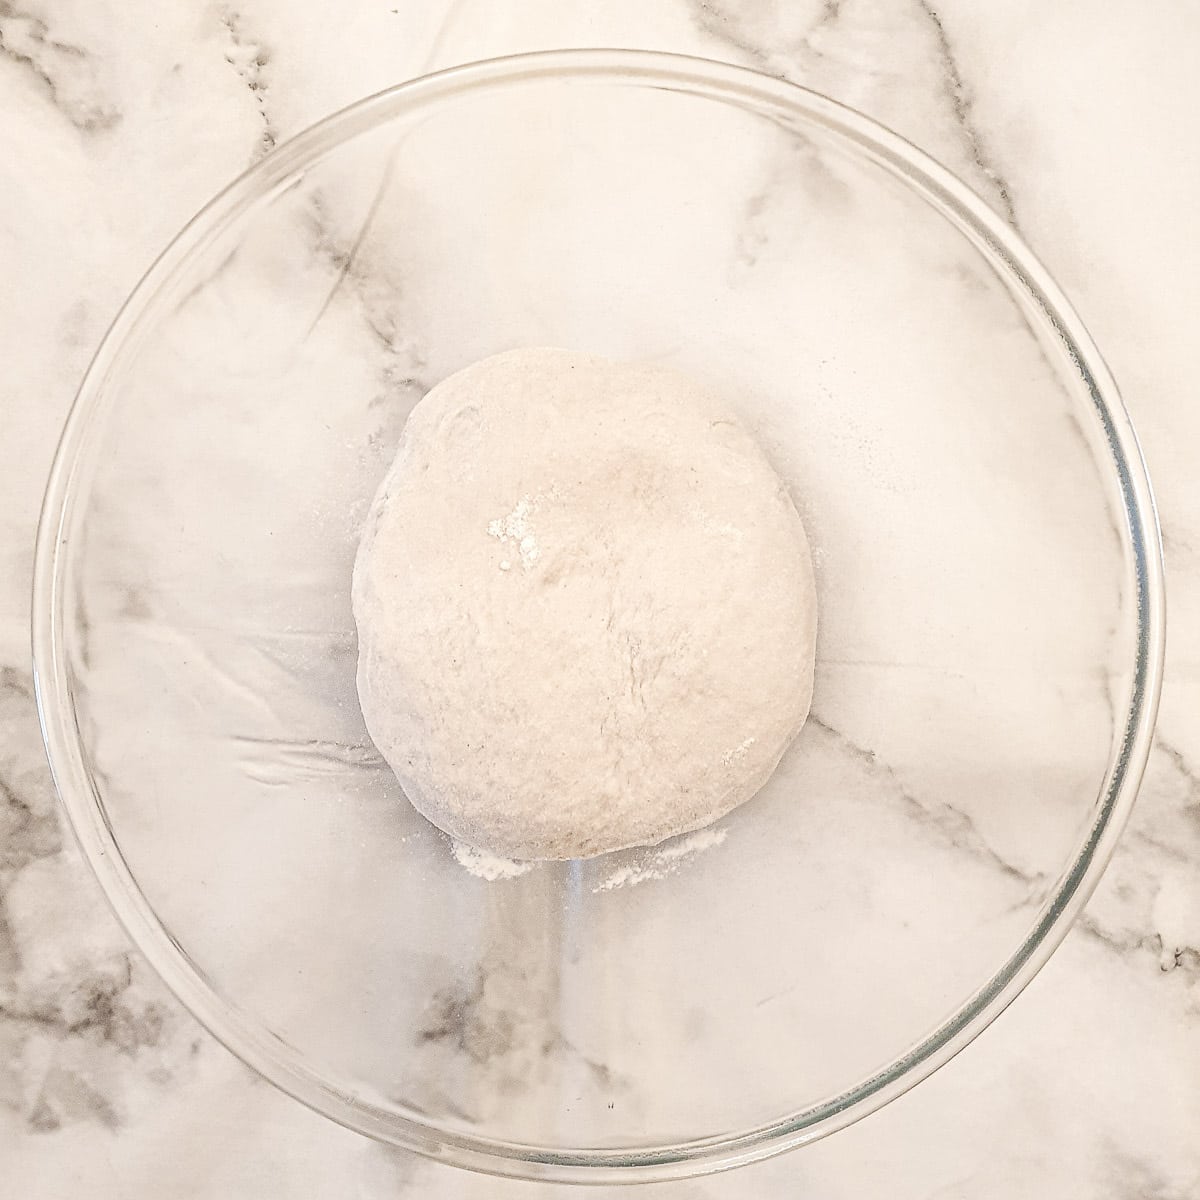
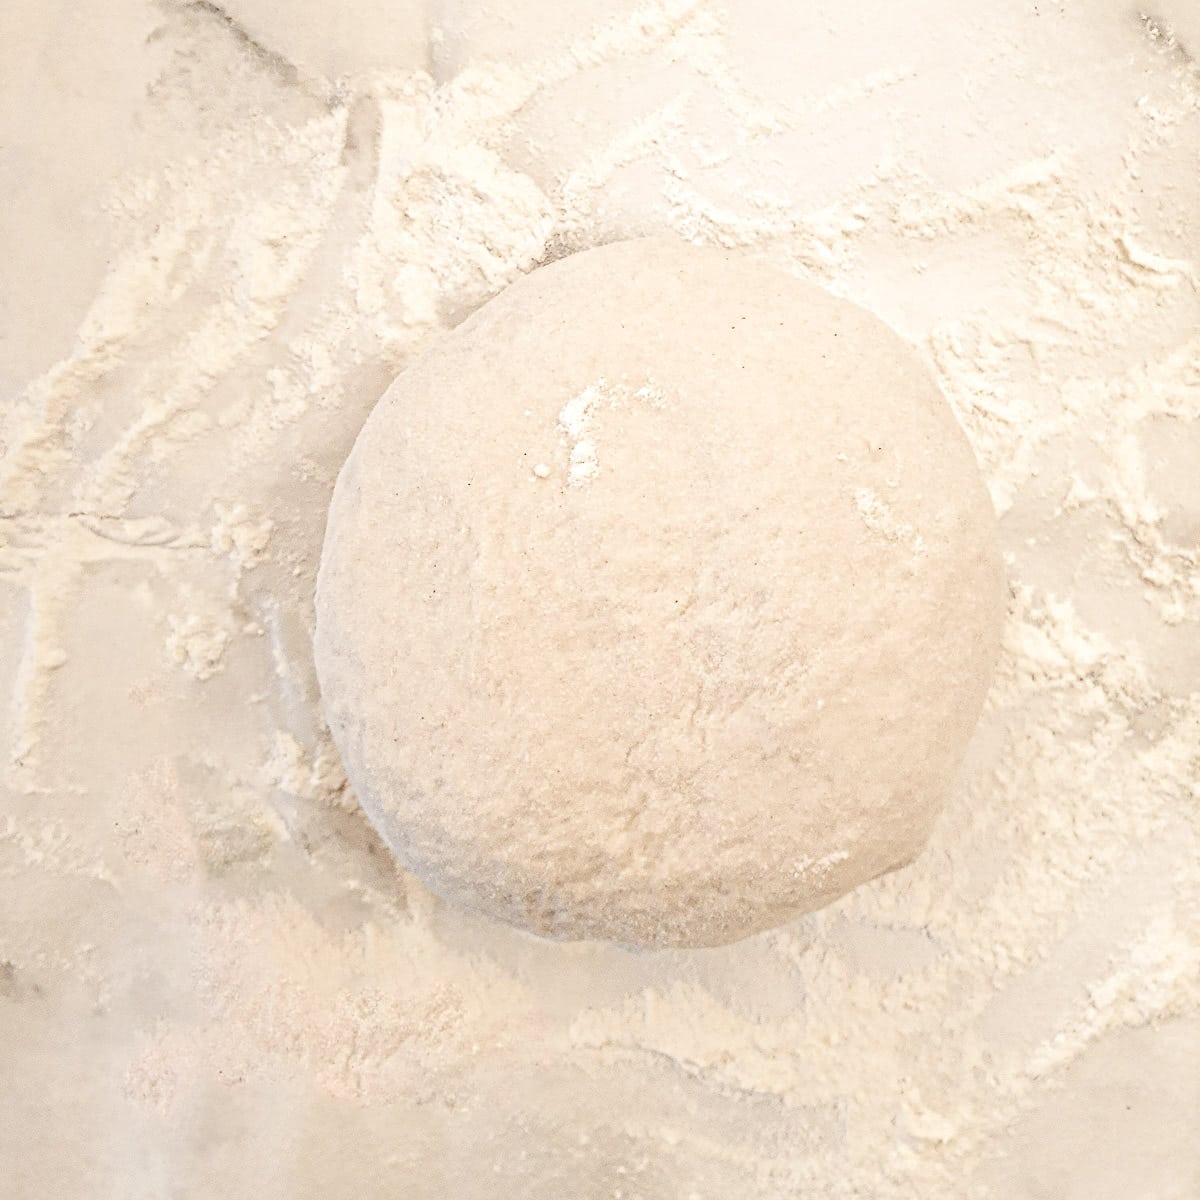
Step 3: Once the dough has been kneaded, form it into a ball and transfer it to a clean bowl. Cover the bowl with cling film, place a towel over it to keep it warm, and leave it in a warm place for an hour to rise.
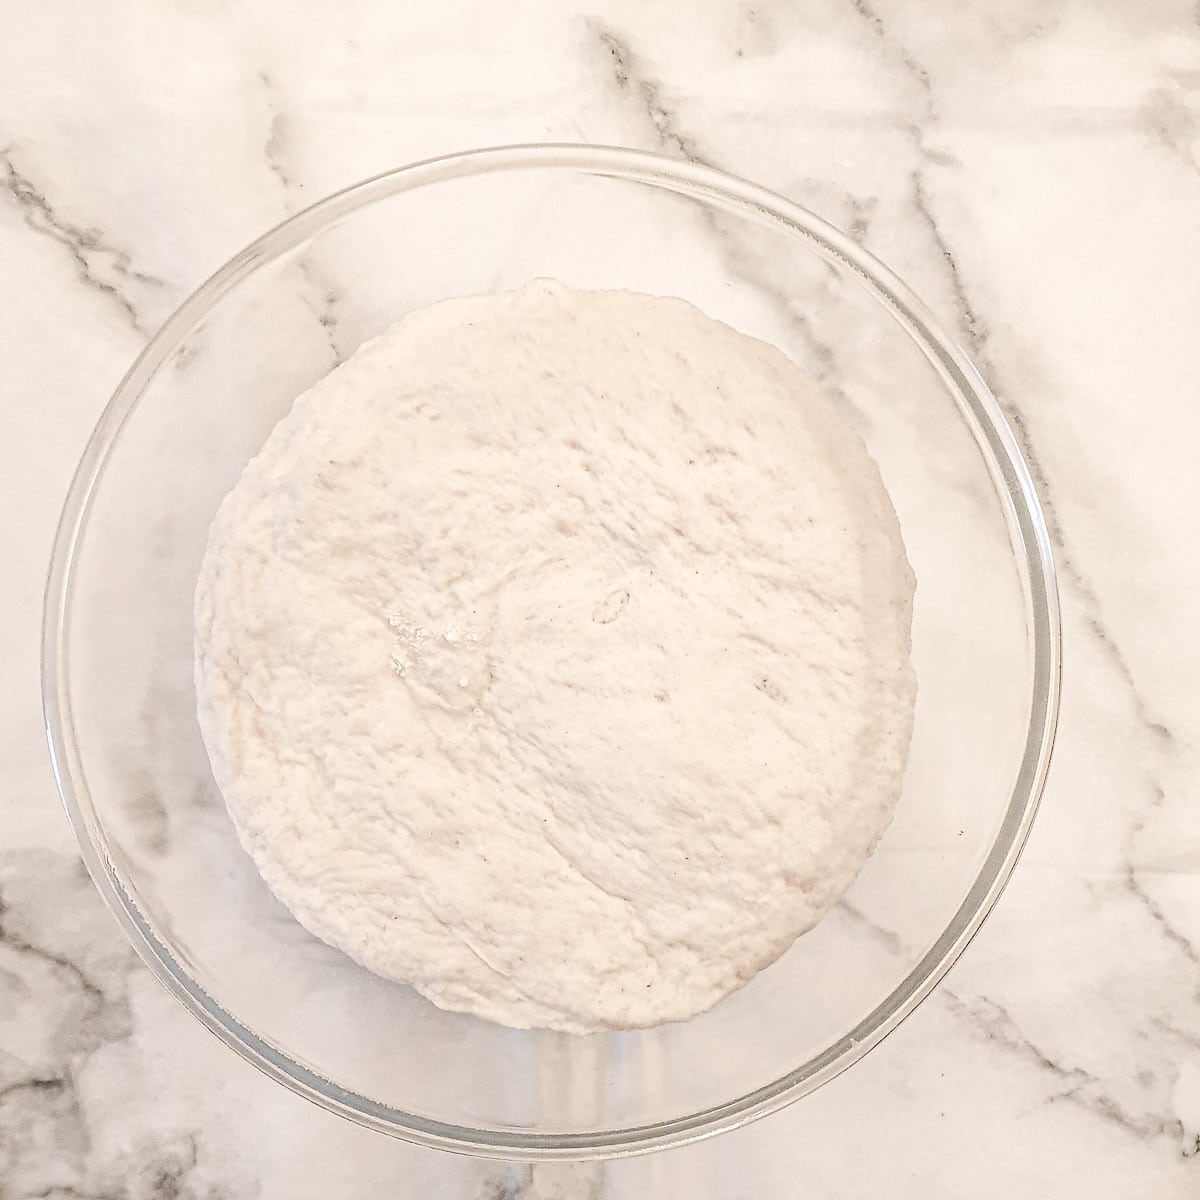
Step 4: After an hour, the dough should have more than doubled in size.
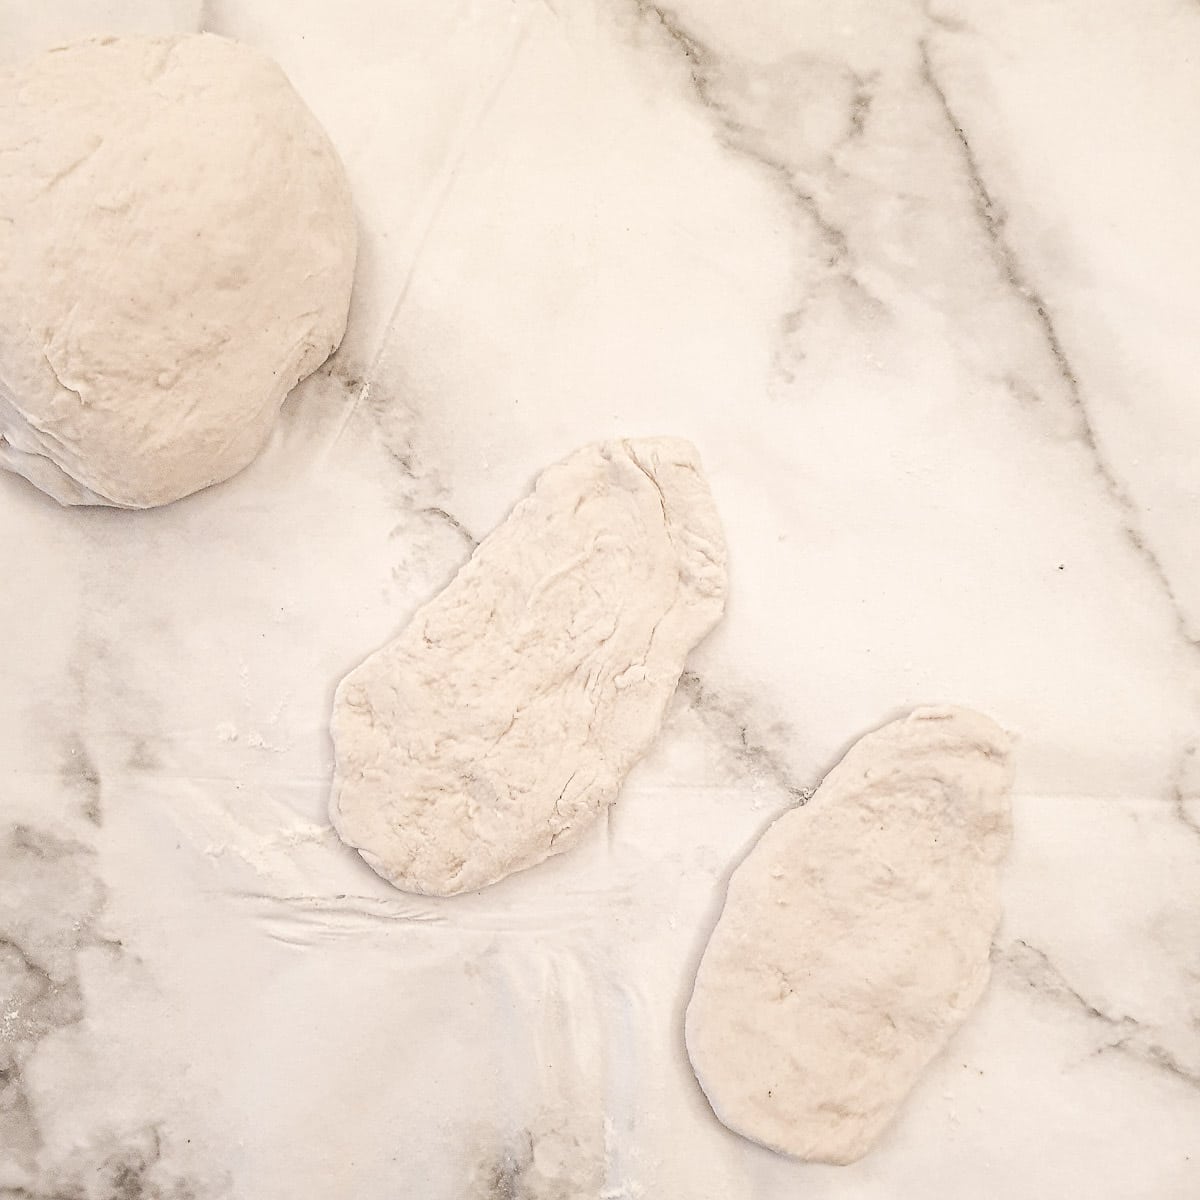
Step 5: Punch the dough down and knead it lightly. Break off golf-ball-sized pieces and press them into flat, oval shapes, approximately one-quarter of an inch in thickness.
Fry the vetkoek
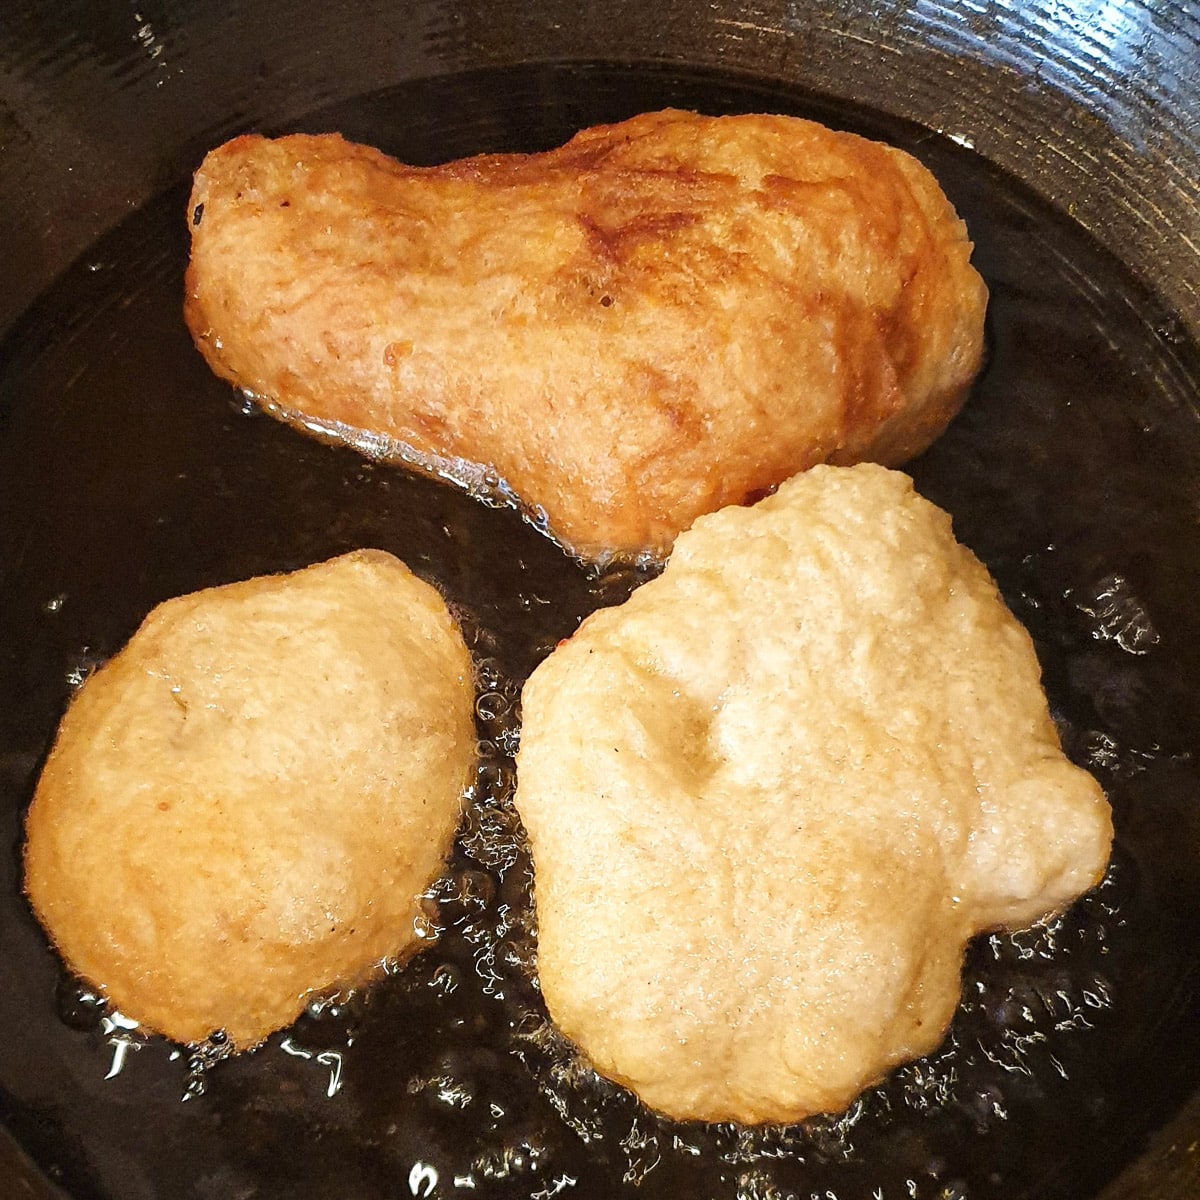
Step 6: Heat about 2 inches of sunflower oil in a wok or a large saucepan. It will be hot enough when a small piece of dough 'sizzles' and rises to the top when you add it. Add the vetkoek in a single layer.
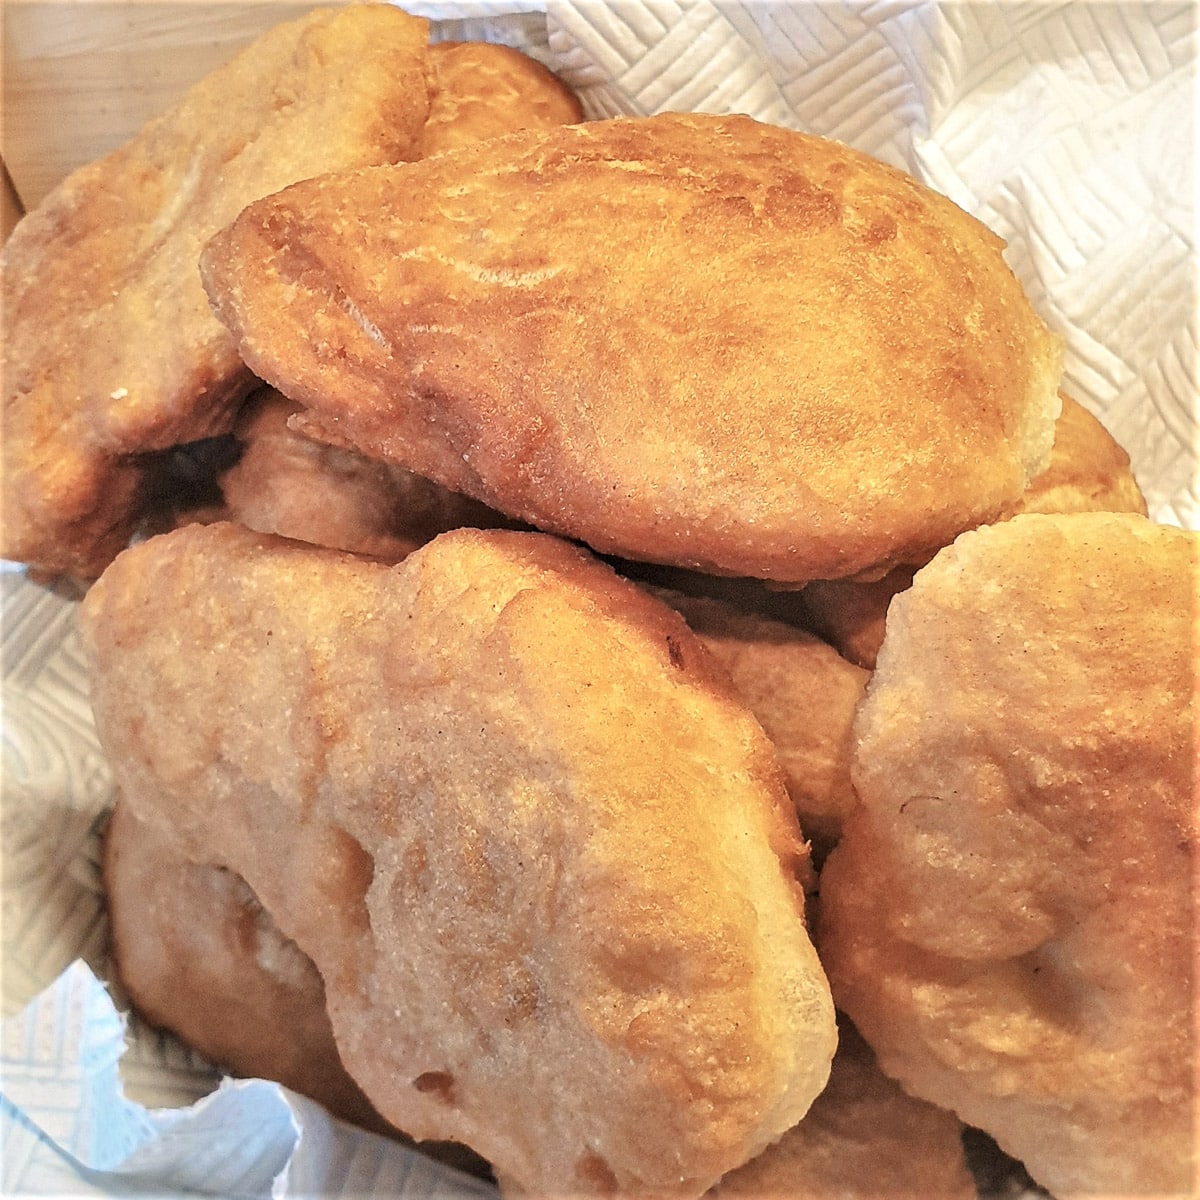
Step 7: Fry the vetkoek in batches for 4 to 5 minutes per side, until puffed and golden. Use a spatula to help you turn the vetkoek. Once cooked, place them on a paper towel to absorb excess oil.
Tips for a successful outcome
Here are my top tips for ensuring you always have a great result when you make vetkoek:
The yeast
- Check the expiry date on the yeast. If the yeast is old, there is a chance that the vetkoek will not rise properly.
- If you are unsure, test the yeast by combining it with a couple of tablespoons of lukewarm water and a pinch of sugar. Let it stand for a few minutes.
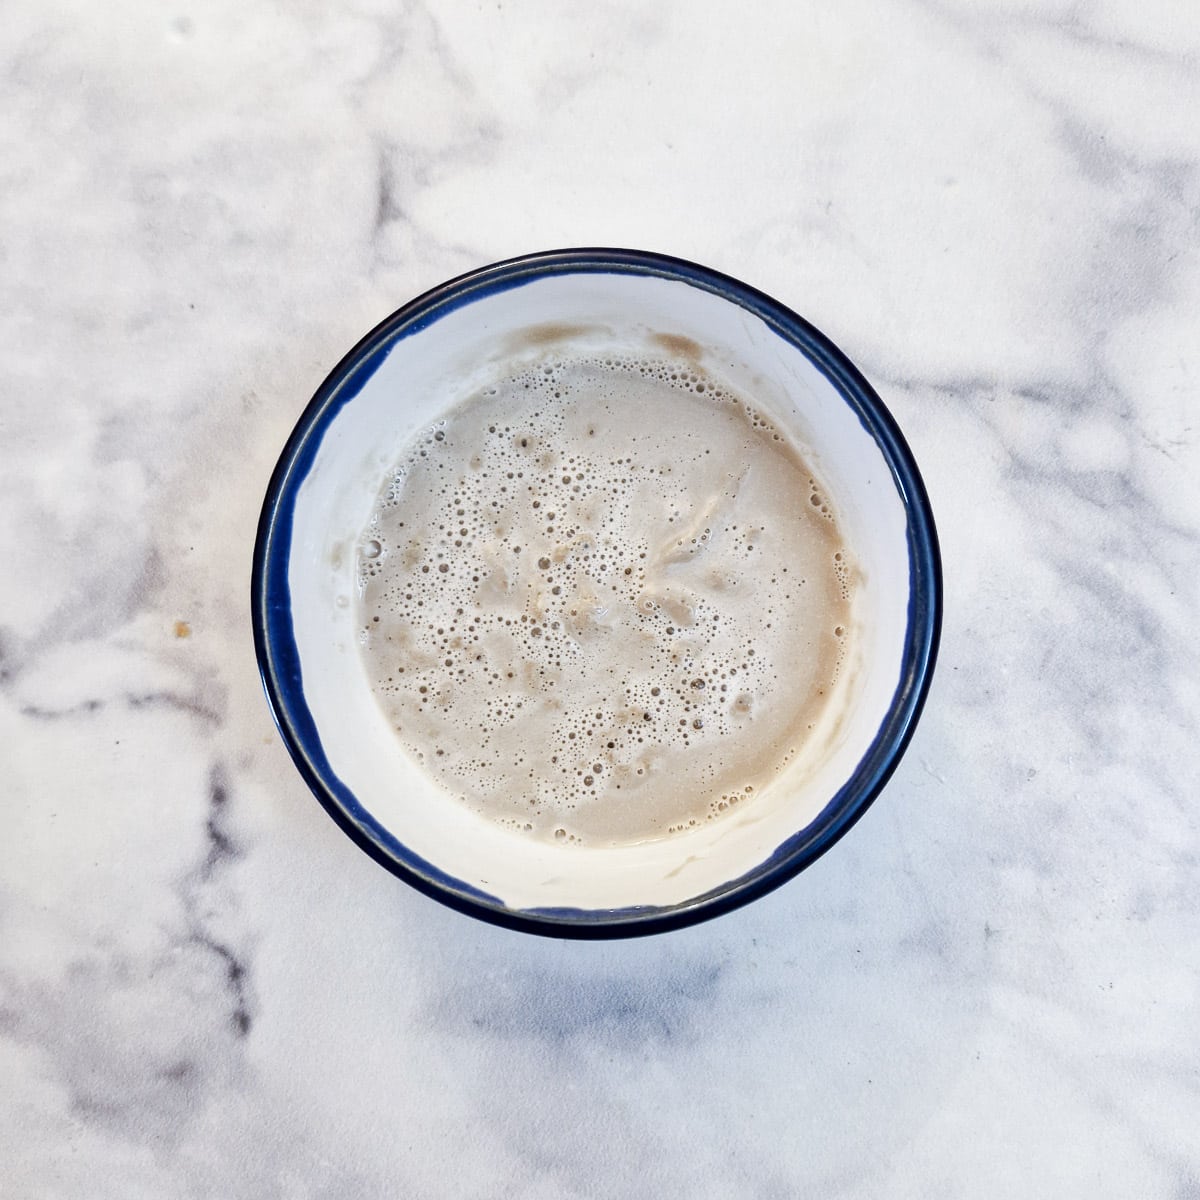
The yeast should have formed a froth on top. If it doesn't foam, it means your yeast is dead, and you should throw it away and buy a fresh batch.
The dough
- You can knead the dough by hand or use a stand mixer fitted with a dough hook.
- Don't add all of the water at once; keep a little aside. Depending on the strength of the flour you are using, you may not need all the water. If you find you need the extra water, add it a tablespoon at a time until you get a soft, smooth dough. On the other hand, if you find the dough is too sticky, you can add a little extra flour. The ratio is approximately 2 parts flour to 1 part water.
- The dough should rise for at least 1 hour, but if it is quite a cold day, you could leave it for longer. It won't come to any harm.
The vetkoek
- I like to make smallish vetkoek (using golf-ball-sized pieces of dough); you may prefer larger vetkoek. It doesn't really matter how large you make them. What does matter is the thickness. If you make the vetkoek too thick, there is a danger that the outside will be lovely and golden, but the inside will still be raw and 'doughy'. I find that a 1 cm thickness (or just less than half an inch thickness) is about right.
- I like to pull the dough into shape using my hands for a more rustic look. If you want a neater appearance, you could use a cookie cutter to cut the dough (but do press it out to the required thickness before frying).
- The ideal temperature for frying vetkoek is between 170°C to 180°C (or 340°F to 355°F). This allows the outside to form a golden crust and gives the inside time to cook through without absorbing too much oil. If the oil is too hot, the outside will brown too fast, leaving the inside raw; conversely, if the oil is not hot enough, the vetkoek will absorb too much oil and become greasy.
- If you don't have a thermometer, drop a small piece of dough into the oil. It should rise to the top and start bubbling gently. If it bubbles aggressively and starts to brown immediately, the oil is too hot; if it sinks to the bottom and doesn't bubble, the oil should be heated a little more.
- Don't overcrowd the pan when frying the vetkoek. They will swell up as the cook, and you need enough room to turn them easily.
- Cut a vetkoek in half to test whether it is done. It should be fully cooked with lots of air bubbles. If there is any raw dough in the centre, you should cook it for a few minutes longer.
Serving suggestions
The traditional way of serving vetkoek is to split them in half and fill them with curried mince. If you want to be a little more adventurous, try adding a spoonful of fruity chutney!
However, there are lots of other ways to serve them, both savoury and sweet:
Savoury fillings
- Chicken mayonnaise - combine shredded cooked chicken with mayonnaise, chopped spring onions and optionally a dash of hot sauce such as sriracha or tabasco.
- German meat salad - this salad is not only delicious when served in a crusty bread roll, but it also makes a great filling for a leftover vetkoek!
- Cheese and apricot jam - a combination of sweet and savoury (don't knock it til you've tried it 🙂 ). And if you don't like apricot jam, try it with cheese on its own!
Sweet ideas
- Instant doughnuts - make small vetkoek and roll the hot fried vetkoek in a mixture of cinnamon and sugar.
- Apricot jam - just leave out the cheese! There's something about apricot jam that just screams 'serve me on vetkoek'!
- Golden syrup or honey - the sweetness of the spread combined with the chewiness of the vetkoek has to be experienced!
I like to eat them warm from the frying pan, spread with a thick smear of butter!
Equipment
These are the main items of equipment you will need to make vetkoek:
- Mixing bowl - for mixing and kneading the dough.
- Stand mixer - this is optional, but it takes all the hard work out of kneading the vetkoek dough.
- Wok or large saucepan - or frying the vetkoek. I prefer using a wok as it tapers towards the base, meaning you don't need to pour in as much oil.
- Spatula -to help you turn the vetkoek in the frying pan.
Storage
Leftover vetkoek can be stored in an airtight container in the kitchen. They do go extra chewy when they are cold, so you can crisp them up in the air fryer (190C / 380F) for 5 minutes, or place them on a baking tray at the same temperature for 8 to 10 minutes.
You can also freeze vetkoek. Once cool, transfer them to a freezer bag and freeze for 2 to 3 months. Let them thaw at room temperature, then reheat either in the air fryer or in the oven as above.
You can also freeze the vetkoek dough.
- Let the dough complete the first rise, then punch it down and wrap it in cling film or transfer it to a freezer bag.
- Freeze, then use within a month for best texture and rise.
- Defrost overnight in the refrigerator, then leave it on the counter to come to room temperature before shaping and frying. You may need to sprinkle the dough with a little flour as it may be quite sticky and difficult to handle.
FAQ
Yes! Vetkoek can be made a day in advance and stored in an airtight container. Warm them in the oven or air fryer before serving to freshen them up.
For best results you should use a neutral-flavoured vegetable oil such as sunflower or rapeseed. Avoid olive oil as the smoke point is not high enough for the high temperature you need to fry vetkoek.
Vetkoek are neutral in flavour so they are well suited to both sweet and savoury fillings. See the section on 'serving suggestions' higher up the post.
Save for later
If you would like to try this recipe, why not save these 'how to make vetkoek' instructions to one of your Pinterest boards so you can find it easily. Just click the image below.
Alternatively, you can save the recipe by clicking on the floating heart icon on the right-hand side of the screen.
Related recipes
Visit my South African recipes page for other delicious ideas. Here are a few you might enjou

📋The recipe

How to make vetkoek
(Click the stars to rate this recipe)
Equipment
- Mixing bowl
- Stand mixer optional for kneading
- Wok OR
- Large saucepan for frying
- Spatula
Ask a Question
If you have a question about this recipe that has not been answered, please use the box below to ask it.
Use this with care. This is an AI-generated result and may contain errors or inaccuracies. I cannot be held responsible for the information returned.
Ingredients
- 2 cups / 280 grams plain or all-purpose flour
- 2 teaspoons / 7 grams dried instant yeast
- 1 cup / 240 ml lukewarm water approximately
- 1 teaspoon salt optional
- 1 teaspoon sugar optional
- Vegetable oil for frying
Instructions
- Tip the flour into a large mixing bowl, sprinkle the yeast on top and give it a bit of a mix. Then add the salt and sugar (if using). Don't let the yeast come into direct contact with the salt.2 cups / 280 grams plain or all-purpose flour, 2 teaspoons / 7 grams dried instant yeast, 1 teaspoon salt, 1 teaspoon sugar
- Add most of the water, give it a good stir until it all comes together, then knead for 10 to 15 minutes until you have a nice smooth elastic dough. You can use a food mixer with a dough hook to take all the hard work out of this. Add the reserved water only if necessary to form a soft dough.1 cup / 240 ml lukewarm water
- Once the dough has been kneaded, form it into a ball and transfer it to a clean bowl. Cover the bowl with cling film, place a towel over it to keep it warm, and leave it in a warm place for an hour to rise.
- After an hour, the dough should have more than doubled in size.
- Punch the dough down and knead it lightly. Break off golf-ball-sized pieces and press them into flat, oval shapes, approximately one-quarter of an inch in thickness.
- Heat about 2 inches of sunflower oil in a wok or a large saucepan. It will be hot enough when a small piece of dough 'sizzles' and rises to the top when you add it. Add the vetkoek in a single layer.Vegetable oil
- Fry the vetkoek in batches for 4 to 5 minutes per side, until puffed and golden. Use a spatula to help you turn the vetkoek. Once cooked, place them on a paper towel to absorb excess oil.
Notes
- Check the expiry date on the yeast. If the yeast is old, there is a chance that the vetkoek will not rise properly.
- If you are unsure, test the yeast by combining it with a couple of tablespoons of lukewarm water and a pinch of sugar. Let it stand for a few minutes.
- The yeast should have formed a froth on top. If it doesn't foam, it means your yeast is dead, and you should throw it away and buy a fresh batch.
- You can knead the dough by hand or use a stand mixer fitted with a dough hook.
- Don't add all of the water at once; keep a little aside. Depending on the strength of the flour you are using, you may not need all the water. If you find you need the extra water, add it a tablespoon at a time until you get a soft, smooth dough. On the other hand, if you find the dough is too sticky, you can add a little extra flour. The ratio is approximately 2 parts flour to 1 part water.
- The dough should rise for at least 1 hour, but if it is quite a cold day, you could leave it for longer. It won't come to any harm.
- I like to make smallish vetkoek (using golf-ball-sized pieces of dough); you may prefer larger vetkoek. It doesn't really matter how large you make them. What does matter is the thickness. If you make the vetkoek too thick, there is a danger that the outside will be lovely and golden, but the inside will still be raw and 'doughy'. I find that a 1 cm thickness (or just less than half an inch thickness) is about right.
- I like to pull the dough into shape using my hands for a more rustic look. If you want a neater appearance, you could use a cookie cutter to cut the dough (but do press it out to the required thickness before frying).
- The ideal temperature for frying vetkoek is between 170°C to 180°C (or 340°F to 355°F). This allows the outside to form a golden crust and gives the inside time to cook through without absorbing too much oil. If the oil is too hot, the outside will brown too fast, leaving the inside raw; conversely, if the oil is not hot enough, the vetkoek will absorb too much oil and become greasy.
- If you don't have a thermometer, drop a small piece of dough into the oil. It should rise to the top and start bubbling gently. If it bubbles aggressively and starts to brown immediately, the oil is too hot; if it sinks to the bottom and doesn't bubble, the oil should be heated a little more.
- Don't overcrowd the pan when frying the vetkoek. They will swell up as the cook, and you need enough room to turn them easily.
- Cut a vetkoek in half to test whether it is done. It should be fully cooked with lots of air bubbles. If there is any raw dough in the centre, you should cook it for a few minutes longer.
- Let the dough complete the first rise, then punch it down and wrap it in cling film or transfer it to a freezer bag.
- Freeze, then use within a month for best texture and rise.
- Defrost overnight in the refrigerator, then leave it on the counter to come to room temperature before shaping and frying. You may need to sprinkle the dough with a little flour as it may be quite sticky and difficult to handle.
Nutrition
I am not a nutritionist. The nutrition information has been calculated using an on-line calculator, and is intended for information and guidance purposes only. If the nutrition information is important to you, you should consider calculating it yourself, using your preferred tool.
If you made this recipe and enjoyed it, I'd love it if you could give me a star rating in the comments below. And if you'd like to get in touch, you can email me at [email protected]. I'd love to hear from you. And don't forget to subscribe to my mailing list so you can grab yourself a copy of my FREE COOKBOOK!
If you'd like to continue browsing, just click on this link to all my recipes.

Peter says
It's just as I remember it! Even my fussy British born husband wants me to make it more often . Lovely recipe.
VJ says
Hi Peter, Thanks for taking the time to comment. I'm so pleased your husband enjoyed the curry. You'll have to introduce him to some more of my South African recipes!
Angela says
Love this recipe! Tastes authentic and is a real family winner. I never have leftovers! And your quick and easy vetkoek recipe makes it even easier and tastes just as good as the one featured in this recipe.
VJ says
Hi Angela, so glad you liked the recipe - it's one of my favourites. For the benefit of other readers, the quick and easy vetkoek recipe you are referring to is the one made with 2-ingredient dough, and can be found on this link.
Lora Stiles says
Is there anywhere I can buy vetkoekke in the UK as my health only allows for me to cook them frozen in the oven. I also suffer from cateracts and hopefully will not have so long to wait to have them removed (sigh)
So i would love to buy vetkoekke in the UK please please
gratefully
Lora
VJ says
Hi Lora,
I'm afraid I've never seen frozen vetkoek for sale in the UK, so I'm unable to help you with that request. However, I have another vetkoek recipe on my site (quick and easy vetkoek) which are made with self-raising flour and Greek yoghurt and you can get away with shallow frying them. Perhaps that will help you. Hope you manage to get your cataracts sorted soon! x
Rene says
This turned out beautifully! I chose to omit potatoes, celery and carrots. It's a really authentic South African taste. Loved it.
craig Winterton says
As a novice cook, the Vetkoek turned out really well with the whole family asking for seconds. Will definitely try this again.
VJ says
Hi Craig
That's great. So pleased you enjoyed them. Thank you for letting me know. VJ x
Christel says
I baked your vetkoek recipe this morning and it came out perfectly.
It is really the best vetkoek recipe out there. I have tried numerous recipes but this one is by far the best.
Thank you for sharing your recipe.
VJ says
So glad they turned out well for you 🙂
Gerda says
I was at a party and everyone had to bring a 'plate' to share. A South African lady brought these delicious mince filled Vetkoek. So I looked on the net and found your recipe. They turned out just as yummy as hers were. Thanks and I will definitely try your other recipes.
VJ says
What a lovely compliment Gerda. Thank you - I hope you enjoy my other recipes.
Katherine says
This is such a tasty mince recipe and so versatile if you freeze the leftovers! Obviously I forgot to do this again - bad habit on my side??my mince was always same old same old but with this recipe it gave the mince a beautiful aroma right through the house!!! My brother-inlaw even commented on the delicious smell coming from inside when he came to visit!!!
VJ says
So glad you enjoyed it. It's nice to hear that my recipes are a success.
VJ says
Glad you enjoyed it Steve. It's one of my favourites too.
Steve says
Delicious, one of those you just don't want to stop eating.