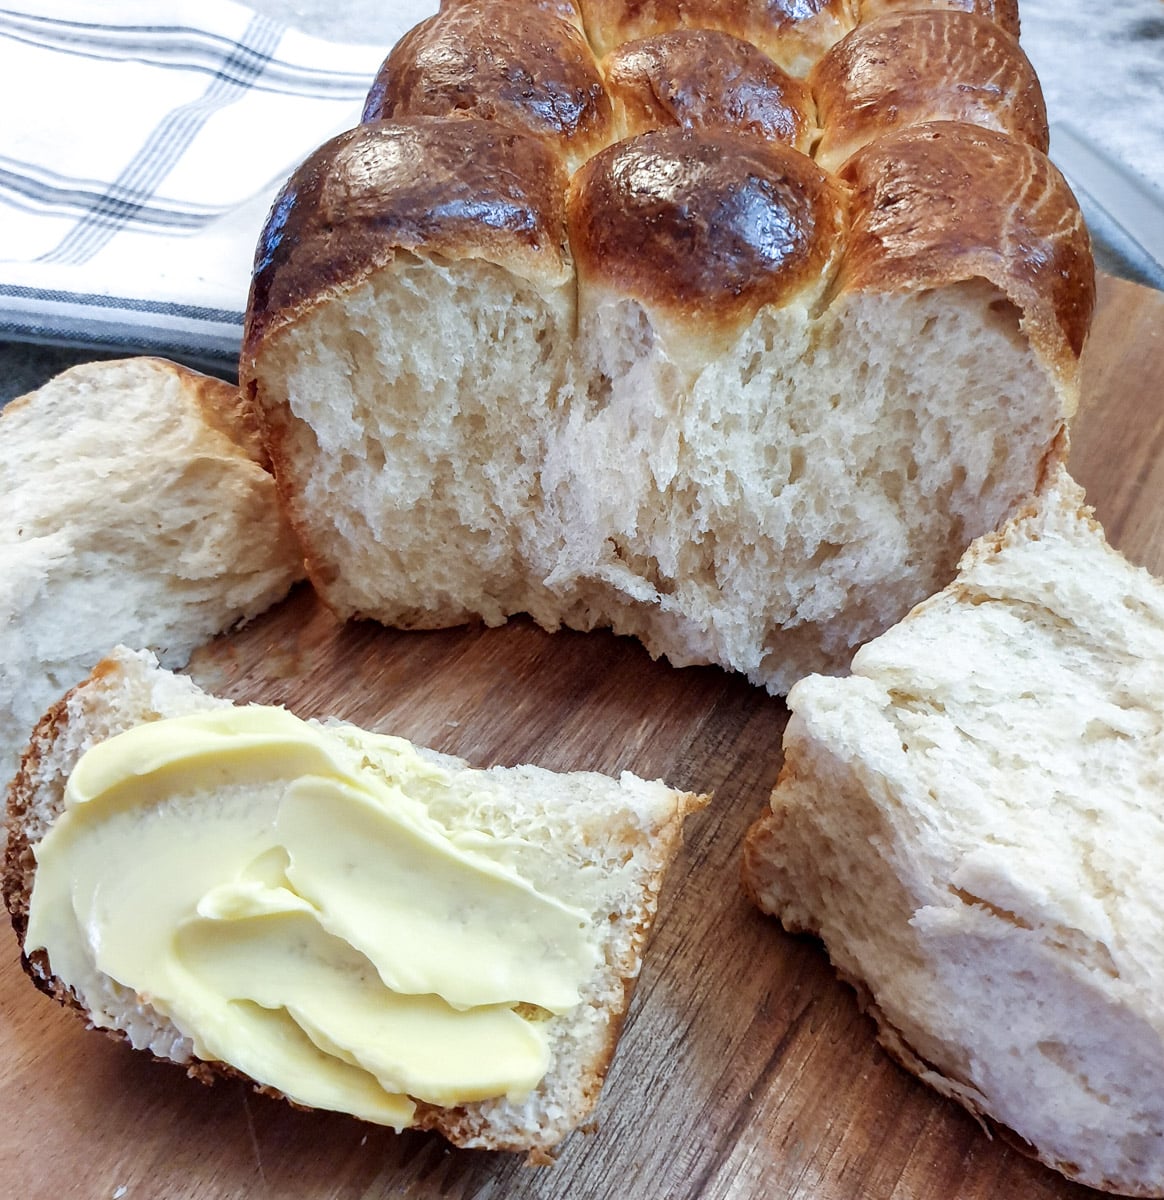
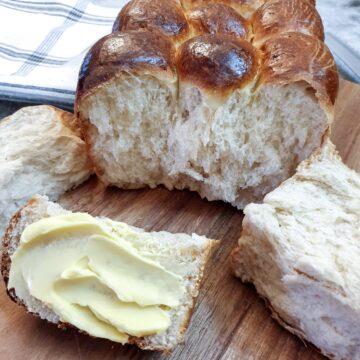
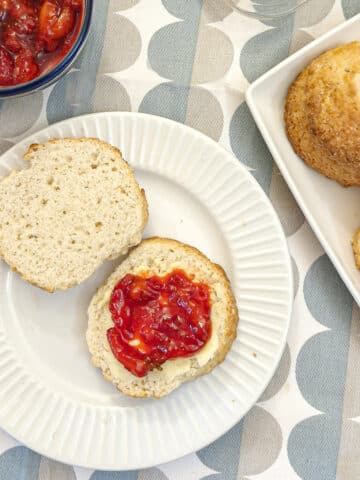
This recipe for condensed milk rusks is my version of the famous 'Mosbolletjies' or South African rusks. You can eat them soft and warm from the oven, smothered in butter, or you can dry them into a traditional hard crunchy rusk and dunk them in a cup of tea or coffee. Either way, they are delicious!
Jump to:
What are mosbolletjies (and what does it mean)?
Mosbolletjies (pronounced moss-boli-keys) are traditional South African rusks that can be enjoyed either warm and soft from the oven, or dried until they are hard and crispy and dunked into a cup of tea or coffee as a light breakfast or as a mid-morning snack.
The recipe originated from the French Huguenots who arrived in South Africa in the late 1600s and the texture of the soft (undried) mosbolletjies is very similar to a French brioche bun. Over the years, probably due to the fact that bread had to be preserved to prevent it from going mouldy, the recipe evolved to include drying out the baked dough into hard rusks.
However, even when dried, the texture is light and crispy, which enables coffee or tea to soak into the rusk with a quick dunk.
The word Mosbolletjies is an Afrikaans word made up of two words, mos and bolletjies. Mos is the word for 'must' or semi-fermented grape skins which are a by-product of wine production. The yeast spores on the grape skins were used as the leavening agent in the dough. Bolletjies simply translates to balls, probably because the dough was formed into ball shapes before being baked. Once dried (and hard) the mosbolletjies are known as mosbeskuit (mos-bes-kate), beskuit being the Afrikaans word for rusks.
Another couple of interesting facts, before we get onto the recipe, is that in Germany a similar recipe for rusks is known as zweiback, or twice-baked, referring to both the initial baking in the oven and the second drying-out process. And in Italy they make these yummy almond biscotti - biscotti also meaning twice-baked.
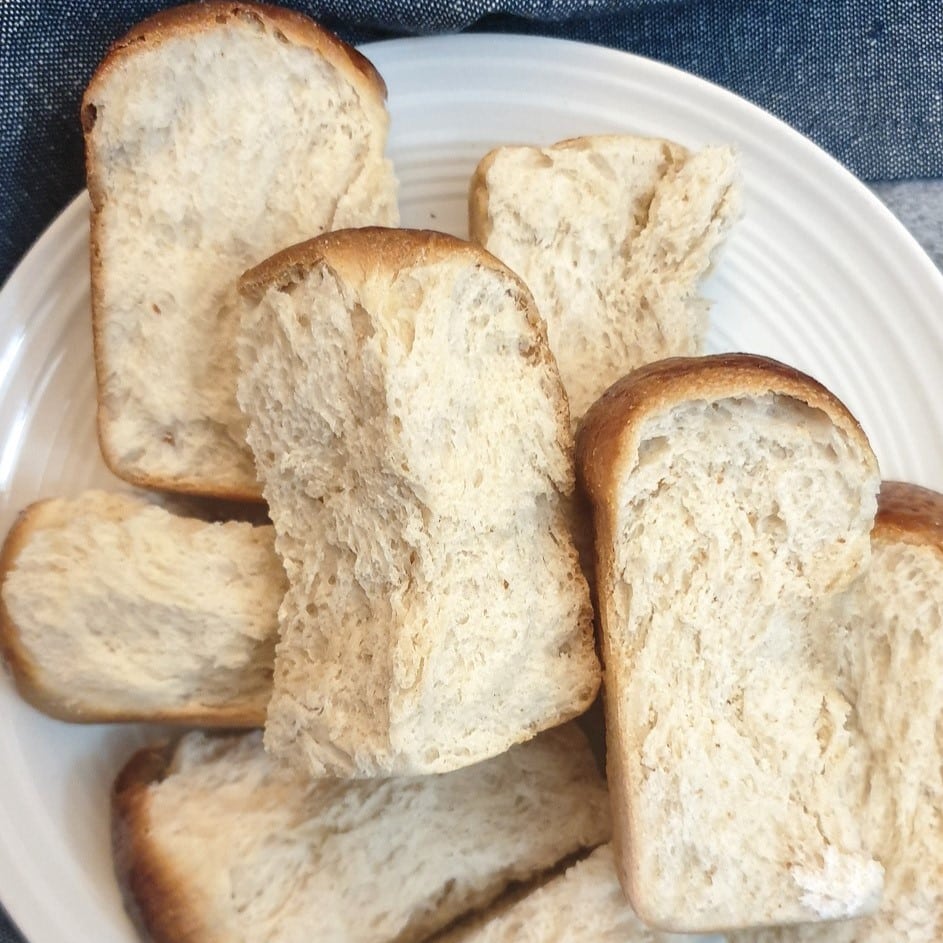
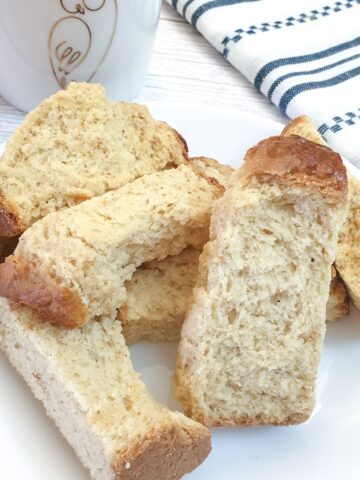
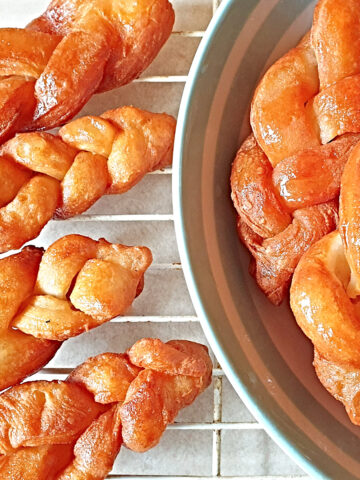
This is how the rusks look once they've been dried.
I first learned how to make these rusks more than 50 years ago from my late mother-in-law who taught me how to knead the dough by hand. Luckily times have changed and we now have stand-mixers to take all the hard work out of the process!
Over the years I've adapted the recipe to include condensed milk, which I think adds an extra touch of sweetness. I don't think condensed milk was even thought of when this recipe first originated - but that's progress for you 🙂 .
Let me show you how to make my version of condensed milk rusks.
What you will need
Equipment
I would heartily recommend a stand mixer. You can get away with kneading by hand, but it will take between 15 and 20 minutes of hard work, whereas the stand-mixer can have these rusks kneaded and ready to proof in less than 10 minutes.
If you don't have a stand mixer you will need a large mixing bowl. I like to use a old-fashioned earthenware mixing bowl which is large enough for to hold all the ingredients.
You will also need a couple of large loaf tins for baking the rusks.
Ingredients
This recipe will make about 25 mosbolletjies, each of which can be cut into 3 pieces to make approximately 75 rusks. However, this will depend on how many of the soft rolls you eat before you dry them 🙂 .
**You can get the complete list of ingredients and full instructions for making your own condensed milk rusks (mosbolletjies) on the printable recipe card at the end of this post**

Flour - this is plain all-purpose flour. If you live in South Africa you can use cake flour. We want a nice light texture for these rusks and strong or bread flour will be too heavy.
Condensed milk - for this recipe, you will only need half a tin. The normal-sized condensed milk can is 397 grams (or 14 ounces), so for this recipe, you will need half of that which is about 200 grams (or 7 ounces).
Butter - use unsalted butter if possible - this recipe does include salt so you don't want to overdo the saltiness. The butter should be very soft, at least at room temperature, to make it easy to knead into the flour.
Sugar - granulated sugar is fine. You can use caster sugar if you prefer.
Eggs - I used medium-sized eggs.
Yeast - I used instant yeast. If you would prefer to use fresh yeast you will need twice as much fresh yeast by weight.
Salt - you don't need a lot of salt, but between half and one teaspoon does improve the flavour of the rusks. Use to your own taste.
Water (not pictured) - this should be lukewarm - about the temperature you would use to bathe a baby.
What to do
Because these rusks are made with yeast they will need a few hours for proofing (rising) and you should take this into account.
This is a breakdown of the timings. It does seem a long time, but most of the time is hands-off, and believe me, once you've tasted one of these condensed milk rusks you'll find it was worth the wait!
- Test the yeast (optional) - 5 minutes
- Knead the dough - 10 minutes in stand mixer / 20 minutes by hand
- First proof - 2 hours
- Form rusks into balls and place in a baking pan - 10 minutes
- Second proof - 1 to 2 hours minimum (I actually ran out of time and left mine overnight)
- Bake the rusks - 30 minutes - depending on the size of your baking tin
- Dry the rusks - 3 to 4 hours in a dehydrator or overnight in a very cool oven.
I always like to test my yeast before baking with it, just to make sure it hasn't gone stale. There's not much worse than spending hours making a recipe only to find out it didn't work properly because the yeast didn't rise.
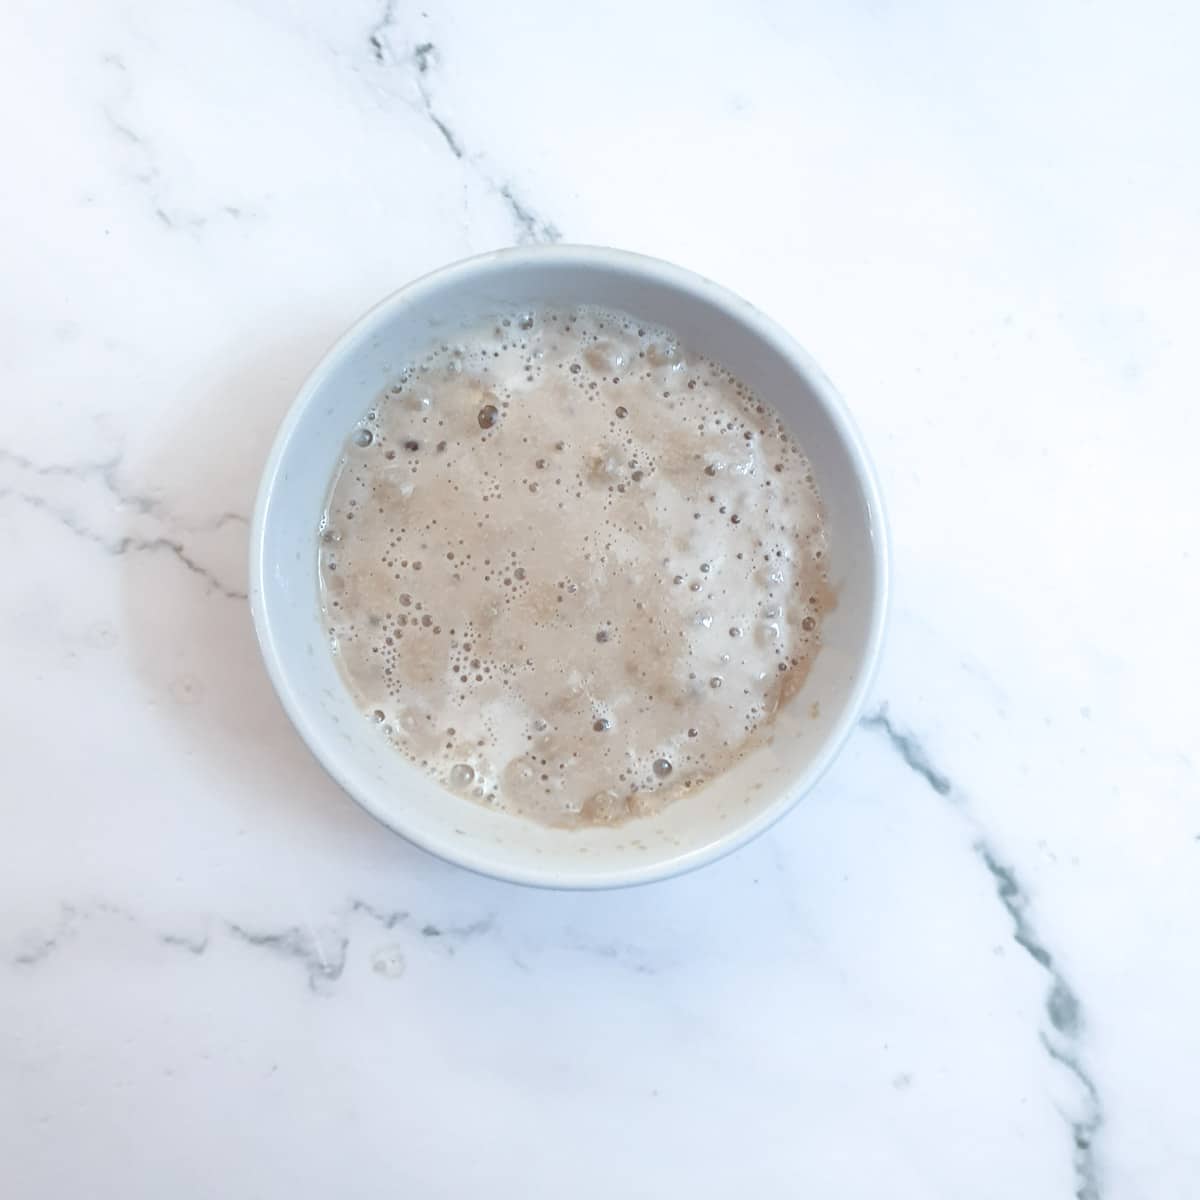
To test your yeast, place it into a small bowl with a teaspoon of the sugar (from the recipe) and add one or two tablespoons of lukewarm water (also from the recipe ingredients). Leave the yeast to stand for a few minutes until it becomes frothy.
If the yeast doesn't froth then it's probably time to get some fresh!
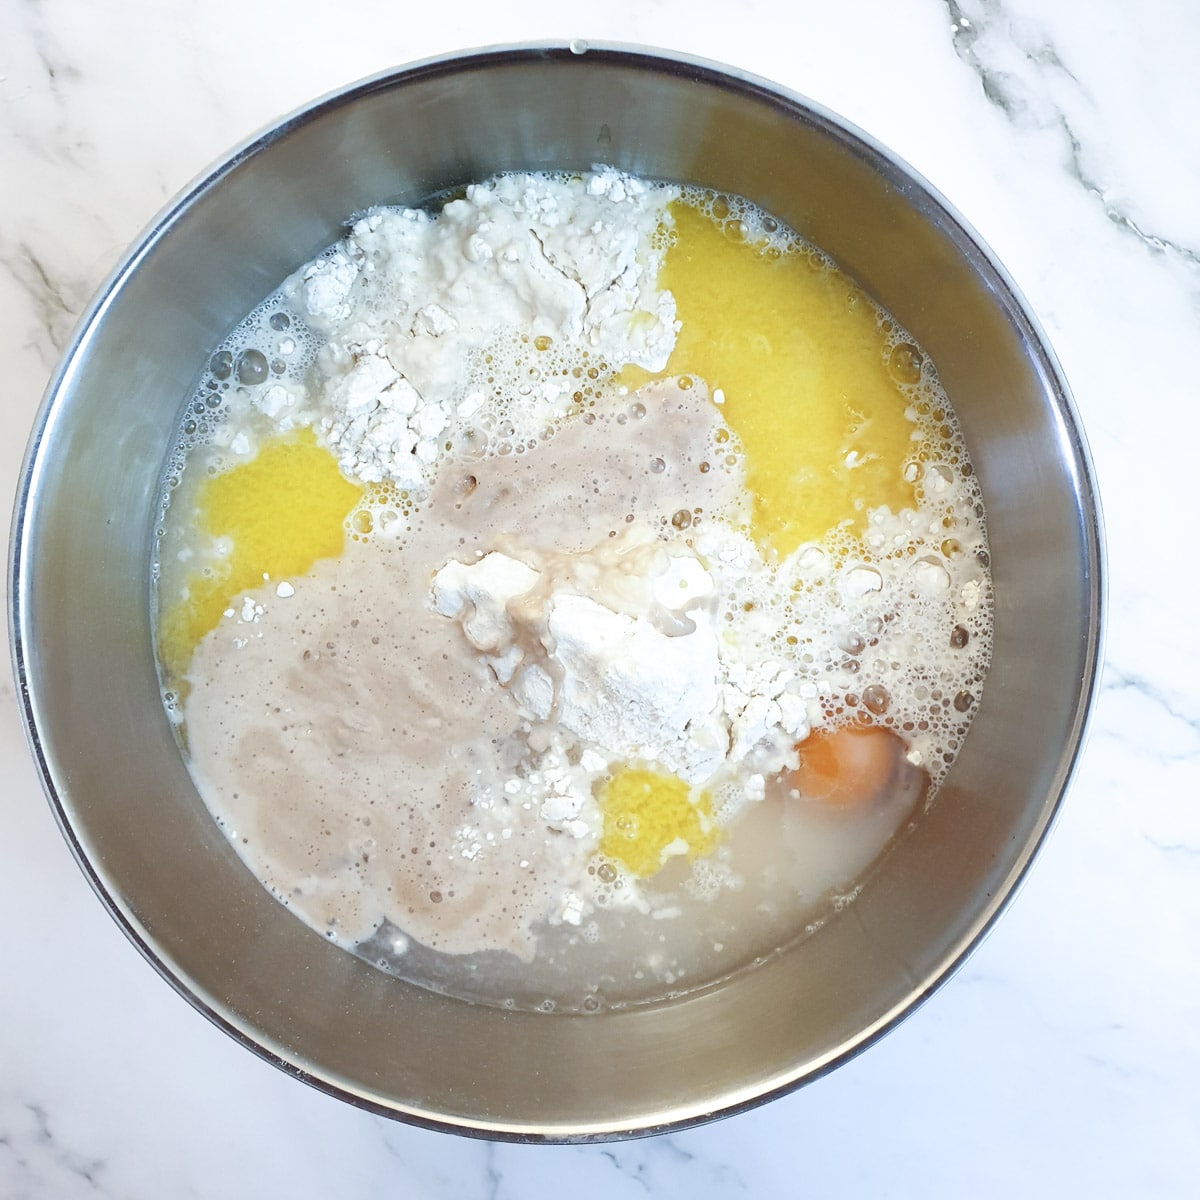
Place all the ingredients (including the yeast) and most of the water, into a large mixing bowl or the bowl of your stand mixer.
The reason we don't add all of the water at once is that it depends on the strength of the flour as to the actual amount of water you will need. If you add all the water at once and the dough becomes too sticky, you can't take the water out again.
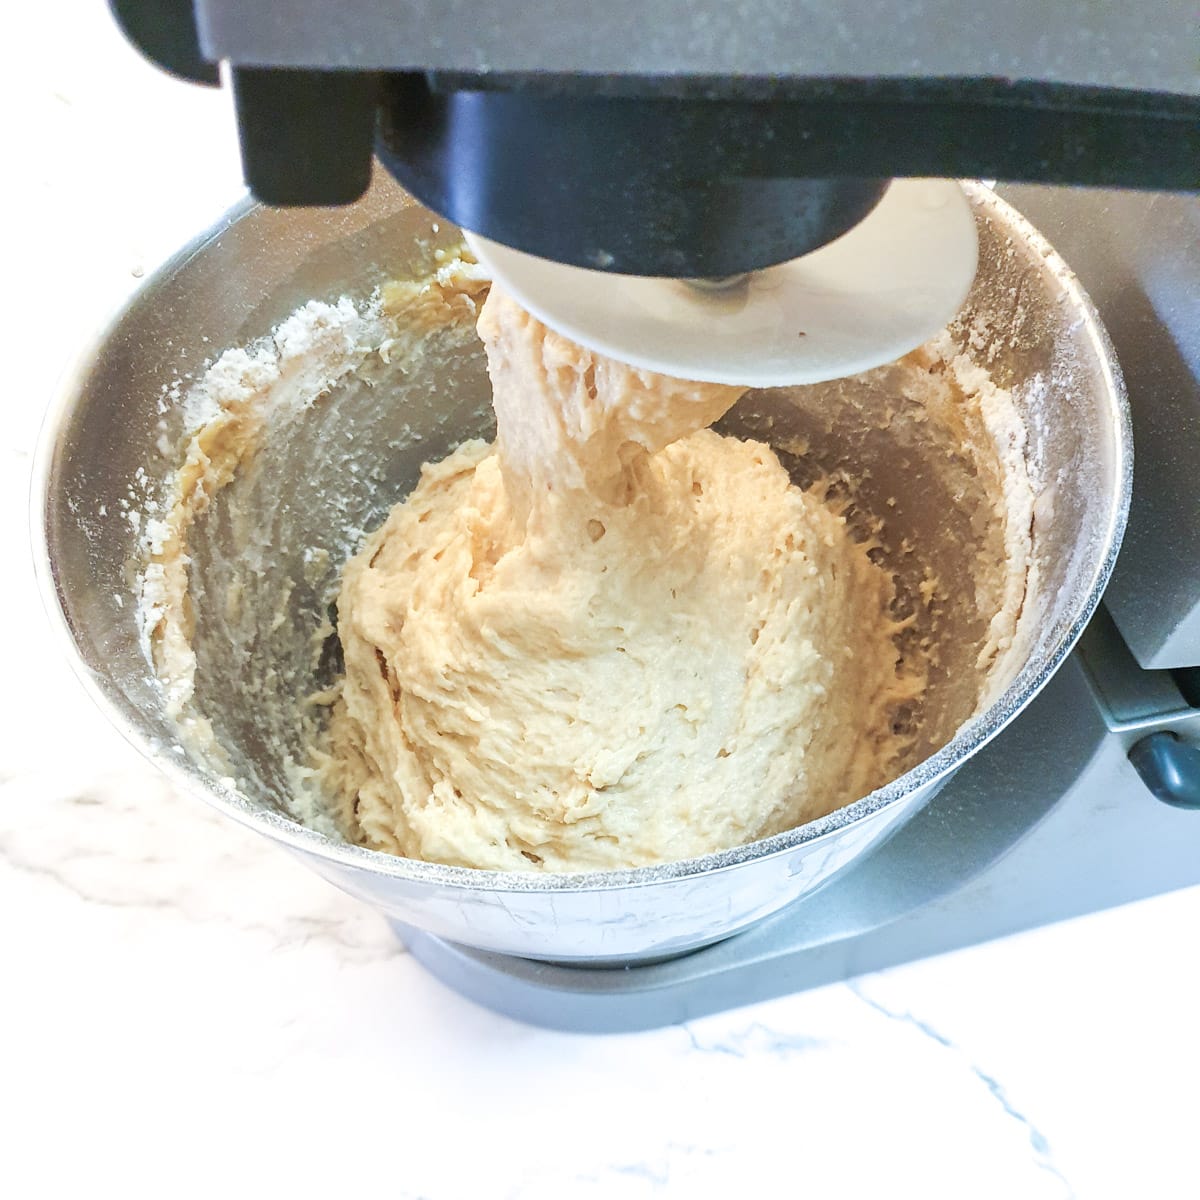
Fit the dough hook into your stand-mixer and knead first on low speed (2 minutes) to combine the ingredients, and then on high speed for 7 to 8 minutes until the dough is smooth and elastic.
If the dough seems too dry, add the remaining water.
See below for instructions on how to knead the dough by hand.
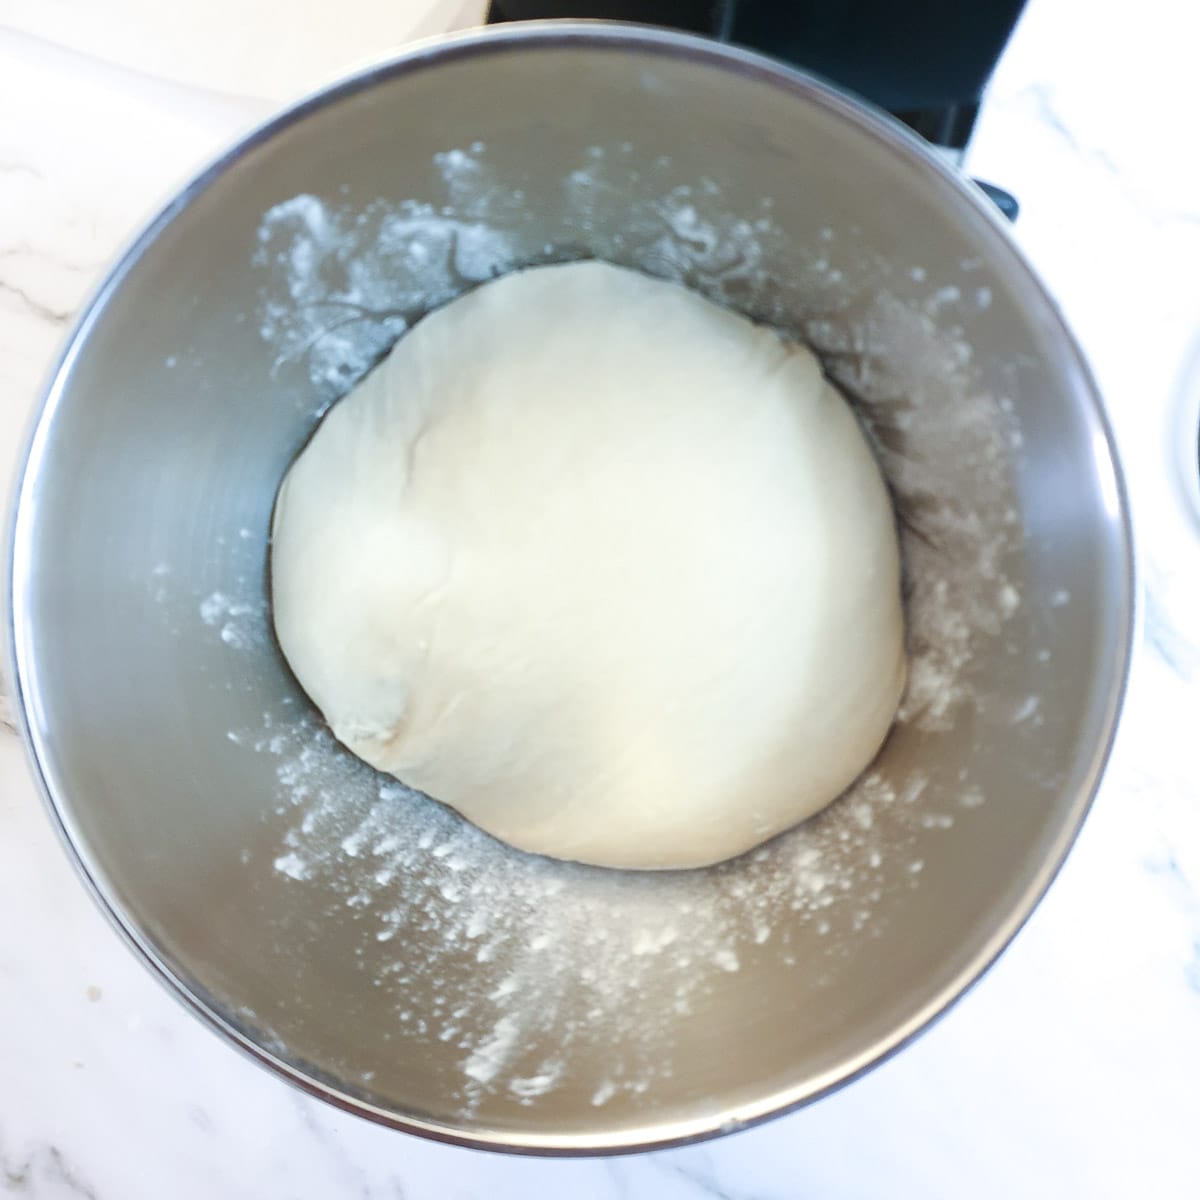
Once the dough has been kneaded, shape it into a smooth ball, and place it in a lightly floured bowl. Cover the bowl with a clean towel and leave the bowl in a warm draught-free place for 2 hours to allow the dough to rise.
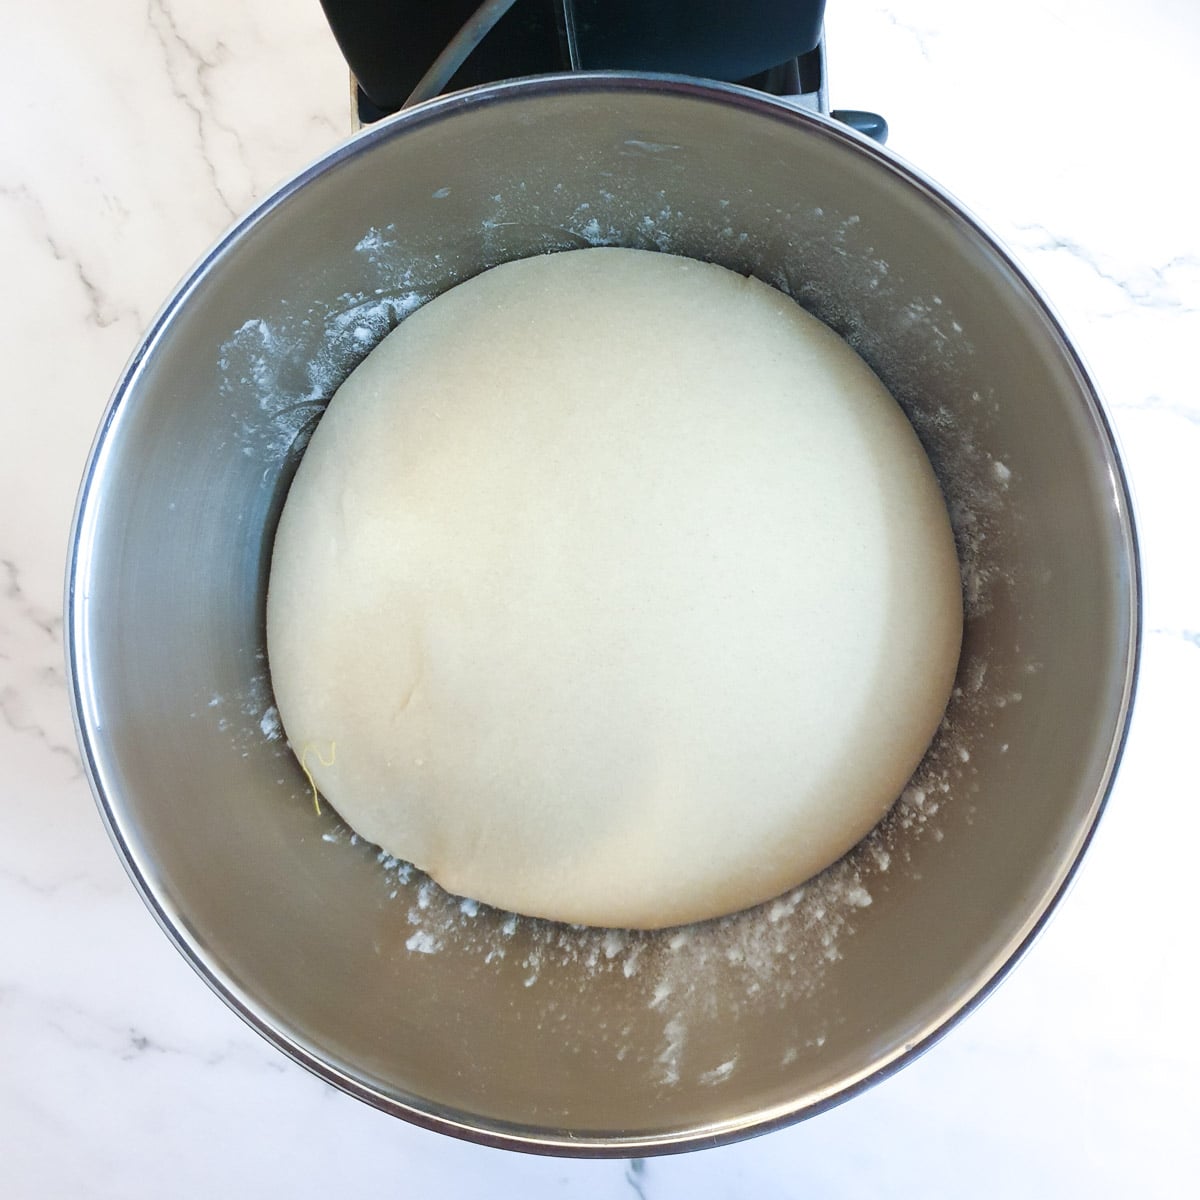
After 2 hours, the dough should have doubled in size.
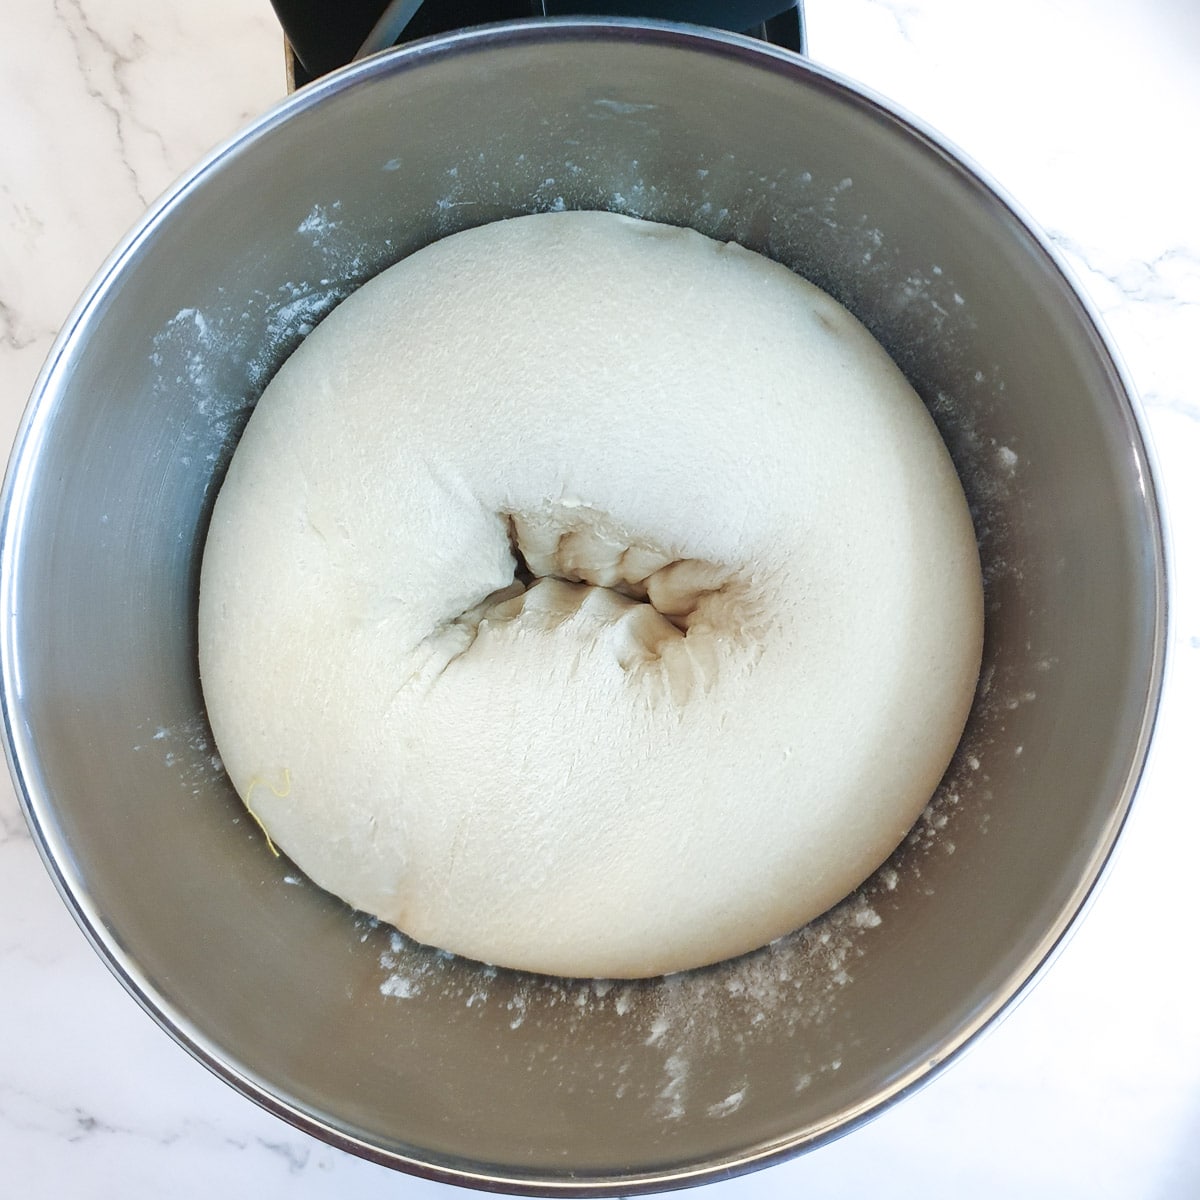
Knock the dough down by punching it with your fist, then knead it lightly.
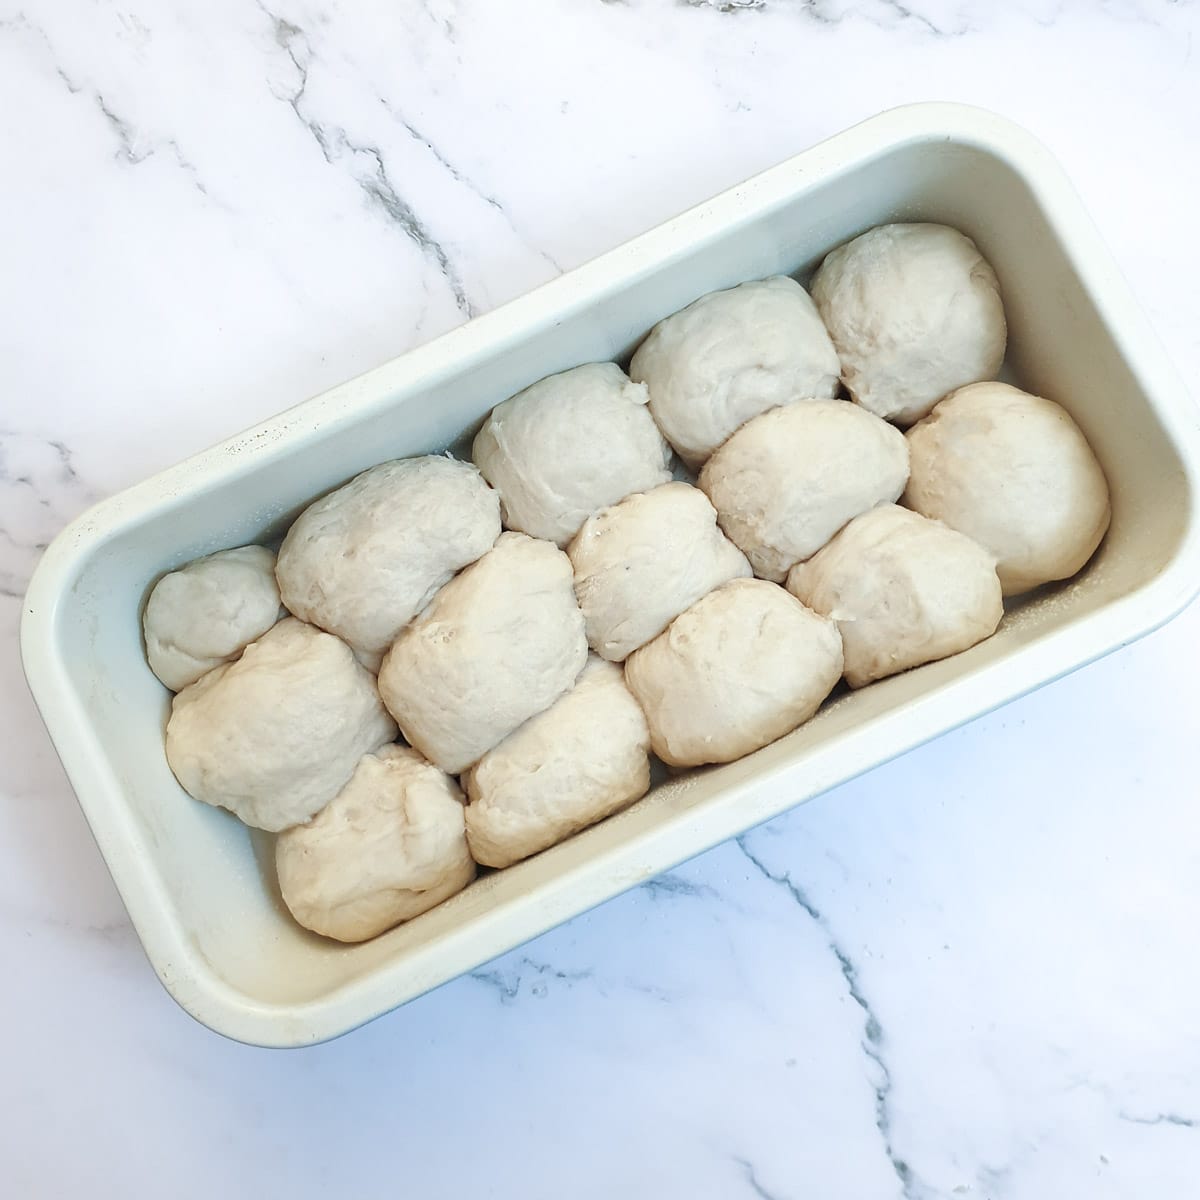
Divide the dough into 25 to 30 reasonably even-sized balls (larger than a golf ball, but smaller than a tennis ball) and pack them tightly into a large lightly greased loaf tin. I used 2 tins.
Cover the tins with a clean towel and leave them in a warm place to rise. This will take at least another 2 hours, but it doesn't matter if you leave them longer.
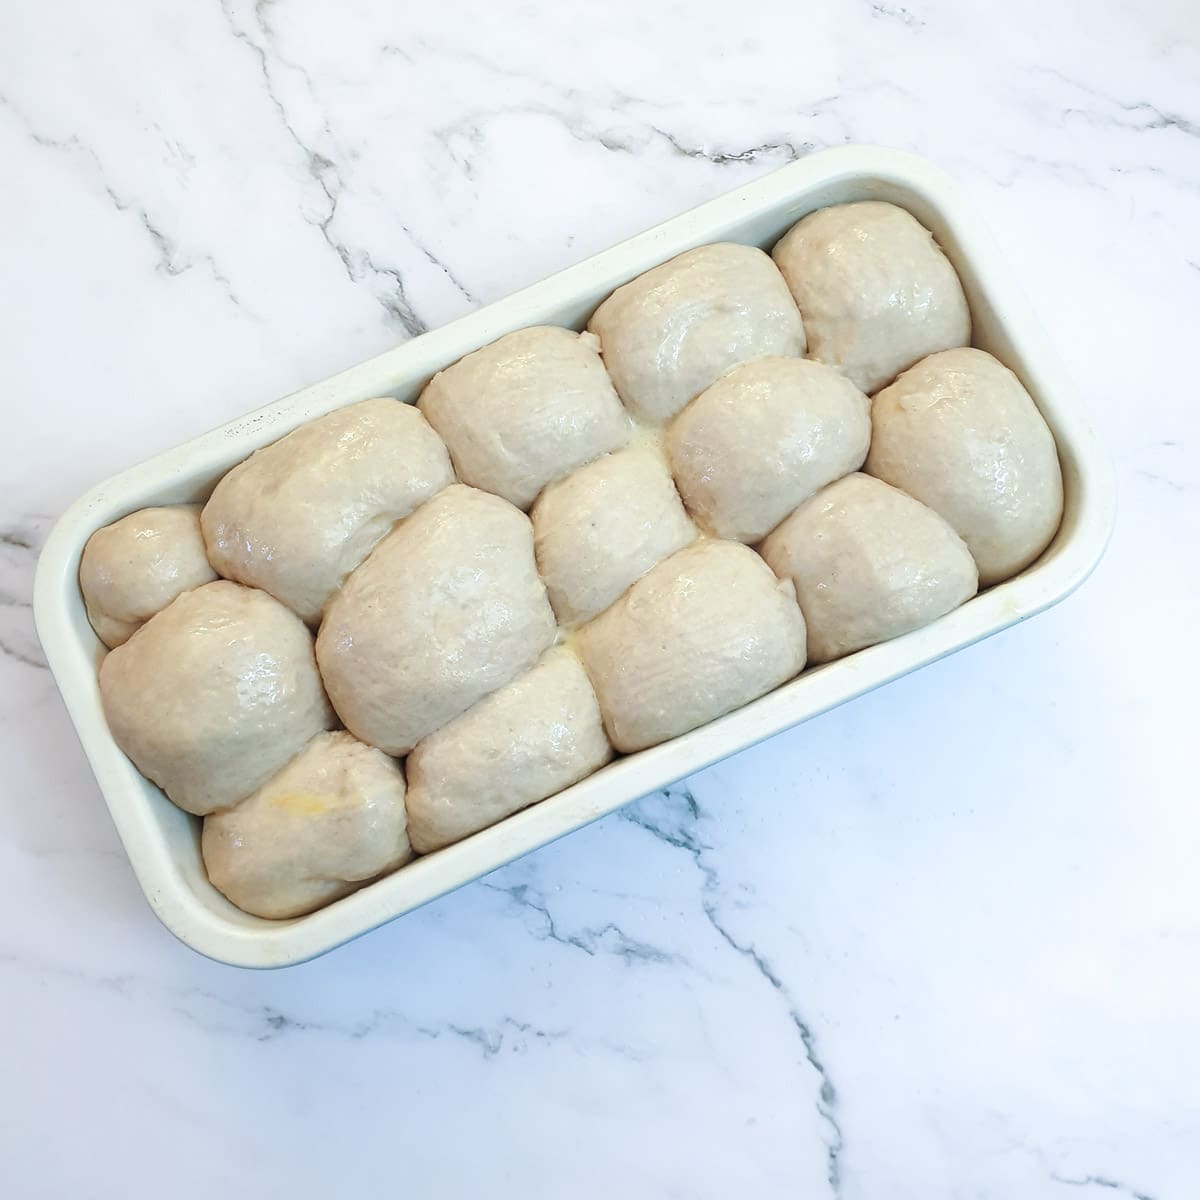
They should have approximately doubled in size.
Brush the top of the dough balls with lightly beaten egg to ensure they brown nicely.
Bake at 175C / 350F for 30 - 35 minutes until the rusks are golden brown.
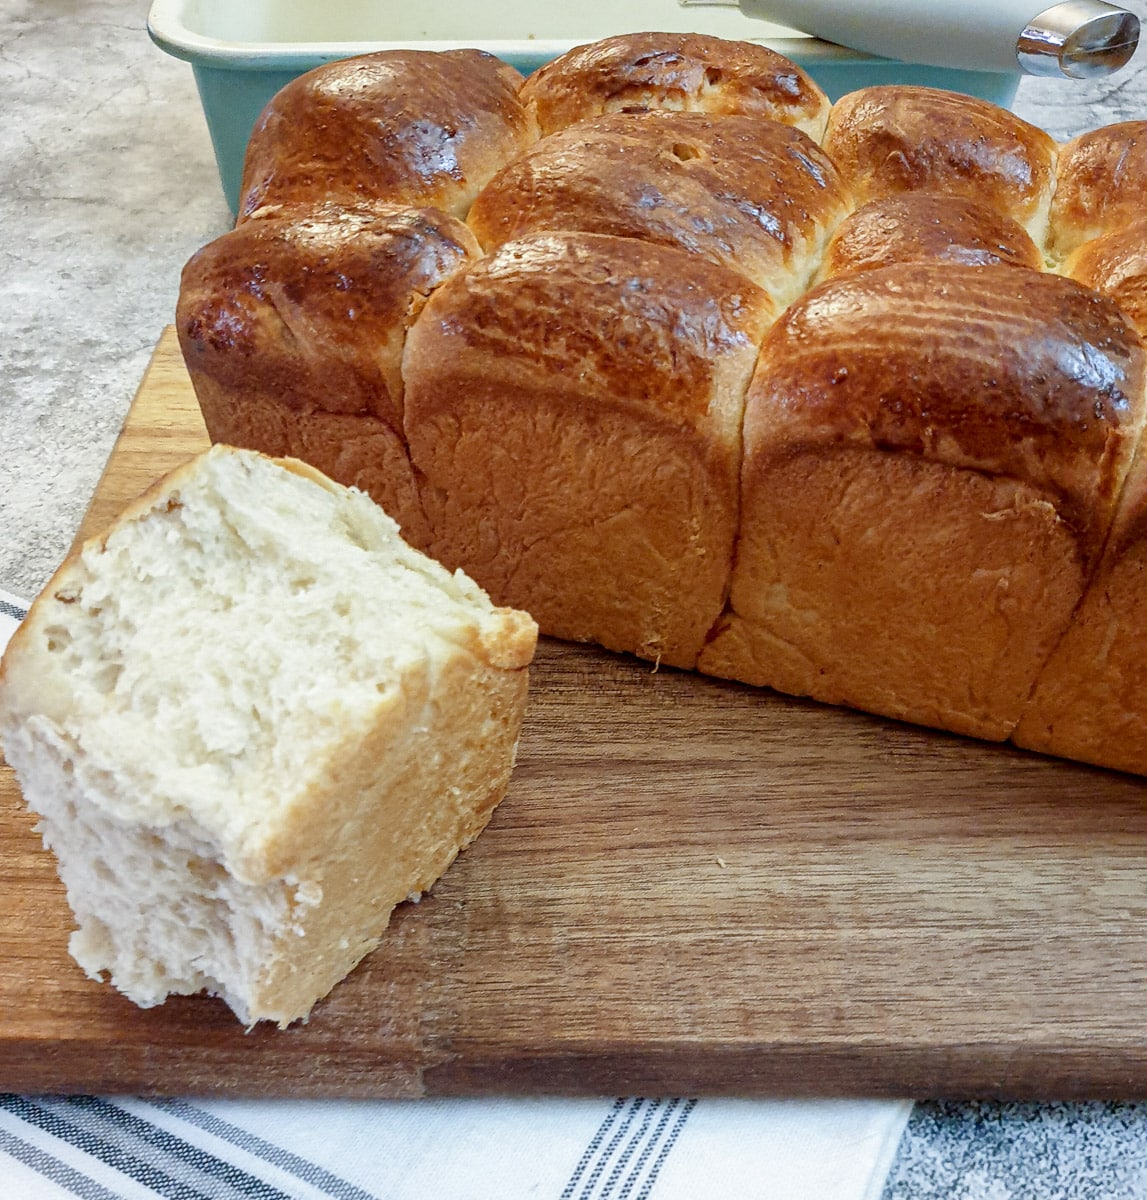
Remove the condensed milk rusks from the baking pan as soon as they are cool enough to handle, and let them cool further on a wire tray. This will prevent the rusks from 'sweating' in the baking tin.
Once the rusks have cooled, break pieces off, smother in butter (and jam or honey if you are so inclined) and enjoy the soft rusks warm.
How to dry the mosbolletjies
If you would like to dry the condensed milk rusks so that you can enjoy dunking them in your coffee, you can use a dehydrator or simply use your oven. The initial steps are the same no matter which method of drying you choose.
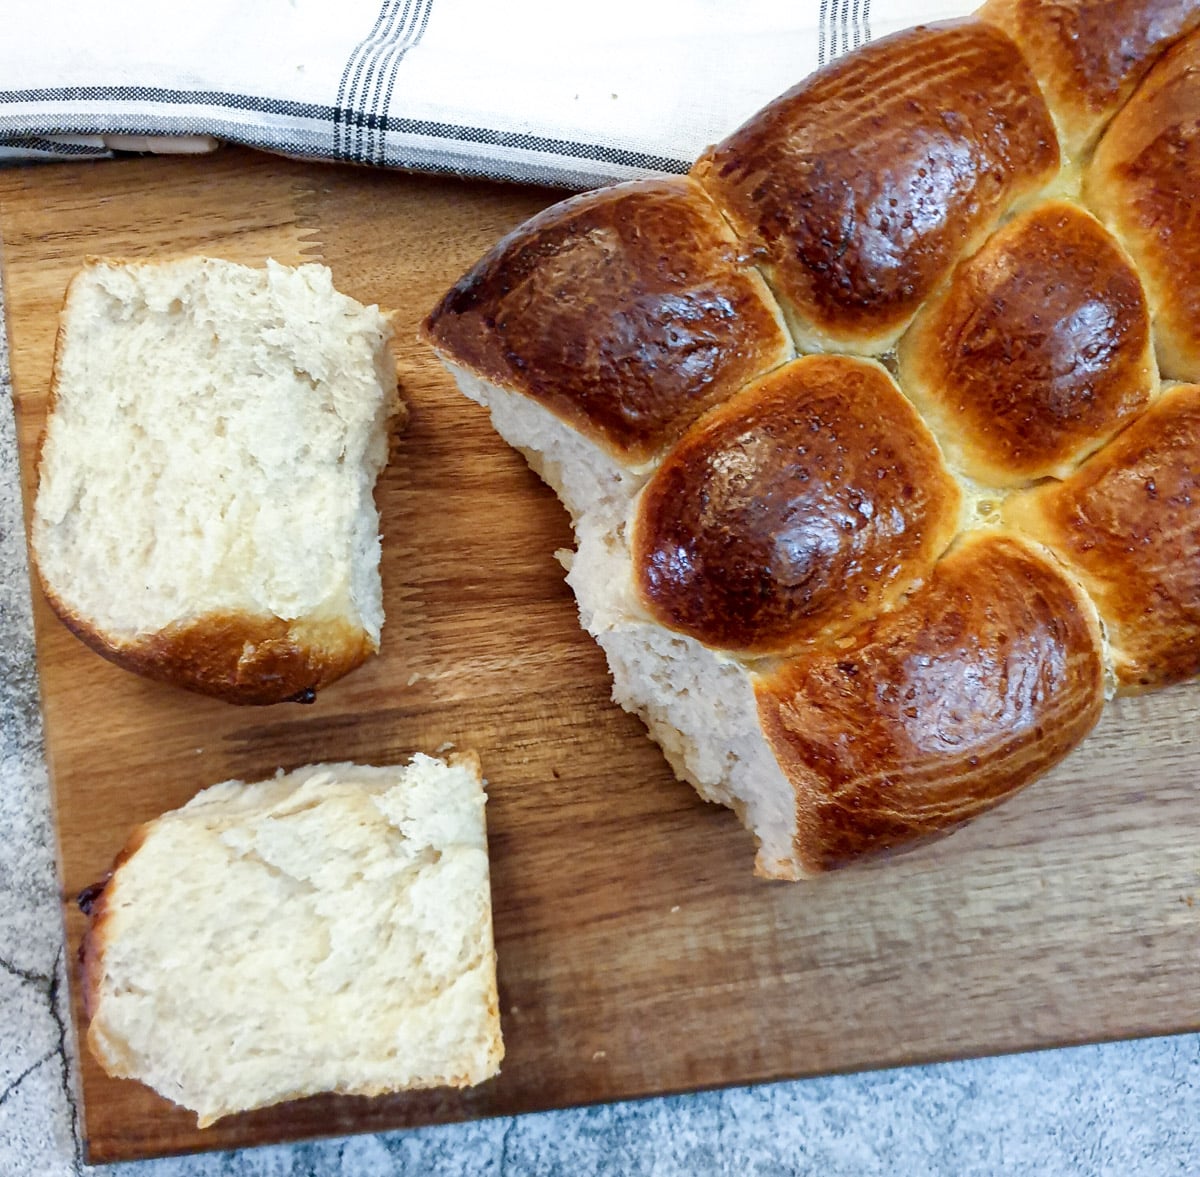
- Cut the rusks into slices. I normally break the rusks into pieces along the joins between the individual balls.
- Slice off one-third of the ball (top to bottom), then cut the remaining piece in half - this will give you three rusks per ball.
- If you've made larger balls you can simply cut them into 4 pieces.
- Alternatively, if your balls are quite small you may want to dry them without cutting them into smaller pieces.
I used the dehydrate function on my air-fryer oven to dry the rusks. It's a lot faster than drying them in the oven.
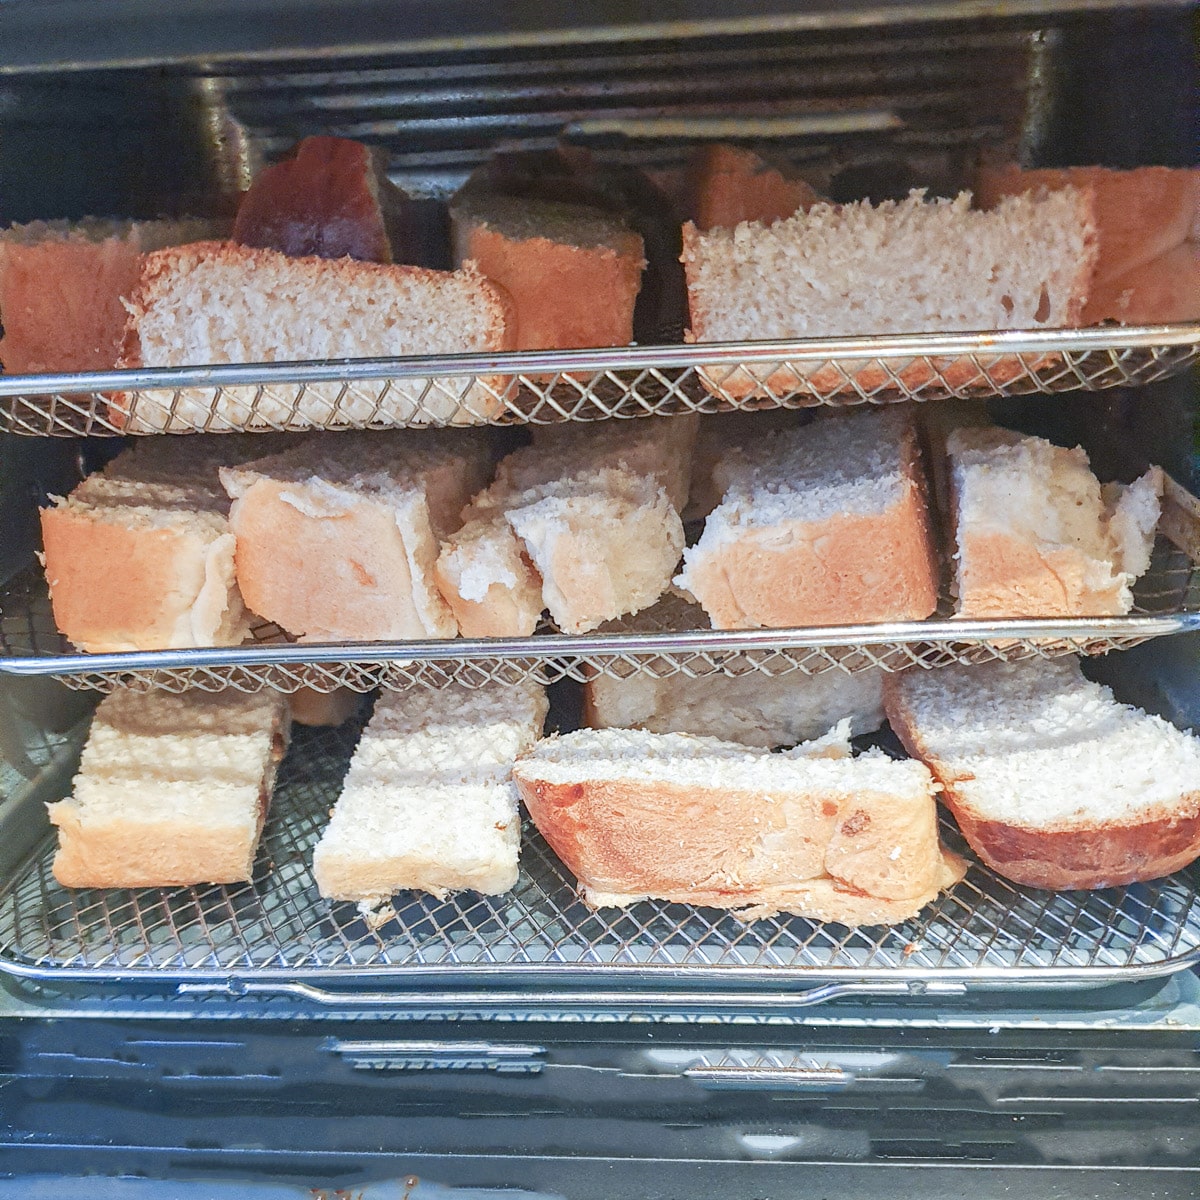
Set the air-fryer temperature to 80C / 175F and set the timer for 4 hours.
The dried rusks should be completely firm with no 'give' if you press one gently between your fingers. If they are not completely dried out leave them in the dehydrator for another half an hour or so.
To dry the rusks in the oven - arrange the cut rusks on the wire racks (so the heat can circulate) of your oven and dry them overnight at 70C / 160F. If you line the bottom of your oven with a sheet of tinfoil it will help to catch the crumbs!
Store the rusks in an airtight tin. They will stay fresh for several weeks.
If you'd like to be notified of new recipes, why not subscribe to my newsletter? To say thank you, you will receive a free recipe e-book containing some of my most popular cakes and desserts.
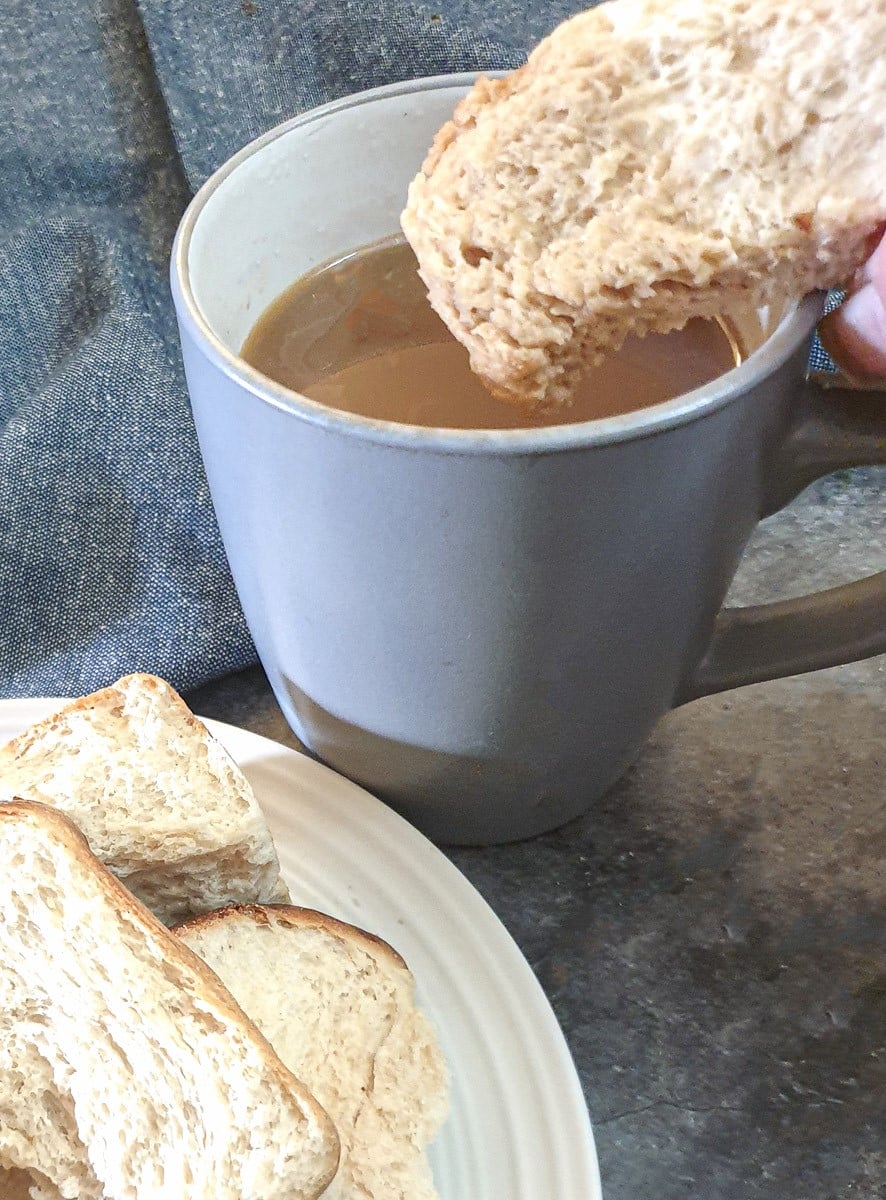
I have to admit it. A dried rusk dunked into a cup of coffee is one of my favourite breakfasts!
Condensed milk rusks FAQ
Some people like to glaze the top of the rusks with a mixture of one tablespoon of sugar dissolved in 3 tablespoons of warm water. If you would like to do this, you should brush the sugar glaze onto the rusks as soon as they come out of the oven, while they are still warm.
While mosbolletjies traditionally do contain aniseeds, I don't particularly like the flavour, so I've left it out. If you want to add aniseed to your rusks you can add 3 tablespoons of aniseed at the mixing stage.
I wouldn't freeze the rusks once they have been dried. They stay fresh for ages, so there's not much point in freezing them.
However, if you want to enjoy freshly baked (soft) mosbolletjies for breakfast, you can freeze the dough once it has been shaped and allowed to rise. Wrap the risen dough balls (in the baking tin) in a layer of tinfoil and then one or two layers of cling wrap. Freeze for up to 6 months.
To use, take out of the freezer the night before, leave the rolls in the fridge to defrost overnight and then bake according to the recipe instructions.
If you intend to do this I would recommend using disposable baking tins.
When you knead the dough, you are essentially stretching the gluten in the flour which will form the structure of the baked product.
Once you have combined all the ingredients, and the dough has started to come together into a ball, remove it from the mixing bowl and place it onto a floured surface.
Press down with the heel of your hand and at the same time press forwards with your hand for a few inches to stretch the dough away from you. Pull the dough back onto itself and repeat the movement.
Give the dough a quarter turn after every few stretches and repeat until the dough is pliable, smooth and elastic.
It will take between 15 and 20 minutes of hand kneading to get the dough in this recipe to the right consistency.
These rusks taste pretty much the same as the ones you buy in the shops. Amazon stocks a whole range of Ouma rusks which were the preferred brand when I lived in South Africa. I have to say though, it's a lot cheaper to make your own 🙂 .
Save for later
If you would like to try your hand at making these condensed milk rusks why not save the recipe to one of your Pinterest boards so you can find it easily? Just click on the image below.
Alternatively, you can save the recipe by clicking on the floating heart icon on the right-hand side of the screen.
Related recipes
If you enjoy this recipe you may want to try some of these easy recipes too:
You can find these and many more recipes on my South African recipes page.
📋The recipe
Condensed milk rusks (mosbolletjies)
(Click the stars to rate this recipe)
Equipment
- Stand mixer or
- Large mixing bowl
- Large loaf tins
- Air-fryer oven to dehydrate (optional)
Ask a Question
If you have a question about this recipe that has not been answered, please use the box below to ask it.
Use this with care. This is an AI-generated result and may contain errors or inaccuracies. I cannot be held responsible for the information returned.
Ingredients
- 8 cups / 1120 grams plain all-purpose flour
- 7 ounces / 200 grams condensed milk
- 4½ ounces / 125 grams butter at room temperature
- 4½ ounces / 125 grams sugar
- 2 medium eggs
- 2 teaspoons / 7 grams instant yeast
- ½ teaspoon salt or to taste
- 2 cups / 480 ml luke-warm water
Instructions
- The oven should be preheated to 175°C / 350°F, however - wait until you are almost ready to put the rusks in the oven before preheating it.
- To test your yeast, place it into a small bowl with a teaspoon of the sugar (from the recipe) and add one or two tablespoons of lukewarm water (also from the recipe ingredients). Leave the yeast to stand for a few minutes until it becomes frothy. If the yeast doesn't froth then it's probably time to get some fresh!2 teaspoons / 7 grams instant yeast
- Place all the ingredients (including the yeast) and most of the water into a large mixing bowl or into the bowl of your stand mixer.The reason we don't add all of the water at once is that it depends on the strength of the flour as to the actual amount of water you will need. If you add all the water at once and the dough becomes too sticky, you can't take the water out again.8 cups / 1120 grams plain all-purpose flour, 7 ounces / 200 grams condensed milk, 4½ ounces / 125 grams butter, 4½ ounces / 125 grams sugar, 2 medium eggs, ½ teaspoon salt, 2 cups / 480 ml luke-warm water, 2 teaspoons / 7 grams instant yeast
- Fit the dough hook into your stand-mixer and knead first on low speed (2 minutes) to combine the ingredients, and then on high speed for 7 to 8 minutes until the dough is smooth and elastic.If the dough seems too dry, add the remaining water.See the notes below for how to knead the dough by hand.
- Once the dough has been kneaded, shape it into a smooth ball, and place it in a lightly floured bowl. Cover the bowl with a clean towel and leave the bowl in a warm draught-free place for 2 hours to allow the dough to rise. It should double in size.
- Knock the dough down by punching it with your fist, then knead it lightly.
- Divide the dough into 25 to 30 reasonably even-sized balls (larger than a golf ball, but smaller than a tennis ball) and pack them tightly into a large lightly-greased loaf tin. I used 2 tins.
- Cover the tins with a clean towel and leave them in a warm place to rise. This will take at least another 2 hours, but it doesn't matter if you leave them longer. The dough should double in size.
- Brush the top of the dough balls with lightly beaten egg to ensure they brown nicely.Bake at 175C / 350F for 30 - 35 minutes until the rusks are golden brown.
- See the notes section for instructions for drying the rusks.
Notes
Once you have combined all the ingredients, and the dough has started to come together into a ball, remove it from the mixing bowl and place it onto a floured surface.
Press down with the heel of your hand and at the same time press forwards with your hand for a few inches to stretch the dough away from you. Pull the dough back onto itself and repeat the movement.
Give the dough a quarter turn after every few stretches and repeat until the dough is pliable, smooth and elastic.
It will take between 15 and 20 minutes of hand kneading to get the dough in this recipe to the right consistency. Variations: If you would like to glaze the rusks with a sugar syrup once they have baked, dissolve 1 tablespoon of sugar in 3 tablespoons of warm water and brush this on top of the rusks once they come out of the oven. For an aniseed-flavoured rusk, add 3 tablespoons of aniseed (or to your own taste) to the mixture before mixing. How to dry the mosbolletjies If you would like to dry the rusks so that you can enjoy dunking them in your coffee, you can use a dehydrator or simply use your oven. The initial steps are the same no matter which method of drying you choose.
-
- Cut the rusks into slices. I normally break the rusks into pieces along the joins between the individual balls.
-
- Slice off one-third of the ball (top to bottom), then cut the remaining piece in half - this will give you three rusks per ball.
-
- If you've made larger balls you can simply cut them into 4 pieces.
-
- Alternatively, if your balls are quite small you may want to dry them without cutting them into smaller pieces.
Nutrition
I am not a nutritionist. The nutrition information has been calculated using an on-line calculator, and is intended for information and guidance purposes only. If the nutrition information is important to you, you should consider calculating it yourself, using your preferred tool.
Jen says
My ouma taught me to make the balls by filling one hand with dough and then squeezing it in a fist tight enough until the dough came out in a ball between the thumb and forefinger. 🙂 The size of the ball can be controlled by the amount of dough allowed to escape by the squeeze.
VJ says
Good tip - thanks for sharing!
Lynn Nrink says
Love your version of mossbolletjies. Gonna give them a go for sure! Dankie!
VJ says
My plesier! Hope you enjoy them!