Blinis make the BEST party appetisers. They are quick to cook and the best part is that you can put out individual bowls of toppings and let your guests make their own appetisers. Party sorted! If you'd like make your own blinis, read on and follow my easy instructions on how to make blinis yourself.
**As an Amazon affiliate, I earn from qualifying purchases.**
Jump to:
What are blinis?
Blinis are simply bite-sized Russian pancakes made by frying spoonfuls of yeast-based batter in a blini pan or a frying pan until they turn golden brown and bubbly.
The yeast in the batter causes hundreds of tiny bubbles to rise up during the cooking process, making the texture of a blini spongy and soft, with a crispy rim thanks to the hot oil.
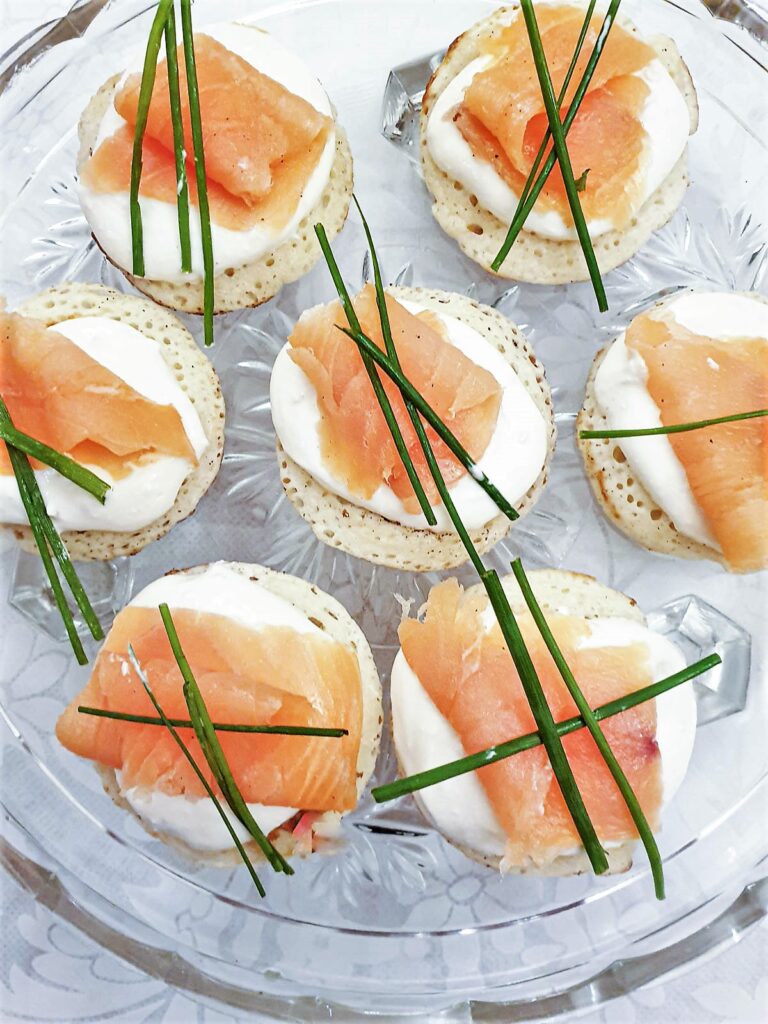
Once you've fried the blinis (which doesn't take very long), you use them to form the base for little hand-held canapes. Traditionally they are topped with sour cream, smoked salmon, and caviar, but you can top them with whatever you fancy. To give you some ideas, I've included a few of my suggestions for toppings further down the post.
Depending on the topping you use, blinis can be served either warm or at room temperature.
Plates of ready-prepared blinis are great to hand around as an appetiser with cocktails, or you can throw a blini party. Just put out plates of plain blinis, along with lots of bowls of different toppings, and let your guests assemble their own. It makes for super-easy entertaining and everyone gets to enjoy their own favourite topping!
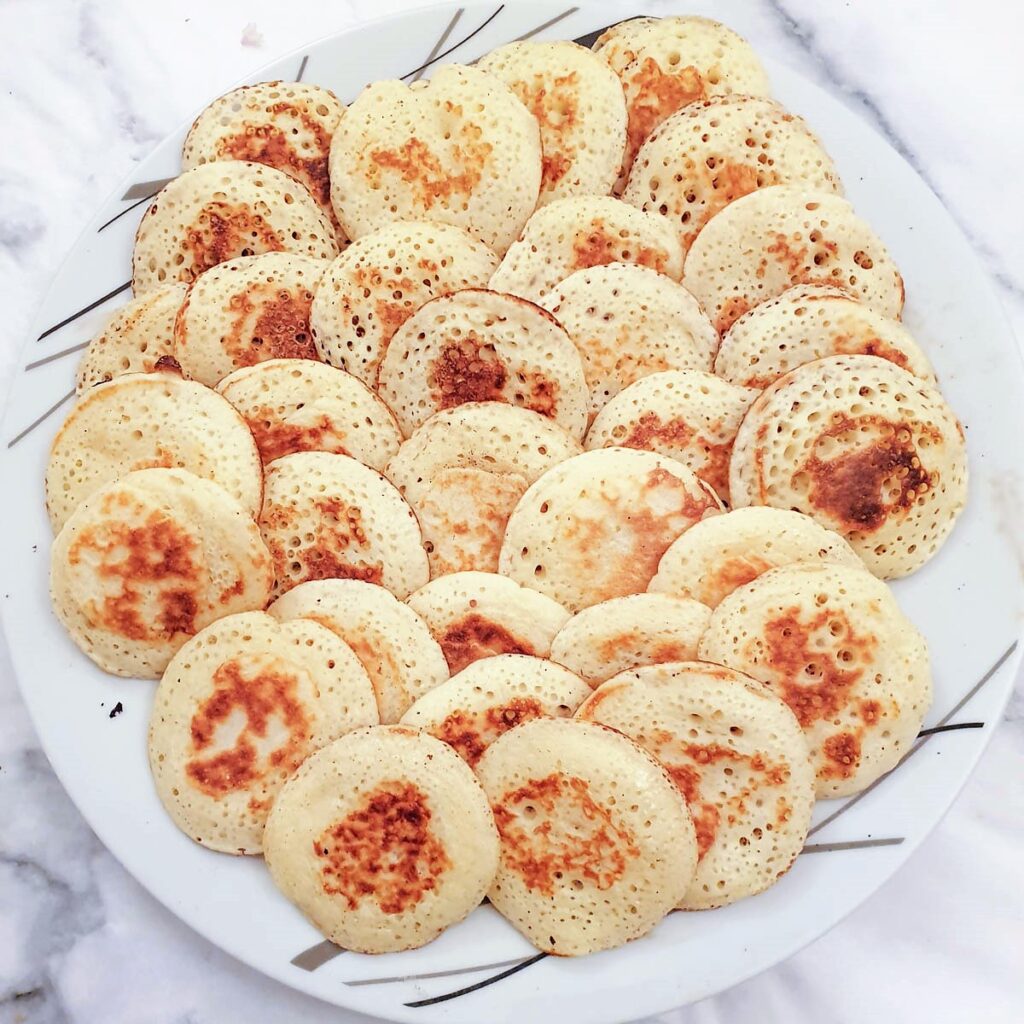
If you are thinking that blinis are difficult to make, you'd be wrong! All you have to do is mix up a quick batter and let it stand for an hour before frying the blinis for two to three minutes per side. Depending on the size of your pan you can fry up to 10 blinis at a time so it doesn't take very long.
Why not follow my instructions on how to make blinis and see for yourself?
Ingredients
This recipe will make about 40 blinis, but you can easily double up the ingredients to make a larger batch. You can get the complete list of ingredients and instructions for how to make blinis on the printable recipe card at the end of this post.
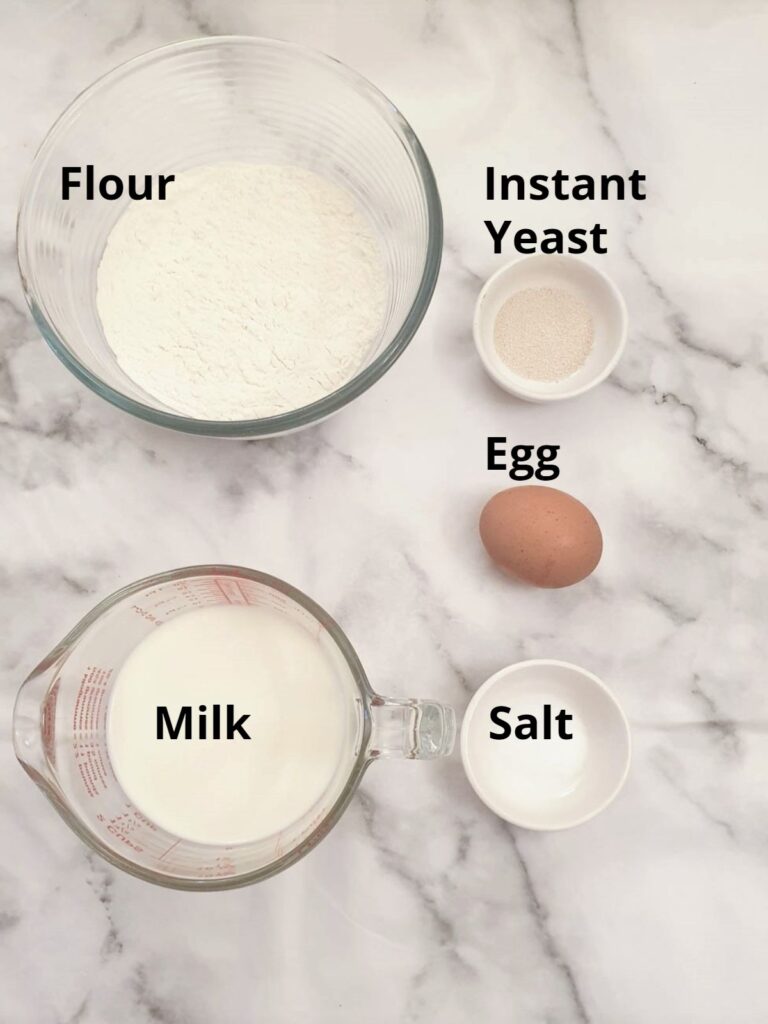
Flour - Blinis are traditionally made with buckwheat flour, which is more absorbent than wheat flour and is used in recipes for pancakes, blini, and pasta. However, I couldn't source buckwheat flour in my local supermarket, so I substituted it with plain all-purpose flour. You could also use wholewheat flour which will give a nuttier taste to the blinis.
Instant yeast granules - this is what causes the distinctive bubbles or holes in the blinis.
Egg - for added texture and should be at room temperature. If you store your eggs in the fridge, just pop it into a bowl of lukewarm water for a few minutes to bring it up to room temperature.
Milk - this should be lukewarm. I warmed mine in the microwave for a few seconds until it registered 40C / 104F on a digital thermometer. If you don't have a thermometer just feel the temperature with your finger - it should feel lukewarm.
Salt - this is optional but does improve the flavour.
You will also need a small amount of sunflower or canola oil for frying.
How to make blinis
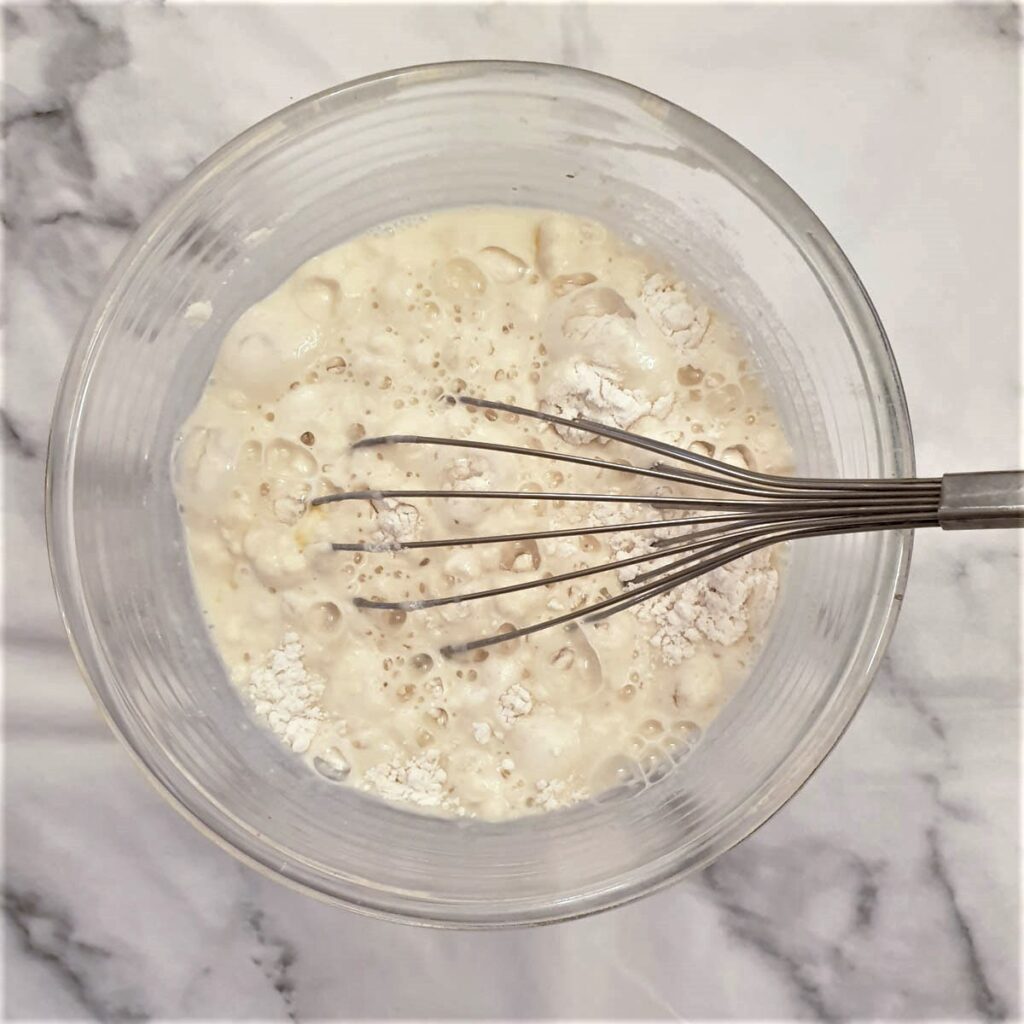
- Place the flour, salt and instant yeast granules into a mixing bowl and make a well in the centre.
- Break the egg into the milk and stir to combine.
- Pour the egg and milk into the flour and beat with a whisk until you have a smooth thick batter.
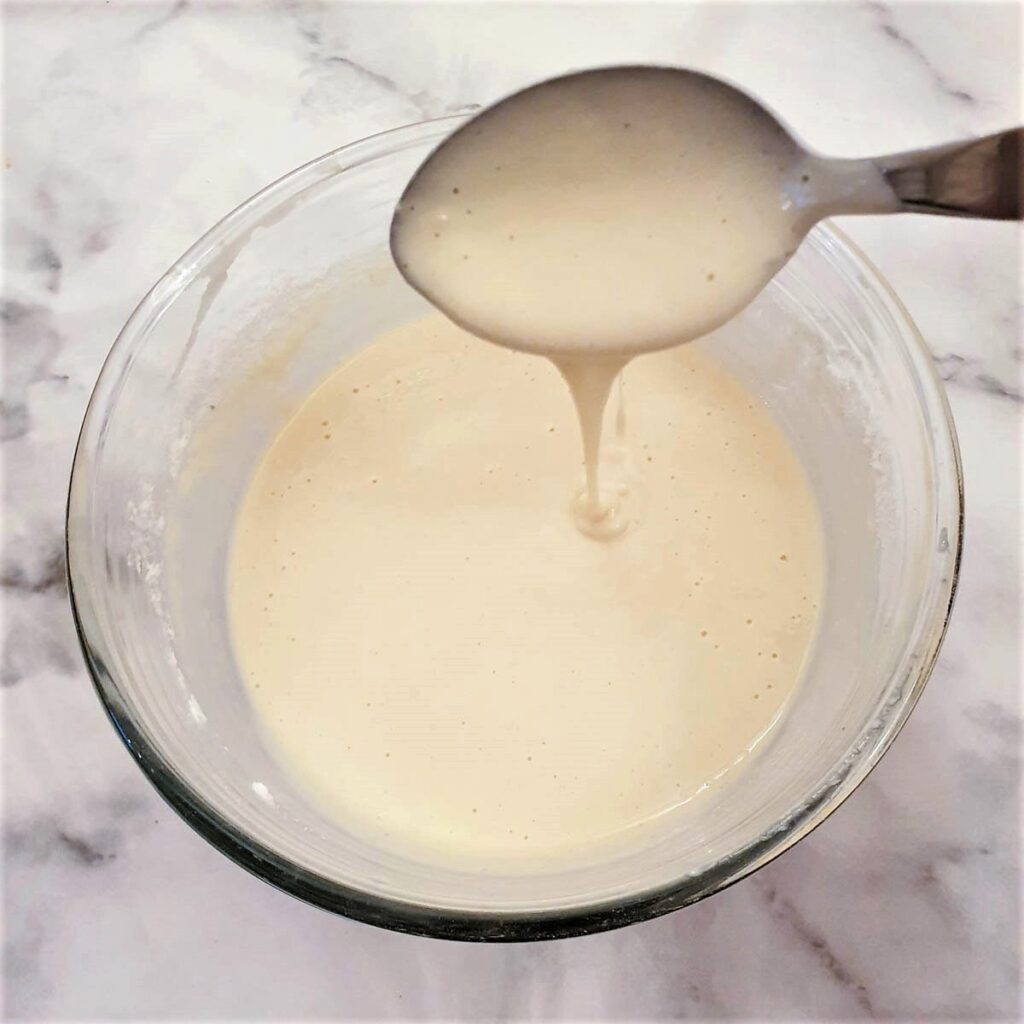
- Cover the bowl with plastic wrap or a clean tea towel and leave it in a warm place for an hour until it turns spongy with lots of tiny bubbles on top.
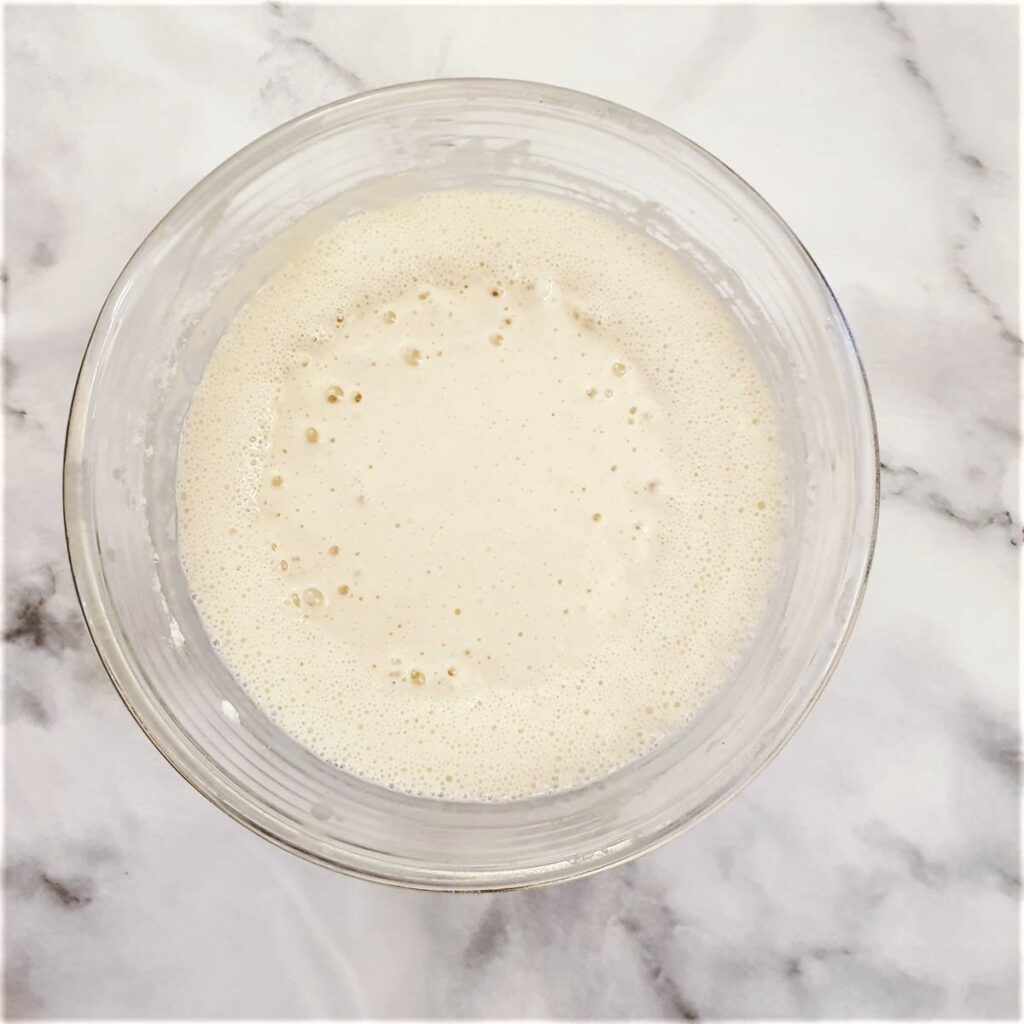
Give the batter another quick stir with your balloon whisk before using.
How to fry blinis
I like to use a blini pan because it means I don't have to worry about the blinis spreading and running into one another as they fry. However, if you don't have a blini pan you can just use a heavy-based frying pan.
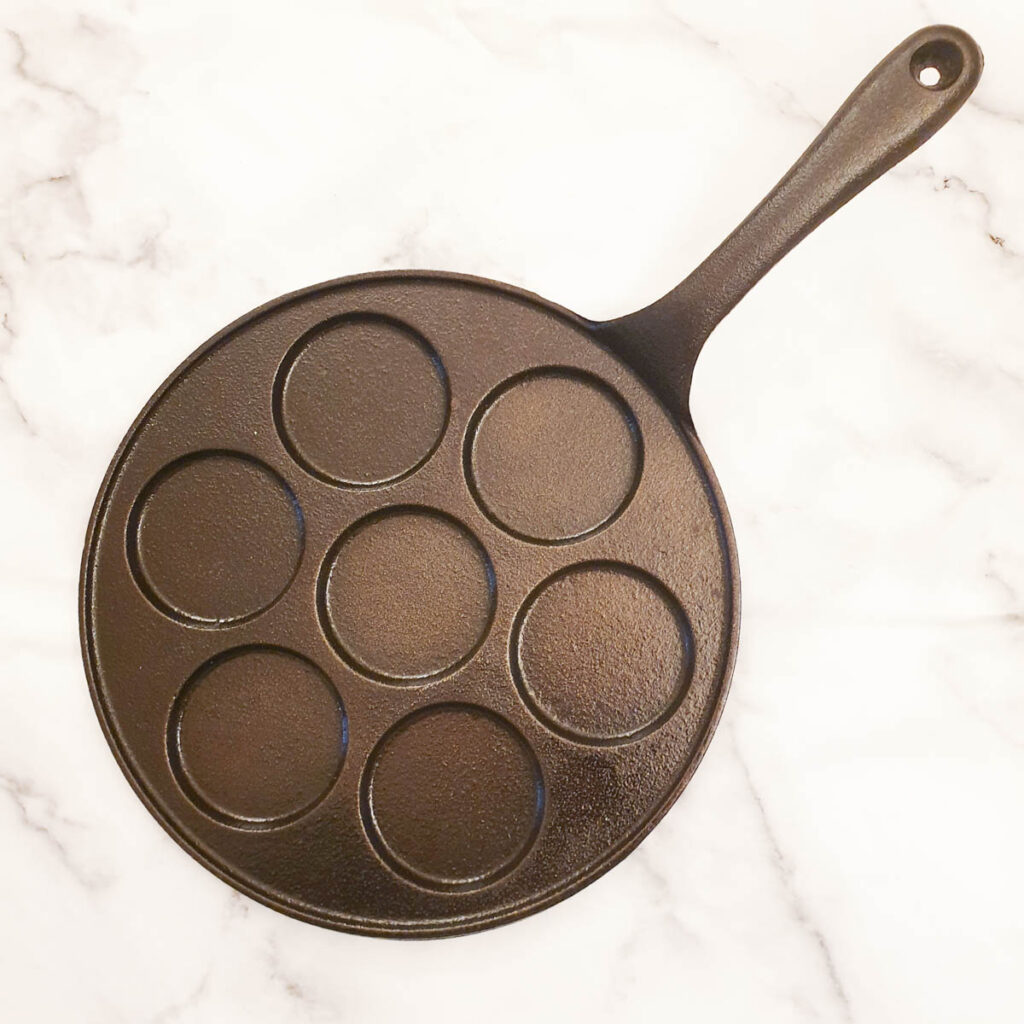
It's made from cast iron and gets very hot, so if you do use one of these, be sure to keep a pot holder handy!
If you'd like to get one of these for yourself, here's a link to a blini pan on Amazon.
- Start off by brushing your pan with sunflower oil. I find it easiest to pour a tablespoon of oil into a cup and use a silicone brush to paint the oil onto the pan.
- Allow the pan to heat until the oil is hot and shimmering. You may need to adjust the temperature as you fry the blinis. If the temperature is too hot the blinis will burn before they are cooked through; too cold and the blinis may stick to the pan. Just the first batch as a test and adjust the heat accordingly.
- Use a tablespoon to drop the batter into the pan. If you are using a frying pan, be sure to leave enough room for the blinis to spread as they cook. If you are using a blini pan add sufficient batter to just fill the holes.
- Fry on one side for 2 to 3 minutes until the blinis are covered in bubbles and the underside is golden brown.
- Turn the blinis over and fry on the other side for another 2 minutes until browned.
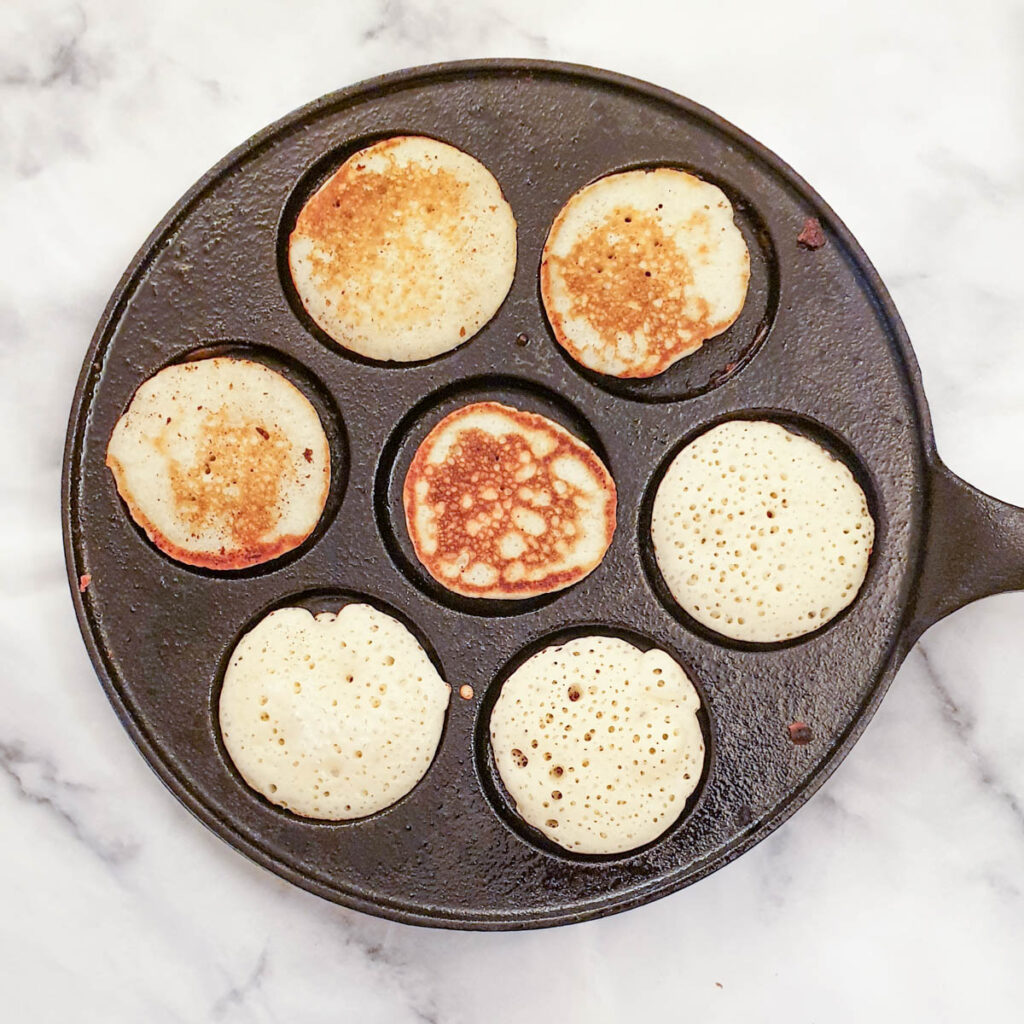
Once cooked, transfer the blinis to a large plate lined with paper towels while you fry the remaining batches.
If you'd like to be notified of any new recipes, why not subscribe to my newsletter? As a thank-you gift, you will receive a free recipe e-book containing some of my most popular cakes and desserts.
Suggestions for toppings
These are just a few suggestions, I'm sure you can think of plenty more for yourself.
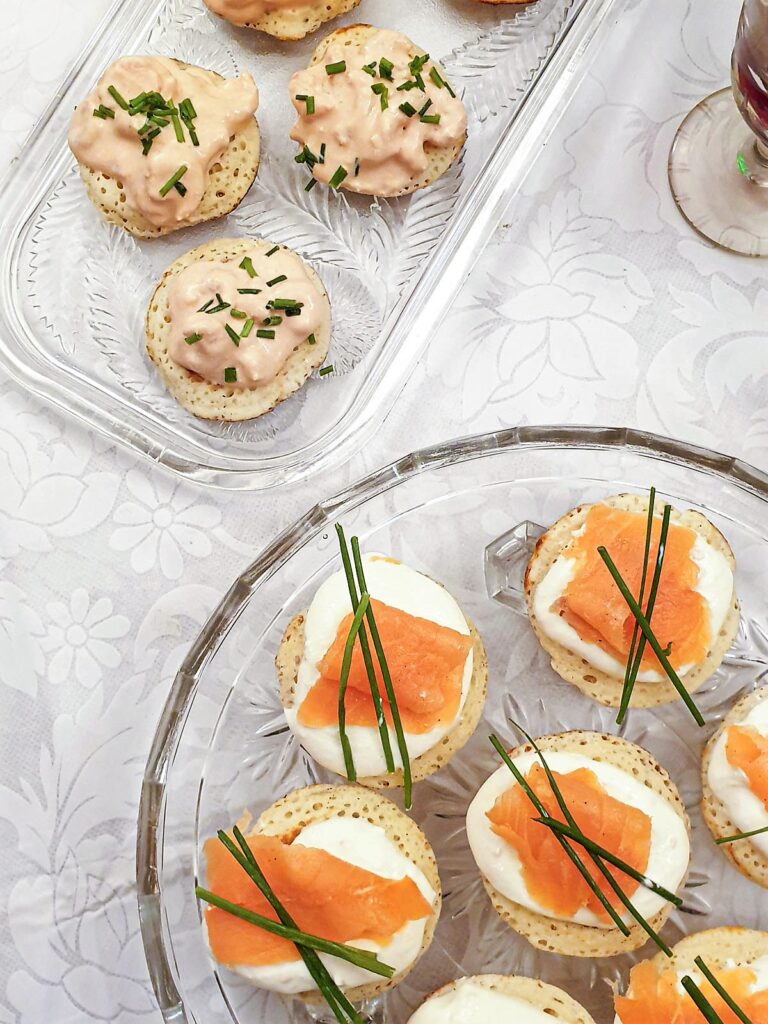
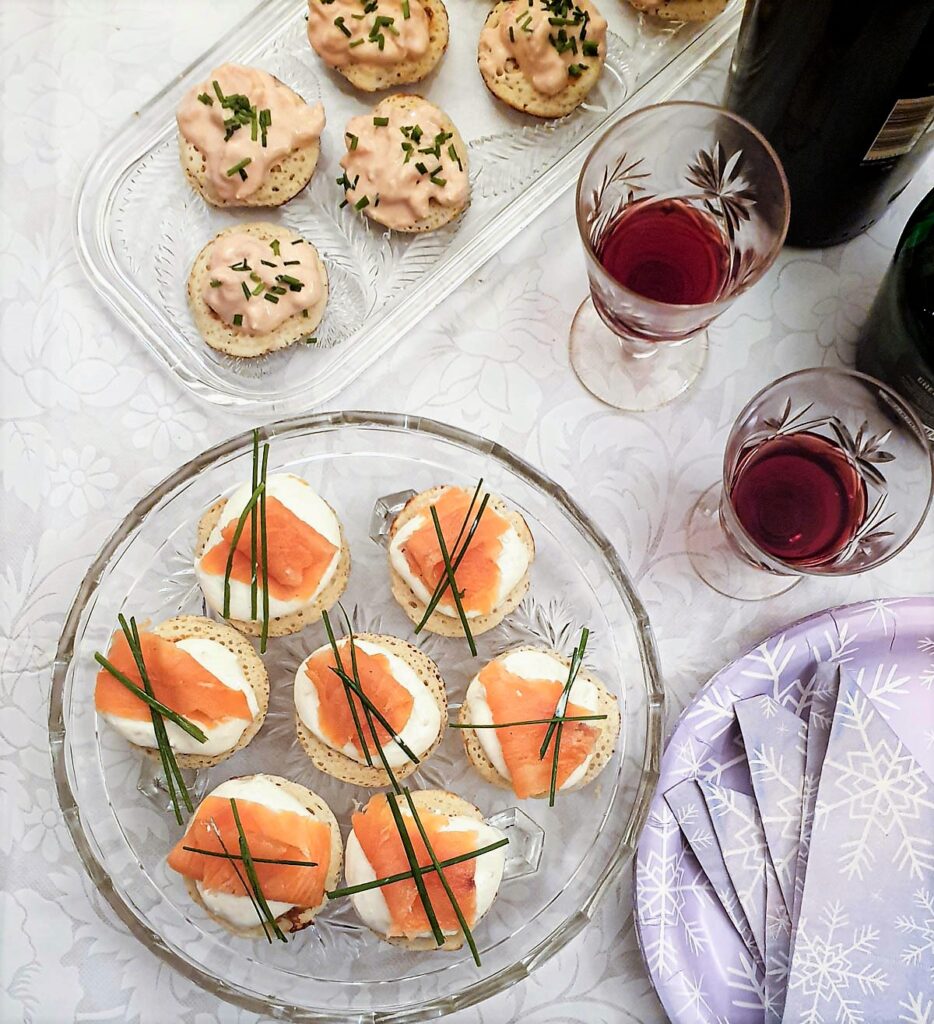
- Mix sour cream with one or two teaspoons of creamed horseradish (to your own taste) and top with slices of smoked salmon and chives.
- Make a simple Marie Rose sauce by mixing 2 parts mayonnaise with 1 part tomato ketchup and a few drops of Tabasco or other hot sauce. Mix with defrosted and well-drained prawns. Run out of mayonnaise? Don't worry - here's a simple recipe for homemade mayonnaise.
- Spread the blinis with creamed horseradish and top with thin slices of roast beef.
- Mix mayonnaise with chopped hard-boiled eggs and top with a spear of asparagus or crumbled crispy bacon.
- Spread with sweet chilli sauce and top with shredded cooked chicken.
- Garlic aioli topped with slices of salami and olives.
- Top with a spoonful of guacamole and prawns.
- Spread with cream cheese and top with garlic mushrooms.
- A smear of chicken liver pate topped with two or three silverskin onions, or chopped pickled gherkins, or even a spoonful of pear and onion chutney.
And of course, you don't only have to make them savoury. Blinis also make delicious desserts too. Why not try some of these:
- Whipped cream topped with a strawberry.
- Make a custard using normal custard powder (I like to use Bird's). Follow the instructions on the pack, but double up on the amount of custard powder so you get a thick spoonable custard instead of a thin runny custard. Top with sliced bananas.
- Simply spread with your favourite jam or honey, or a spoonful of Nutella.
- Biscoff spread - yummy!
Any questions?
The batter can be frozen for up to 3 months in a plastic freezer bag.
To use - allow the batter to defrost in the refrigerator then follow the recipe instructions for frying.
Cooked blinis can be frozen (without toppings) for 3 months or longer in a plastic freezer bag.
To use - let them defrost on the countertop and then warm either in the microwave or in a frying pan on the stove before adding the toppings.
This depends on the topping you choose. Things like roast beef and horseradish, or chicken and sweet chilli are delicious served warm whereas toppings using mayonnaise, sour cream, or creme fraiche are best served cold.
Technically you can - untopped blinis will stay fresh if stored in the refrigerator covered in plastic wrap, for up to three days. However, they are best eaten fresh as they do tend to dry out slightly if stored.
The batter can be made in advance and stored, covered, in the refrigerator for 2 to 3 days. Stir the batter well before using, and thin it down with a little milk if it has thickened too much.
Save for later
If you'd like to make blinis yourself, why not pin the recipe to one of your Pinterest boards so you can find it easily when you need it? Just click on the image below.
Alternatively, you can save the recipe by clicking on the floating heart icon on the right-hand side of the screen.
Other party recipes
If you're looking for other snack-type recipes for parties, why not try some of these:
- Creamy mushroom tarts with puff pastry
- Crispy chicken wings with barbeque sauce
- Beef samosas with peas and potatoes
- Potato and onion bhajis
- Scotch eggs
- Pork and apple sausage rolls
- Sesame chicken strips
📋The recipe
How to make blinis
(Click the stars to rate this recipe)
Equipment
Ingredients
- 1¼ cups / 175 grams plain all-purpose flour
- 1 teaspoon instant yeast granules
- 1 medium egg at room temperature
- 1 cup /250 ml milk lukewarm
- ½ teaspoon salt optional
- sunflower oil for frying
Instructions
- Place the flour, salt, and instant yeast granules into a mixing bowl and make a well in the centre.1¼ cups / 175 grams plain all-purpose flour, 1 teaspoon instant yeast granules, ½ teaspoon salt
- Break the egg into the milk and stir to combine.1 medium egg, 1 cup /250 ml milk
- Pour the egg and milk into the flour and beat with a whisk until you have a smooth thick batter.
- Cover the bowl with plastic wrap or a clean tea towel and leave it in a warm place for an hour until it turns spongy with lots of tiny bubbles on top.
- Stir the batter before using.
- Brush your frying pan with sunflower oil and heat until the oil is shimmering.sunflower oil
- Use a tablespoon to drop the batter into the pan. If you are using a frying pan, be sure to leave enough room for the blinis to spread as they cook. If you are using a blini pan then add just enough batter to fill the holes.
- Fry on one side for 2 to 3 minutes until the blinis are covered in bubbles and the underside is golden brown.
- Turn the blinis over and fry on the other side for another 2 minutes until browned.
- Transfer the blinis to a large plate lined with paper towel while you fry the remaining batches.
- Top with sour cream and smoked salmon and garnish with chives to serve. See the notes and the body of the post for alternative topping ideas.
Notes
- Mix sour cream with one or two teaspoons of creamed horseradish (to your own taste) and top with slices of smoked salmon and chives.
- Make a simple marie rose sauce by mixing 2 parts mayonnaise with 1 part tomato ketchup and a few drops of tabasco or other hot sauce. Mix with defrosted and well-drained shrimps. Run out of mayonnaise? Don't worry - here's a simple recipe for homemade mayonnaise.
- Spread the blinis with creamed horseradish and top with thin slices of roast beef.
- Mix mayonnaise with chopped hard-boiled eggs and top with a spear of asparagus or crumbled crispy bacon.
- Spread with sweet chilli sauce and top with shredded cooked chicken.
- Garlic aioli topped with slices of salami and olives.
- Top with a spoonful of guacamole and prawns.
- Spread with cream cheese and top with garlic mushrooms.
- A smear of chicken liver pate topped with two or three silverskin onions or chopped pickled gherkins, or even a spoonful of pear and onion chutney.
Nutrition
I am not a nutritionist. The nutrition information has been calculated using an on-line calculator, and is intended for information and guidance purposes only. If the nutrition information is important to you, you should consider calculating it yourself, using your preferred tool.
If you made this recipe and enjoyed it, I'd love it if you could give me a star rating in the comments below. And if you'd like to get in touch, you can email me at [email protected]. I'd love to hear from you. And don't forget to subscribe to my mailing list so you can grab yourself a copy of my FREE COOKBOOK!
If you'd like to continue browsing, just click on this link to all my recipes.












Did you make this recipe? Let me know!