Indulge in the mouthwatering goodness of this cheese and onion loaf, packed with layers of scrumptious cheese and flavorful onions. It's perfect for sandwiches, soup, barbeques, or just slathered with butter. And the best part? No kneading required!
Jump to:
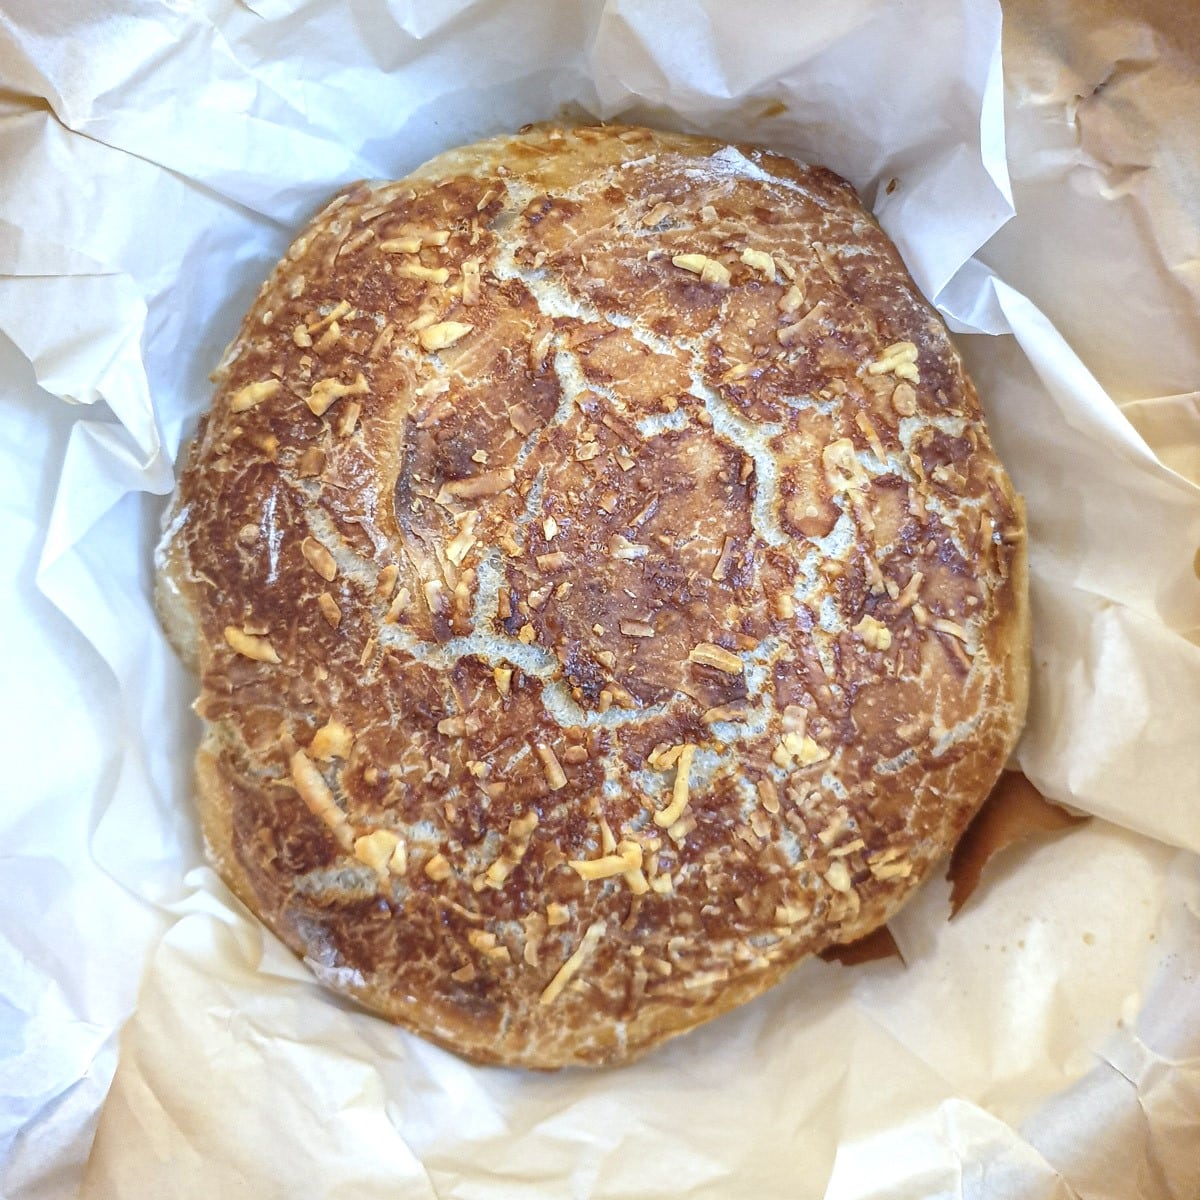
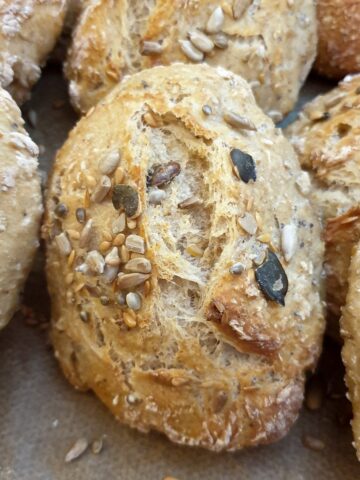
Crusty artisan bread
Prepare to be impressed by this quick-mix cheese and onion bread! With its layers of gooey cheese and tasty onions, crusty exterior, and holey texture, it looks and tastes like a freshly baked artisan loaf from a professional bakery. Yet this loaf takes less than 10 minutes to mix!
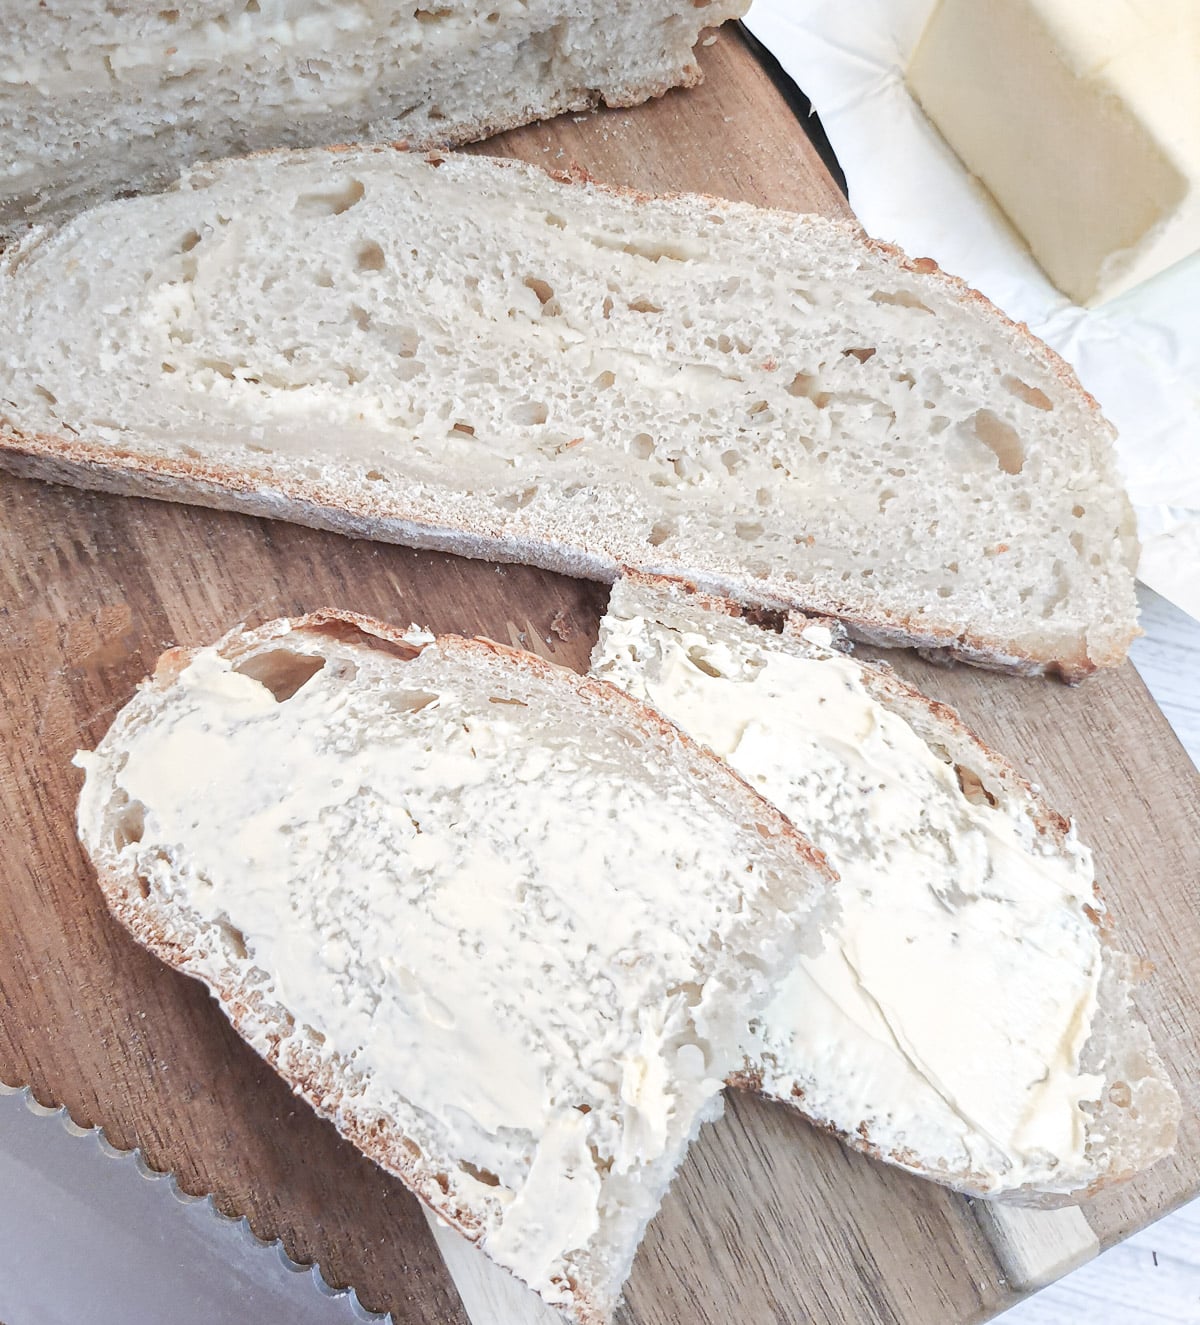
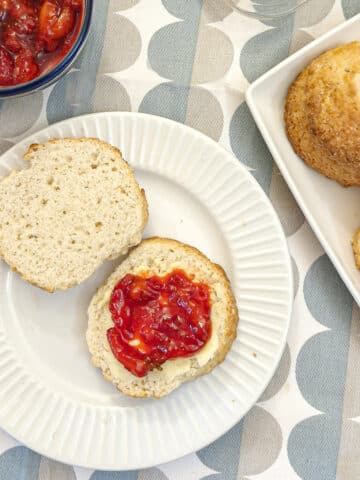
The cheese and onions are folded into the dough once it has risen, and these form layers inside the bread. Cut a slice of this bread and it's as though you have a ready-made cheese and onion sandwich. All you need is a smear of butter.
Of course, you can do lots more with the bread:
- Serve it toasted with a bowl of homemade beef vegetable soup
- Top it with ham and sliced tomatoes for a quick and easy lunch.
- It's the perfect loaf to serve when you're having a barbeque.
- Dunk chunks of the bread into these tasty peri peri chicken livers.
Because the dough contains yeast, it does need time to rise. This dough needs at least 3 to 5 hours to rise properly, but it doesn't matter if you leave it for 12 hours or even longer. I normally mix my dough in the afternoon on the day before I want to bake the bread and then just cover the bowl with cling film (or plastic wrap) and leave it to rise overnight. You could also mix the dough early in the morning and leave it to rise all day, then pop it in the oven an hour before supper time.
The secret to getting a soft crumb with a crispy crust is to cook the bread in a dutch oven. The dutch oven simulates the steaminess of a professional steam oven, holding in the steam that is released from the bread, and helping the bread to cook properly.
10 minutes before the end of the cooking time, just remove the lid from the dutch oven and leave the bread to brown and form a crispy crust.
If you don't have a dutch oven it doesn't matter. You can get the same effect by baking the formed loaf onto a baking tray and putting a dish of water into the oven to create the steam. Remove the water 10 minutes before the end of the cooking time to allow the crust to form.

The texture of the dough
This is a very loose and sticky dough and it will spread when baking. The dutch oven helps contain the dough and form the distinctive round shape.
If you bake the bread on a baking sheet, be prepared for a flatter loaf. It will still taste delicious.
Because this is a very sticky dough and you won't be able to knead it. However, that's quite an advantage, because who wants to spend hours kneading dough anyway?
In order to handle and shape the dough you will need a couple of pastry scrapers (and a little extra flour).
Once the dough has been allowed to rise, scrape it out of the bowl onto a floured surface and sprinkle the surface with a little more flour. Use the pastry scraper to fold the bread up and over onto itself a few times, layering each fold with a sprinkling of cheese and onions.
Once that's done, all you have to do is transfer the dough to a dutch oven and bake for 40 to 45 minutes.
Let me show you how to do it.
What you will need
Equipment
As far as equipment goes, you will need a large mixing bowl for mixing the dough. I like to use an earthenware bowl similar to the one in the pictures, which is big enough to hold all the ingredients.
You will also need a dutch oven to bake the loaf. A heavy cast iron one is ideal.
If you don't have a dutch oven, you can use a flat baking tray instead, or even a metal roasting dish.
For handling the dough, I would advise using pastry scrapers - this is a very soft and sticky dough and it will be inclined to stick to your hands.
Ingredients
This recipe will make one loaf, 9 to 10 inches in diameter.
**For the complete list of ingredients and full instructions for making this cheese and onion loaf, see the printable recipe card further down this post**
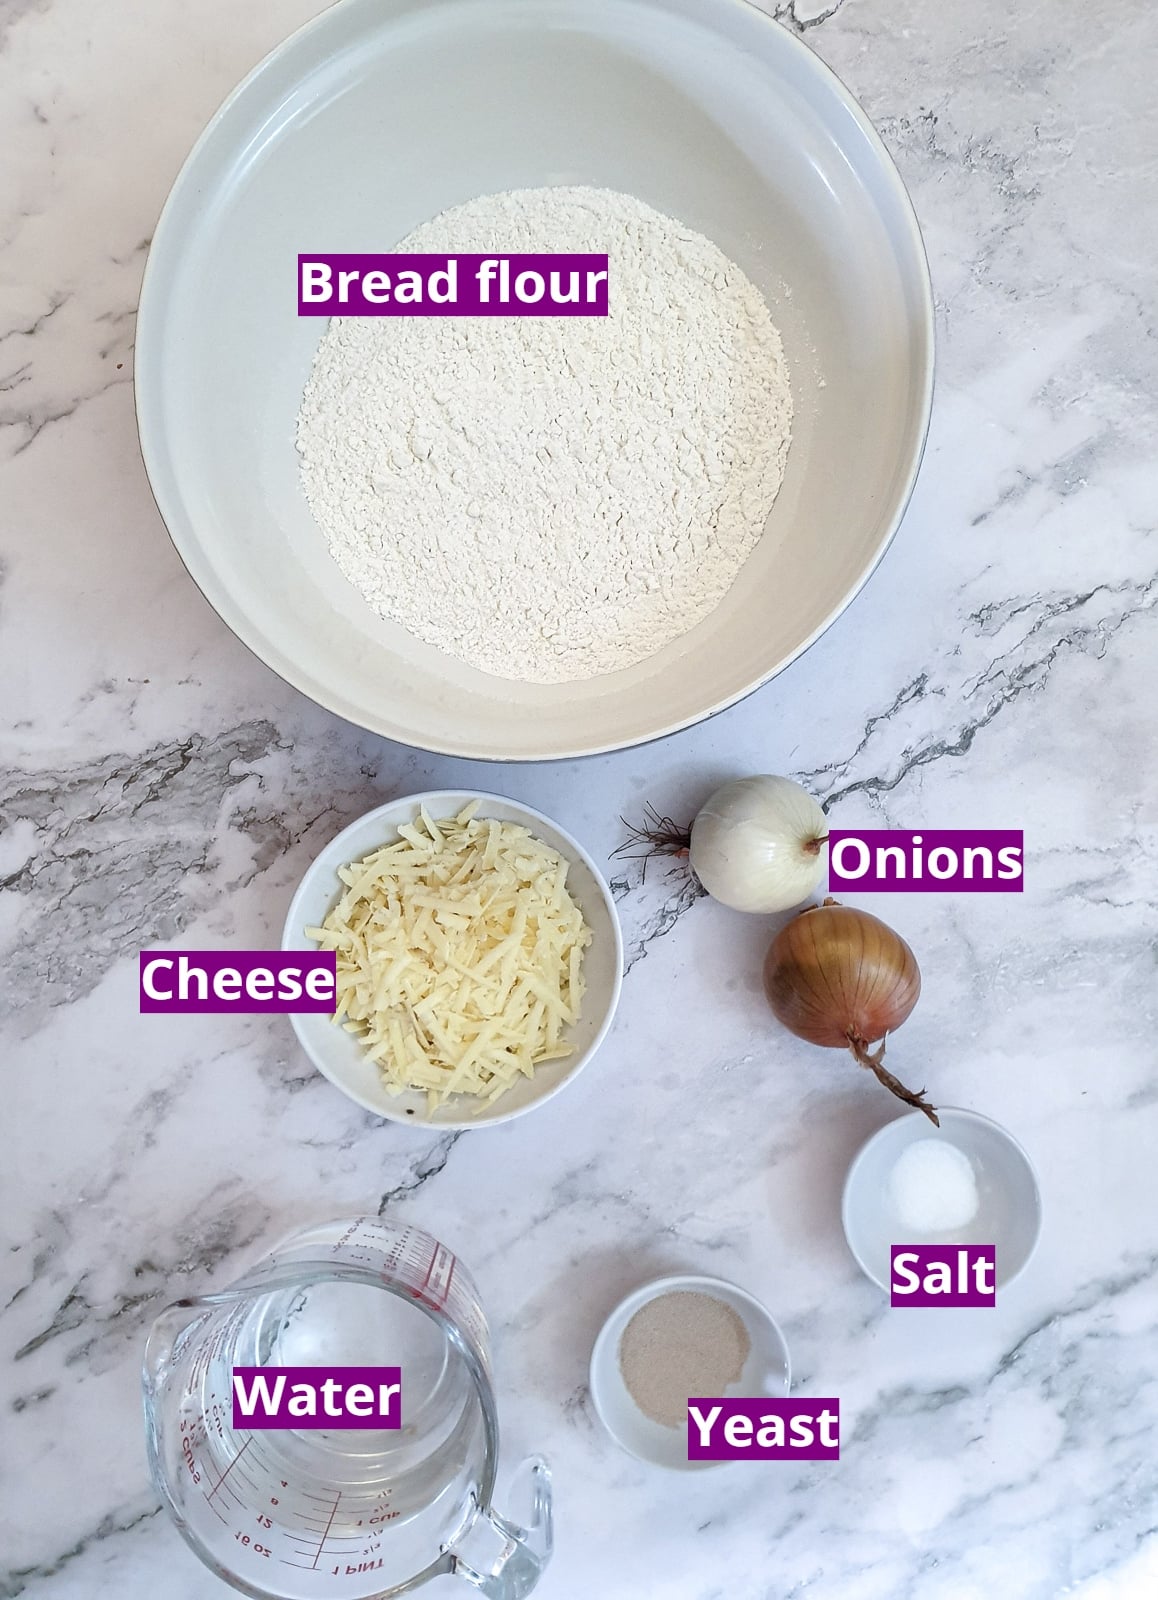
Flour - this is strong white bread flour, which has a higher protein content than all-purpose flour. All-purpose flour will work with this recipe, but the texture of the bread will be softer and not as chewy.
Yeast - I used instant yeast granules but you could use active yeast instead.
Salt - this improves the flavour of the bread - if you don't use salt in your diet you can leave it out.
Water - you want to use lukewarm water, not cold water. Lukewarm water helps the yeast to activate. Don't use hot water though as water that is too hot will kill the yeast.
Cheese - this is used for layering into the dough before it goes into the oven. You can use any cheese that grates well - I used cheddar.
Onions - the onions should be peeled and thinly sliced. They will be added to the dough along with the cheese. There is no need to cook them first - the heat from the oven does the job. I put 2 small onions into the picture, but in reality, you will probably only need one onion.
What to do
Mix the dough
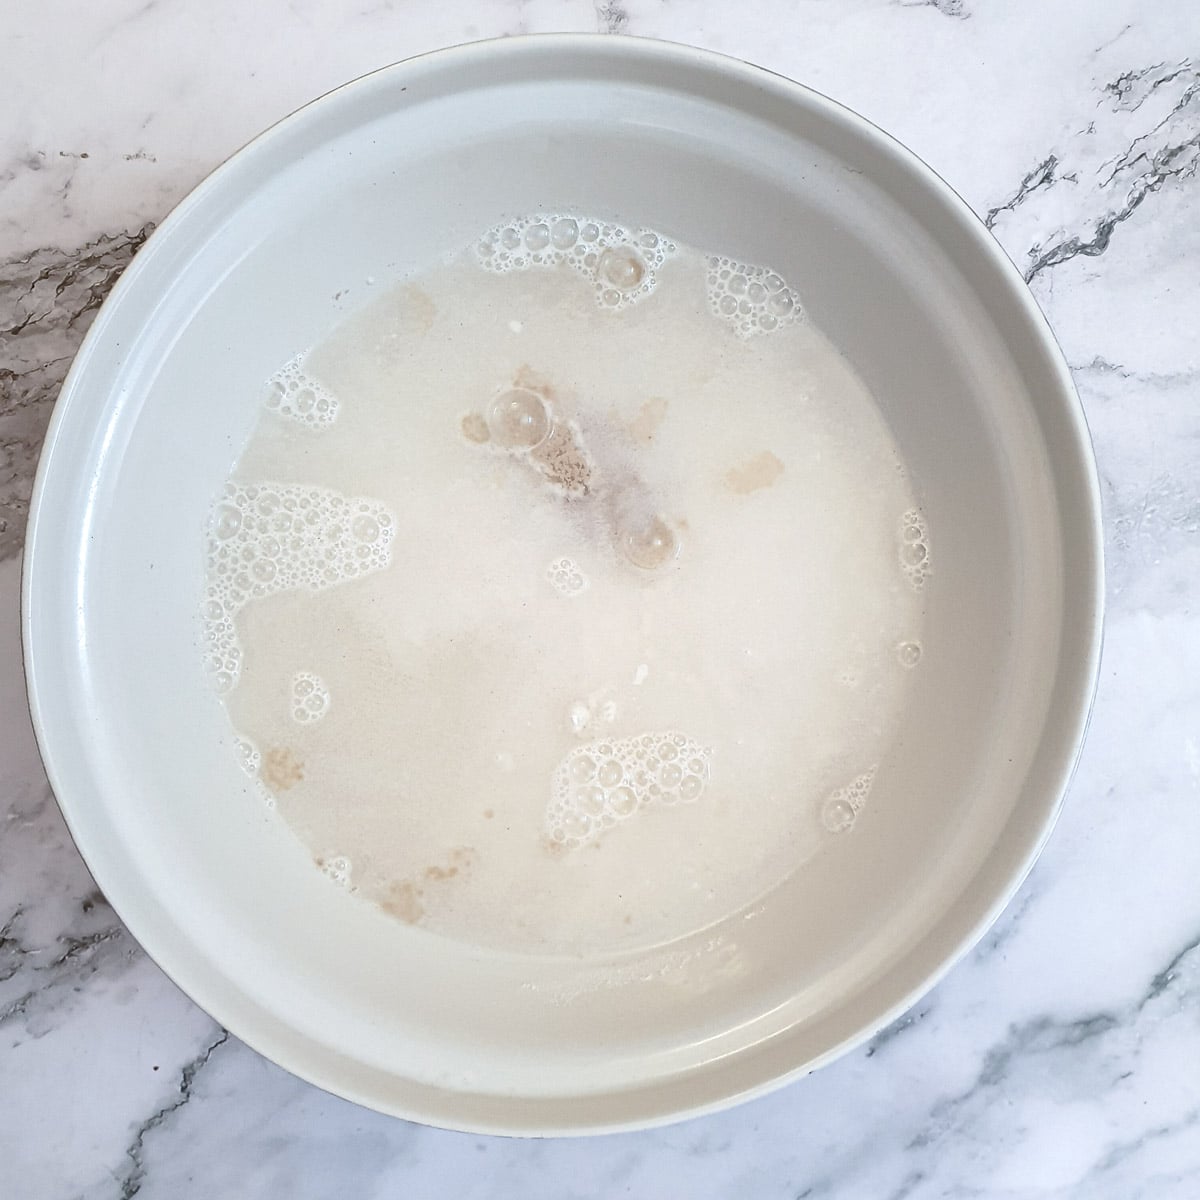
Place the flour, salt, yeast and most of the water into a mixing bowl. Depending on the strength of your flour you may not need all of the water and it's easier to add the extra if it is needed, rather than make the dough too wet.
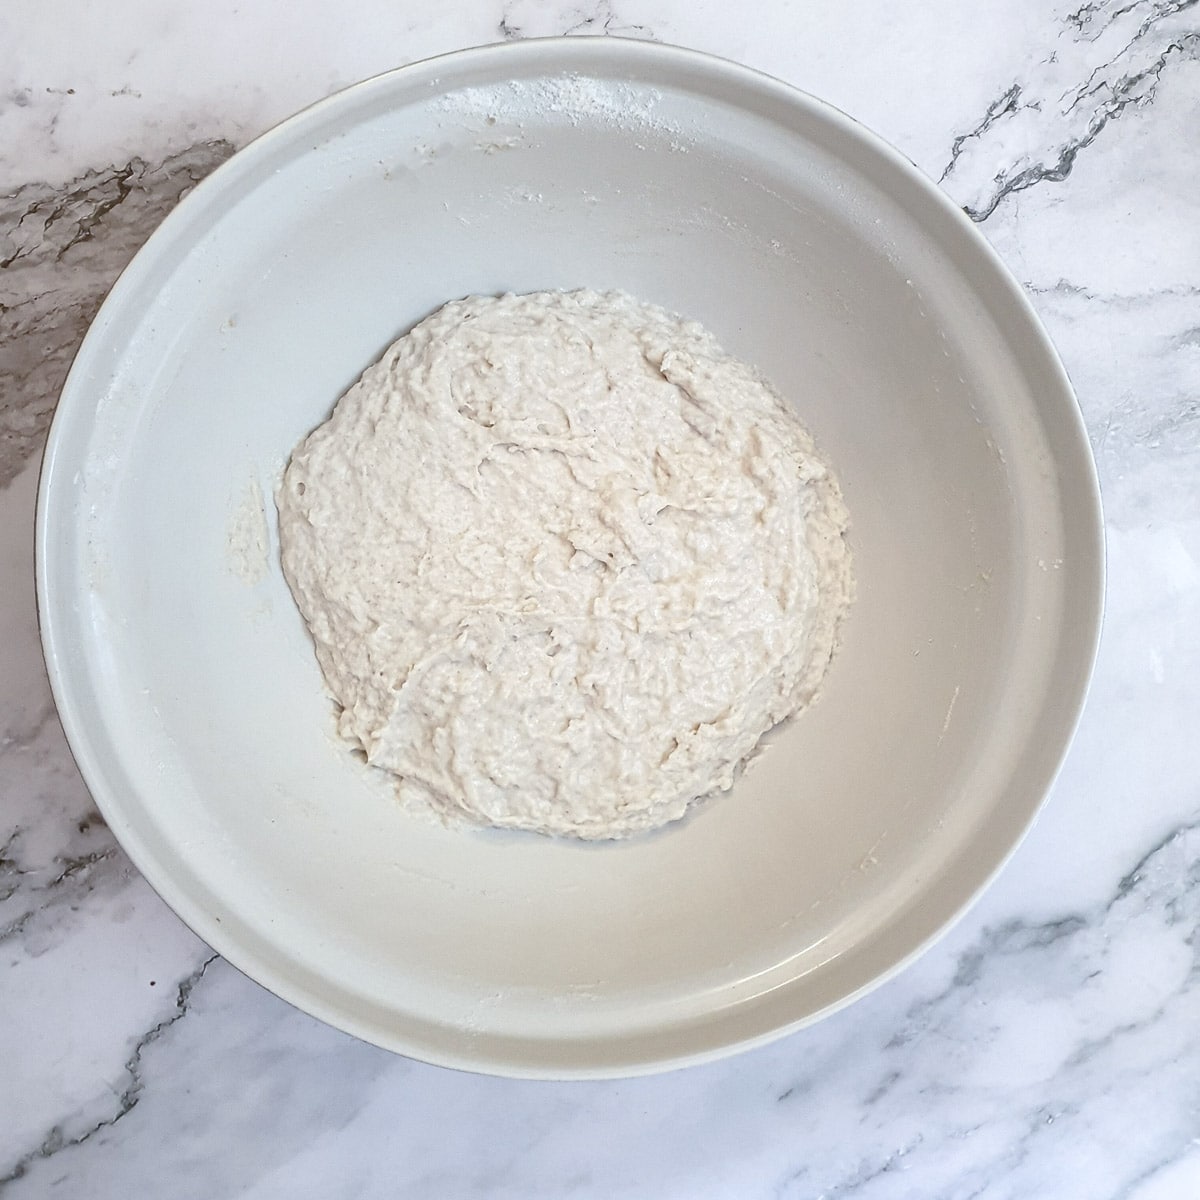
Mix all the ingredients together until well combined. The dough should come together in a ball and be sticky to the touch, but not wet and sloppy.
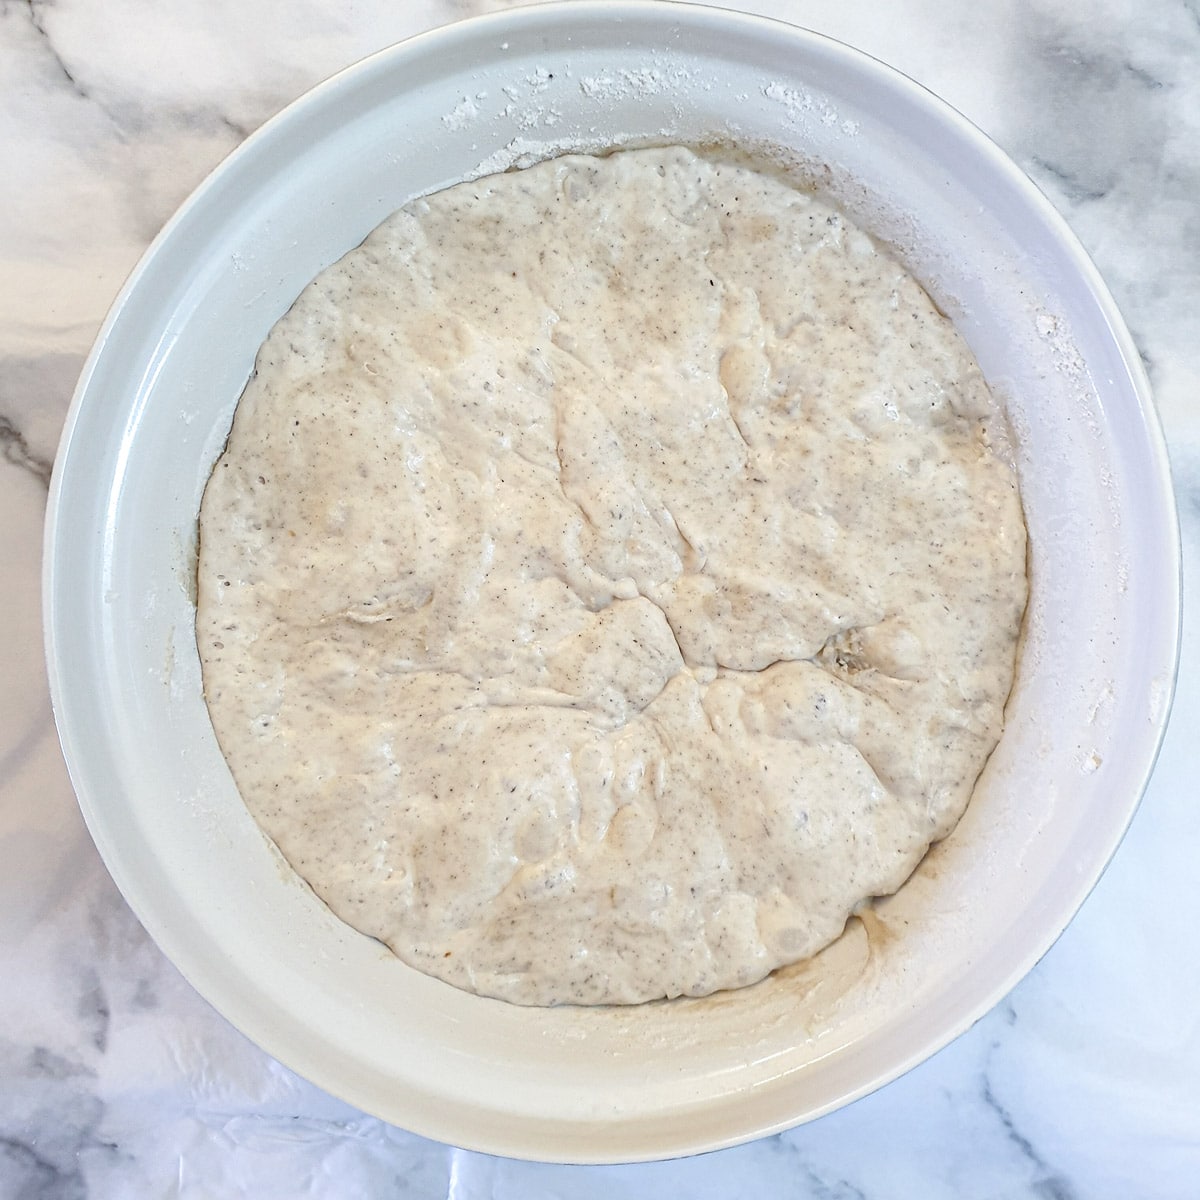
Cover the bowl with plastic wrap and then cover it with a towel. Leave the bowl of dough in a warm draught-free place to rise for a minimum of 3 hours (if you are in a hurry), but preferably longer. I like to leave mine to rise overnight. The dough should have doubled in size and be soft and spongy.
Shape and bake the loaf
When you are ready to bake the bread, place the Dutch oven into the oven and turn the oven on to 220C / 425F. Leave it for at least 20 minutes to give it time to heat up.
If you are using a baking tray, place a dish of water on the bottom of the oven.
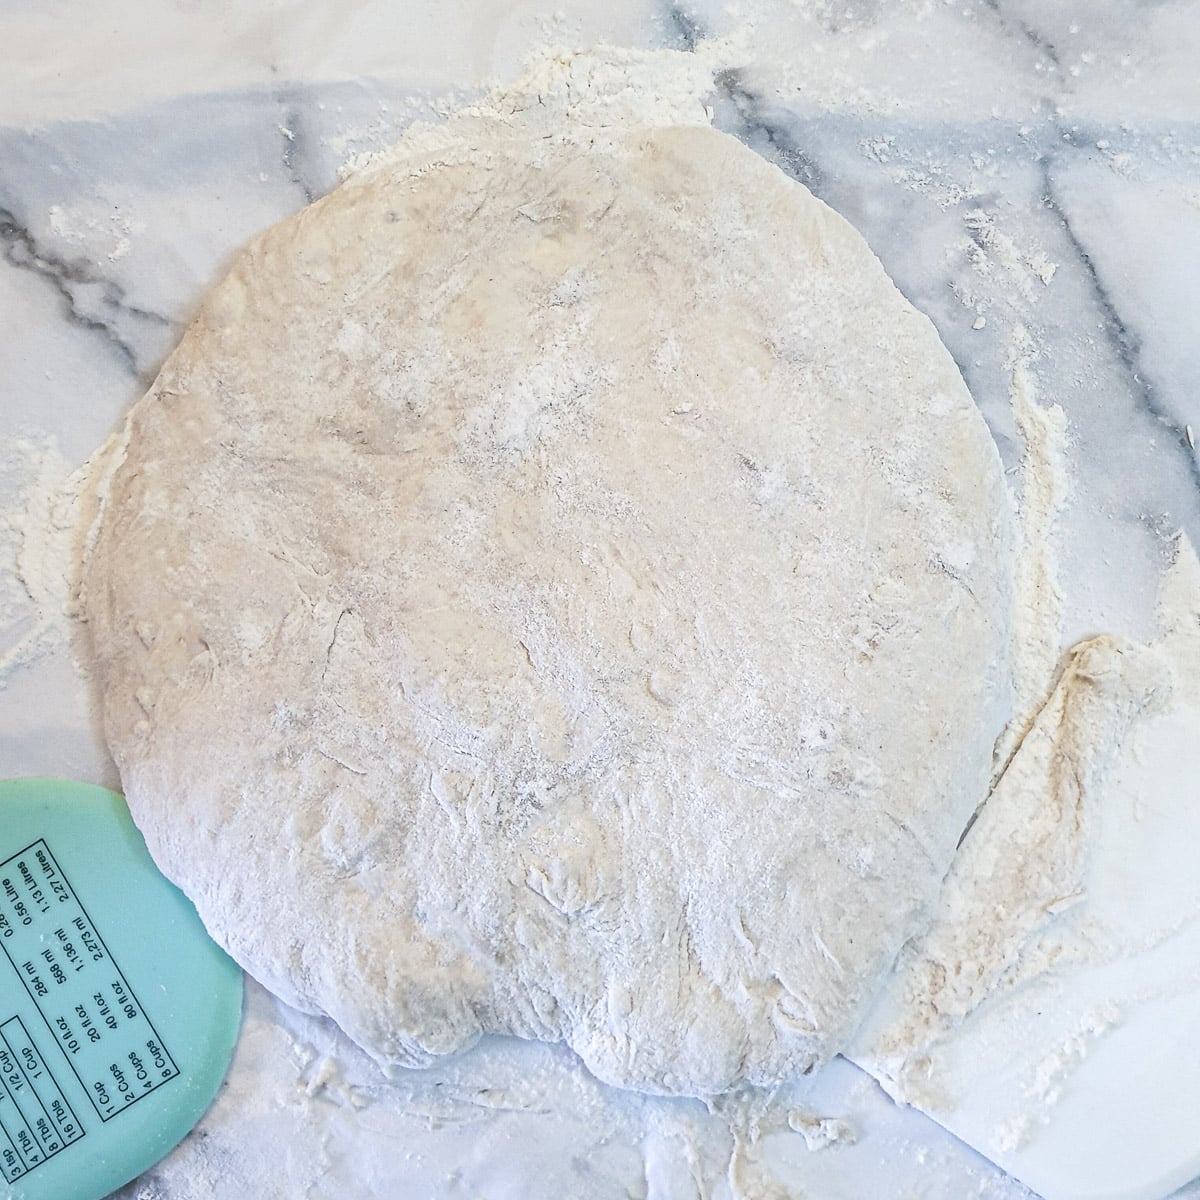
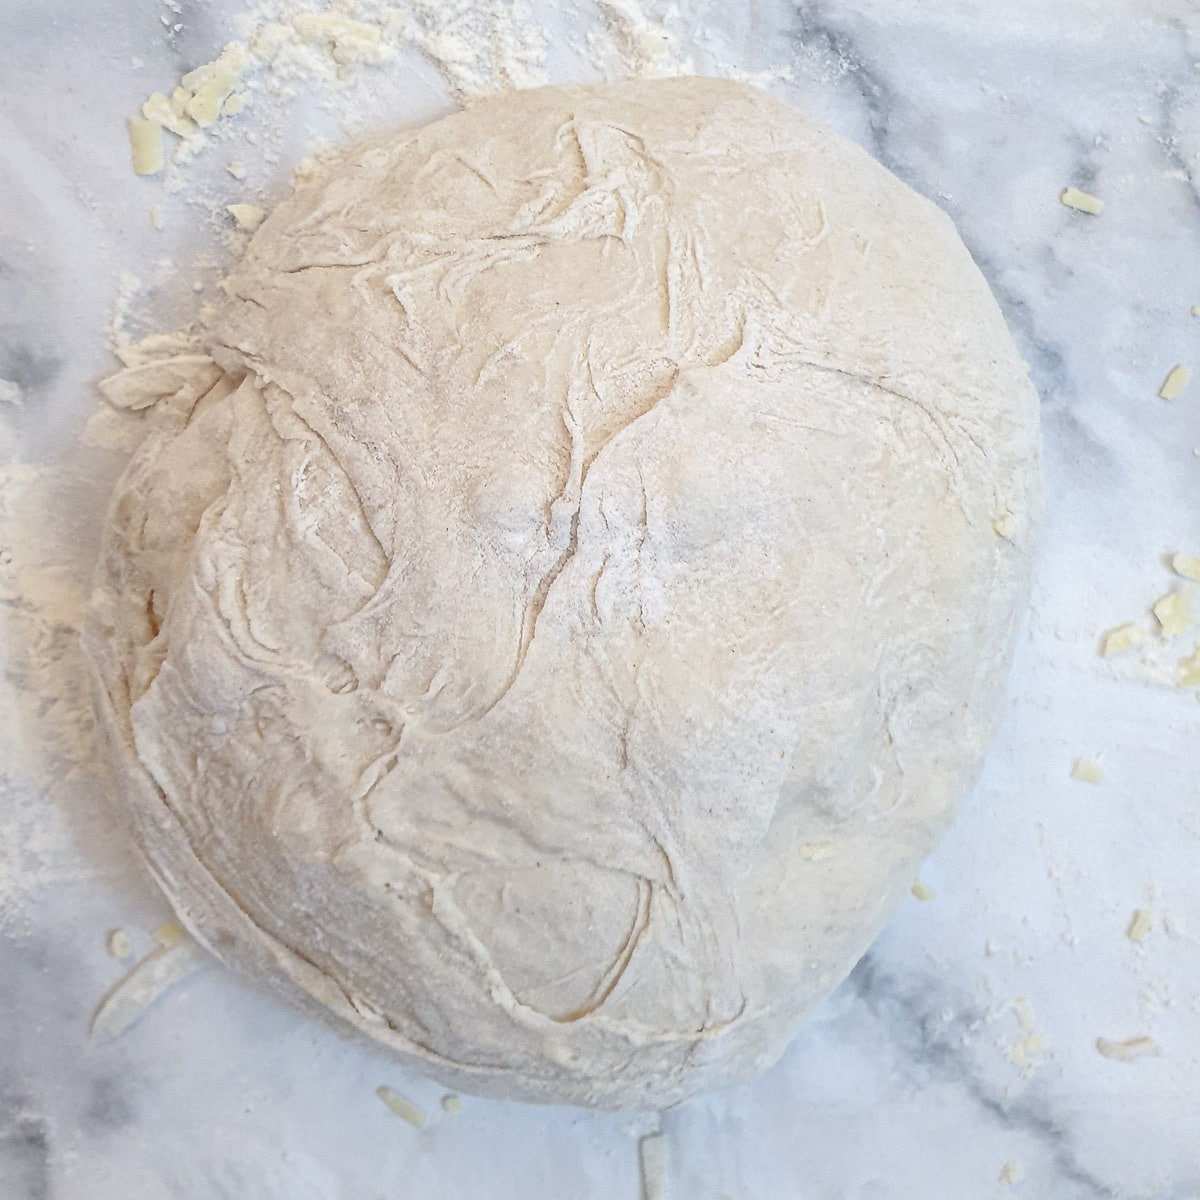
Tip the dough out onto a floured surface and use pastry scrapers to help you turn it over on itself 3 or 4 times. This will help get the air out of the dough. Sprinkle the dough lightly with flour if it seems too sticky. Pat the dough out into a thick circular shape.
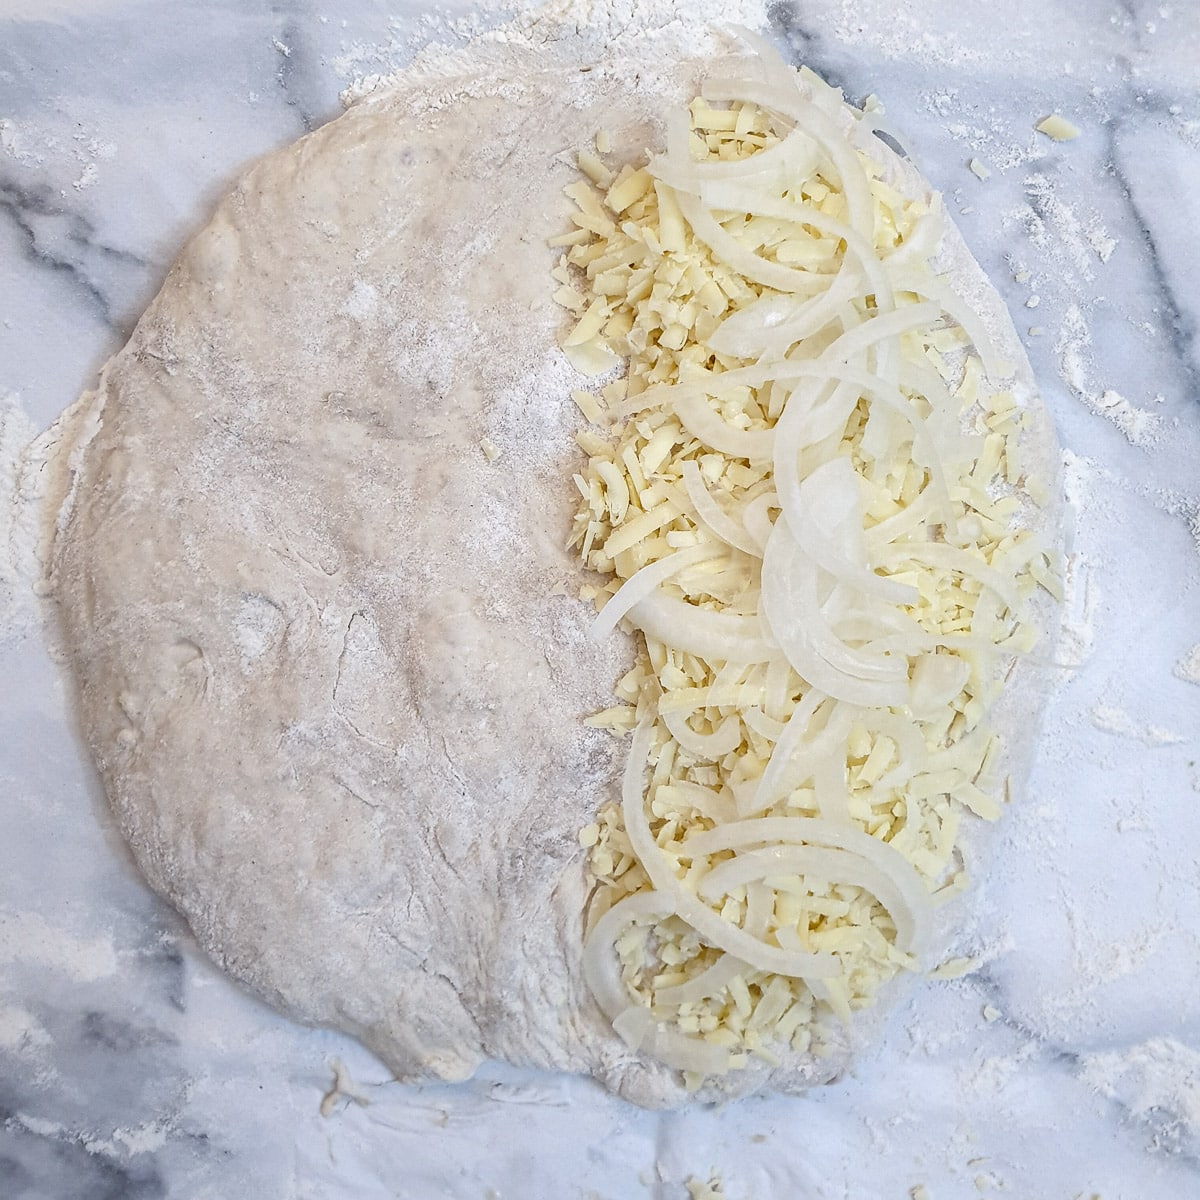
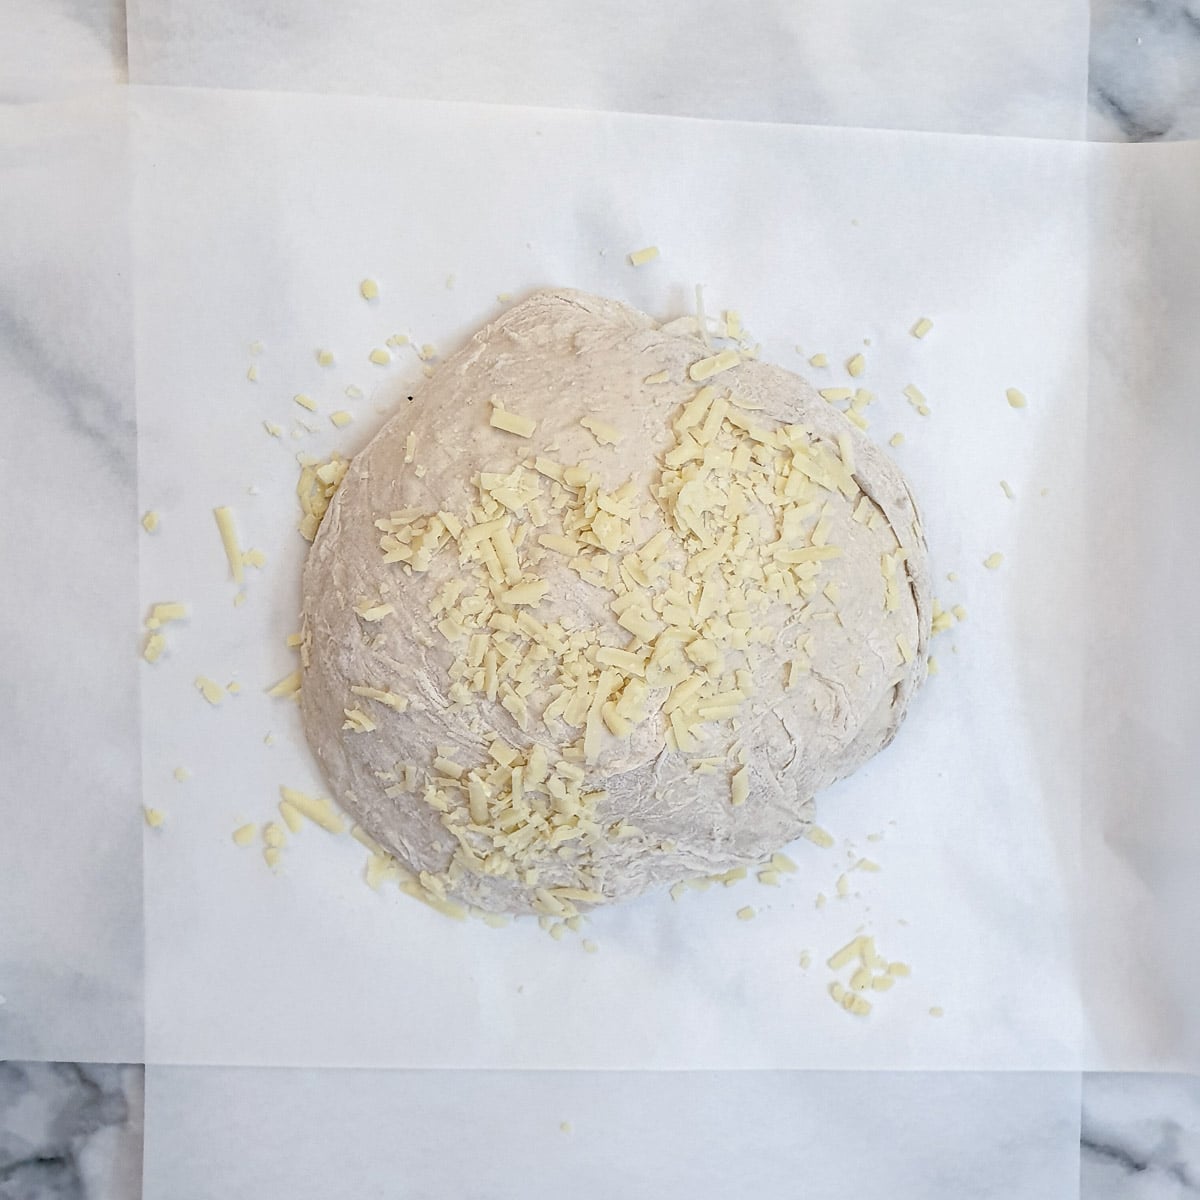
Sprinkle half of the dough with grated cheese and top with sliced onions. Then use the pastry scrapers to help you fold the uncovered half of the dough up and over the cheese and onions.
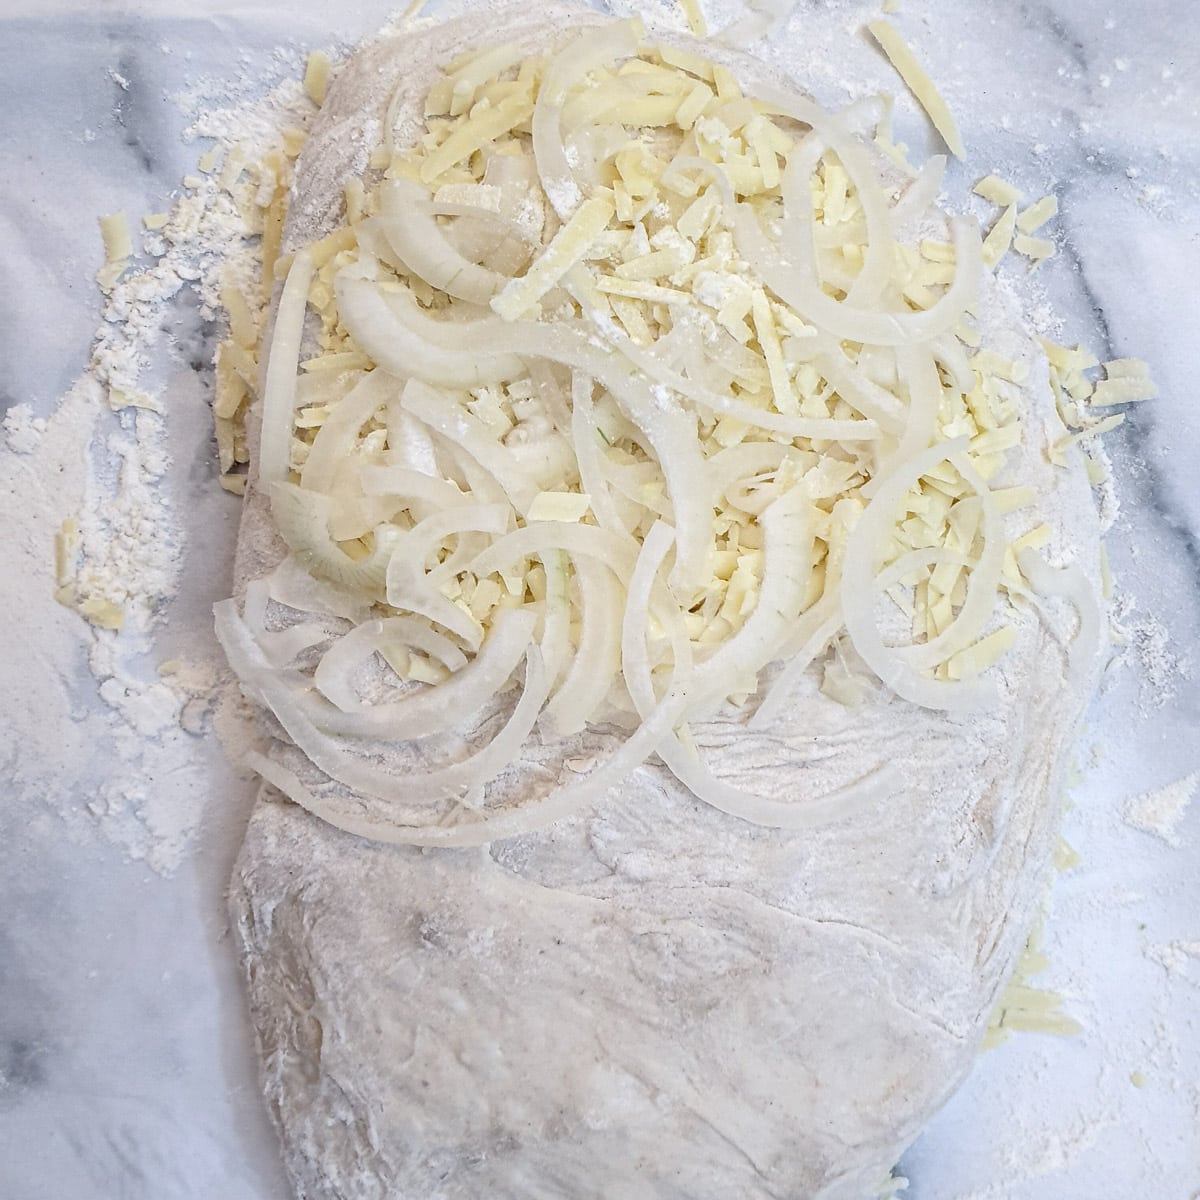
Pull the dough into shape so that you have a semi-circle of dough enclosing the cheese and onions. Sprinkle the top half of the dough with more cheese and onions. Leave the bottom half of the dough uncovered.
Using the pastry scrapers to help you, fold the bottom half of the dough up over the cheese and onions, then use your hands to stretch the dough to enclose the cheese and onion and form a circular shape.
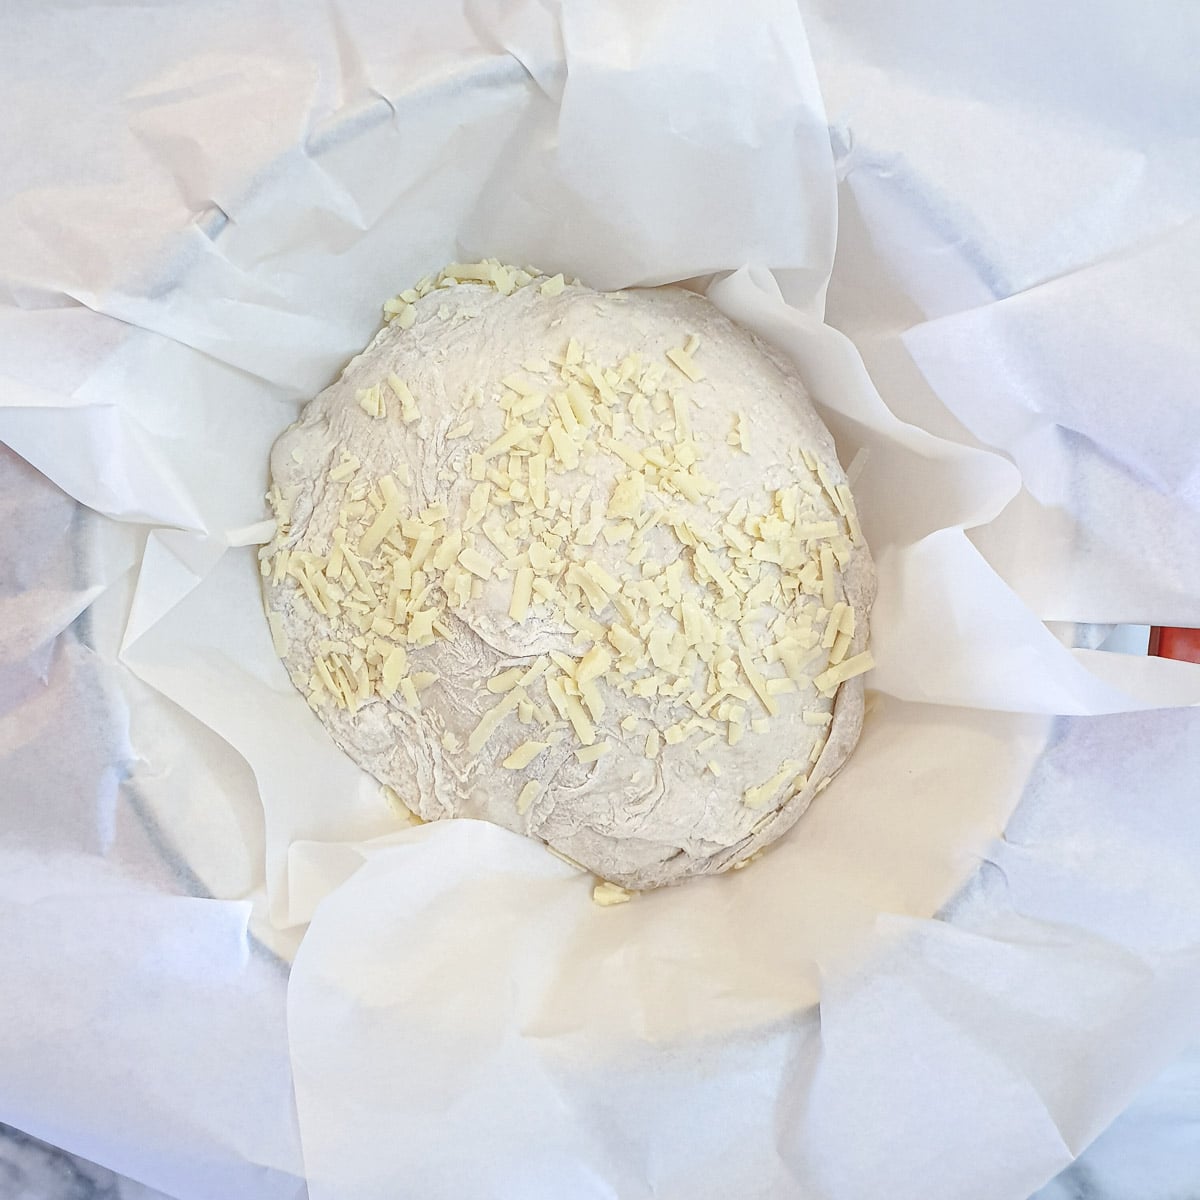
Lay 2 pieces of baking parchment into a cross shape and transfer the ball of dough into the centre. This will make it easier to get the dough into the Dutch oven. Sprinkle the top of the dough with grated cheese.
Take the Dutch oven out of the oven (be careful, it will be very hot) and using the baking parchment to help you, transfer the dough (still on the baking parchment) into the Dutch oven. You can optionally score a deep cross on top of the loaf - I didn't bother!
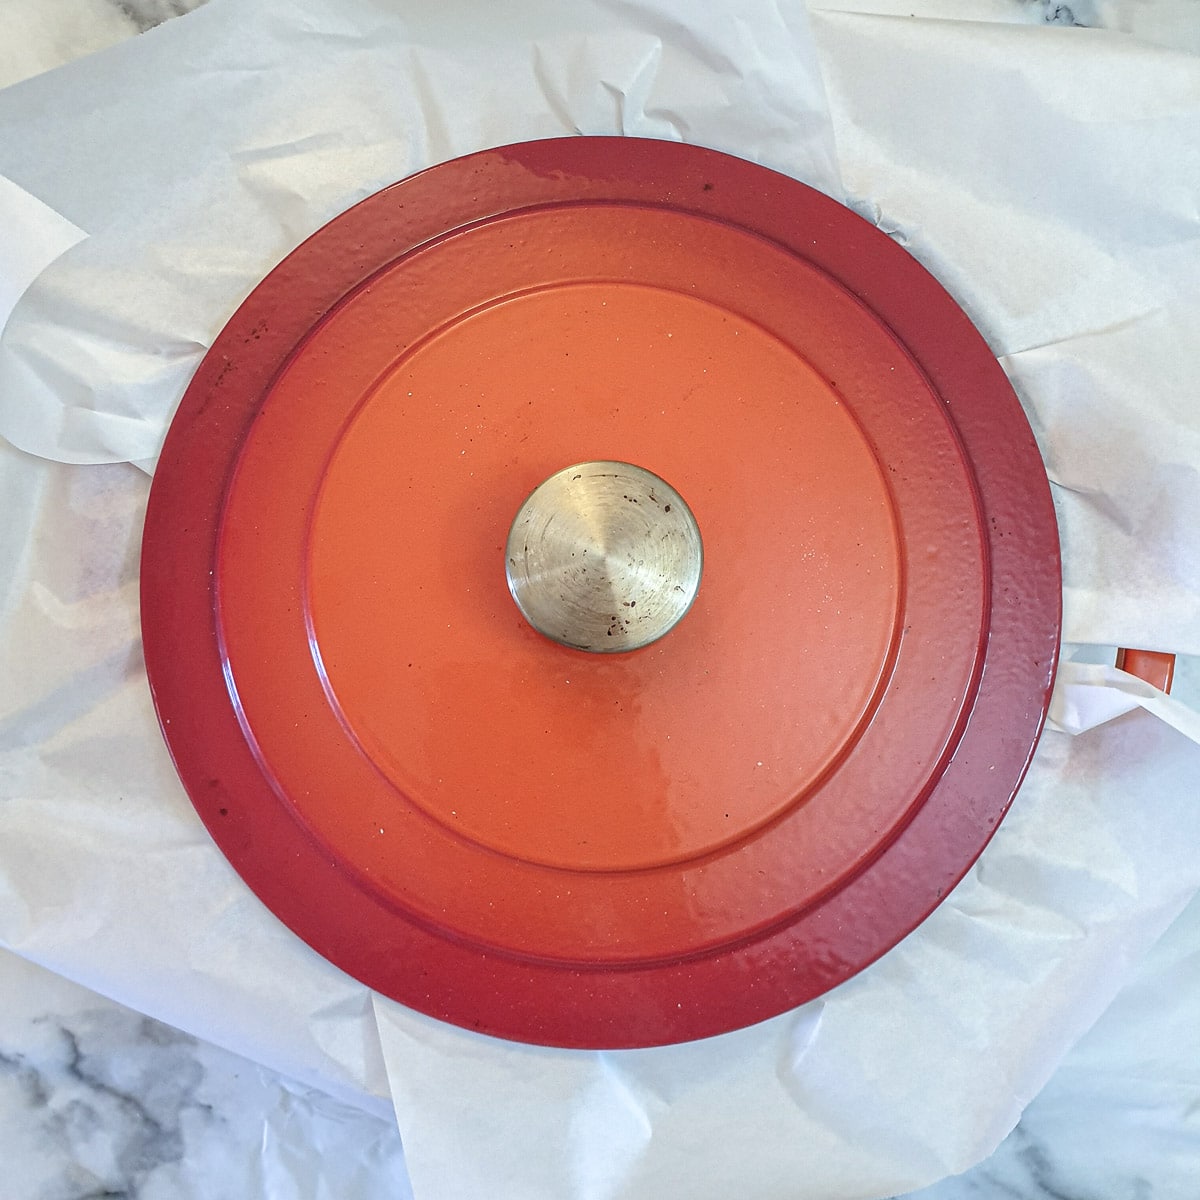
Cover the Dutch oven with a lid, letting the baking parchment stick out of the sides. Return the Dutch oven to the oven and bake for 30 minutes.
After 30 minutes, remove the lid and continue to bake for a further 10 to 15 minutes until the loaf is crisp and golden.
Remove the bread from the oven and allow it to cool before slicing.
This bread will stay fresh for at least 2 days. After that, it makes wonderful toast.
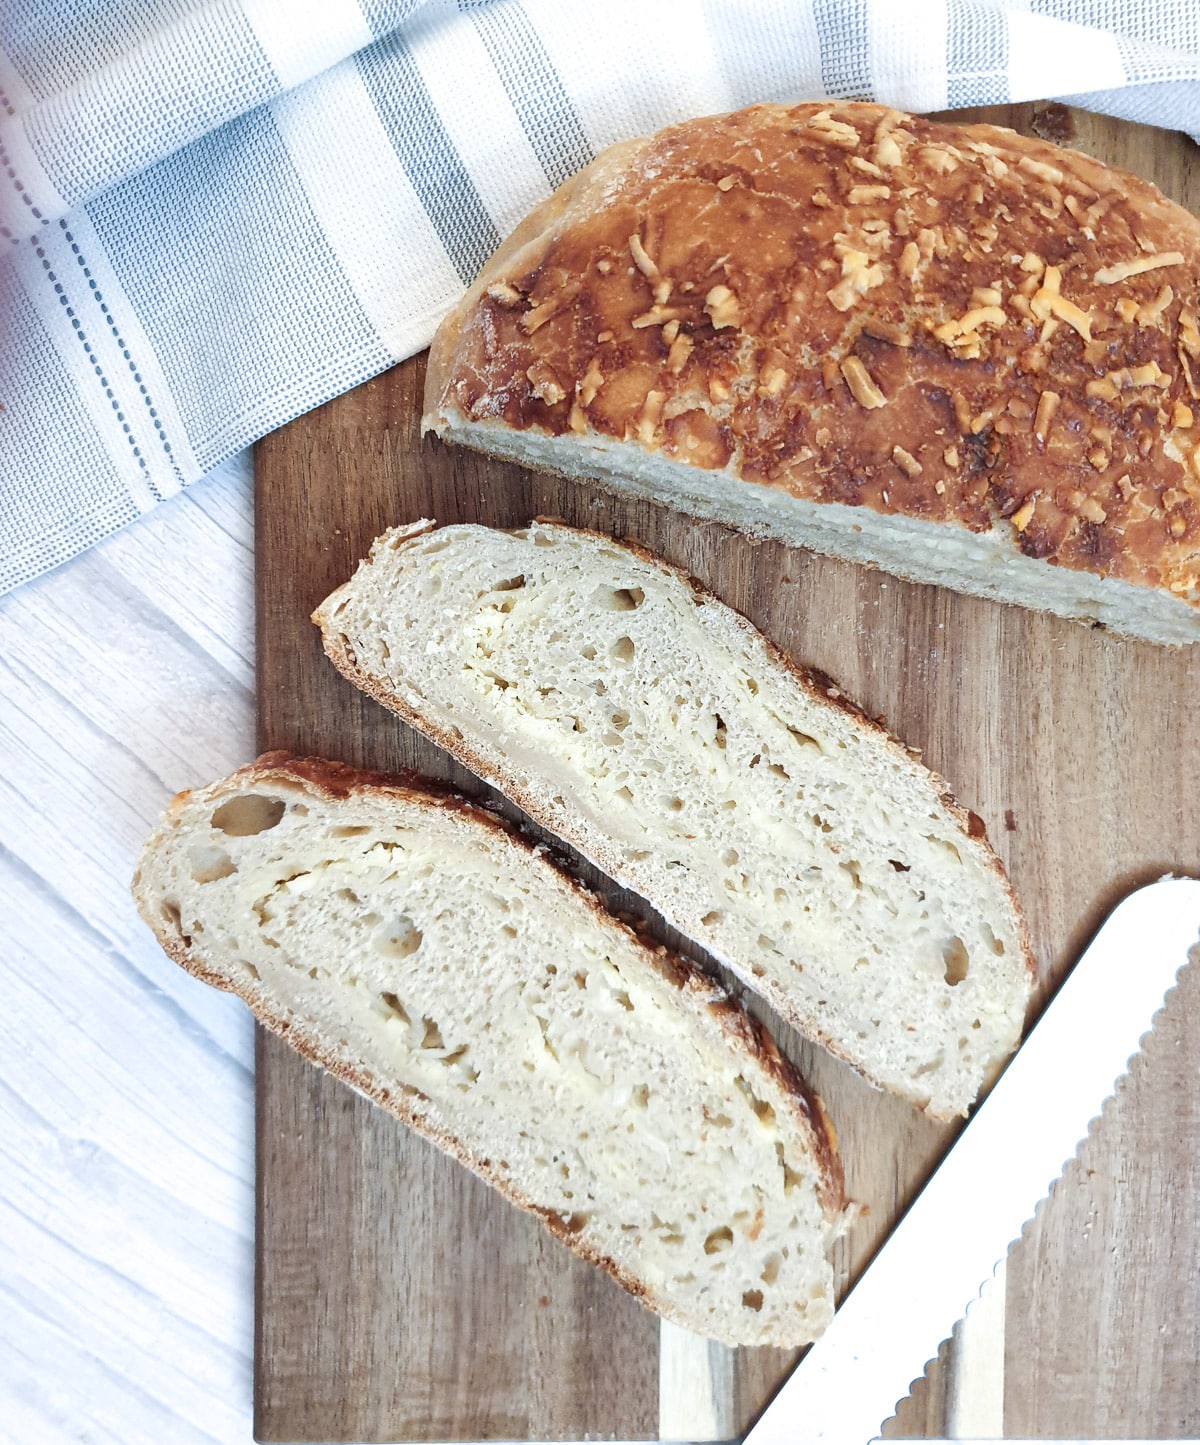
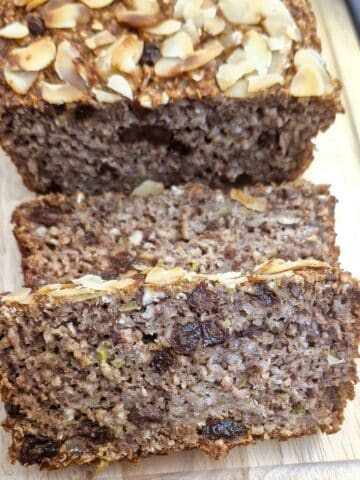
You can see the distinctive holes that form throughout the loaf, and the cheese and onion laminations in this image.
If you'd like to be notified of new recipes, why not subscribe to my newsletter? To say thank you, you will receive a free recipe e-book containing some of my most popular cakes and desserts.
Cheese and onion loaf FAQ
This bread needs to be baked in a steamy environment. If you don't have a Dutch oven, place a large bowl or dish of water on the bottom shelf of your oven while the oven is preheating. The water will start to boil and form steam.
You can either place the dough into a normal bread pan (line it with baking parchment to make for easy removal) or shape it freeform on a baking sheet.
Bake the bread on the middle shelf of your oven.
Do be careful when opening the oven door. There will be HOT STEAM in the oven that can cause a nasty burn (don't ask me how I know this). Keep your face away from the oven door when you open it.
Bake the bread for the same time as the original recipe but remove the bowl of water from the oven after 30 minutes to give the crust time to crisp.
Because the bread baked in this way is not covered with a lid, it might start to brown before the end of the cooking time. If this happens, lay a sheet of tin foil loosely over the bread to prevent further browning.
No, there are lots of other flavouring options. Why not try one of these:
- Swap out the onions for herbs - try rosemary, oregano, thyme, basil or simply a spoonful of dried Italian mixed herbs. You can use either dried or fresh herbs. Just remember that the taste of dried herbs is about three times stronger than fresh ones, so don't go overboard with the amount of dried herbs you use. You don't want to overpower the flavour.
- Layer the bread with sundried tomatoes and basil for an Italian twist.
- Swap the onion with garlic for a cheesy garlic bread - this would be perfect for serving with a barbeque, or even alongside a plate of spaghetti bolognese.
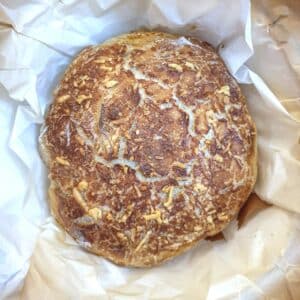
I would recommend that you store the bread in a paper bag or wrap it in a layer of greaseproof paper to maintain the crispness of the crust. You can store it in a plastic bag, but this will cause the crust to soften and may also lead to the bread turning 'soggy'.
Stale cheese and onion bread can be toasted, or even cut into small cubes and used to make croutons.
Yes, I've frozen this bread with great success. I find the best way to freeze it is to cut it into slices first. Slicing the bread means that you can take out just what you need and you don't have to defrost an entire loaf. I normally slice the bread and then pack the slices loosely in a large freezer bag. You could also layer baking parchment between the layers. The bread can be frozen for 6 months or longer. Individual slices of frozen cheese and onion bread defrost within 20 minutes on the countertop.
Save for later
If you would like to make this cheese and onion loaf, why not save the recipe to one of your Pinterest boards so you can find it easily? Just click the image below.
Alternatively, you can save the recipe by clicking on the floating heart icon on the right-hand side of the screen.
Related recipes
If you enjoy baking bread and rolls you may like to try some of my other easy recipes too:

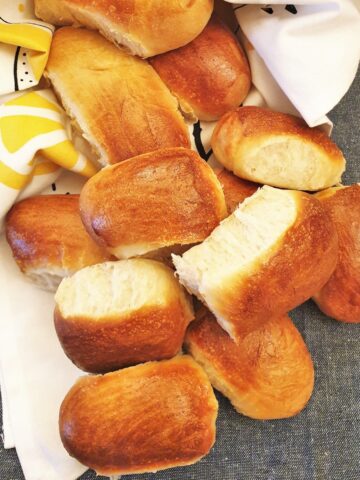
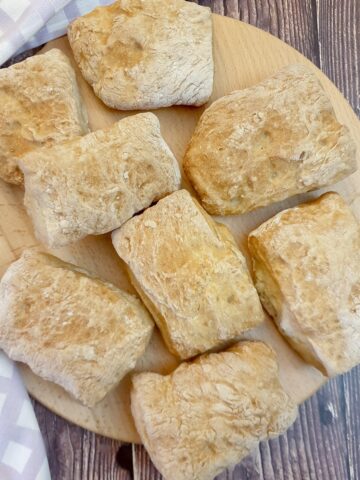
You can find these and many more recipes on my bread and scones recipes page.
📋The recipe
Cheese and onion loaf
(Click the stars to rate this recipe)
Equipment
- Mixing bowl (earthenware)
- Dutch oven OR
- Baking tray
- Pastry scrapers
Ask a Question
If you have a question about this recipe that has not been answered, please use the box below to ask it.
Use this with care. This is an AI-generated result and may contain errors or inaccuracies. I cannot be held responsible for the information returned.
Ingredients
- 3½ cups / 500 grams strong white bread flour
- 2 teaspoons / 7 grams instant yeast granules
- 1 teaspoon salt or to taste
- 1½ cups lukewarm water
- 1 cup / 100 grams grated cheese
- 1 medium onion peeled and finely sliced
Instructions
- Place the flour, salt, yeast and most of the water into a mixing bowl. Depending on the strength of your flour you may not need all of the water and it's easier to add the extra if it is needed, rather than make the dough too wet.3½ cups / 500 grams strong white bread flour, 2 teaspoons / 7 grams instant yeast granules, 1 teaspoon salt, 1½ cups lukewarm water
- Mix all the ingredients together until well combined. The dough should come together in a ball and be sticky to the touch, but not wet and sloppy. If you need the remaining water mix it in now.
- Cover the bowl with plastic wrap and then cover it with a towel. Leave the bowl of dough in a warm draught-free place to rise for a minimum of 3 hours (if you are in a hurry), but preferably longer. I like to leave mine to rise overnight. The dough should have doubled in size and be soft and spongy.
- When you are ready to bake the bread, place the dutch oven into the oven and turn the oven on to 220C / 425F. Leave it for at least 20 minutes to give it time to heat up.
- Tip the dough out onto a floured surface and use pastry scrapers to help you turn it over on itself 3 or 4 times. This will help get the air out of the dough. Sprinkle the dough lightly with flour if it seems too sticky. Pat the dough out into a thick circular shape.
- Sprinkle one half of the dough with half of the grated cheese and top with half of the sliced onions. Then use the pastry scrapers to help you fold the uncovered half of the dough up and over the cheese and onions.1 cup / 100 grams grated cheese, 1 medium onion
- Pull the dough into shape so that you have a semi-circle of dough enclosing the cheese and onions. Sprinkle the top half of the dough with more cheese and onions. Leave the bottom half of the dough uncovered.
- Using the pastry scrapers to help you, fold the bottom half of the dough up over the cheese and onions, then use your hands to stretch the dough to enclose the cheese and onion and form a circular shape.
- Lay 2 pieces of baking parchment into a cross shape and transfer the ball of dough into the centre. This will make it easier to get the dough into the dutch oven. Sprinkle the top of the dough with grated cheese.
- Take the dutch oven out of the oven (be careful, it will be very hot) and using the baking parchment to help you, transfer the dough (still on the baking parchment) into the dutch oven. You can optionally score a deep cross on top of the loaf.
- Cover the dutch oven with a lid, letting the baking parchment stick out of the sides. Return the dutch oven to the oven and bake for 30 minutes.
- After 30 minutes, remove the lid from the dutch oven (or the bowl of water if you are using a baking tray) and continue to bake for a further 10 to 15 minutes until the loaf is crisp and golden.
- Remove the bread from the oven and allow it to cool before slicing.
Notes
You can either place the dough into a normal bread pan (line it with baking parchment to make for easy removal) or shape it freeform on a baking sheet.
Bake the bread on the middle shelf of your oven.
Do be careful when opening the oven door. There will be HOT STEAM in the oven that can cause a nasty burn (don't ask me how I know this). Keep your face away from the oven door when you open it.
Bake the bread for the same time as the original recipe but remove the bowl of water from the oven after 30 minutes to give the crust time to crisp.
Because the bread baked in this way is not covered with a lid, it might start to brown before the end of the cooking time. If this happens, lay a sheet of tin foil loosely over the bread to prevent further browning. Nutrition has been calculated on the assumption that this loaf will be cut into 10 slices, and is per slice.
Nutrition
I am not a nutritionist. The nutrition information has been calculated using an on-line calculator, and is intended for information and guidance purposes only. If the nutrition information is important to you, you should consider calculating it yourself, using your preferred tool.
If you made this recipe and enjoyed it, I'd love it if you could give me a star rating in the comments below. And if you'd like to get in touch, you can email me at [email protected]. I'd love to hear from you. And don't forget to subscribe to my mailing list so you can grab yourself a copy of my FREE COOKBOOK!
If you'd like to continue browsing, just click on this link to all my recipes.


Did you make this recipe? Let me know!