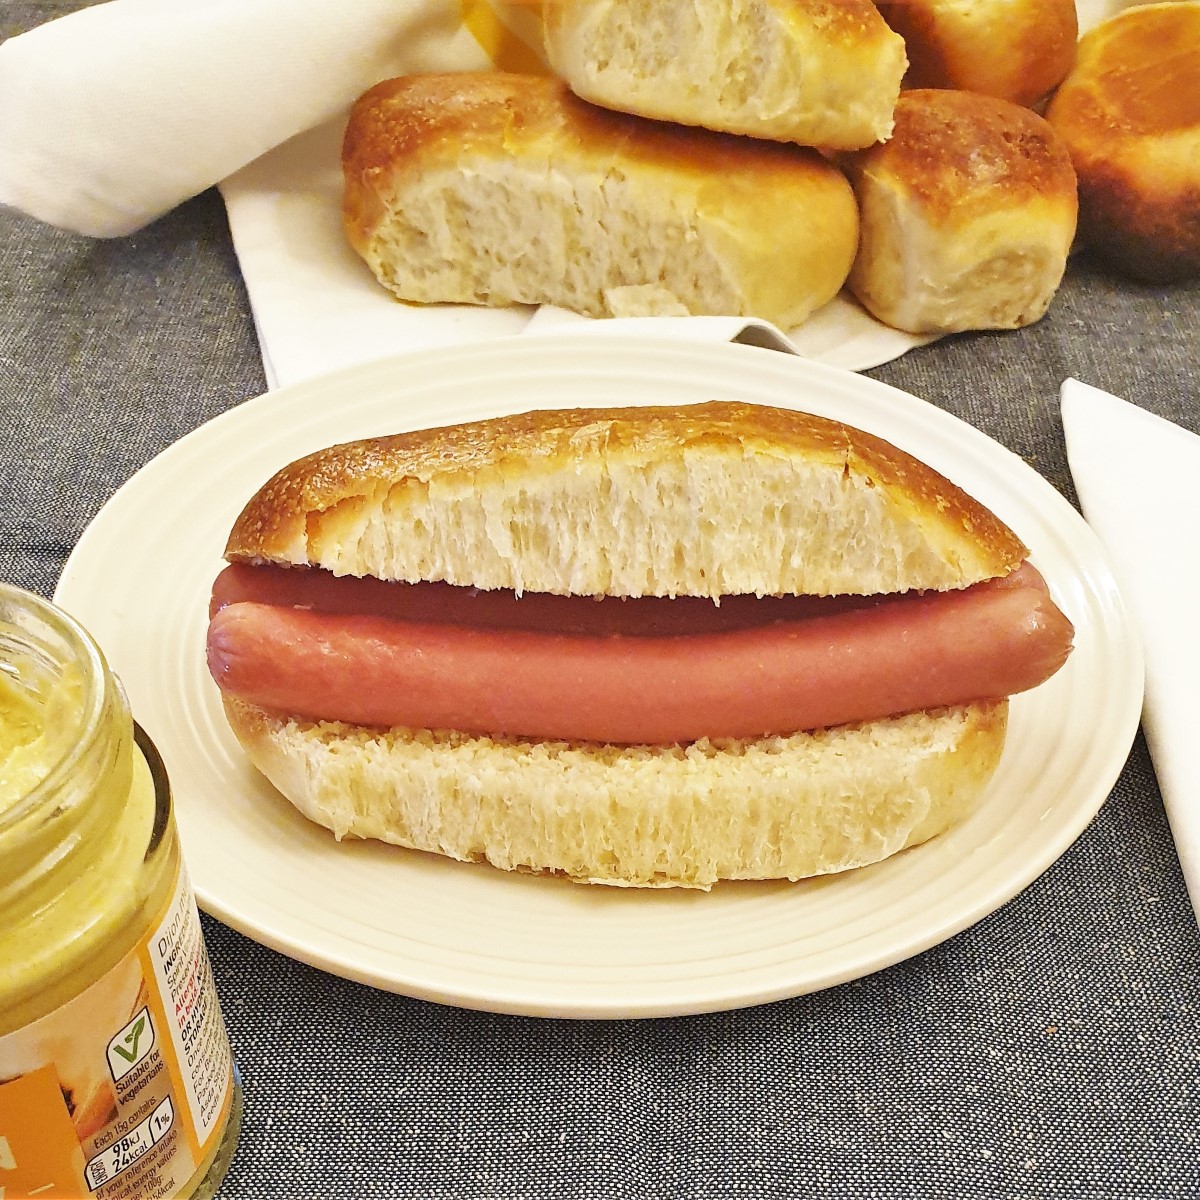
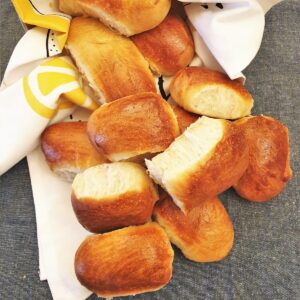
Now that spring is finally on its way in the Northern hemisphere, thoughts are turning to outdoor eating and barbeques. This recipe for homemade hot dog rolls is the perfect way to showcase your baking talents and impress your guests with your own homemade rolls. This recipe is perfect for making hot dog rolls, and you can use it to make hamburger buns too!
**As an Amazon affiliate I earn from qualifying purchases.**
Jump to:
What makes the perfect hot dog roll?
A hot dog is everyone's favourite snack. But if the roll is dry and tasteless then a hot dog can be quite bleh! I've done a bit of research into the perfect hot dog roll, and this is what I've found.
- A hot dog roll should be the same length as the sausage. There's nothing worse than taking a bite out of a hot dog only to find that there's no sausage in it.
- It should have a soft, chewy texture. Don't get me wrong, I love a crusty bread roll (see my post on Portuguese rolls if you are looking for crusty rolls), but a hot dog roll shouldn't leave crumbs all over the place.
- The rolls should freeze well. Nobody likes wasting food, so any leftover rolls should be able to be frozen for later use.
- They should stay fresh as long as possible. Stale bread is no fun to eat and you should be able to freshen the rolls up by steaming them in a damp paper towel in the microwave for a few seconds.
I think this recipe for hot dog buns ticks all these boxes and more.
For instance, you can simply change the shape of the dough and make hamburger buns, or even small soft dinner rolls. This is a very versatile recipe and one that I think you will love.
What's more, because you've made these rolls yourself, you know exactly what's gone into them - so no preservatives etc. And of course, baking your own bread gives you such a sense of achievement!
So let's get on with the recipe - it's much easier than you would think.
Recipe information
- Prep time - 20 minutes
- Rising and proofing time - 4 hours (approximately)
- Cooking time - 20 minutes
- Yield - 8 long rolls (or 16 round or shorter rolls)
- Calories - 283 per roll
- Main equipment - stand mixer. I love my Kenwood chef stand mixer. It makes such short work of mixing dough. But don't worry if you don't have one - I've given instructions in the recipe for kneading the dough by hand.
Ingredients
With just a few simple ingredients you can be making your own hot dog rolls today.
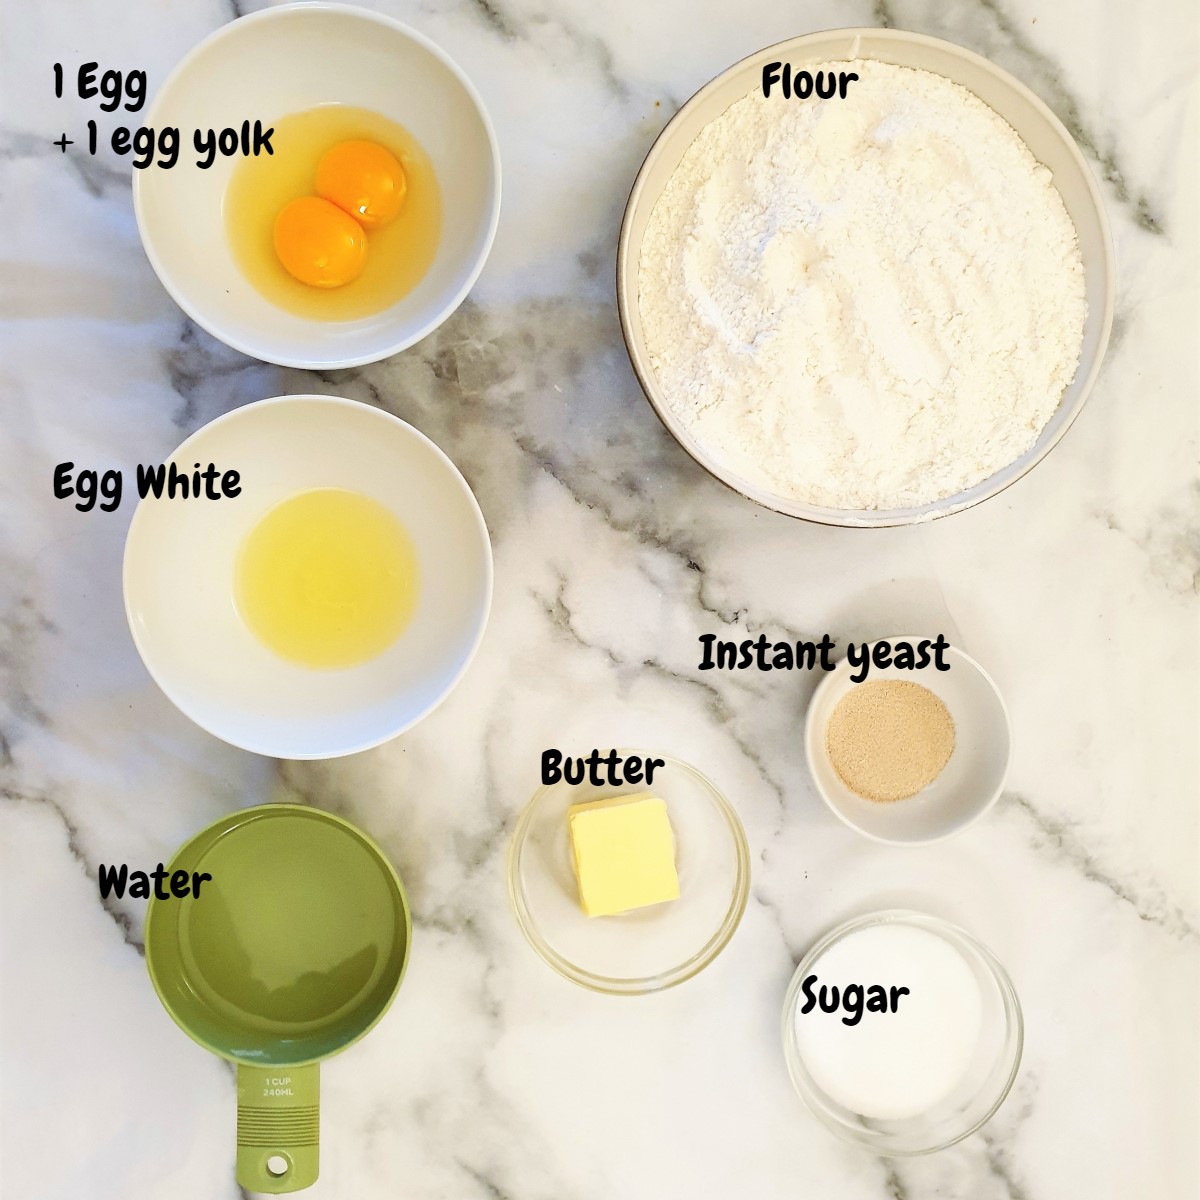
- Flour - for bread making you should always use strong bread flour. Bread flour contains more gluten than all-purpose flour, which helps to create the chewy texture that we need.
- Eggs - this recipe is enriched with one whole egg and one egg yolk. The white of the second egg is mixed with water and used to glaze the rolls before baking.
- Instant yeast - these are granules as opposed to fresh yeast and they have a much longer shelf-life than fresh. They are sold in the UK either in packets of 7g or in tubs that you can measure out yourself. One 7g packet is the equivalent of 2 teaspoons of instant yeast.
- Butter - the dough is enriched with melted butter which helps provide a softer texture, and enhances the taste.
- Sugar - not much, just enough for a hint of sweetness. You can leave out the sugar if you prefer.
- Salt - optional, but I find that a single teaspoon of salt does enhance the flavour.
- Water - this provides the moisture content for the rolls and should be lukewarm, not cold.
Instructions
Mix the dough
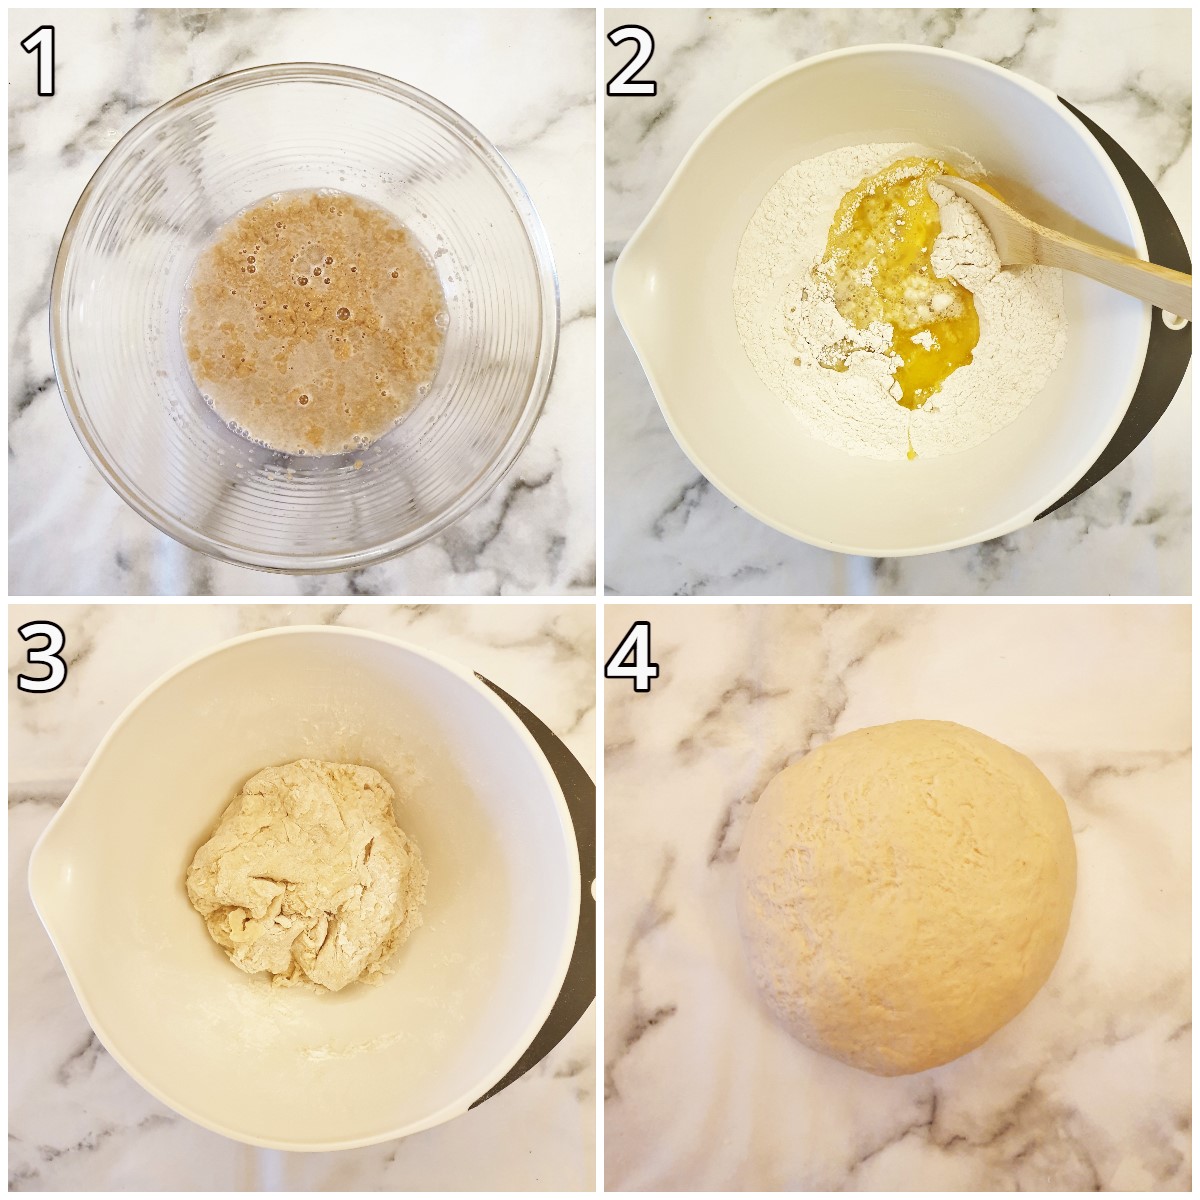
- Measure the water, sugar and yeast into a mixing bowl, and stir until the sugar has dissolved (image 1 above).
- Break one egg into a bowl. Break the other egg and separate the yolk and the white. Add the yolk to the first egg and keep the white in a separate bowl. This will be used for brushing onto the rolls later. Beat the egg and egg yolk lightly with a fork.
- Place the flour into a mixing bowl and pour in the melted butter, the beaten eggs and the yeast mixture (image 2 above). Tip - melt the butter in the microwave - it only takes a few seconds.
- Mix with a wooden spoon until well incorporated (image 3 above).
- Tip the dough out onto a floured surface and knead for 10 minutes until you have a ball of soft non-sticky dough that springs back when you press it gently with your finger (image 4 above).
How to knead dough
Bread dough is kneaded to develop and stretch the gluten strands in the flour to give strength and texture to the rolls.
- Using the bottom half of your palm, press the dough firmly down and away from you.
- Pull the edge of the dough back up towards you and then press it firmly down and away from you again
- Repeat this movement, giving the dough a quarter turn after every three 'pushes'.
- Keep this up for about 10 minutes until the dough is soft and elastic.
If you are using a stand mixer - attach the dough hook and tip all the ingredients into the bowl. Mix on low speed for 2 minutes to combine the ingredients, then increase the speed to medium and leave to mix for about 5 minutes.
Rest the dough
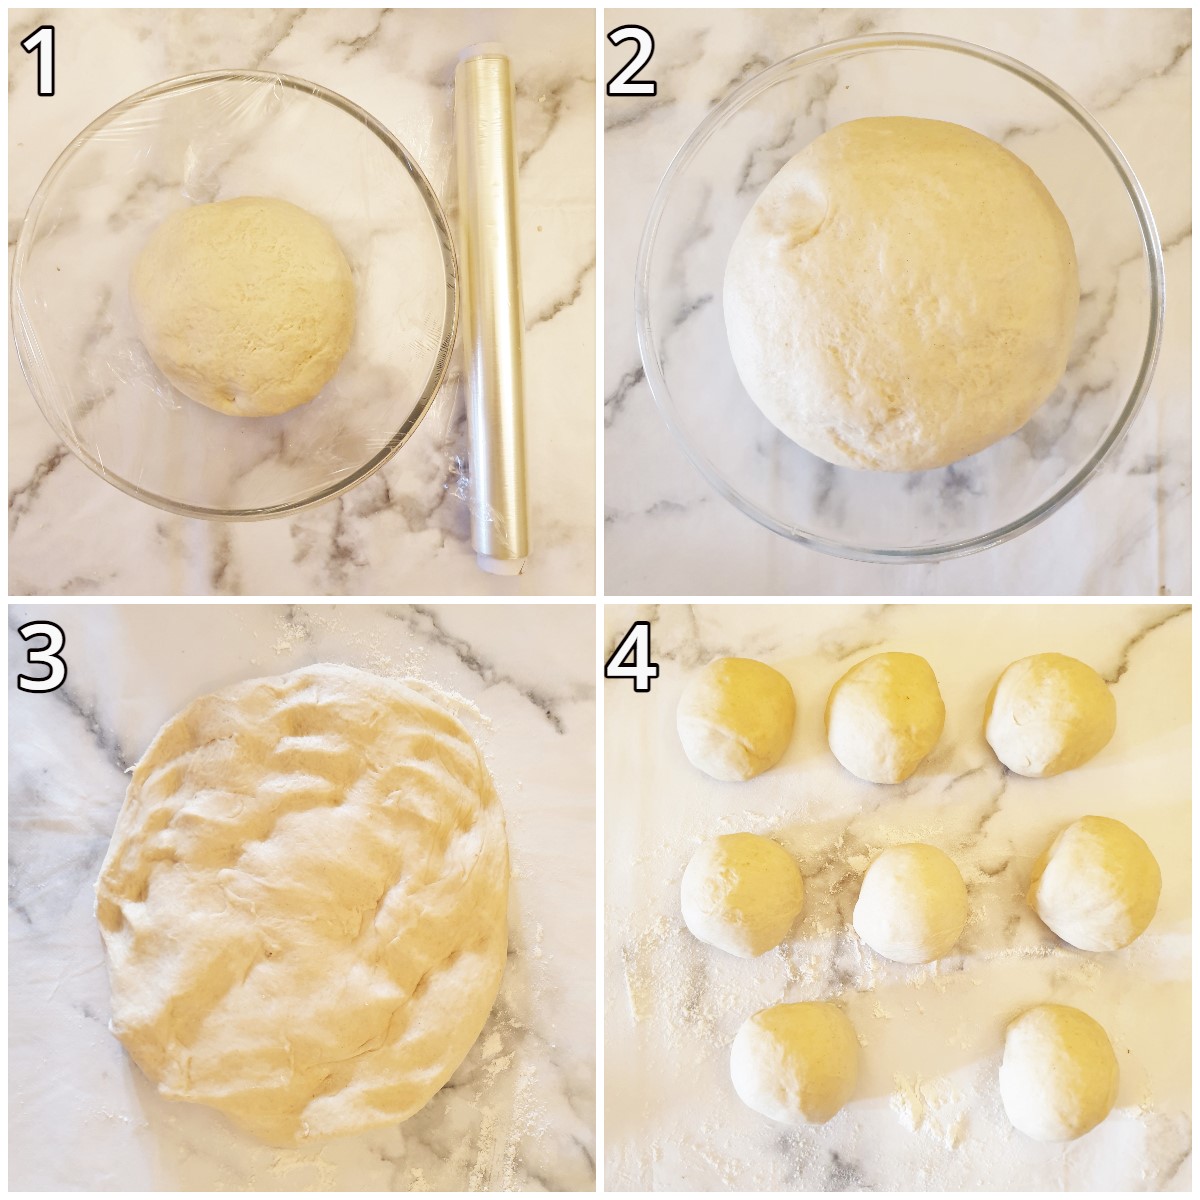
- Place the ball of dough into a mixing bowl, cover the bowl with a piece of plastic wrap (image 1 above) and leave in a warm place to rise for about 2 hours. The dough will double in size (image 2 above). I also like to cover the bowl with a clean towel for extra warmth.
- Once the dough has risen, tip it onto a floured surface and punch it down to remove the air bubbles (image 3 above).
- Now divide the dough into 8 equal pieces. I weighed my ball of dough and it weighed 740g which meant each ball was about 92g.
- If you don't have a set of kitchen scales you could guess the size, but I really do recommend having a set of scales in your kitchen. It makes measuring the ingredients for baking so much more accurate than using measuring cups. I use the one in the link, and it's great because it gives you measurements in kg, lb, oz and grams (and it's not expensive either 🙂 ).
Shape the rolls
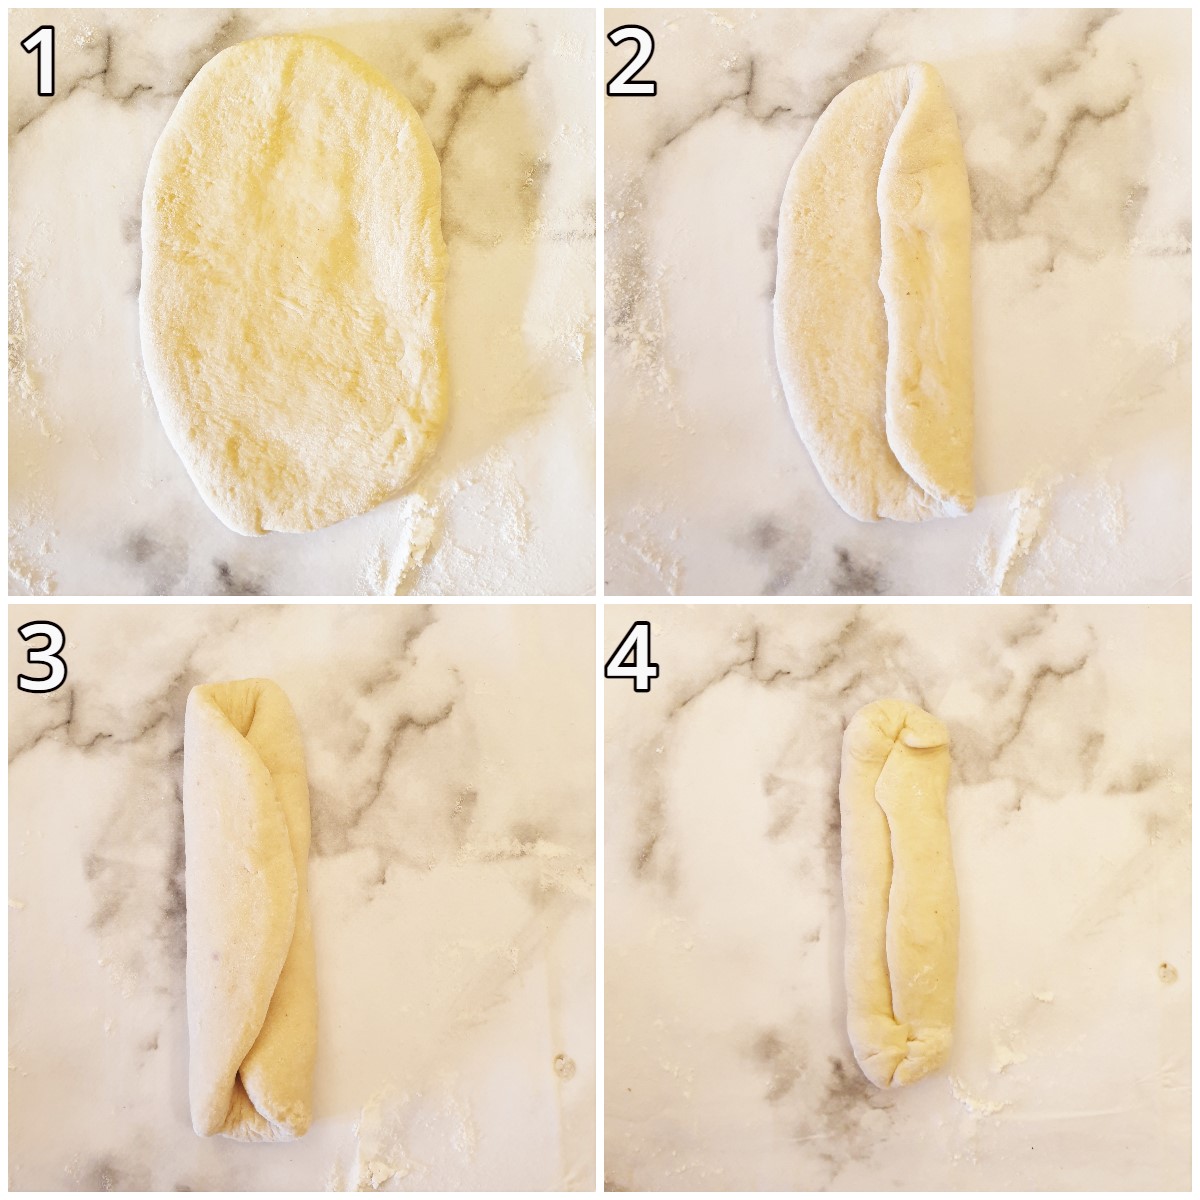
- Take each ball of dough in turn and either roll it with a rolling pin or stretch and flatten it with your hand into an oblong shape approximately 6" x 3" in size (15cm x 8 cm) (image 1 above).
- Fold one side of the dough about one-third of the way over (image 2 above) and then fold the other side on top (image 3 above).
- Press the ends together to close (image 4 above).
- If you want to make hamburger buns, divide the dough into 10 or 12 pieces and flatten each ball of dough to about half an inch in thickness before placing on the baking tray. I find that if I only make 8 round buns out of this dough, the buns are too large.
Proof and bake
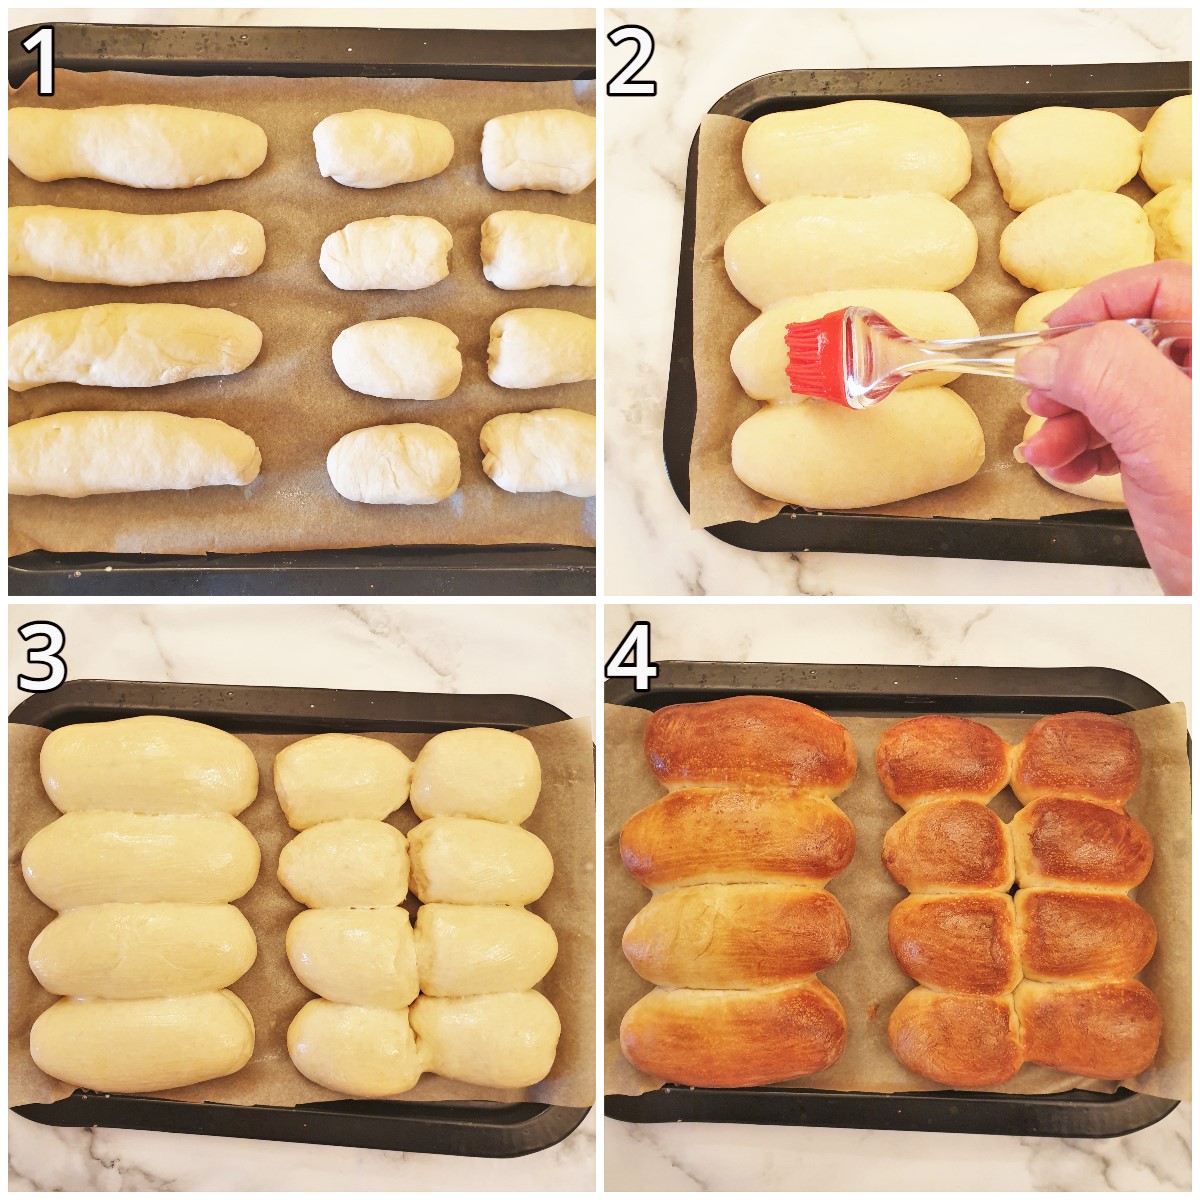
- Place the rolls onto a baking tray lined with a piece of baking parchment (or a silicone baking mat). Leave about ½" or 1cm between each roll to allow for expansion, cover with plastic wrap and leave in a warm place to rise. This will take about 2 hours. I left mine overnight because I started making these rather late in the day.
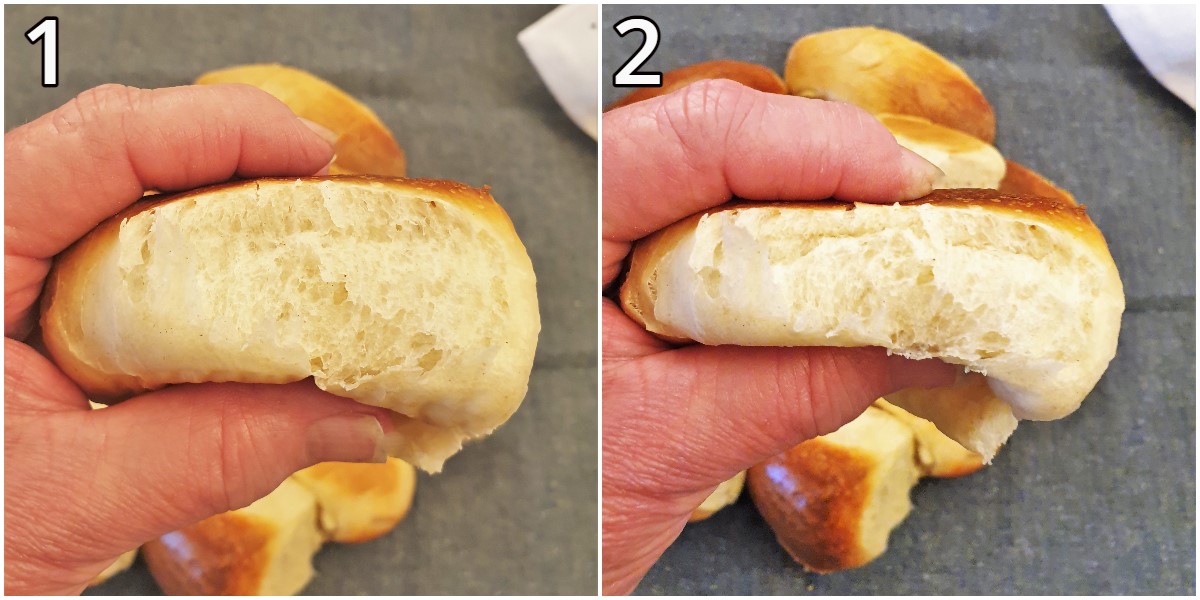
- You can also make smaller rolls by cutting each of the larger rolls in half (image 1 above). This size is perfect for dinner rolls.
- Once the rolls have risen, mix the remaining egg white with 1 tablespoon of cold water and brush all over the top of the rolls (images 2 and 3 above).
- Bake in a preheated oven (190C / 395F) for 15 minutes until golden.
- Remove from the oven, cover the baking tray with a clean tea towel and allow to cool. Then break apart and serve.
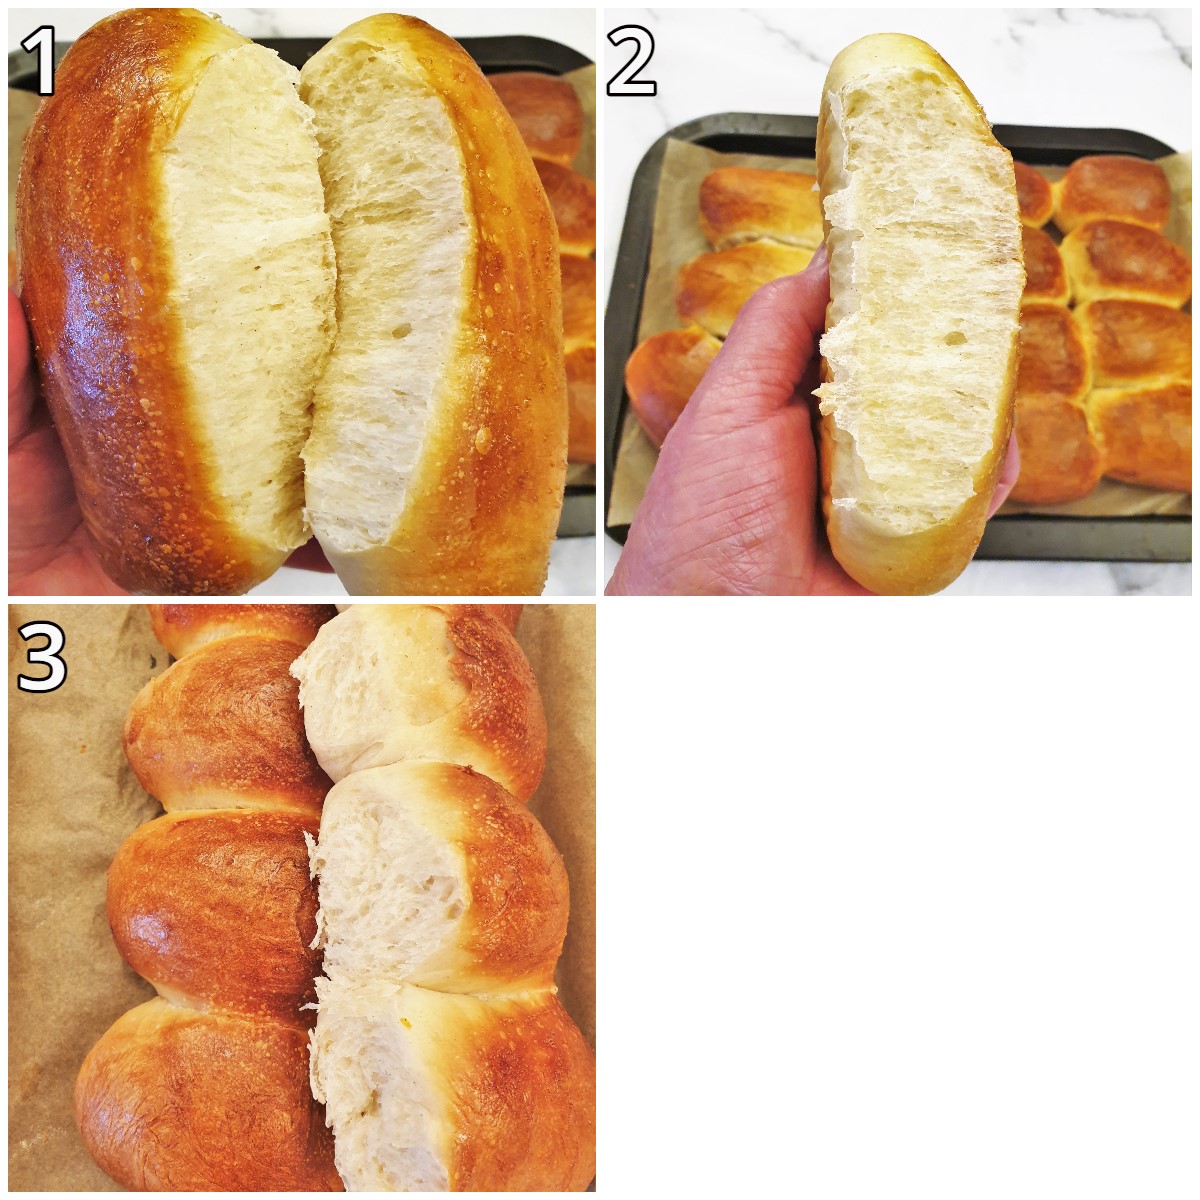
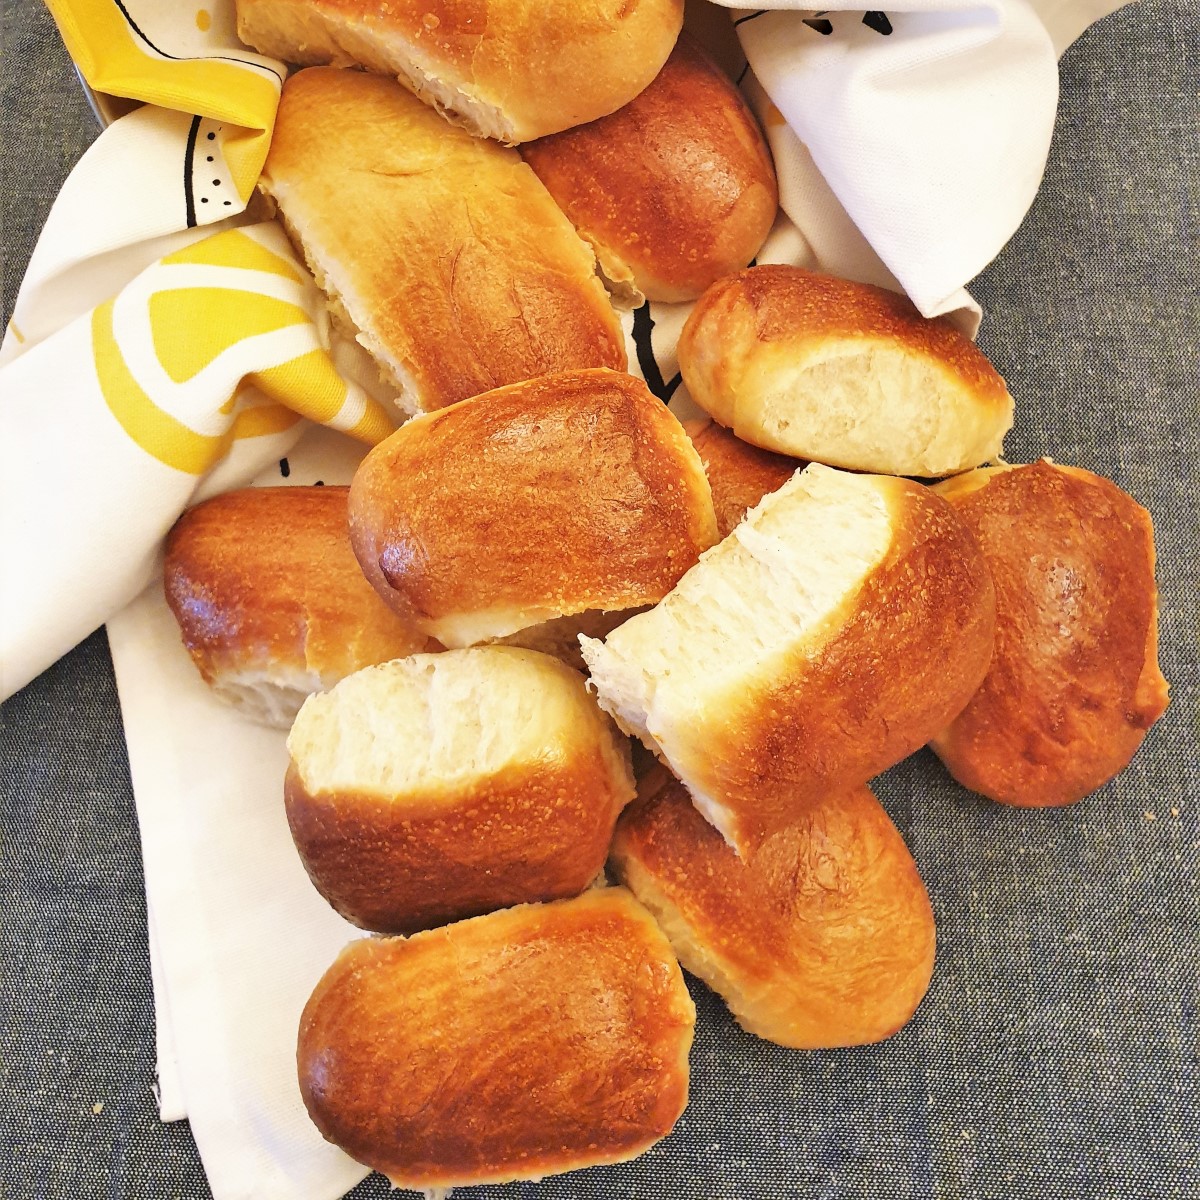
Just look at how soft these rolls are -
If you'd like to be notified of new recipes, why not subscribe to my newsletter? To say thank you, you will receive a free recipe e-book containing some of my most popular cakes and desserts.
Questions
Yes, you can freeze the baked rolls - just let them cook and then pack them into plastic bags and freeze. You can leave them in the freezer for up to 6 months.
To use, remove from the freezer and allow to defrost on the countertop.
Warm them in the oven for a few minutes, or warm them in the microwave for 10 seconds.
You can also freeze the shaped rolls. Brush the unproofed rolls with egg white and water and place them, still on the baking tray, into the freezer. Once solid, transfer them to a plastic bag and freeze them for up to 6 months.
To use, remove from the freezer and arrange on baking parchment on a baking tray. Leave to proof for at least 4 hours. This will allow the frozen rolls time to defrost before they start to proof.
Bake as per the recipe instructions.
The rolls should stay fresh for at least 2 days. However, if they go stale you can freshen them in one of two ways.
1. Sprinkle the rolls with a few drops of water and place them in a hot oven for 5 minutes.
2. Wrap each stale roll in a sheet of damp kitchen paper towel and microwave on high for 10 seconds.
You can also cut stale rolls in half, lengthwise, and toast in the toaster.
Save for later
Why not save this homemade hot dog roll recipe to your Pinterest board so you can make it later? Just click on the image below.
Alternatively, you can save the recipe by clicking on the floating heart icon on the right-hand side of the screen.
Related recipes
If you enjoy baking bread and rolls you may like to try some of my other easy recipes too:

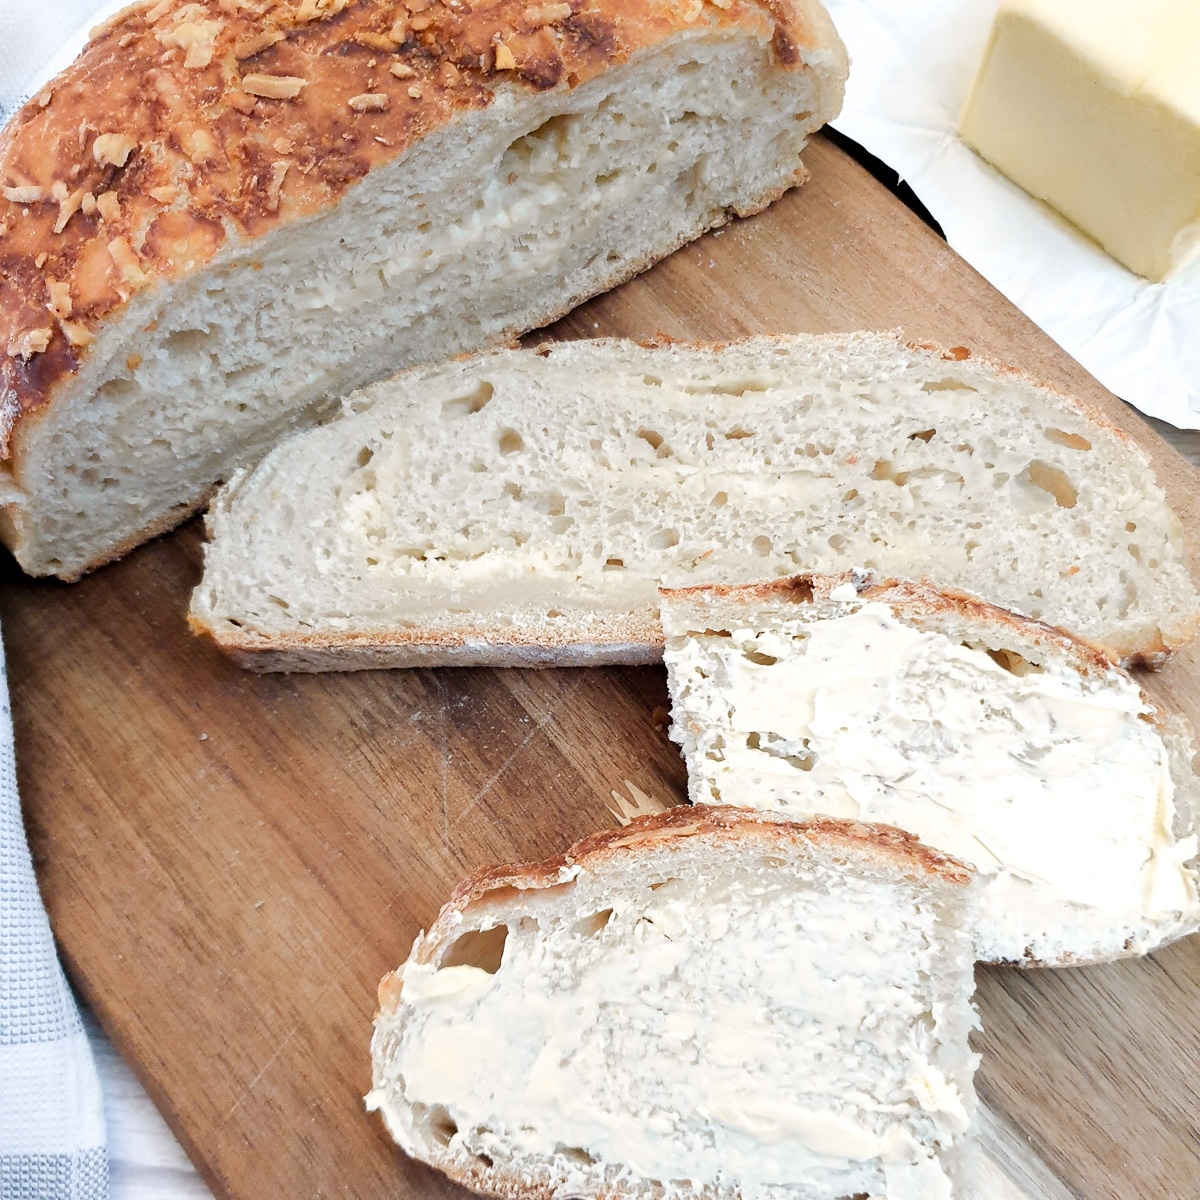
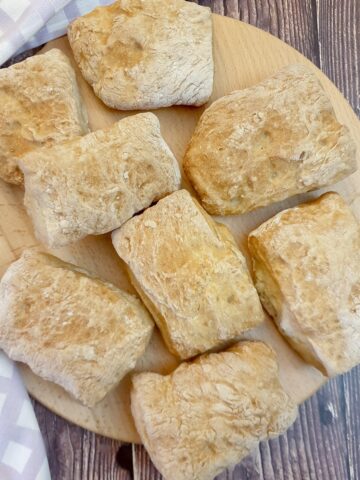
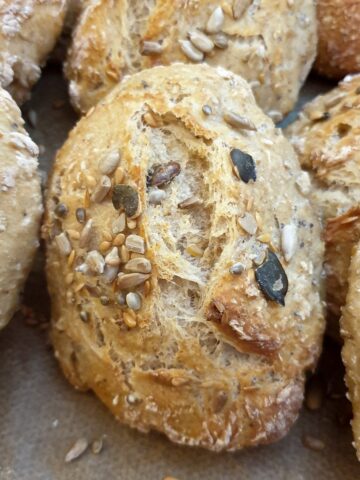
You can find these and many more recipes on my bread and scones recipes page.
📋The recipe
Homemade hot dog rolls (buns)
(Click the stars to rate this recipe)
Equipment
- Mixing bowl
- Baking tray
- Baking parchment
- Stand mixer optional
Ask a Question
If you have a question about this recipe that has not been answered, please use the box below to ask it.
Use this with care. This is an AI-generated result and may contain errors or inaccuracies. I cannot be held responsible for the information returned.
Ingredients
- 3¼ cups (450g) strong bread flour
- ¾ cup (200ml) lukewarm water
- 2 teaspoons (7g) instant yeast granules
- 1 tablespoon (13g) white sugar
- 2 large eggs 1 egg separated
- 2 ounce (60g) butter melted
- 1 teaspoon salt
Instructions
- Measure the water, sugar and yeast into a mixing bowl, and stir until the sugar has dissolved.
- Break one egg into a bowl. Break the other egg and separate the yolk and the white. Add the yolk to the first egg and keep the white in a separate bowl. This will be used for brushing onto the rolls later. Beat the egg and egg yolk lightly with a fork.
- Place the flour and salt into a mixing bowl and pour in the melted butter, the beaten eggs and the yeast mixture.
- Mix with a wooden spoon until well incorporated.
- Tip the dough out onto a floured surface and knead for 10 minutes until you have a ball of soft non-sticky dough that springs back when you press it gently with your finger.
- Place the ball of dough into a mixing bowl, cover the bowl with a piece of plastic wrap and leave in a warm place to rise for about 2 hours. The dough will double in size . I also like to cover the bowl with a clean towel for extra warmth.
- Once the dough has risen, tip it out onto a floured surface and punch it down to remove the air bubbles.
- Now divide the dough into 8 equal pieces. I weighed my ball of dough and it weighed 740g which meant each ball was about 92g
- Take each ball of dough in turn and either roll it with a rolling pin or stretch and flatten it with your hand into an oblong shape approximately 6" x 3" in size (15cm x 8 cm)
- Fold one side of the dough about one-third of the way over and then fold the other side on top. Press the ends of the dough together to close. (See post for images if you are unsure of how to do this).
- Once the rolls have risen, preheat the oven to 190°C / 375°F. Mix the remaining egg white with 1 tablespoon of cold water and brush all over the top of the rolls
- Bake in the preheated oven for 15 minutes until golden brown.
Notes
- Using the bottom half of your palm, press the dough firmly down and away from you.
- Pull the edge of the dough back up towards you and then press it firmly down and away from you again
- Repeat this movement, giving the dough a quarter turn after every three 'pushes'.
- Keep this up for about 10 minutes until the dough is soft and elastic.
Nutrition
I am not a nutritionist. The nutrition information has been calculated using an on-line calculator, and is intended for information and guidance purposes only. If the nutrition information is important to you, you should consider calculating it yourself, using your preferred tool.
If you made this recipe and enjoyed it, I'd love it if you could give me a star rating in the comments below. And if you'd like to get in touch, you can email me at [email protected]. I'd love to hear from you. And don't forget to subscribe to my mailing list so you can grab yourself a copy of my FREE COOKBOOK!
If you'd like to continue browsing, just click on this link to all my recipes.

Did you make this recipe? Let me know!