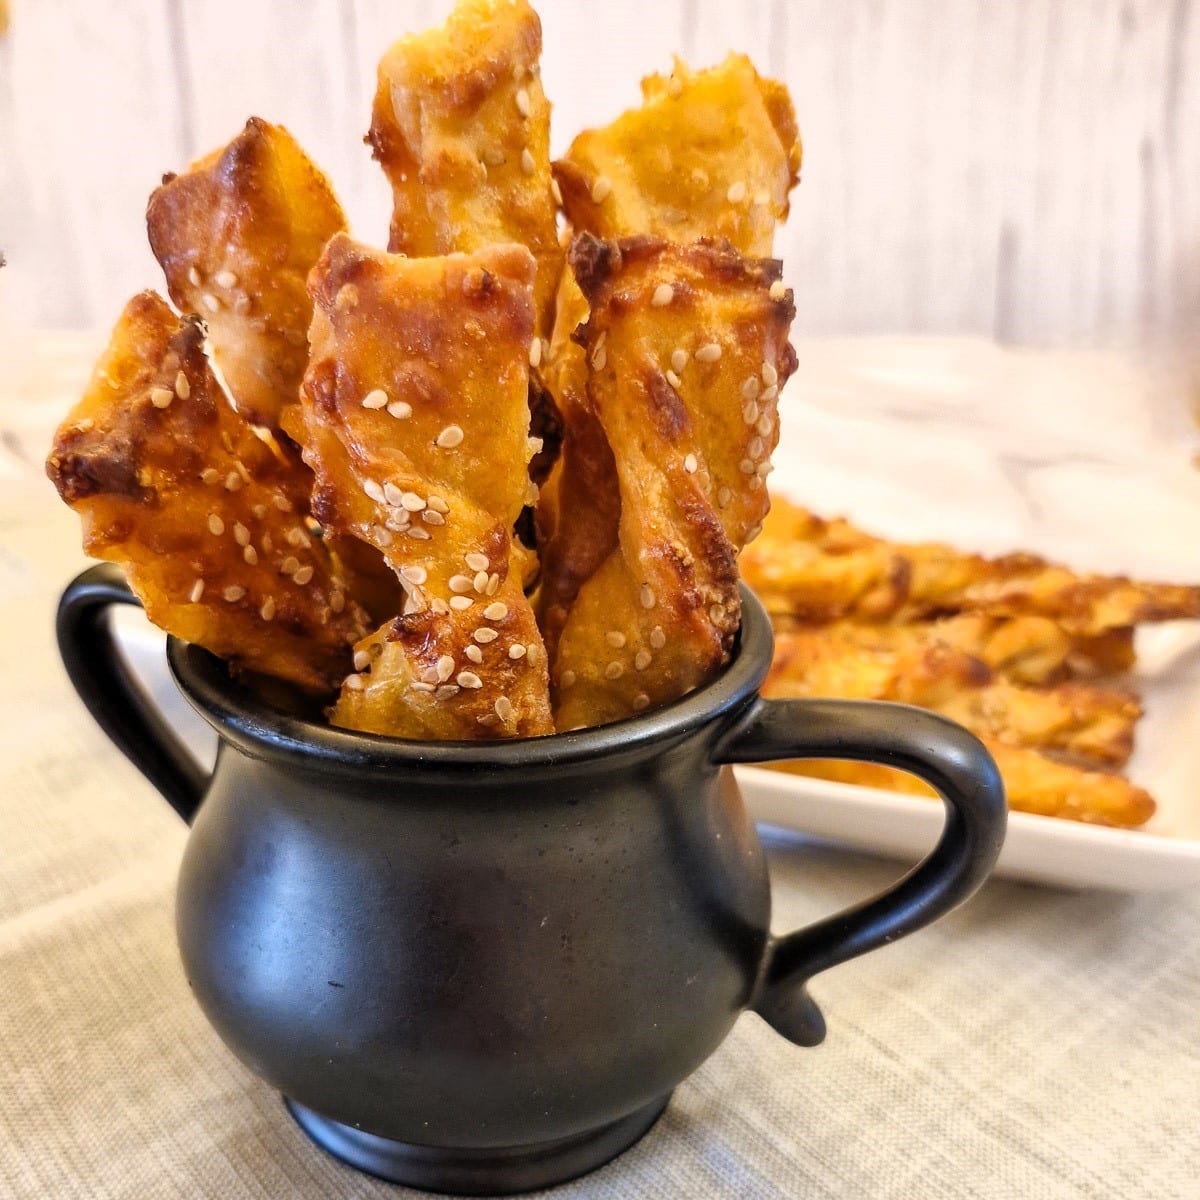
These easy cheese straws are made with 2-ingredients dough rather than puff pastry, which gives them more of a chewy texture. They are perfect for serving with sundowners and I love dipping them in a bowl of soup!
I love how versatile this 2-ingredient dough is. You can use it for both sweet and savoury recipes. I've used it in lots of recipes such as these South African koeksisters and also for this buttery garlic naan bread. I've even used it to make vetkoek which are normally made with yeast and take hours to make the traditional way.
And today, I'm going to show you how easy it is to make these delicious extra cheesy cheese straws using the same dough.
Because this is a dense dough, the cheese straws aren't as crispy as they would be if you made them with puff pastry. Instead they have a more chewy texture, but are packed with cheesy flavour and are delicious served as a light snack with a sundowner. I have to say though, my favourite way to eat them is to dunk them in a bowl of soup.
I've used 2 different types of cheese, cheddar and parmesan, to make these cheese straws, and it is the layers of cheese folded into the pastry that give these cheese straws the lamination that you would typically get with puff pastry.
The pastry itself is simply made by combining self-raising flour and Greek yoghurt. However, for this recipe, I've added a touch of paprika to the dough for extra flavour.
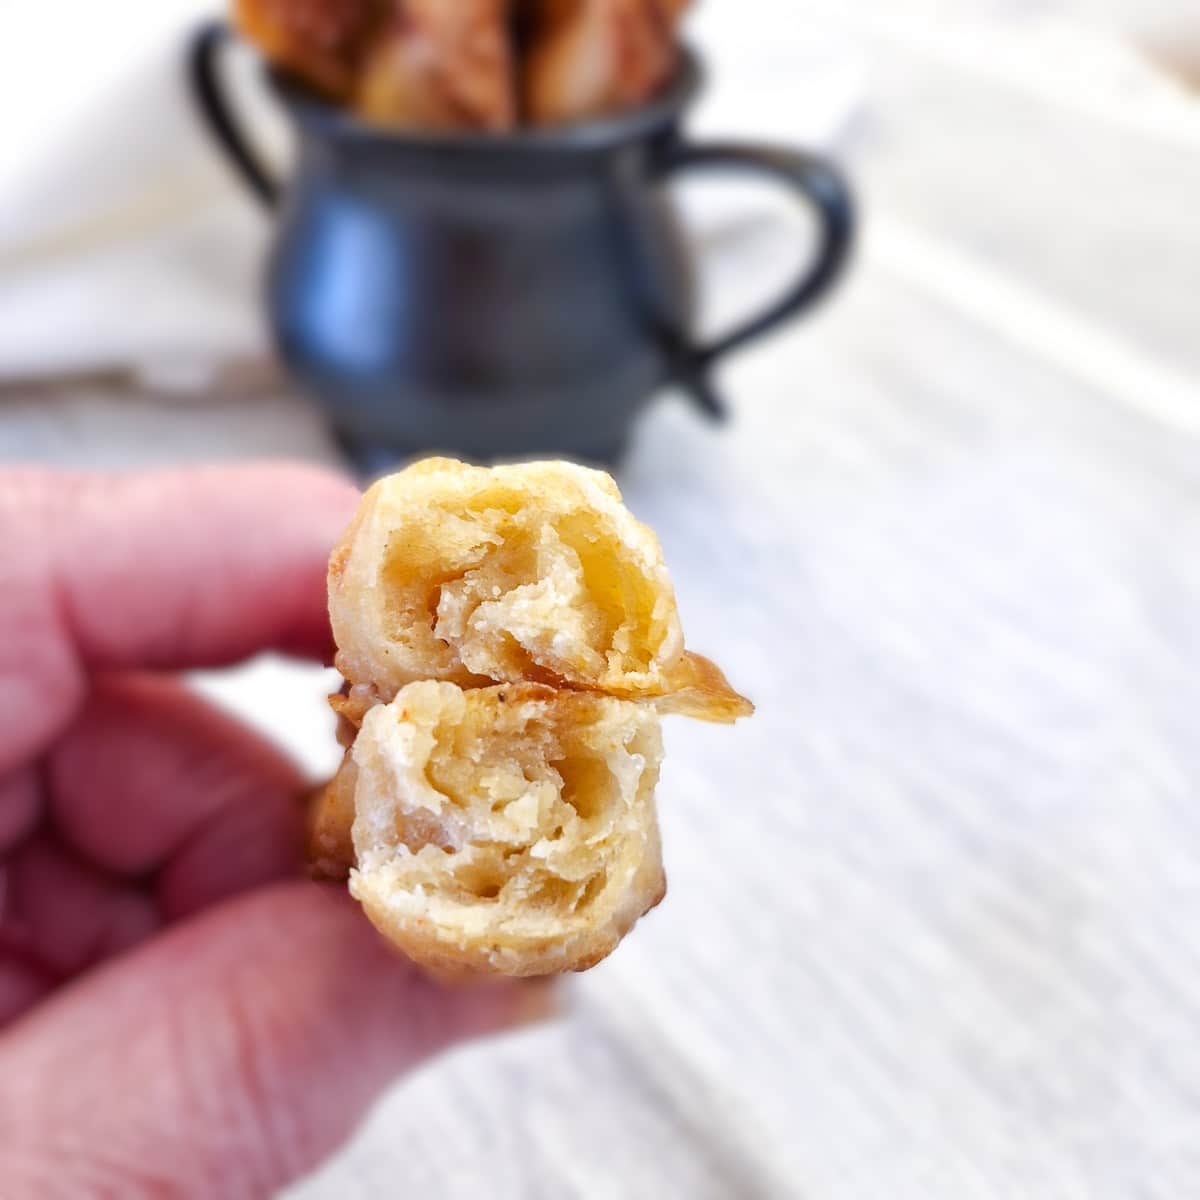
You can see the texture of the cheese straws in the next image. Even though they are slightly chewy, they still have a light and airy texture.
So without further ado let's get on with the recipe.
Jump to:
Ingredients
This recipe makes about 2 dozen cheese straws.
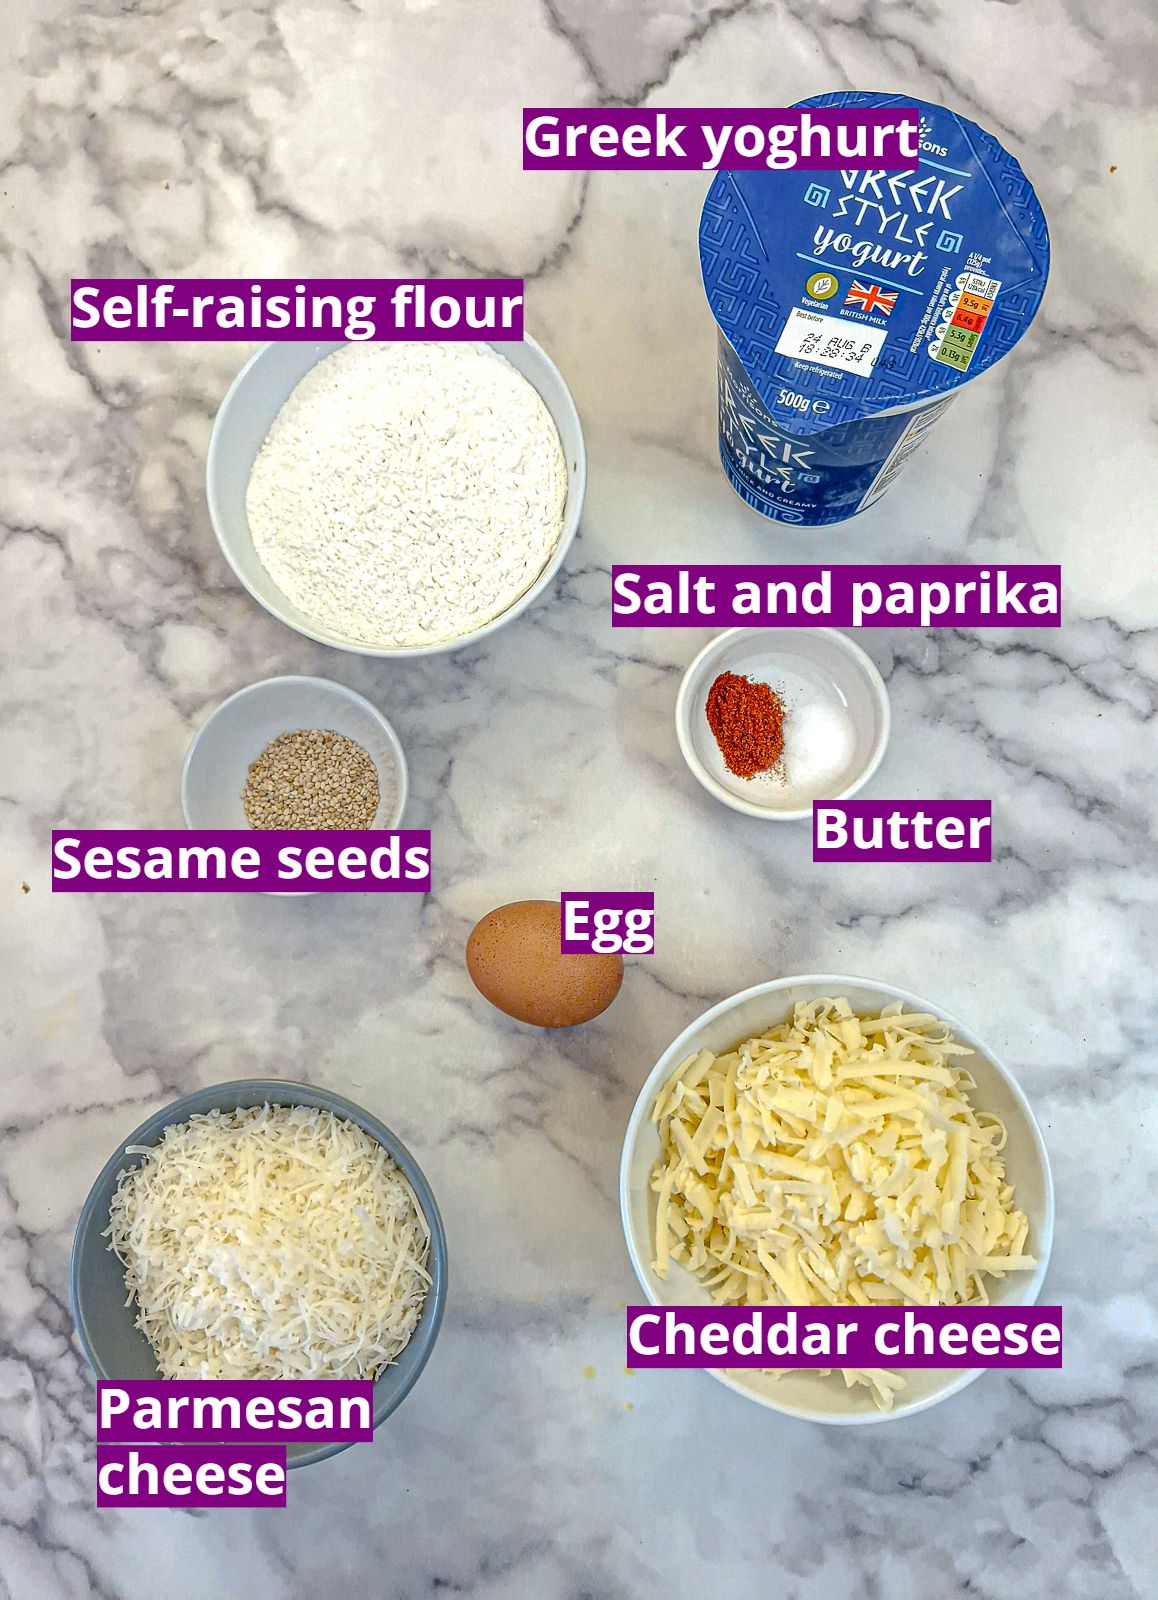
- Self-raising flour - if you only have plain flour you can use this, but you should add one teaspoon of baking powder for every cup of plain flour.
- Greek yoghurt - this is thick Greek yoghurt or natural yoghurt, not the fruity variety!
- Salt and paprika - I know I said that this is 2-ingredient dough, but a little salt and paprika add extra flavour.
- Egg - this is lightly beaten and used to brush on the cheese straws before they go in the oven.
- Sesame seeds - optional, but add a nice taste and texture to the cheese straws. You could substitute with poppy seeds if you prefer.
- Cheddar and parmesan cheese -grated and used to spread onto the rolled pastry. If you want an even more cheesy taste you could sprinkle a little grated parmesan onto the cheese straws with the sesame seeds.
**You can find the exact ingredient measurements on the printable recipe card at the end of this post**
Instructions
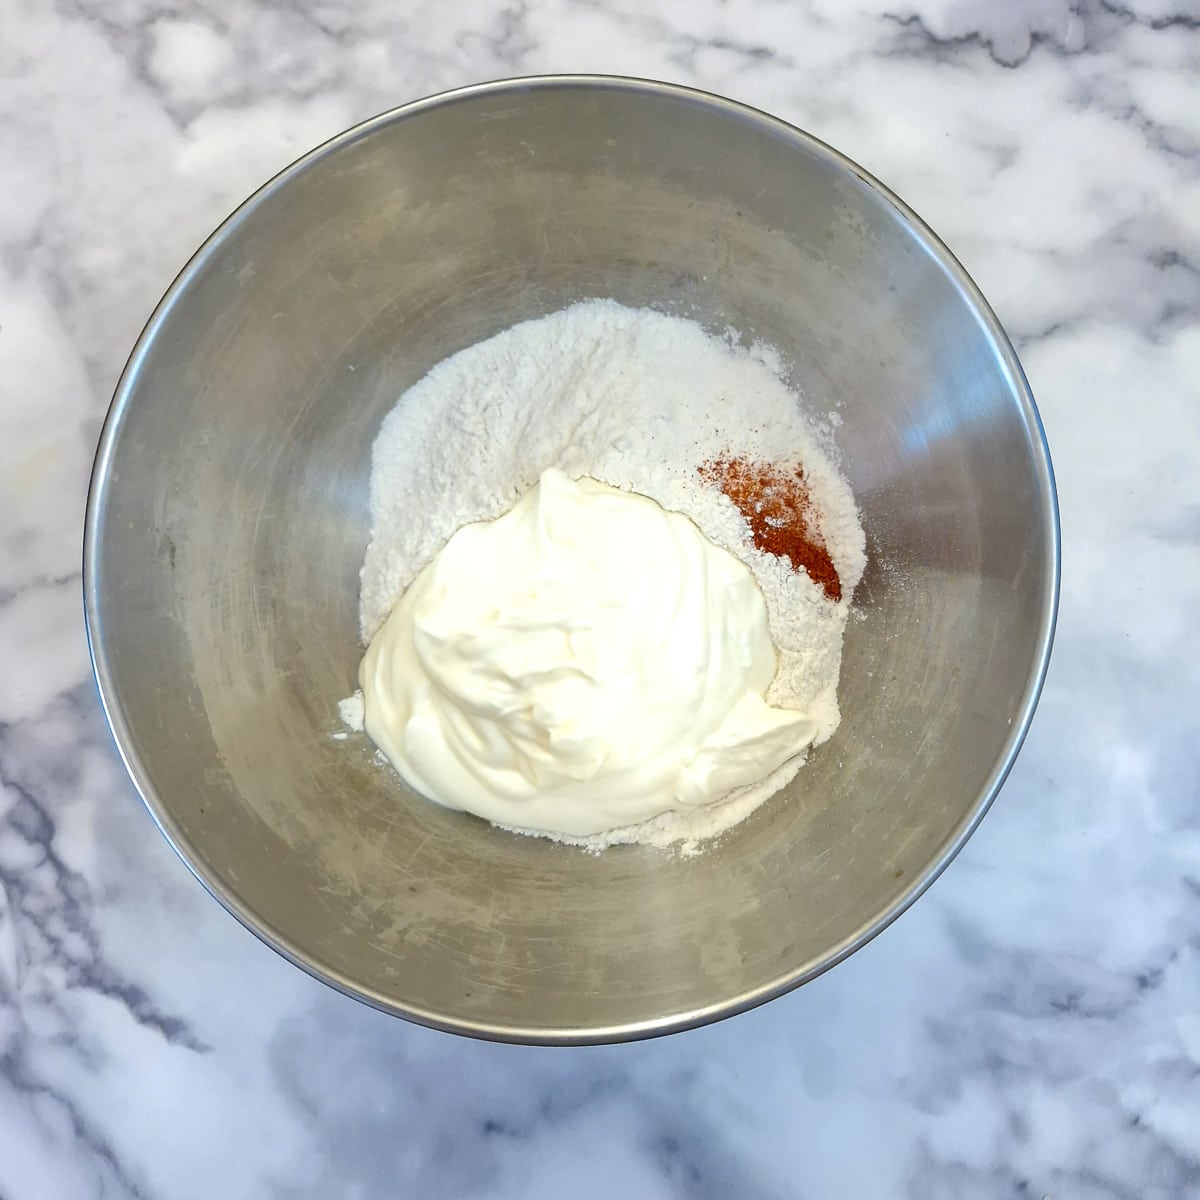
Step 1: Place the flour, paprika, salt and yoghurt into a mixing bowl.
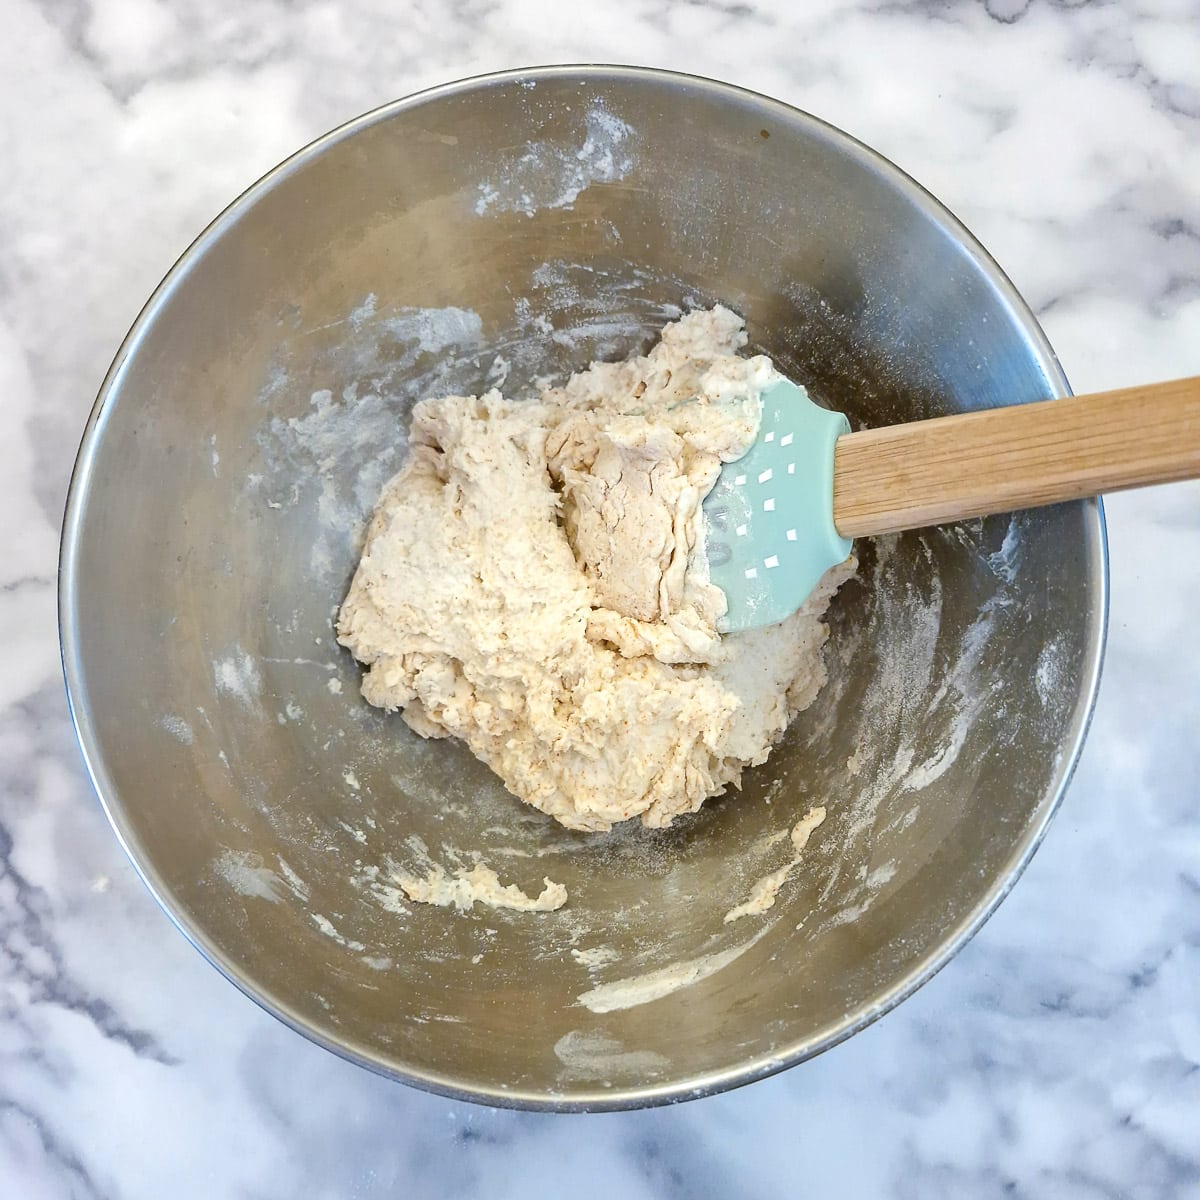
Step 2: Mix with a spatula until the dough comes together in a shaggy ball.
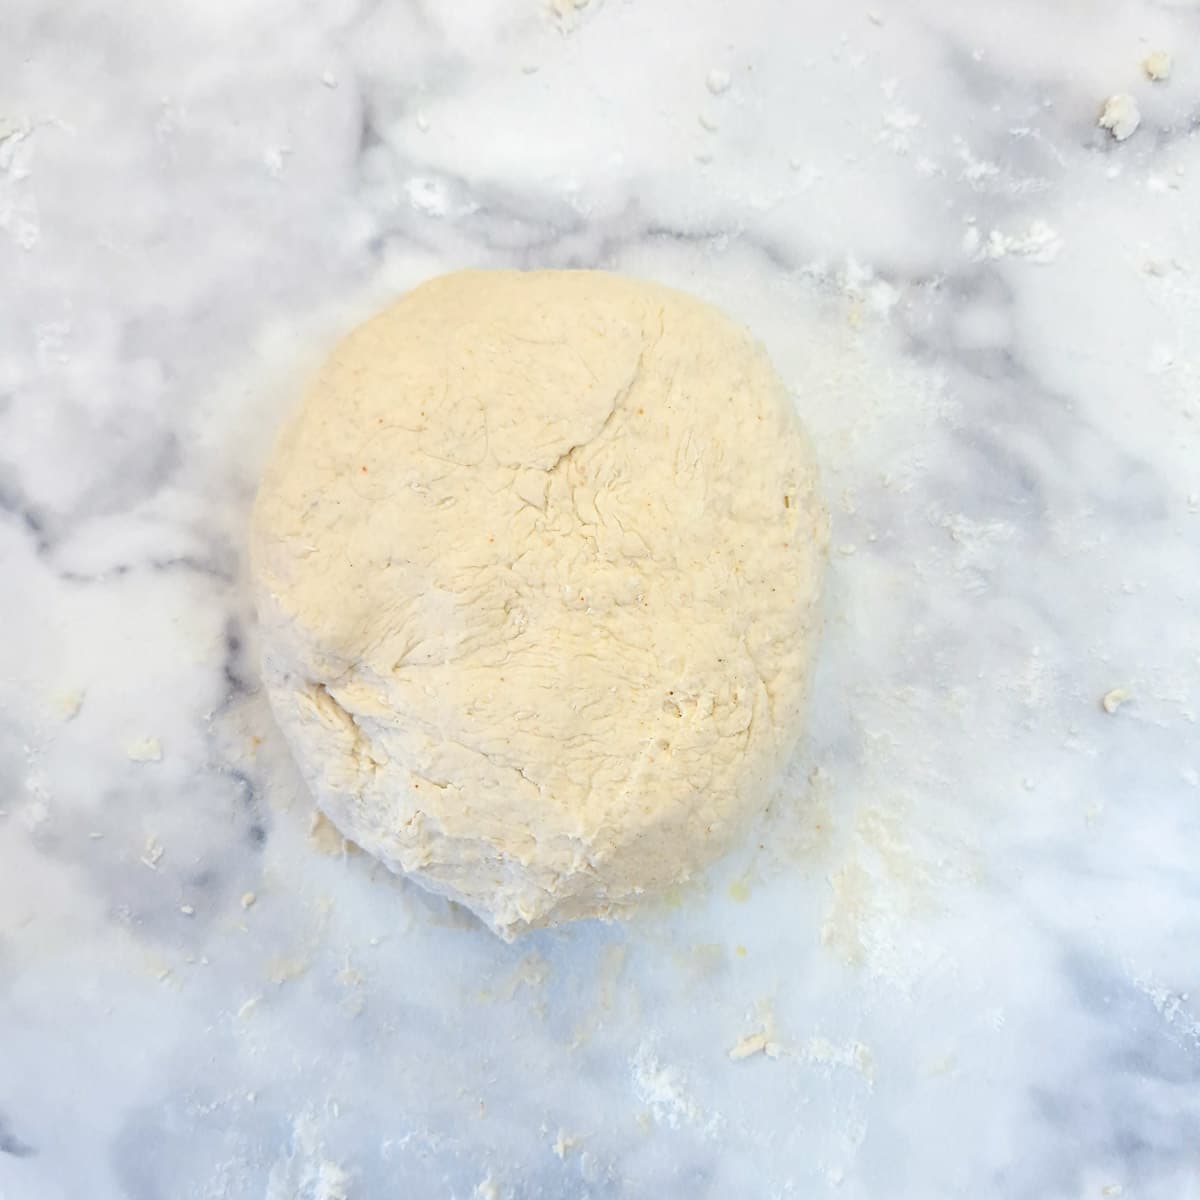
Step 3: Tip the dough out onto a floured work surface and knead lightly until it forms a ball of smooth non-sticky pastry. If the dough is too sticky add extra flour until it becomes manageable.
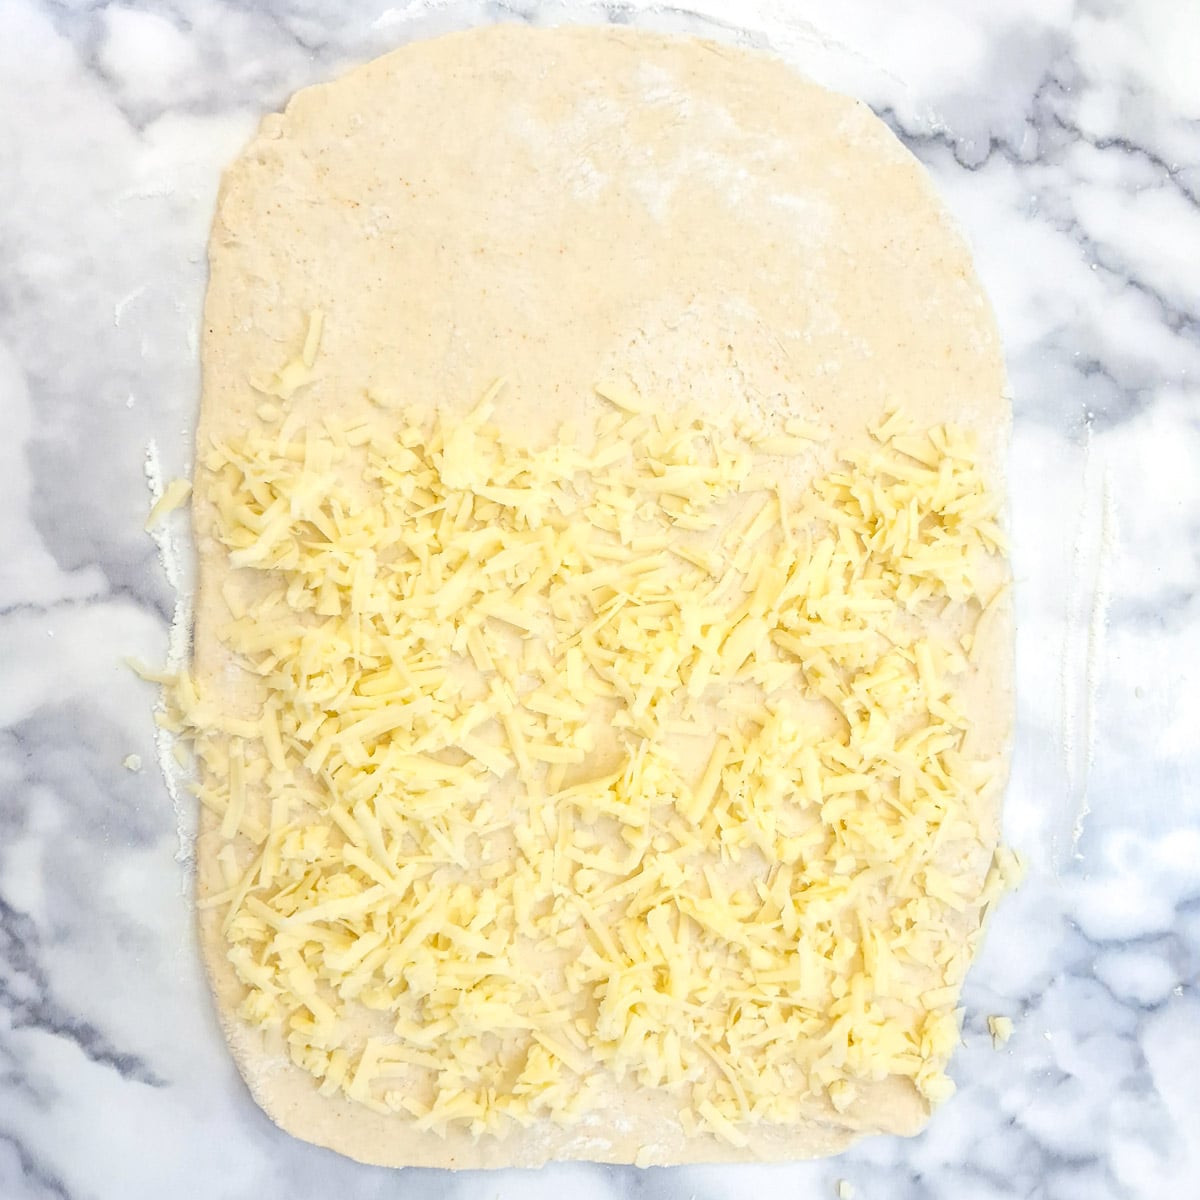
Step 4: Roll the dough into a thin rectangle approximately 15 x 11 inches (or 38 x 28 cm) and sprinkle the bottom two-thirds of the pastry with grated cheddar cheese.
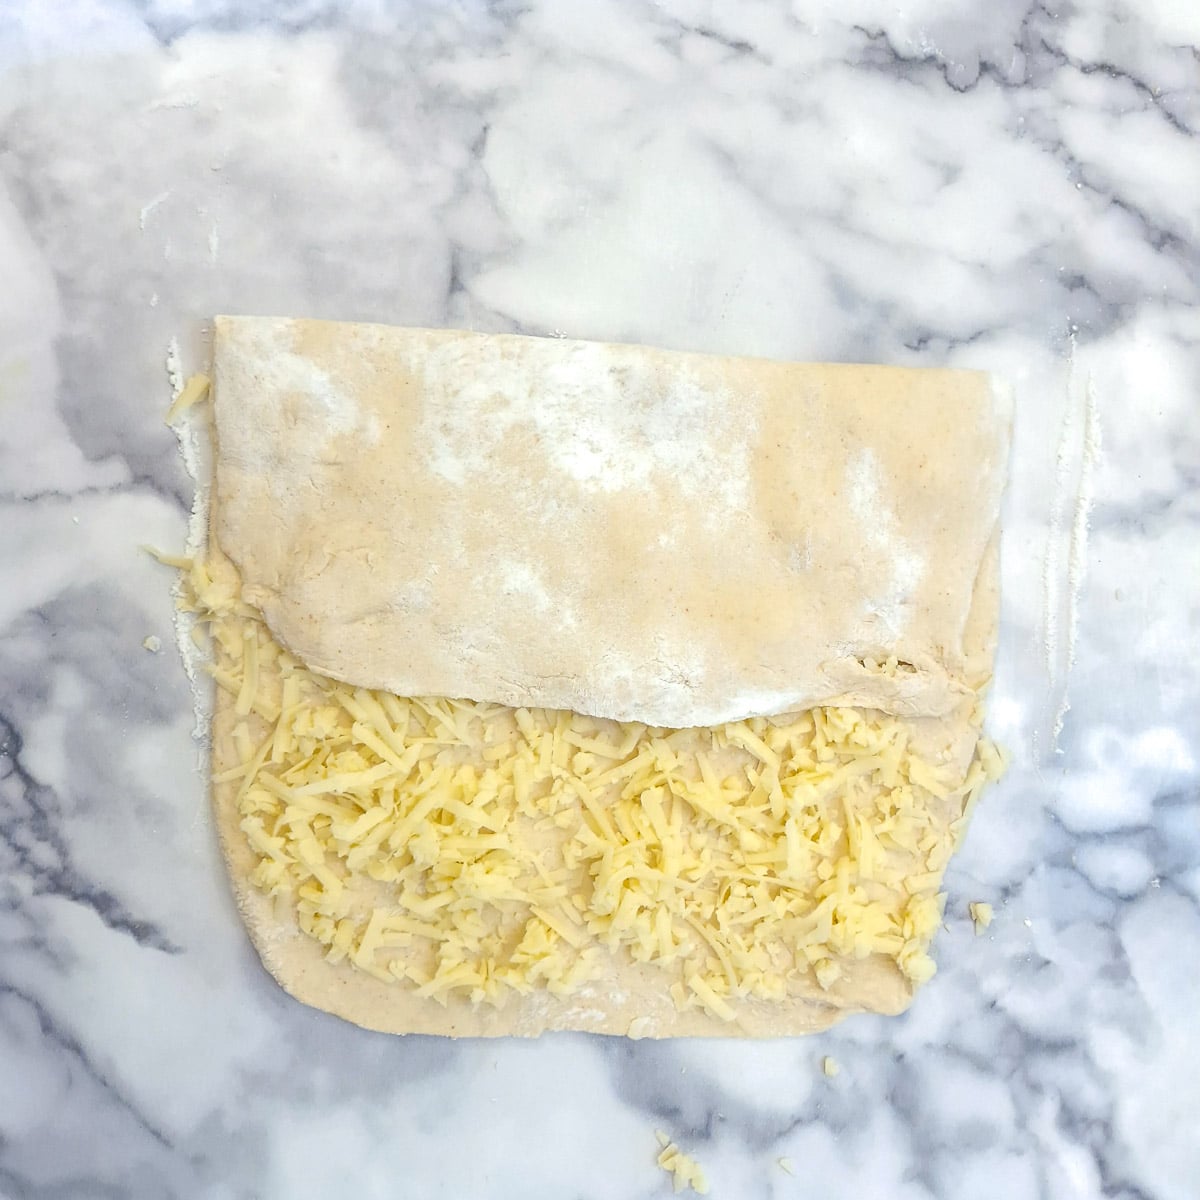
Step 5: Fold the uncovered part of the pastry down to cover one-third of the cheese ...
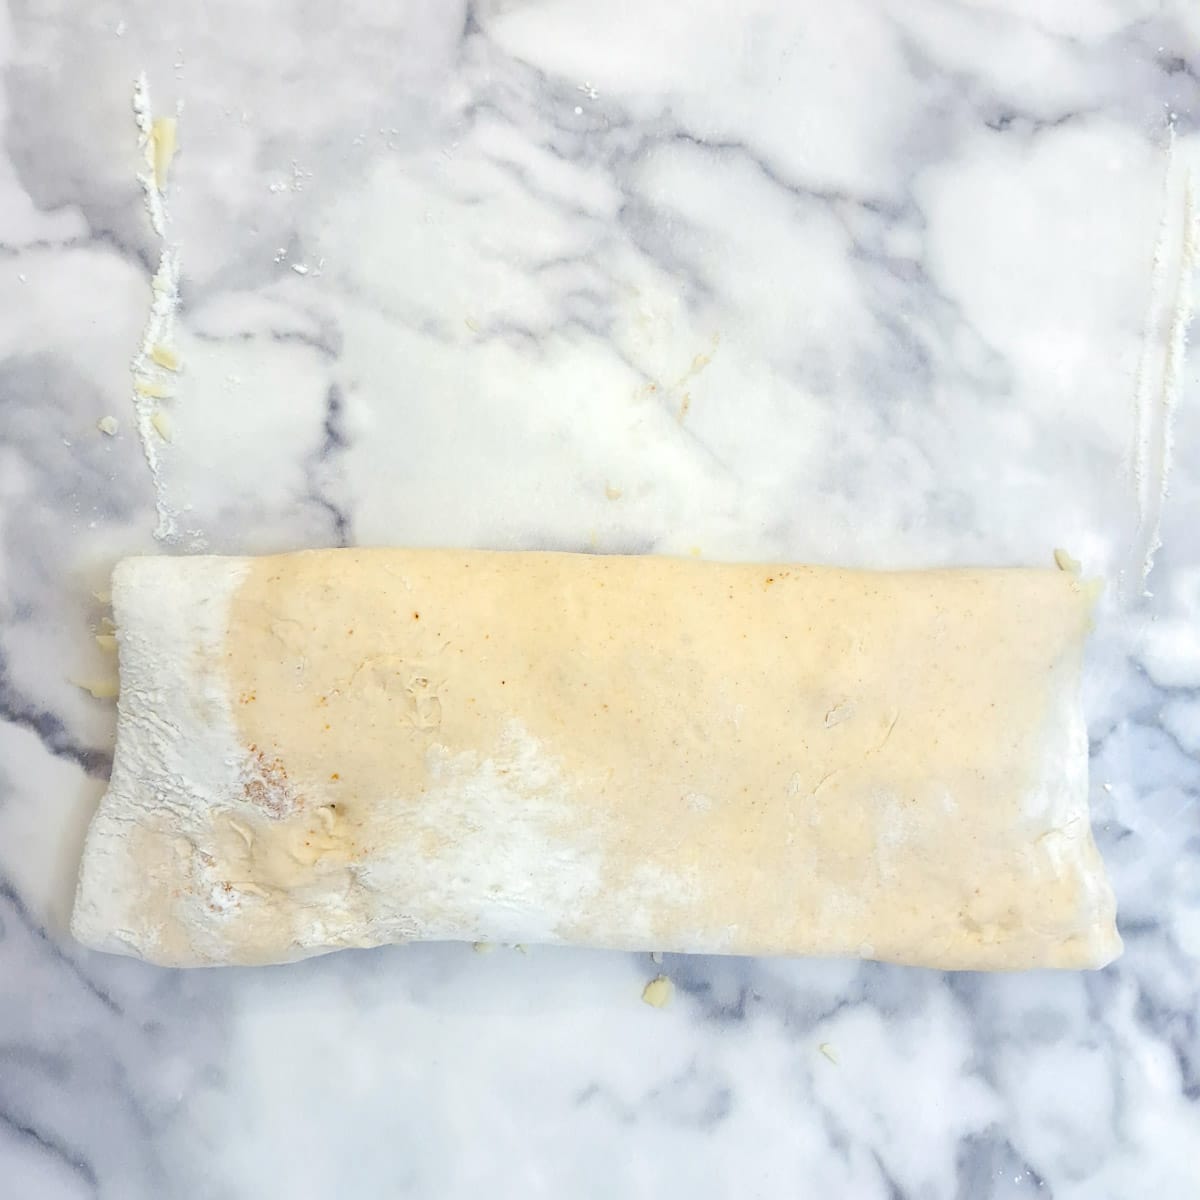
Step 6: ... then fold it down again to cover the remaining cheese.
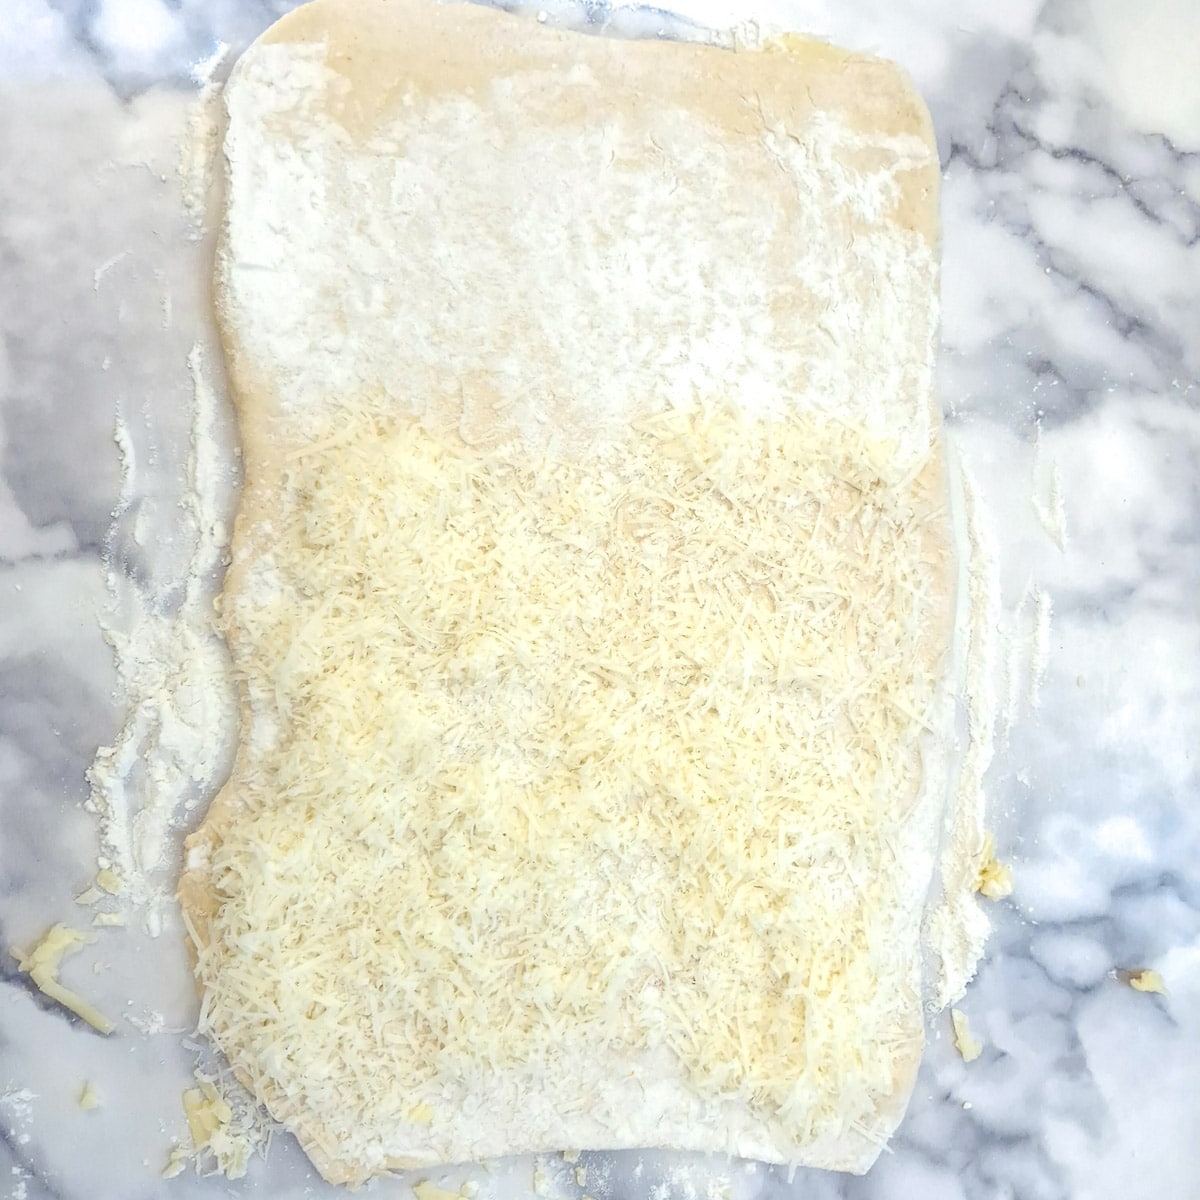
Step 7: Give the pastry a 90 degree turn and roll it out as before. Sprinkle the bottom two-thirds with grated parmesan cheese.
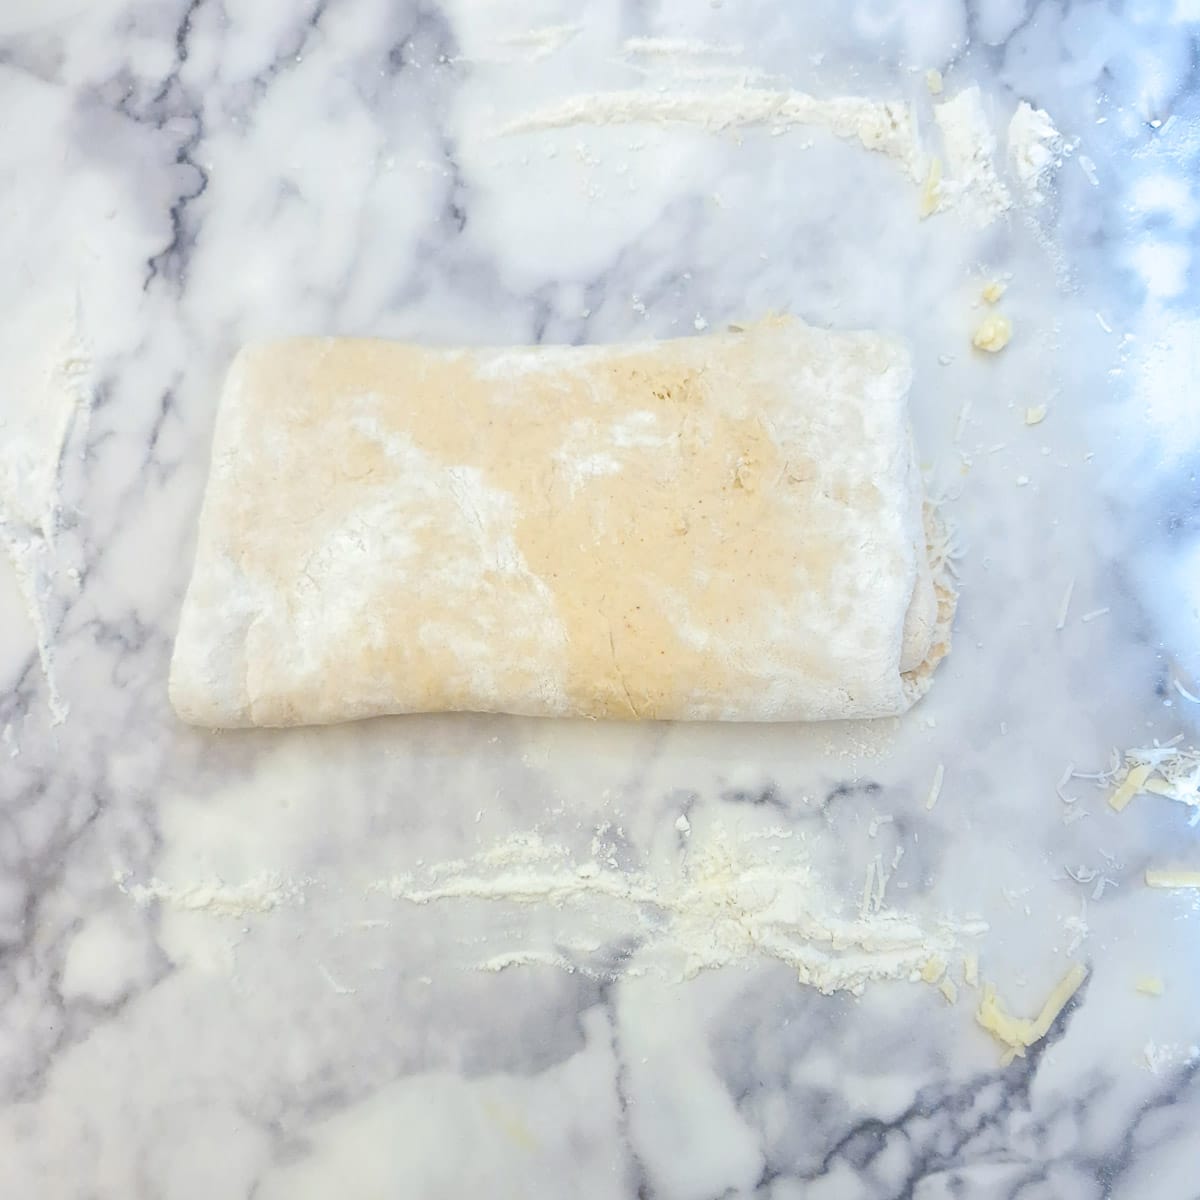
Step 8: Fold the pastry in three as before.
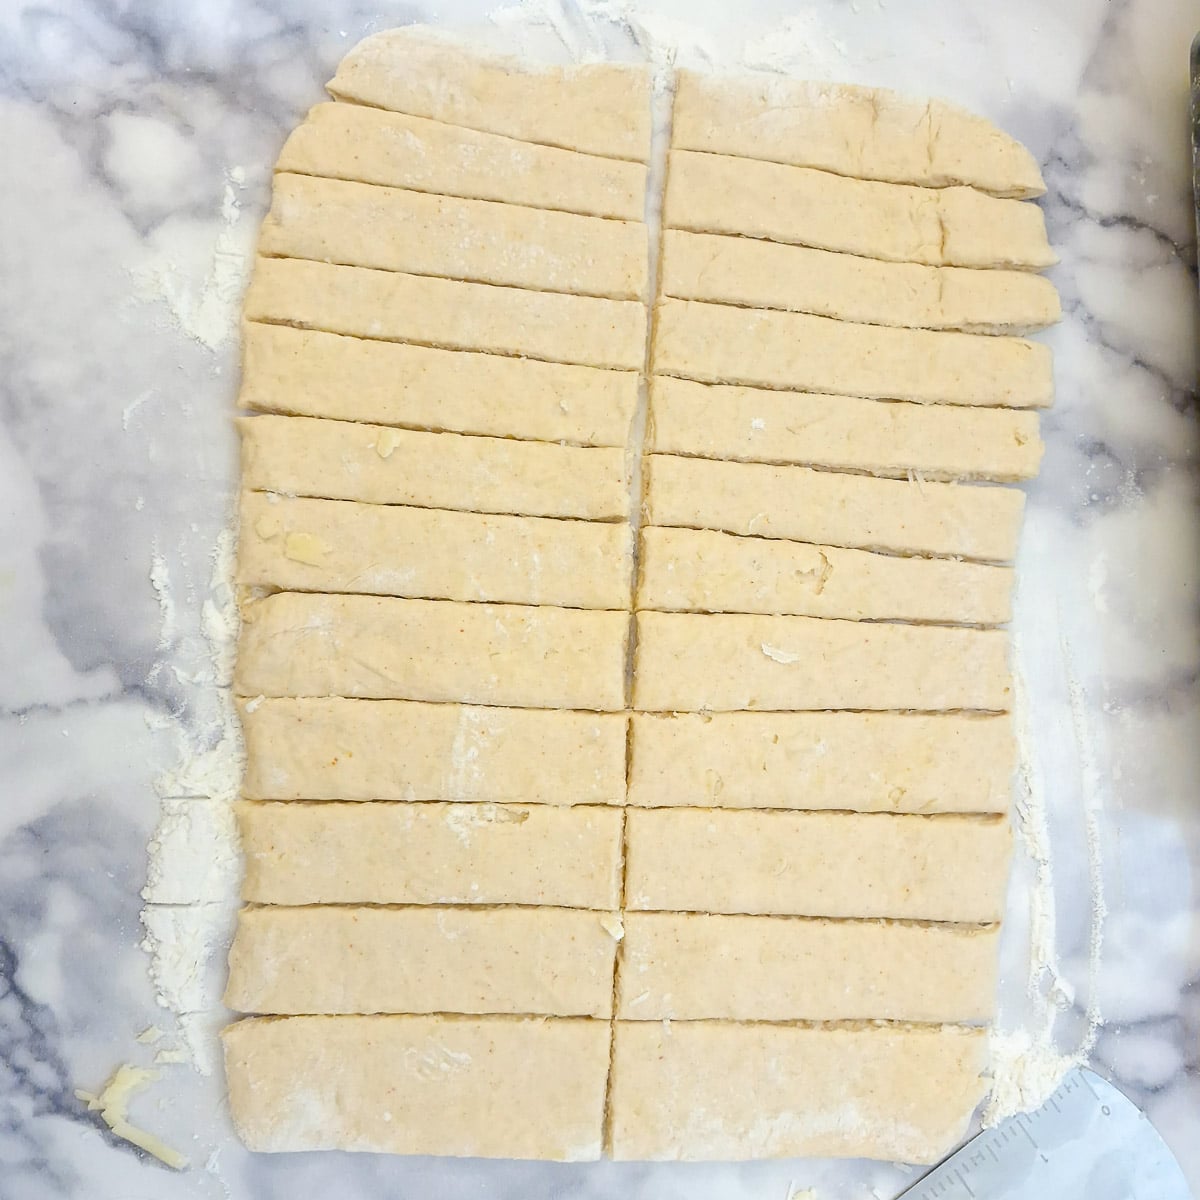
Step 9: Roll the pastry out for a third time and cut it in half down the centre then cut the two side pieces into 1-inch or 2cm-wide strips.
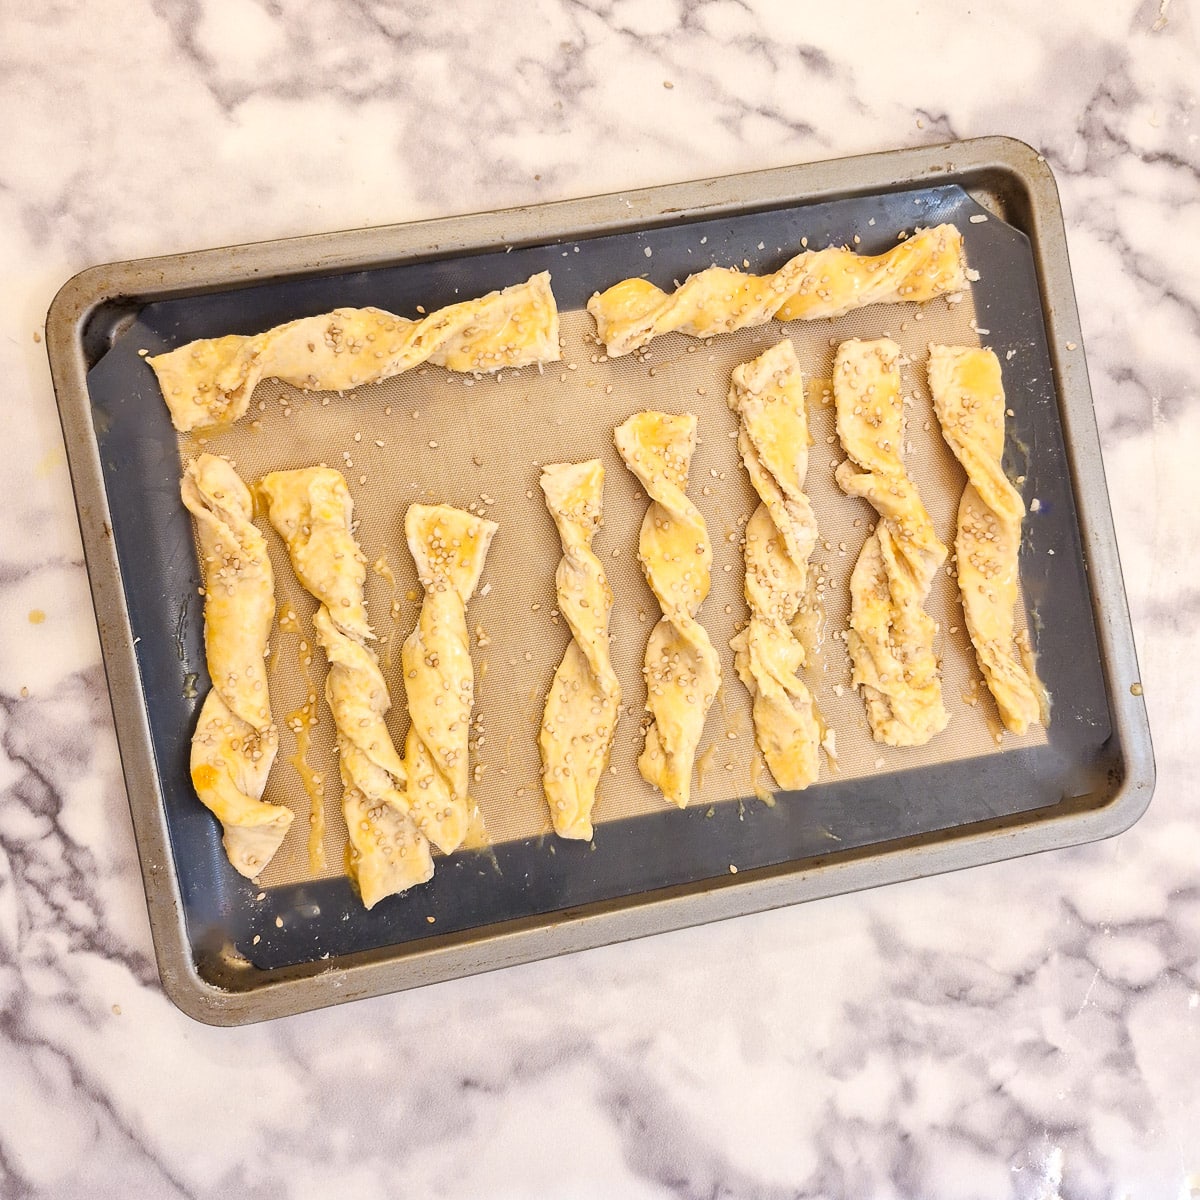
Step 10: Give each strip 2 or 3 twists and arrange them on a baking tray lined with a silicone liner or baking parchment. Brush each strip with lightly beaten egg and optionally sprinkle with sesame seeds.
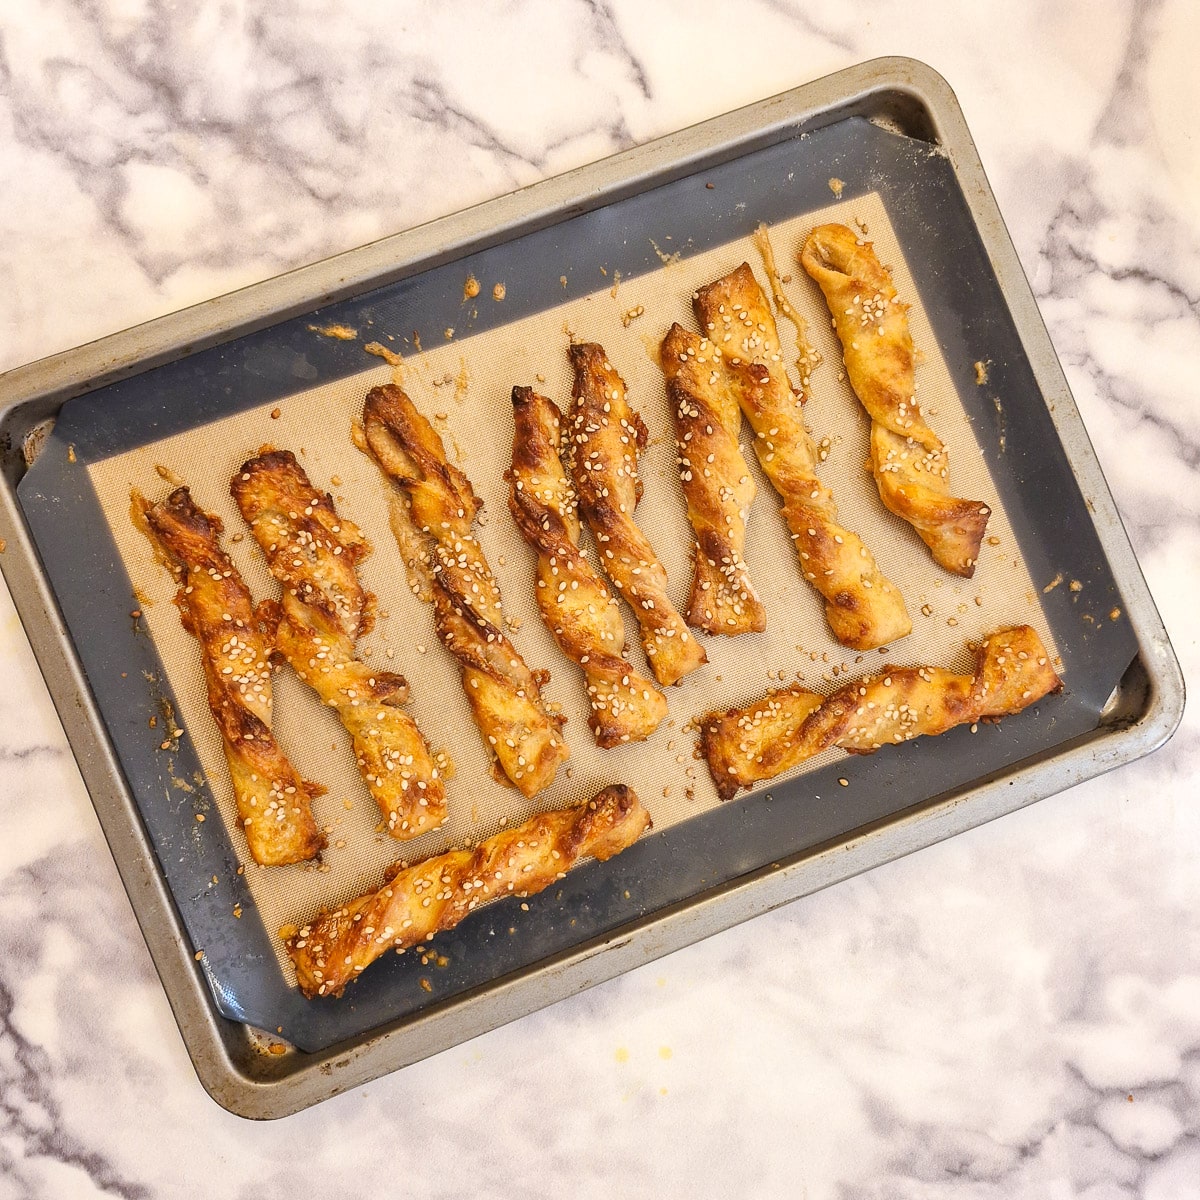
Step 11: Bake in a preheated oven (180C / 355F) for 20 to 25 minutes or until the cheese straws are golden brown.
Tips for a successful outcome
Here are my top tips to ensure your cheese straws turn out perfectly:
- You may not need all the yoghurt - so keep a tablespoon or so aside while you mix the dough. Add the remaining yoghurt if the dough is too dry.
- If you find the dough is too sticky to handle, add extra flour one tablespoon at a time, until the dough becomes easy to handle.
- This recipe is made with self-raising flour. If you don't have self-raising flour use plain flour but add 1.25 teaspoons of baking powder.
- For the cheese I have allowed three-quarters of a cup each of grated cheddar and grated parmesan. You may find this is too much. You will need sufficient of each cheese to spread thinly on the bottom two-thirds of the pastry.
- If you have a pastry cutter you can use this to cut the pastry into strips, otherwise use the back of a knife.
- When you place the cheese straws on the baking tray, press each end gently on the lining paper so that they remain twisted.
Variations
For extra cheesiness spinkle the cheese straws with a little grated pamesan cheese before baking.
To add extra zing, spread a thin layer of mustard onto the pastry before adding the grated cheddar cheese. Don't add mustard with the parmesan cheese as two layers of mustard will make the pastry too wet to handle. Alternatively, add half a teaspoon of mustard powder (or more to your own taste) to the flour.
For a crispier cheese straw, follow the recipe instructions for rolling and folding the cheese straws, but use shop-bought puff pastry instead of the yoghurt/flour pastry.
Equipment
You will need a mixing bowl and a spatula for making the pastry.
To roll the pastry you will need a rolling pin.
For baking the cheese straws you will need one or two flat baking sheets which are lined with either a silicone liner or baking parchment to prevent sticking. If you don't have a suitable liner you should brush the tray lightly with a little melted butter.
Storage
These cheese straws are best eaten fresh on the day they are made.
However, they can be stored in an airtight container in the kitchen and refreshed in a hot oven for a few minutes the next day.
If you have an air fryer you could also place them into the basket and reheat at 200C / 400F for 2 minutes.
The cheese straws are not suitable for freezing.
Save for later
If you would like to try these easy cheese straws, why not save the recipe to one of your Pinterest boards so you can find it easily? Just click the image below.
Alternatively, you can save the recipe by clicking on the floating heart icon on the right-hand side of the screen.
Related recipes
Visit my cheese recipes page for other recipes using cheese. Here are some you might enjoy:

📋The recipe

Easy cheese straws
(Click the stars to rate this recipe)
Equipment
- Mixing bowl
- Spatula
- Cheese grater
- Rolling Pin
- Large baking tray
- Silicone liner OR
- Baking parchment
Ask a Question
If you have a question about this recipe that has not been answered, please use the box below to ask it.
Use this with care. This is an AI-generated result and may contain errors or inaccuracies. I cannot be held responsible for the information returned.
Ingredients
- 1¼ cups / 175 grams self-raising flour
- 1 cup / 240 ml unflavoured Greek yoghurt
- 1 - 2 teaspoons paprika optional
- ½ teaspoon salt optional
- ¾ cup / 75 grams cheddar cheese grated
- ¾ cup / 60 grams parmesan cheese grated
- 1 small egg for egg wash
- 1 tablespoon sesame seeds to sprinkle
Instructions
- Place the flour, paprika, salt and yoghurt into a mixing bowl.1¼ cups / 175 grams self-raising flour, 1 - 2 teaspoons paprika, ½ teaspoon salt, 1 cup / 240 ml unflavoured Greek yoghurt
- Mix with a spatula until the dough comes together in a shaggy ball.
- Tip the dough out onto a floured work surface and knead lightly until it forms a ball of smooth non-sticky pastry. If the dough is too sticky add extra flour until it becomes manageable.
- Roll the dough into a thin rectangle approximately 15 x 11 inches (or 38 x 28 cm) and sprinkle the bottom two-thirds of the pastry with grated cheddar cheese.¾ cup / 75 grams cheddar cheese
- Fold the uncovered part of the pastry down to cover one-third of the cheese, then fold it down again to cover the remaining cheese.
- Give the pastry a 90 degree turn and roll it out as before. Sprinkle the bottom two-thirds of the pastry with grated parmesan cheese.¾ cup / 60 grams parmesan cheese
- Fold the pastry in three as before.
- Roll the pastry out for a third time and cut it in half down the centre then cut the two side pieces into 1-inch or 2cm-wide strips.
- Give each strip 2 or 3 twists and arrange them on a baking tray lined with a silicone liner or baking parchment. Brush each strip with lightly beaten egg and optionally sprinkle with sesame seeds.1 small egg, 1 tablespoon sesame seeds
- Bake in a preheated oven (180C / 355F) for 20 to 25 minutes or until the cheese straws are golden brown.
Notes
- You may not need all the yoghurt - so keep a tablespoon or so aside while you mix the dough. Add the remaining yoghurt if the dough is too dry.
- If you find the dough is too sticky to handle, add extra flour one tablespoon at a time, until the dough becomes easy to handle.
- This recipe is made with self-raising flour. If you don't have self-raising flour use plain flour but add 1.25 teaspoons of baking powder.
- For the cheese I have allowed three-quarters of a cup each of grated cheddar and grated parmesan. You may find this is too much. You will need sufficient of each cheese to spread thinly on the bottom two-thirds of the pastry.
- If you have a pastry cutter you can use this to cut the pastry into strips, otherwise use the back of a knife.
- When you place the cheese straws on the baking tray, press each end gently on the lining paper so that they remain twisted.
Nutrition
I am not a nutritionist. The nutrition information has been calculated using an on-line calculator, and is intended for information and guidance purposes only. If the nutrition information is important to you, you should consider calculating it yourself, using your preferred tool.
If you made this recipe and enjoyed it, I'd love it if you could give me a star rating in the comments below. And if you'd like to get in touch, you can email me at [email protected]. I'd love to hear from you. And don't forget to subscribe to my mailing list so you can grab yourself a copy of my FREE COOKBOOK!
If you'd like to continue browsing, just click on this link to all my recipes.

Did you make this recipe? Let me know!