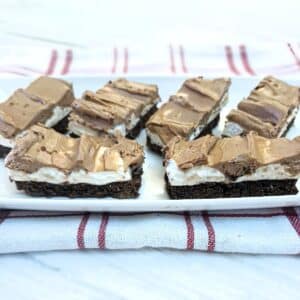
This wagon wheel traybake was inspired by the classic Wagon Wheel biscuits you can pick up in the supermarkets. With a soft chocolatey crumb, a layer of fruity jam and gooey melted marshmallows, all topped with a whipped chocolate ganache, this is a nostalgic bake that's guaranteed to bring back childhood memories with every bite.
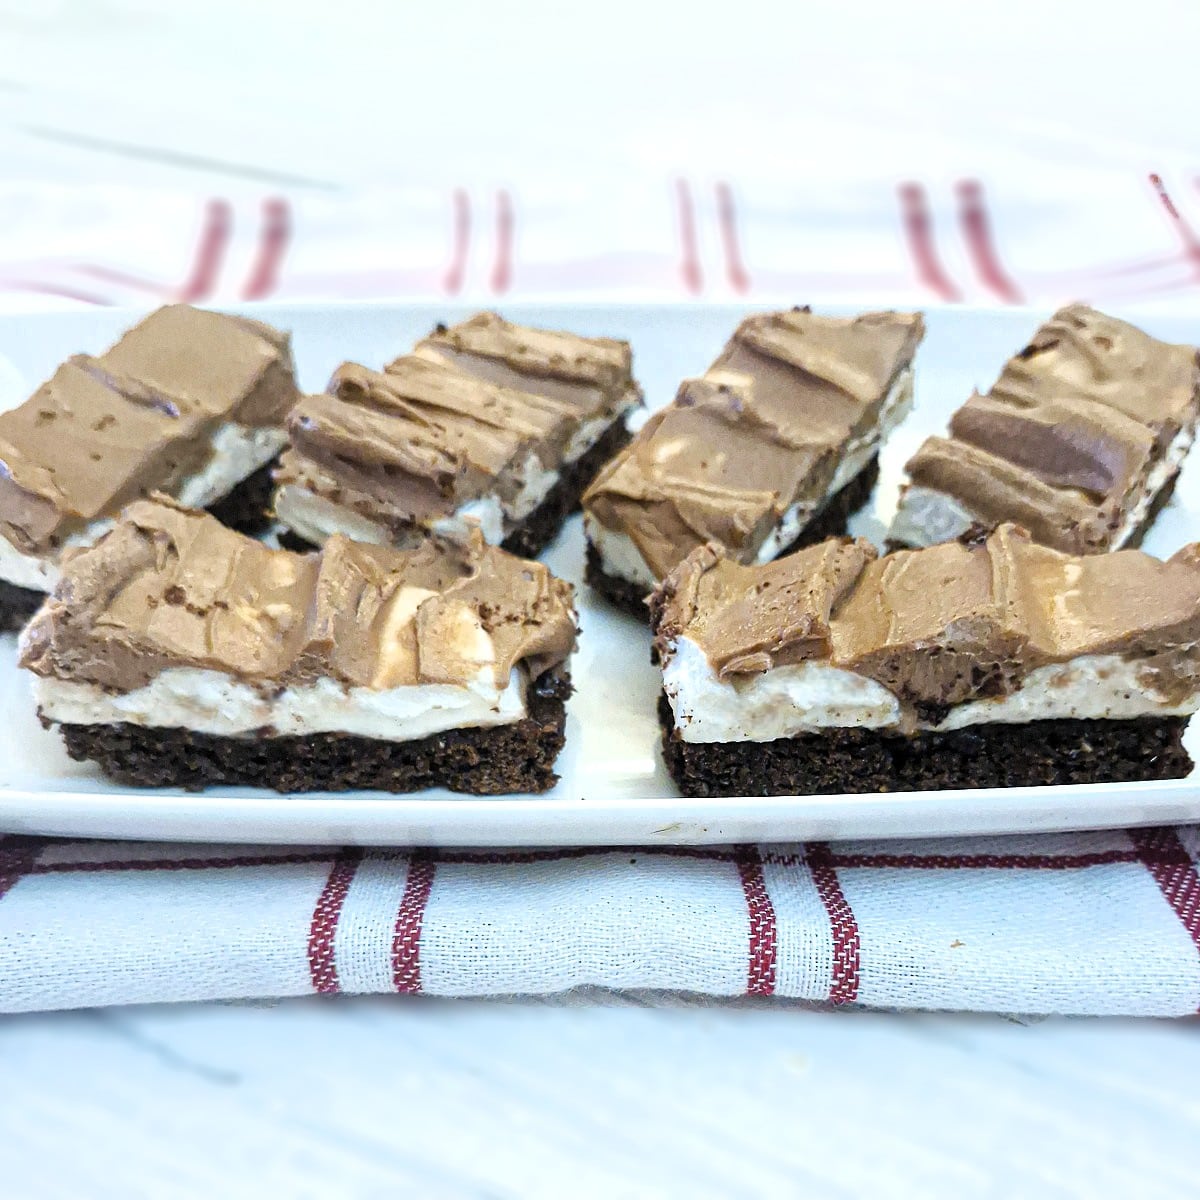
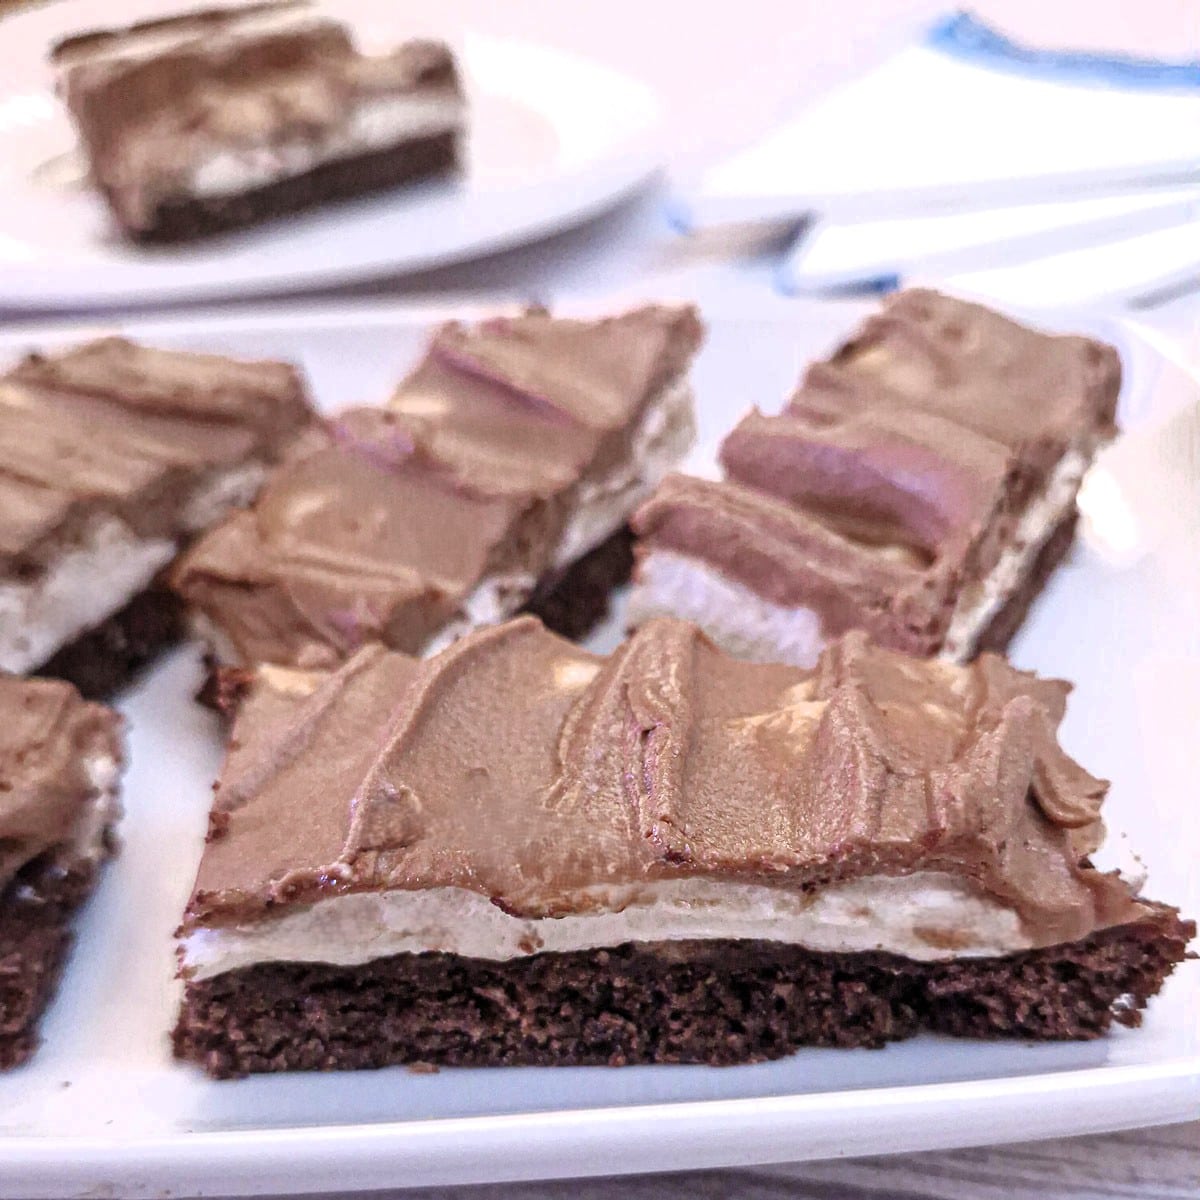
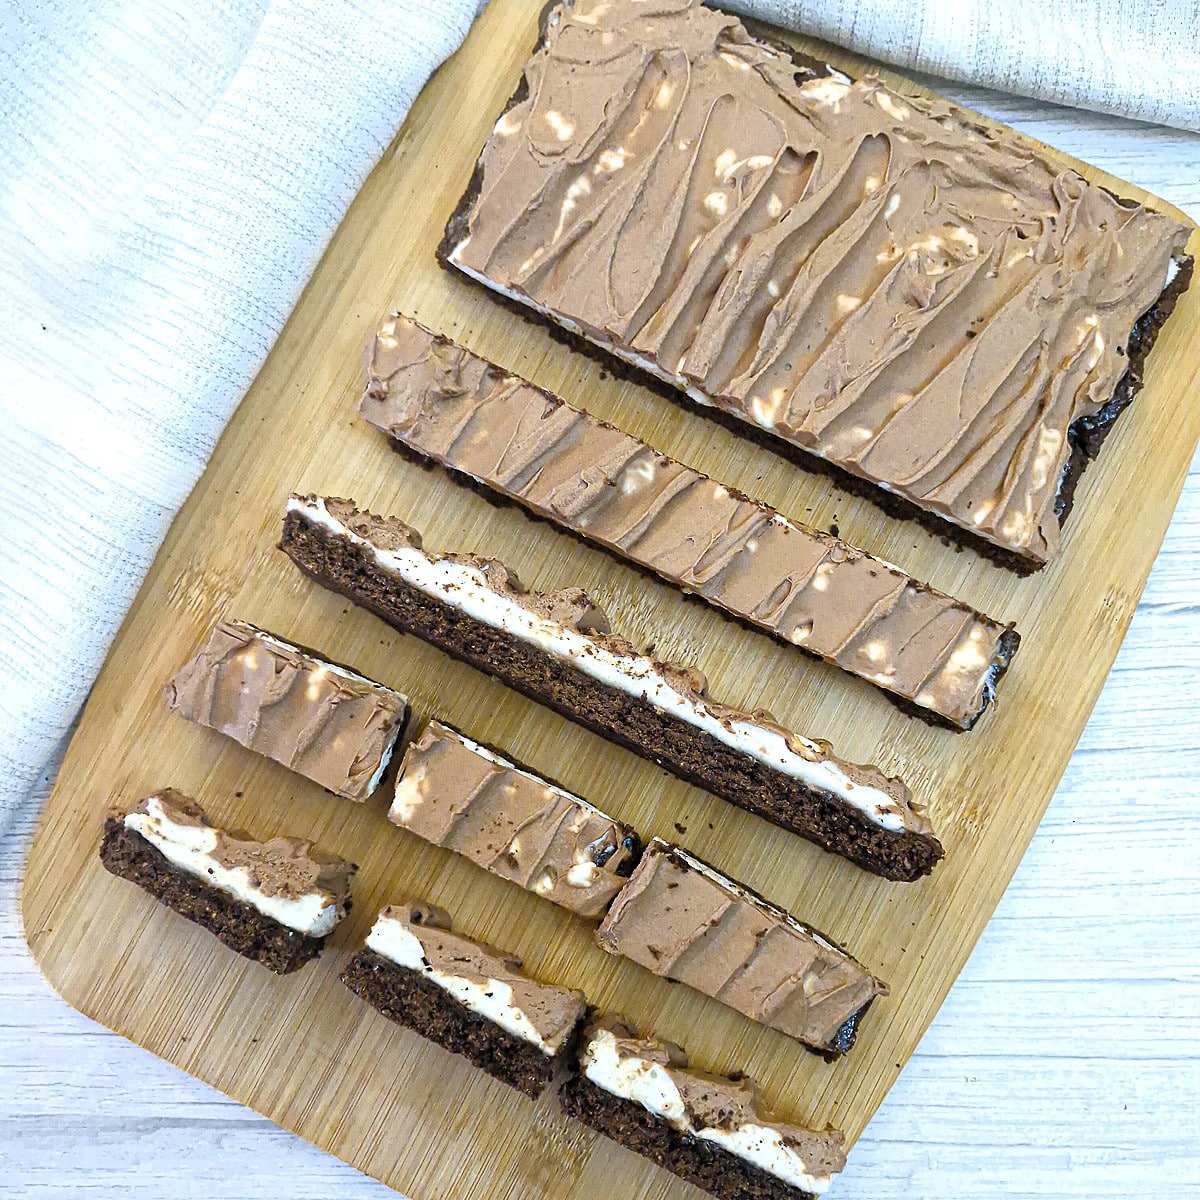
Even though this wagon wheel bake is in traybake form, I like to think I've captured the essence of the original Wagon Wheel! You've got the chocolate, the fruity jam, and of course, the gooey marshmallow. Instead of sandwiching everything between two biscuits, I've layered it all on top of a soft, crumbly wholemeal biscuit base, flavoured with golden syrup, to recreate the distinctive taste of the original version. And in place of the chocolate that coats the original Wagon Wheel, I've topped it with a layer of decadent whipped chocolate ganache.
This wagon-wheel-inspired traybake is perfect for serving with your afternoon tea, popping into a lunchbox, or sharing with friends, family and colleagues at parties, get-togethers, gatherings, and office bake days. Plus, it's always a firm favourite with the kiddies!
Jump to:
- Wagon wheel traybake at a glance
- Why you should try this homemade wagon wheel slice
- Ingredients for this jam and marshmallow traybake
- How to make a wagon wheel traybake
- 💡Top tip 💡
- Remove the baking paper
- Tips for making a wagon wheel traybake
- Variations
- Equipment
- Storing and freezing
- Troubleshooting and FAQ
- Save for later
- Related recipes
- 📋The recipe
Wagon wheel traybake at a glance
- Wagon wheel tray bake in a nutshell: Make and bake a quick pastry-style base, spread with jam, and top with marshmallows, before popping it back into the oven for a few minutes to melt. Once cooled, spread with a generous layer of whipped chocolate ganache.
- Main ingredients:
- Pastry - Wholemeal flour, margarine, sugar, cocoa, golden syrup.
- Filling - Jam, marshmallows
- Topping- Double cream, chocolate
- Prep time: 25 minutes
- Chilling time: 1 hour
- Cooking time: 15 minutes plus 5 minutes to melt the marshmallows.
- Yield: 24 slices
- Difficulty: Easy - if made with store-bought marshmallows; a bit more effort if you make the marshmallow yourself.
Why you should try this homemade wagon wheel slice
- Indulgent. This is not a slice to bake if your willpower is weak! It's rich, chocolatey and seriously moreish. That said, it's a brilliant traybake for sharing with a crowd - especially when you've got plenty of willing taste-testers around!
- Nostalgic. All the classic Wagon Wheel flavours are here - chocolate, jam and marshmallow, but in an easy traybake format. The first time I tasted this, I took one bite and was transported right back to my childhood!
- Make-ahead friendly. This bake stores well in the refrigerator. You can make it up to 3 days in advance - the base is supposed to be soft, so you don't have to worry about it seeming stale.
- Perfect for sharing. This wagon wheel traybake makes 24 generous slices, so there's plenty to go round at parties and gatherings.
- Easy to make. Because it's made with store-bought marshmallows, it's pretty easy to put together.
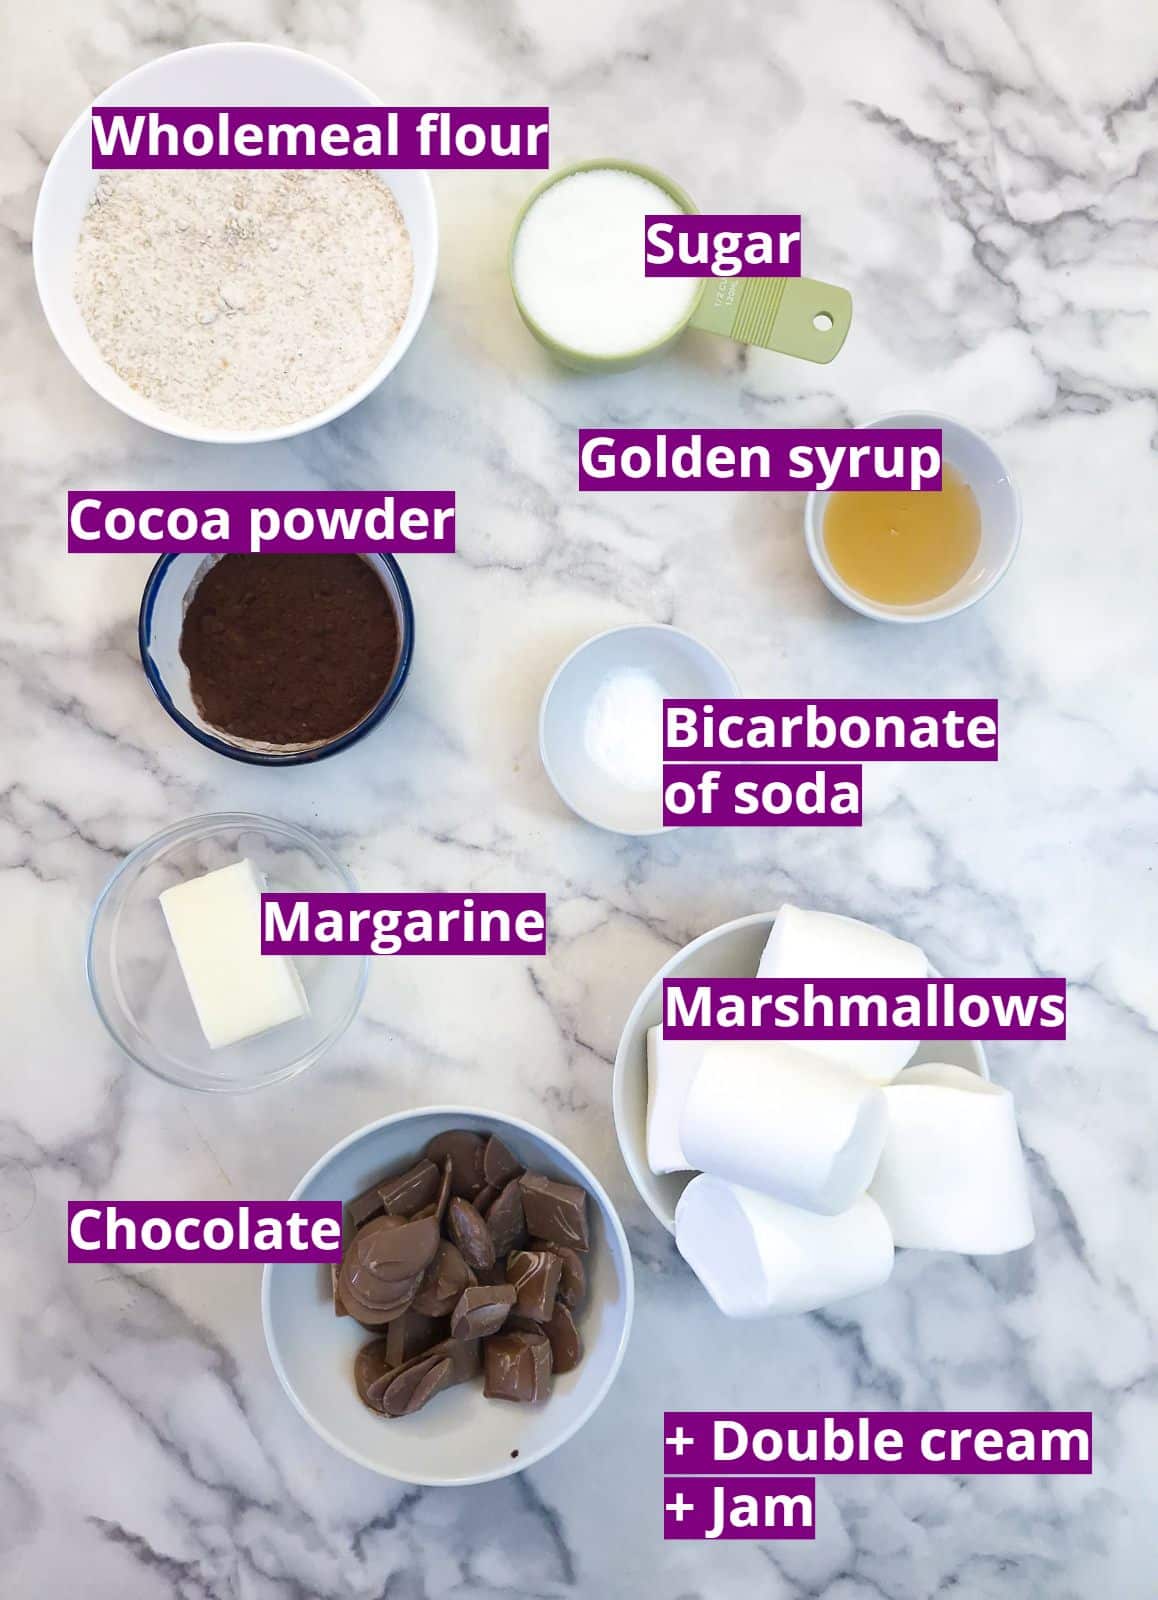
Ingredients for this jam and marshmallow traybake
**This is just an overview to explain why I used a particular ingredient. The complete list of ingredients and the exact measurements are on the printable recipe card at the end of this post.**
Pastry
- Wholemeal flour. I used wholemeal flour to achieve the distinctive wagon wheel biscuit flavour. If you prefer, you can use plain or all-purpose flour, or a mixture of half wholemeal and half plain flour.
- Sugar. Wagon wheel biscuits are not very sweet, which contrasts nicely with the sweet filling, so we don't need to use too much sugar.
- Golden syrup. I used golden syrup to keep the biscuit base nice and soft, as I didn't want a crispy base for the wagon wheel traybake.
- Cocoa powder. This is just normal unsweetened cocoa powder, normally found in the baking aisle in the supermarket. Don't confuse it with sweetened drinking chocolate powder.
- Bicarbonate of soda. This reacts with the acidity of the cocoa powder and golden syrup to give the biscuit base a little rise. We don't want too much rise (as in a cake, for example), but just enough to add lightness. That's why we're not adding baking powder.
- Margarine. I used a baking brick (Stork) from my local supermarket. Substitute with butter if you prefer.
Filling
- Jam. Traditionally, wagon wheels are made with strawberry jam, but you could use raspberry instead. For a better eating experience (no seeds in your teeth), try to get the seedless variety. I forgot to add the jam to the photo, but you can see a picture of the jam I used in the process shot where I spread the jam onto the pastry.
- Marshmallow. This is supposed to be an easy recipe, so I opted to use store-bought marshmallows. I used Jumbo-sized ones and cut them up with a pair of scissors before using them. Normal-sized marshmallows could be cut in half, but mini baking marshmallows can be scattered evenly on top. If you would prefer to make your own marshmallow, you can find the recipe in this coconut marshmallow Weet-Bix slice.
Topping
- Chocolate. You can use baking chocolate or normal eating chocolate. I had a packet of Cadbury's chocolate buttons in the cupboard, so I used those, and added a few squares of Cadbury's Dairy Milk to make up the weight. You should chop it finely - it will be melted in hot cream, and it melts more easily if it is finely chopped.
- Double cream. You may know this as heavy or whipping cream. Don't use single cream. Once the chocolate and cream have been melted, they will be whipped until thick; single cream won't thicken sufficiently.
How to make a wagon wheel traybake
It's not difficult, but there are a lot of steps (pastry base, filling, topping), so I've broken it down into the different sections for you.
Pastry base

Step 1: Use a spatula to combine the flour, sugar, cocoa powder, bicarbonate of soda and salt in a mixing bowl.
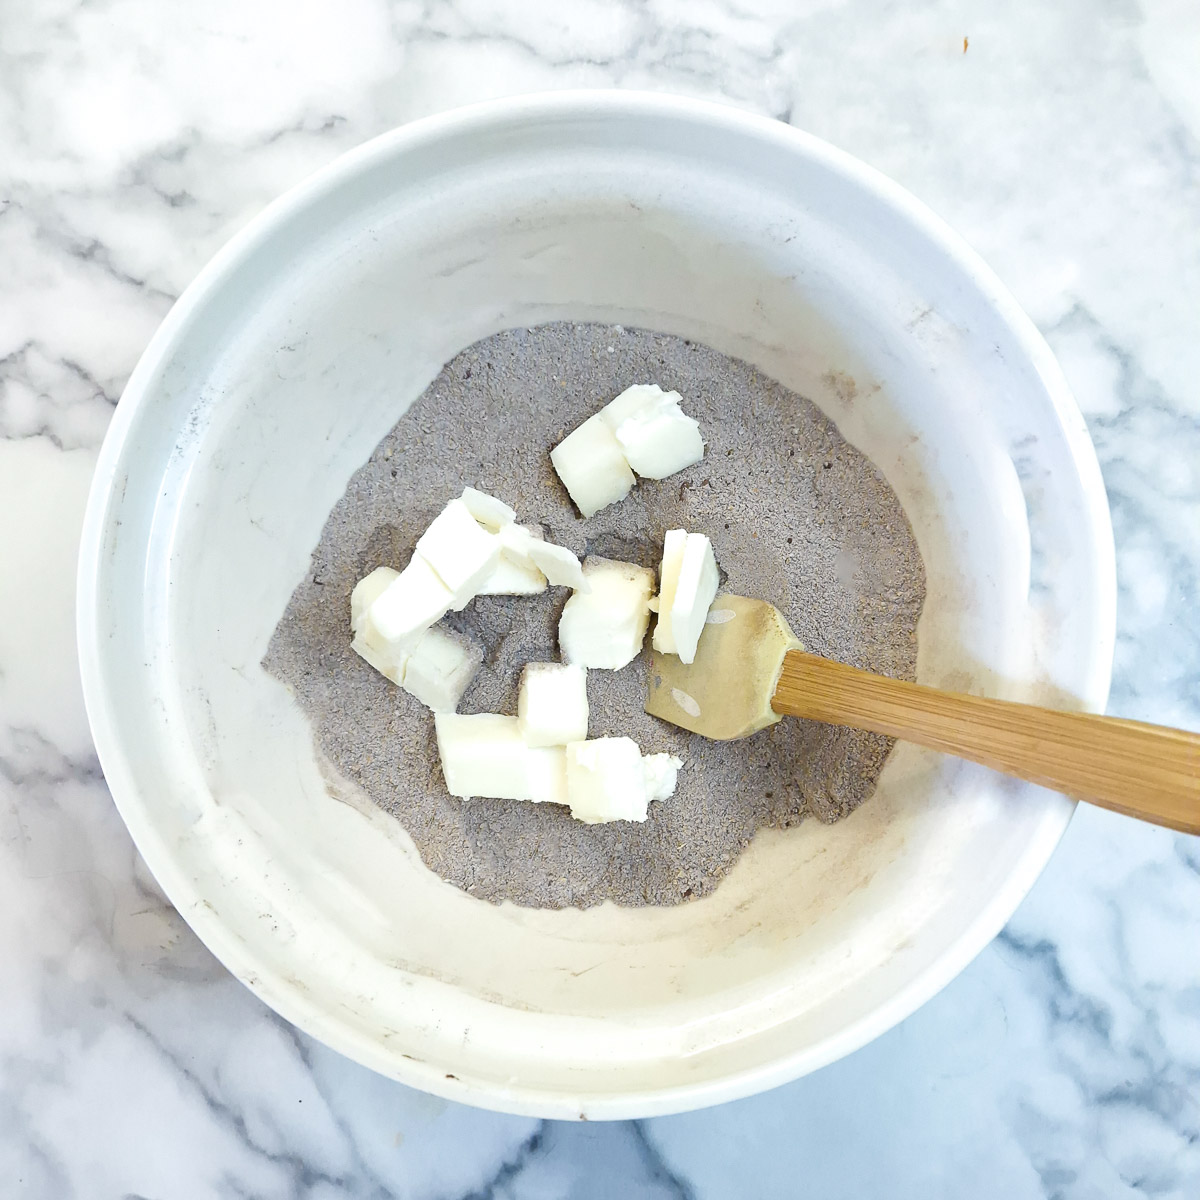
Step 2: Cut the margarine (or butter if using) into cubes and add them to the dry ingredients.
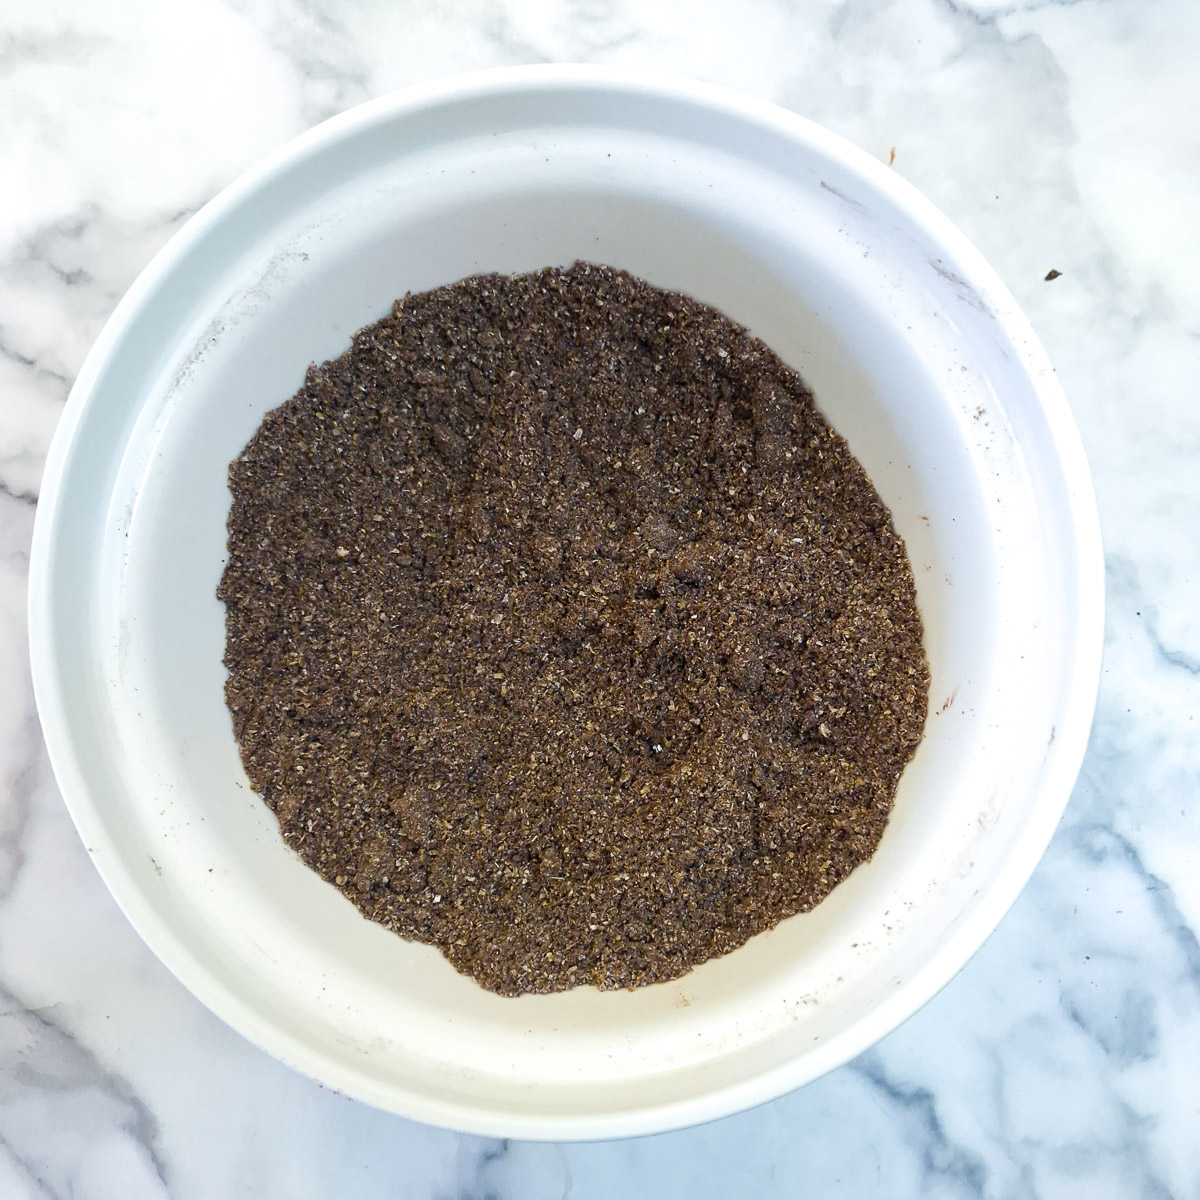
Step 3: Use your fingertips to rub the margarine into the dry ingredients. Once the margarine has been incorporated the mixture should resemble breadcrumbs or coarse sand.
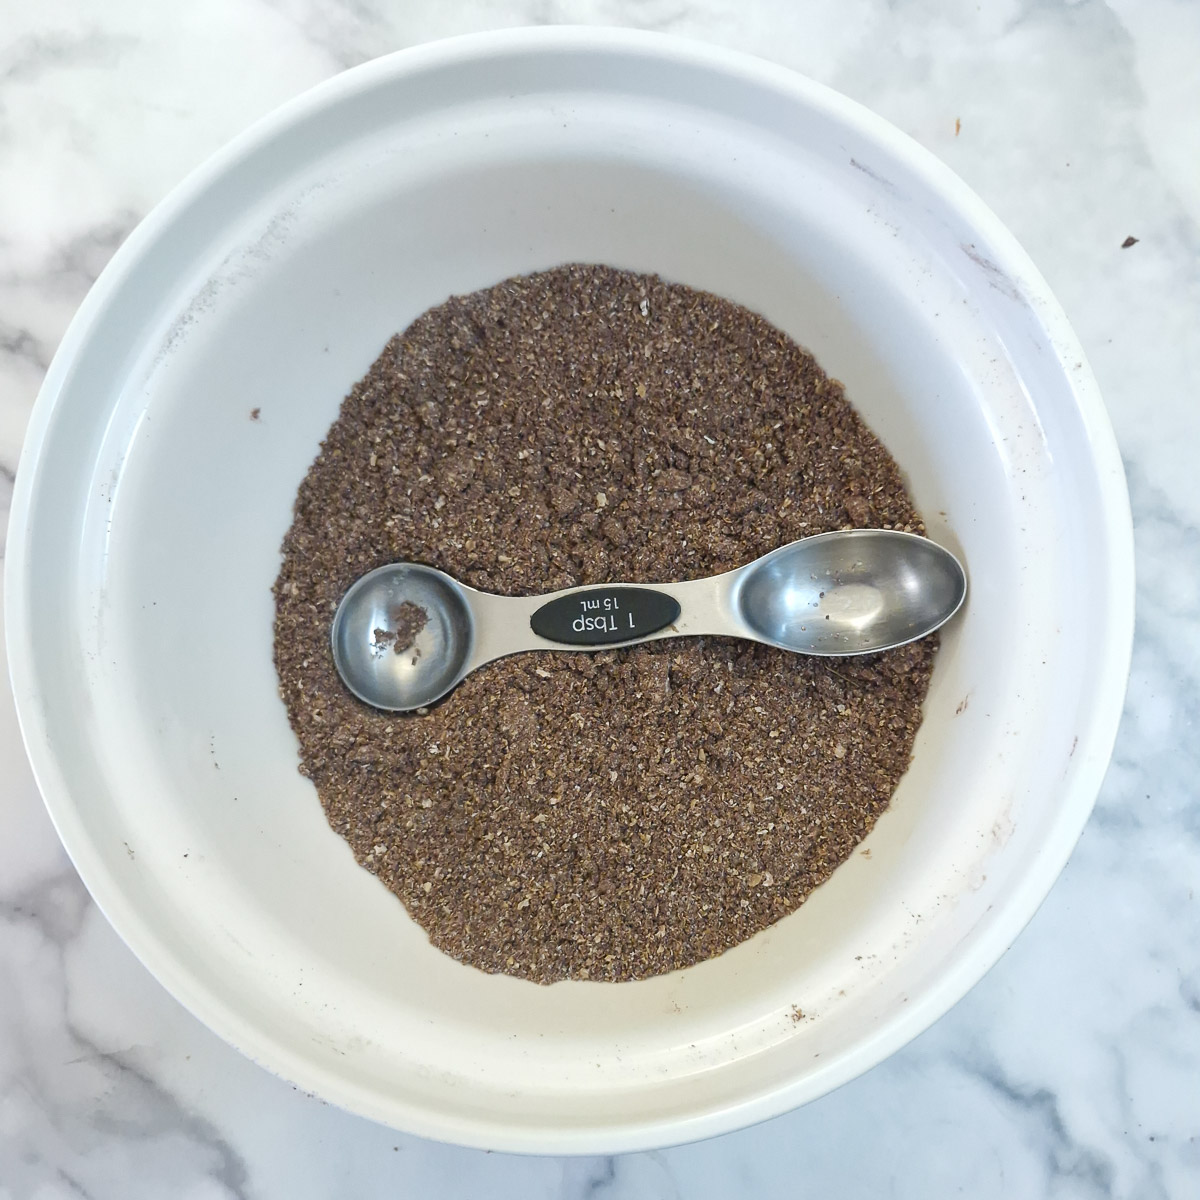
Step 4: Use a measuring spoon (1-tablespoon size) to make indentations in the dry ingredients.
💡Top tip 💡
An easy way to measure syrup or other sticky ingredients is to press an indentation with your measuring spoon into the dry ingredients. The syrup can simply be poured into the indentation, so you don't have to worry about it sticking to your spoon.
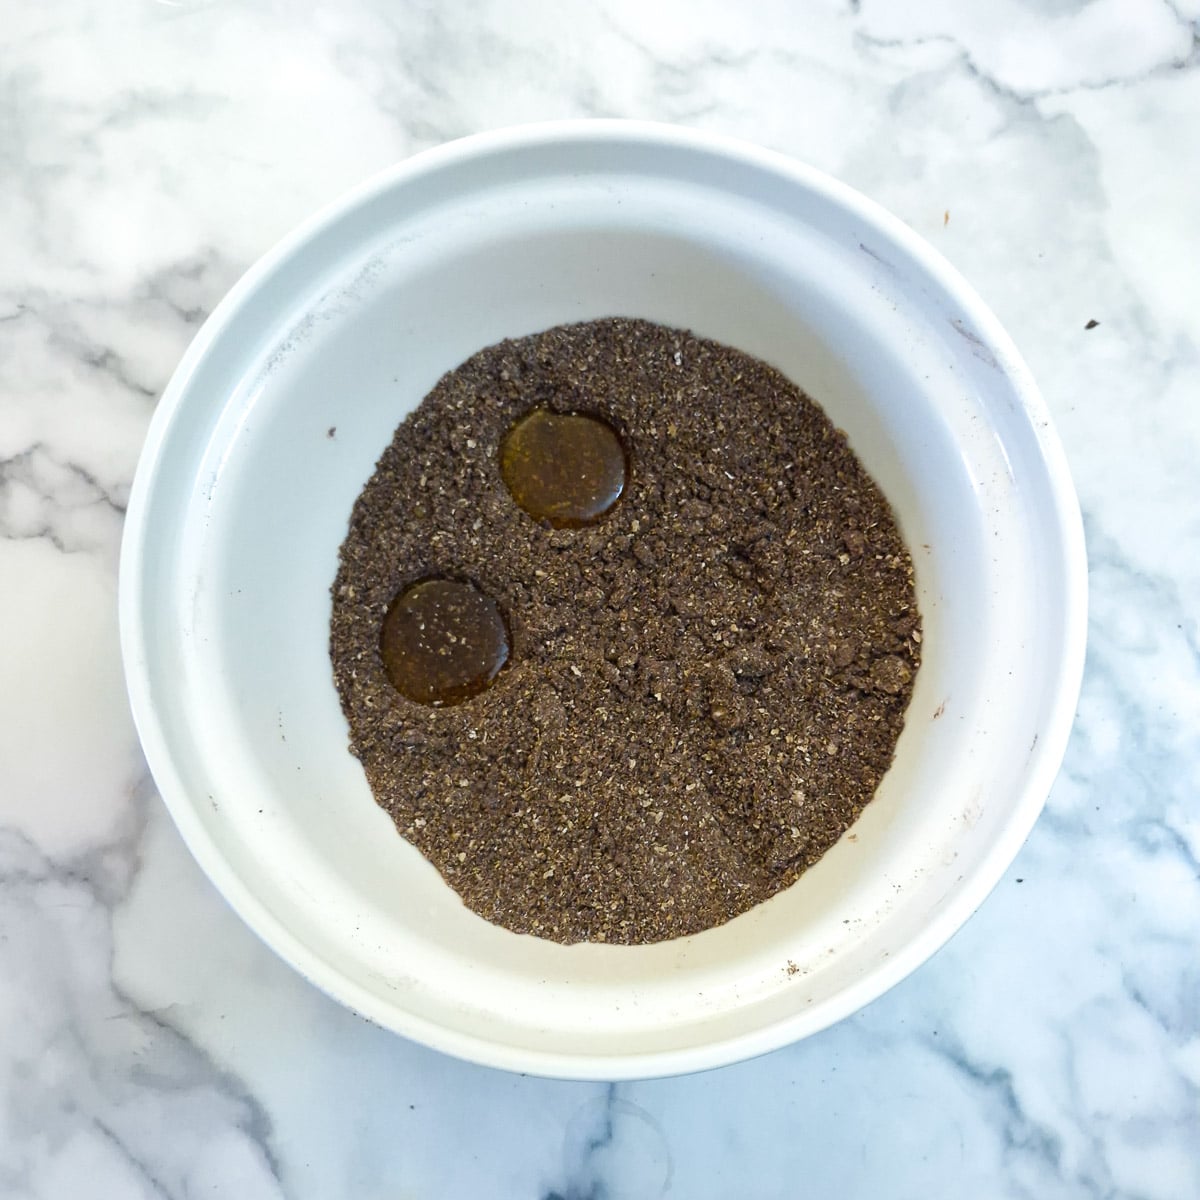
Step 5: Make 2 indentations and pour syrup into each one.
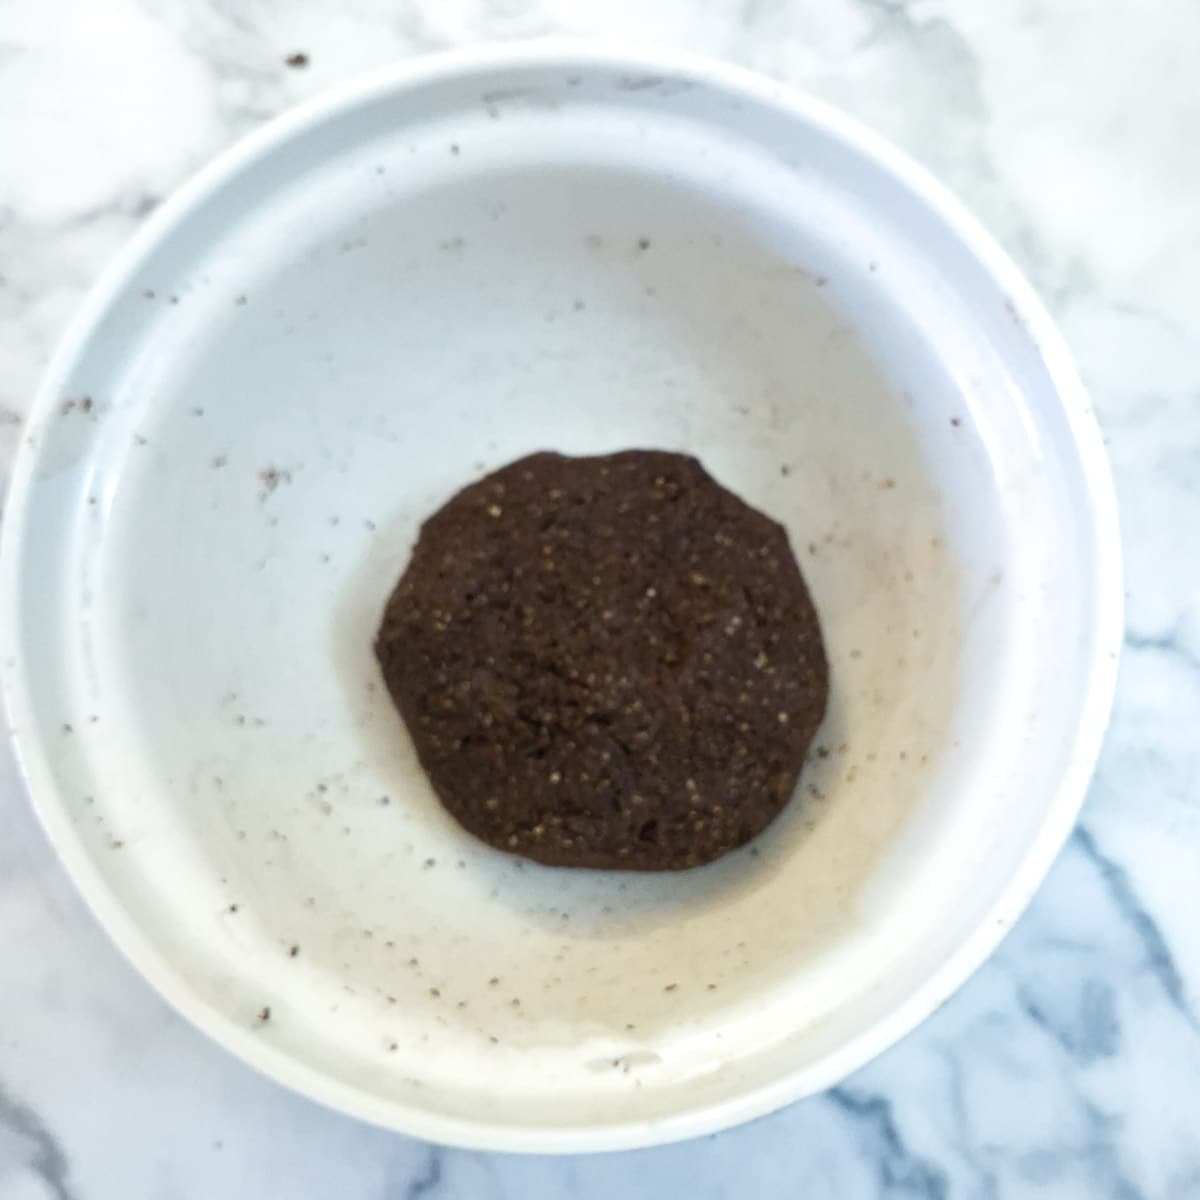
Step 6: Add approximately one-quarter cup or 4 tablespoons of water to the bowl and mix it together to form a soft ball.
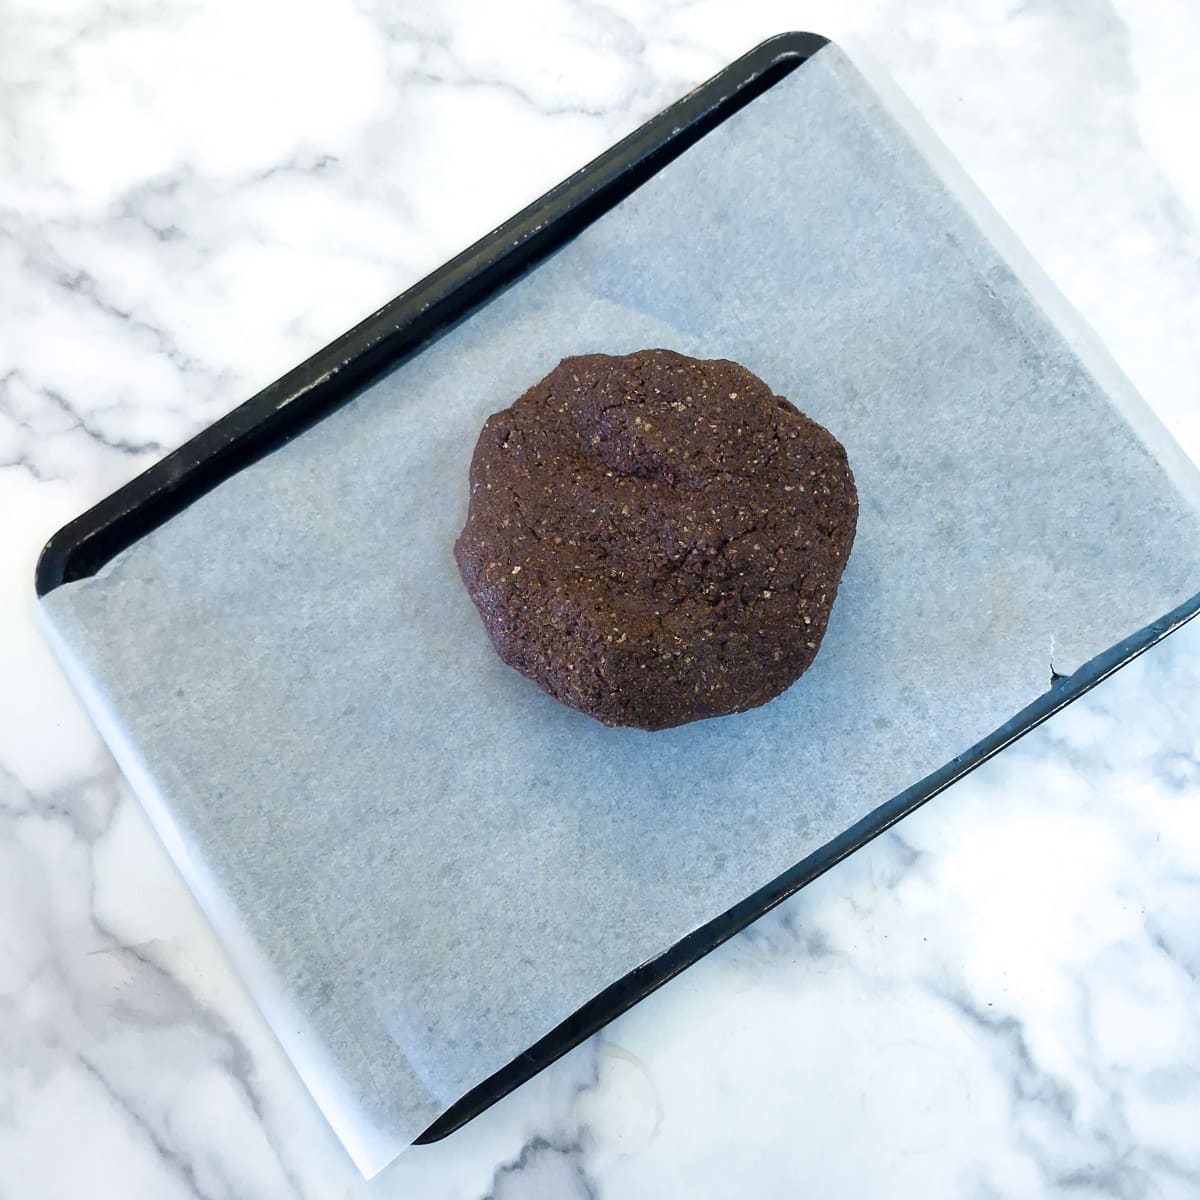
Step 7: Transfer the dough to a baking sheet which has been lined with baking parchment. Leave a little overhang at both ends to help you remove the cooked pastry from the tray. If you don't have baking parchment, be sure to rub the tray with a little cooking oil to prevent the pastry from sticking.
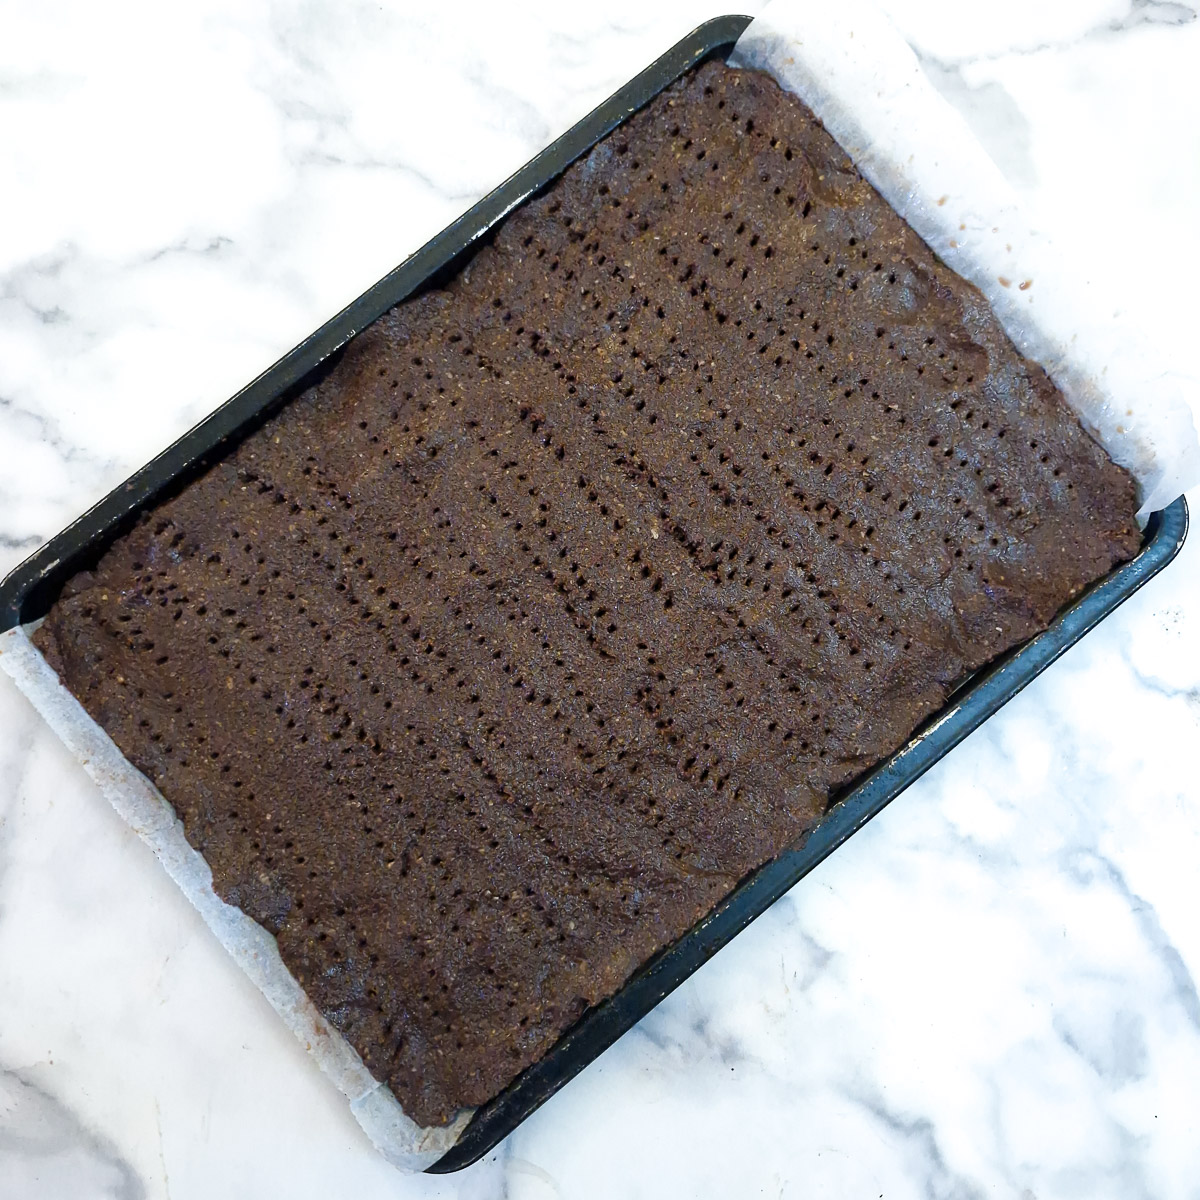
Step 8: Use your fingers and press the dough evenly onto the baking parchment. It should be approximately ⅛-inch in thickness. Prick the dough all over with a fork to prevent the pastry from rising too much. It will rise a little in the oven, but that's OK.
Filling
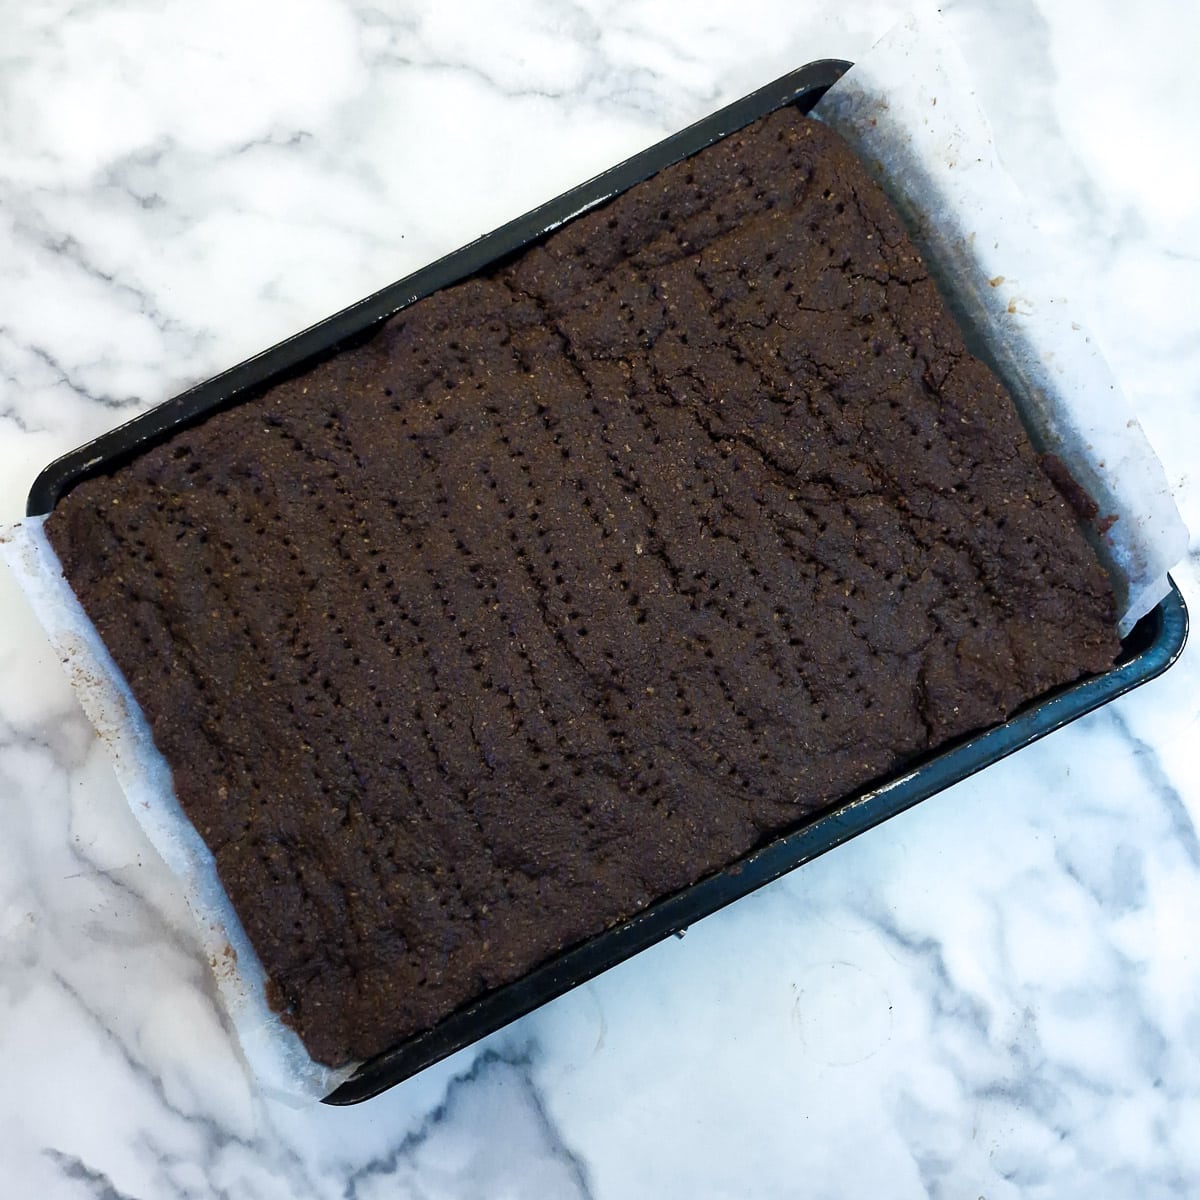
Step 9: Bake the pastry base for 15 minutes in a preheated oven -180C (160C (fan)) / 360F (325F (fan)). Remove from the oven and allow to cool for a few minutes.
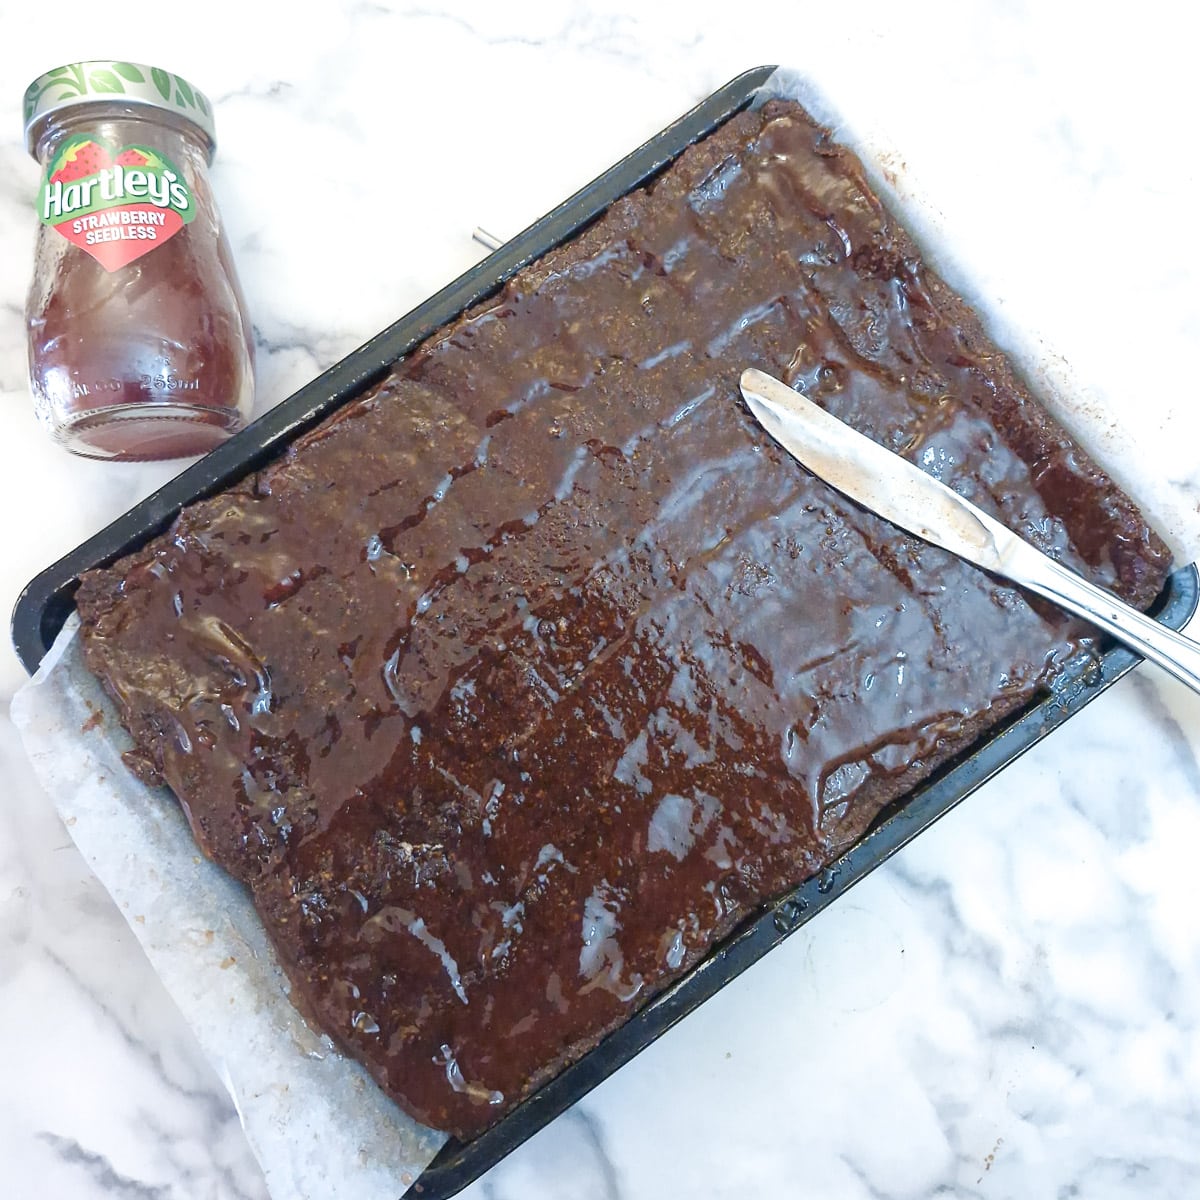
Step 10: Use a flat knife to spread the jam in a thin even layer all over the pastry.
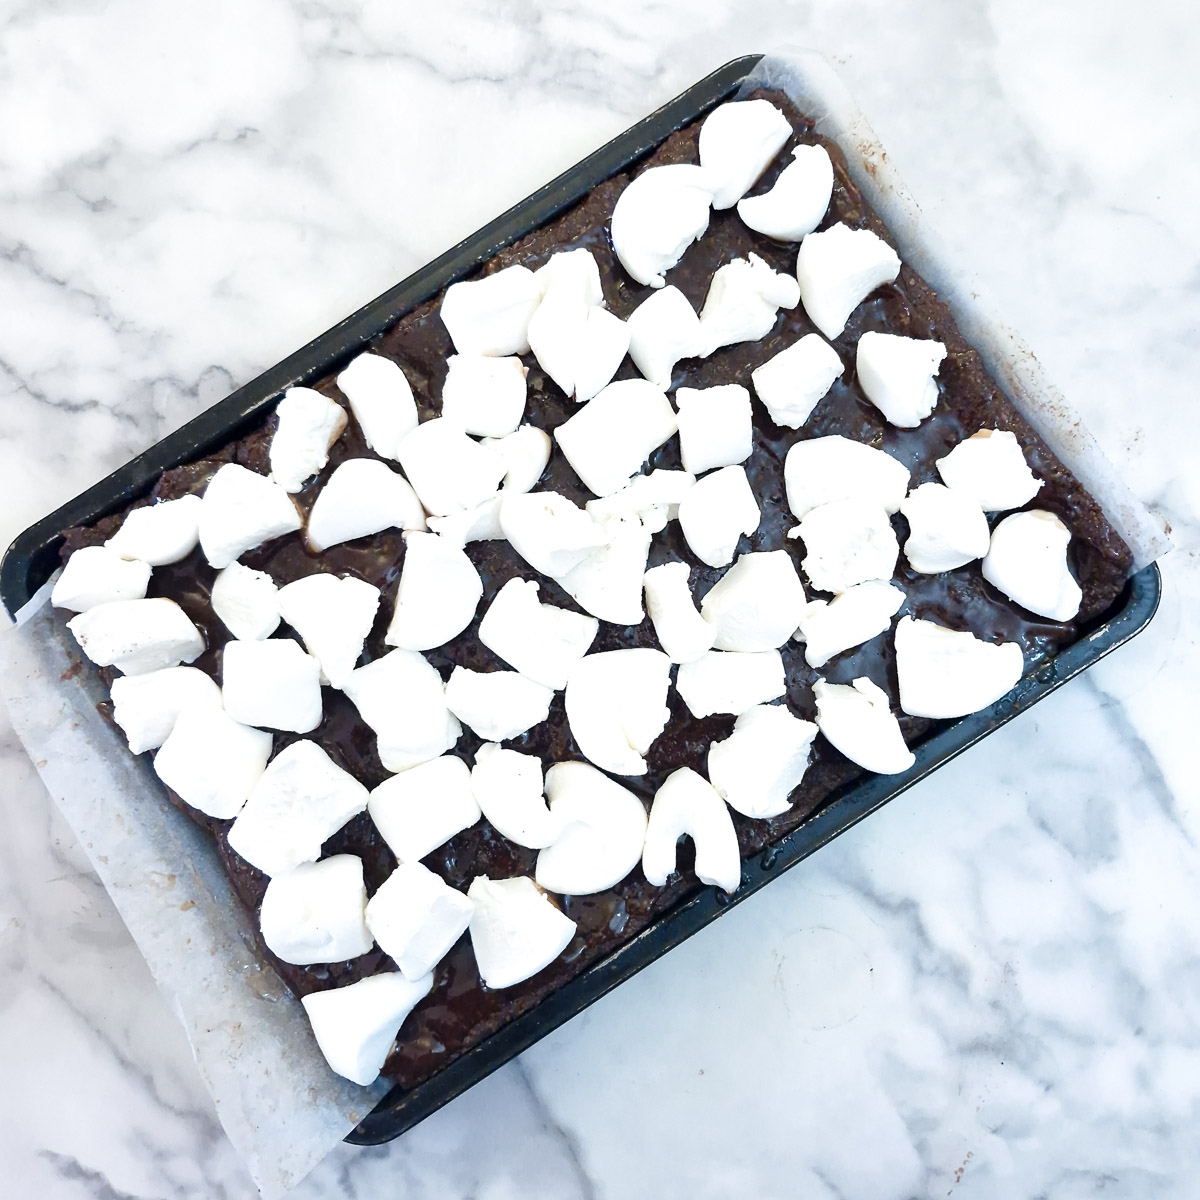
Step 11: Arrange the marshmallows evenly all over the jam. If you've made your own marshmallow, just spread it evenly on top and skip the next step.
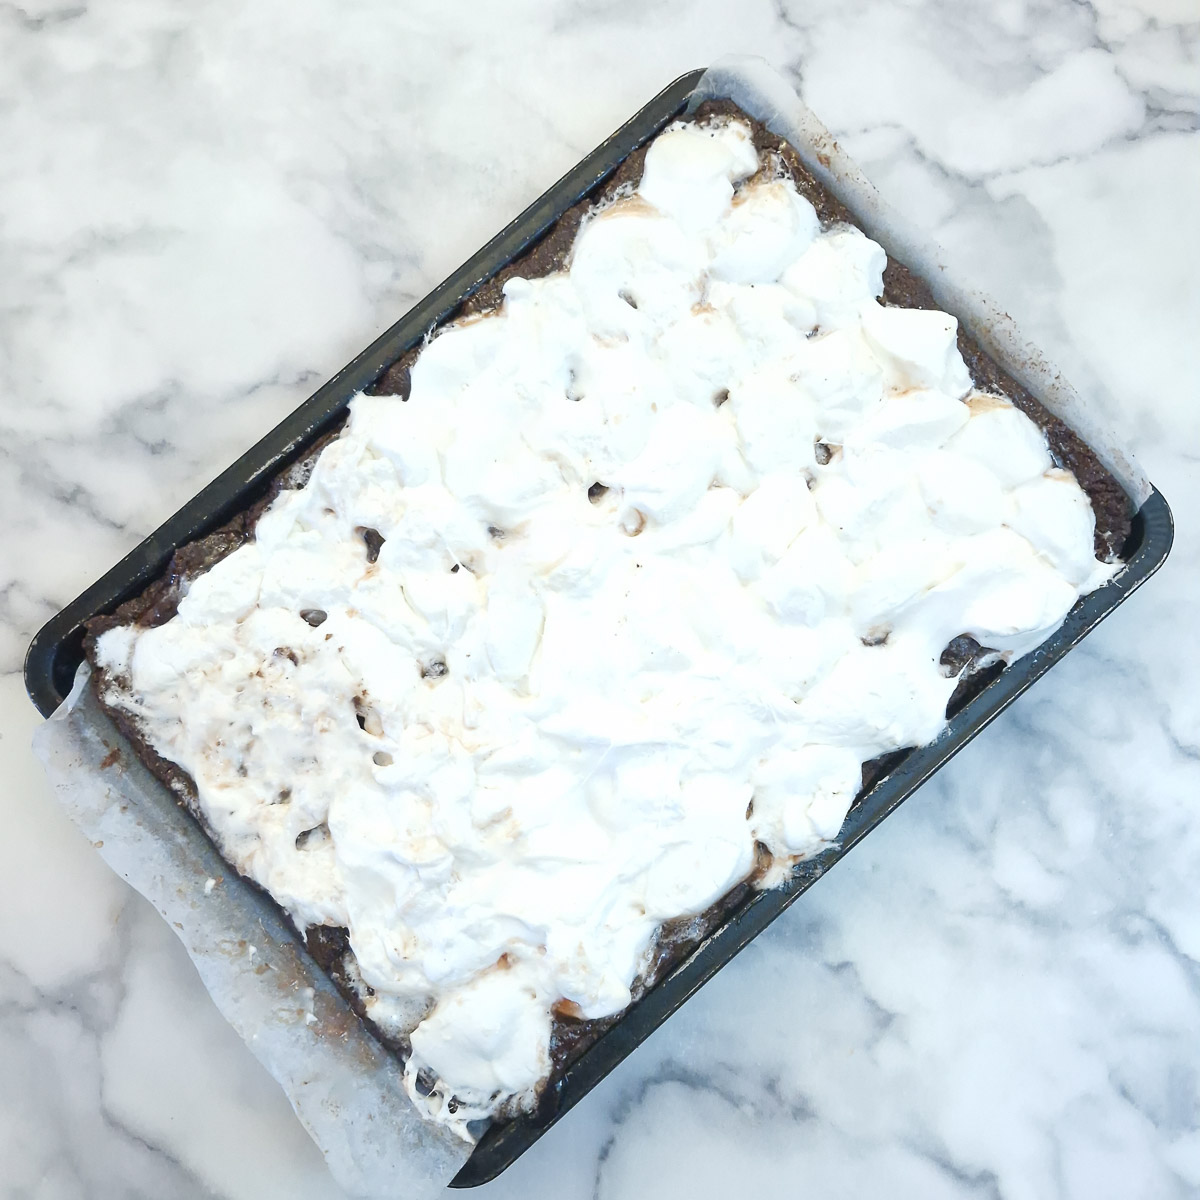
Step 12: Place the tray back into the oven and leave for 5 minutes to melt the marshmallows. Use a flat knife to smooth them out and fill in any holes, so the jam is completely covered. Leave in the refrigerator to cool.
Remove the baking paper
You can remove the baking paper at one of 2 stages:
- after the marshmallows have been chilled, or
- before adding the jam.
After chilling (preferred method)
- Lift the traybake out of the tray using the overhanging parchment.
- Transfer it onto a wooden board, supporting as you go.
- Gently slide the bake down, while pulling the parchment away underneath.
- For extra ease, fold one edge of parchment back on itself and peel it from underneath.
Before adding jam (alternative method)
- Place a wooden board over the tray.
- Carefully flip everything upside down.
- Remove the baking tray and peel away the parchment.
- Replace the tray and flip it back the right way up.
I prefer the first method because the tray bake is firmer after chilling and will be less prone to breaking. Use whichever method you are most comfortable with.
Topping
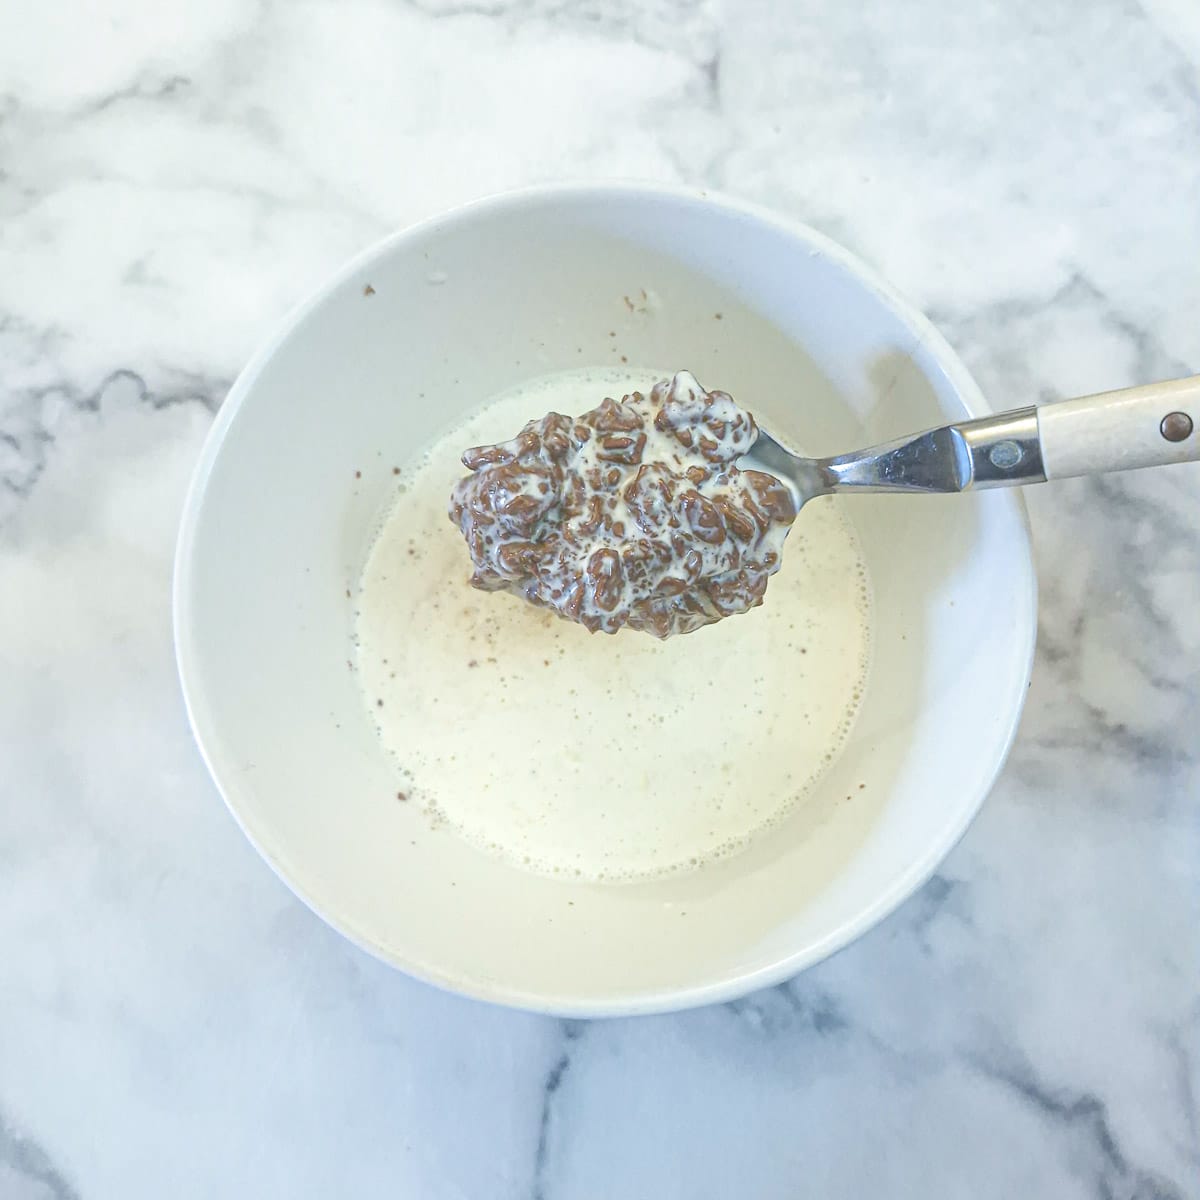
Step 13: Chop the chocolate into small pieces and transfer to a bowl. Heat the cream in a saucepan on the stove until just before boiling point, pour it over the chocolate and allow it to stand for 3 to 4 minutes to soften.
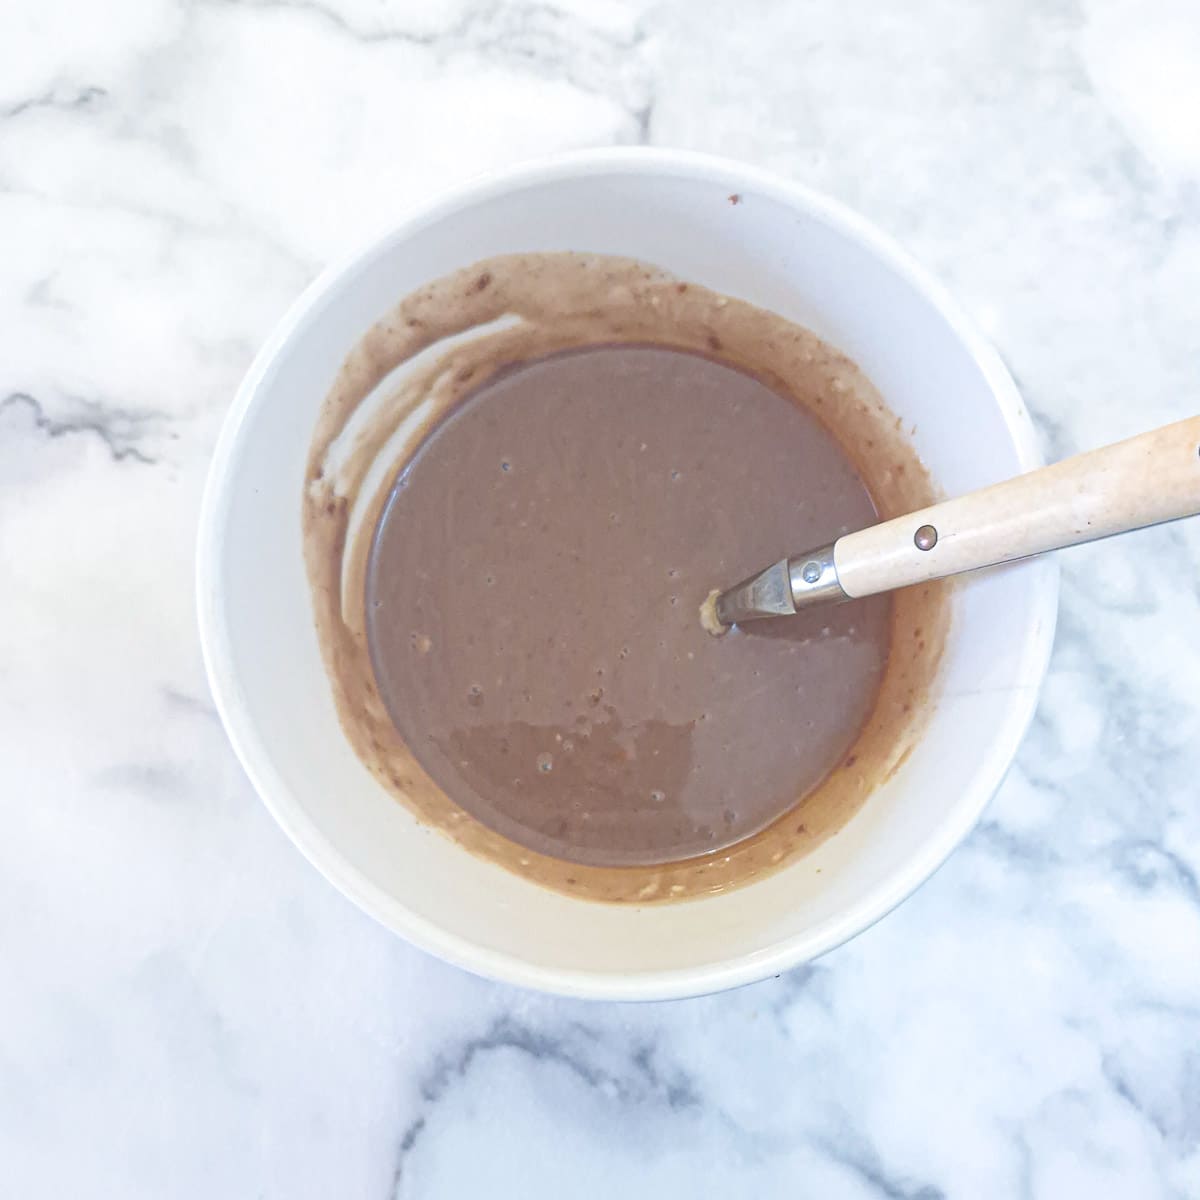
Step 14: Stir the chocolate and cream mixture gently until it becomes smooth, then place it in the refrigerator for 30 minutes to chill.
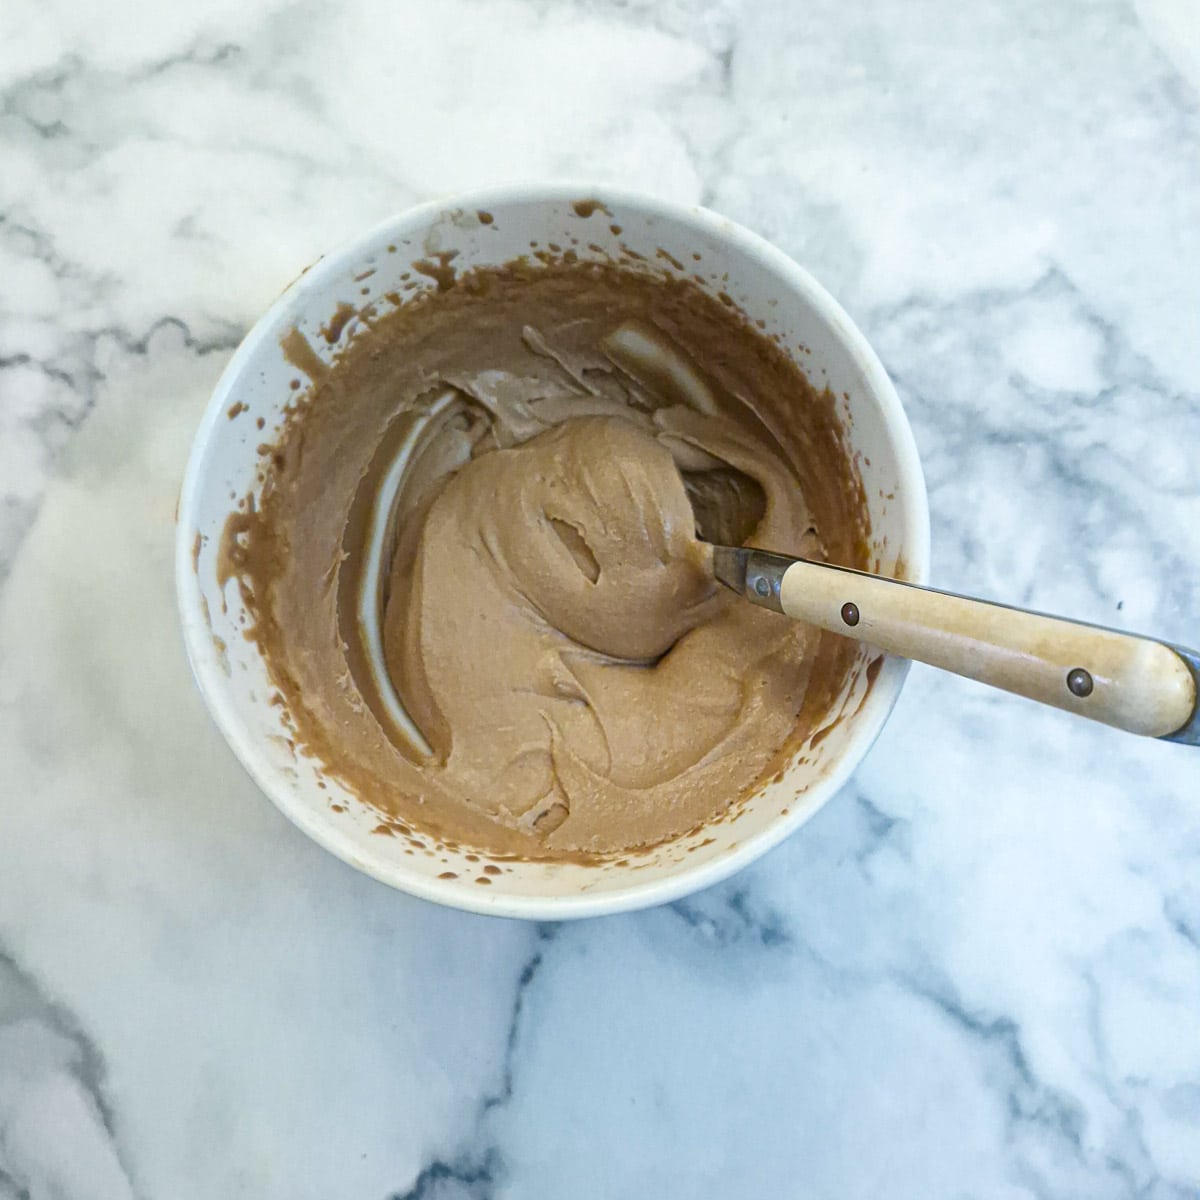
Step 15: Once cold, beat the cream and chocolate with an electric hand blender until it thickens and holds its shape. This will take 3 to 5 minutes, depending on how cold the mixture is.
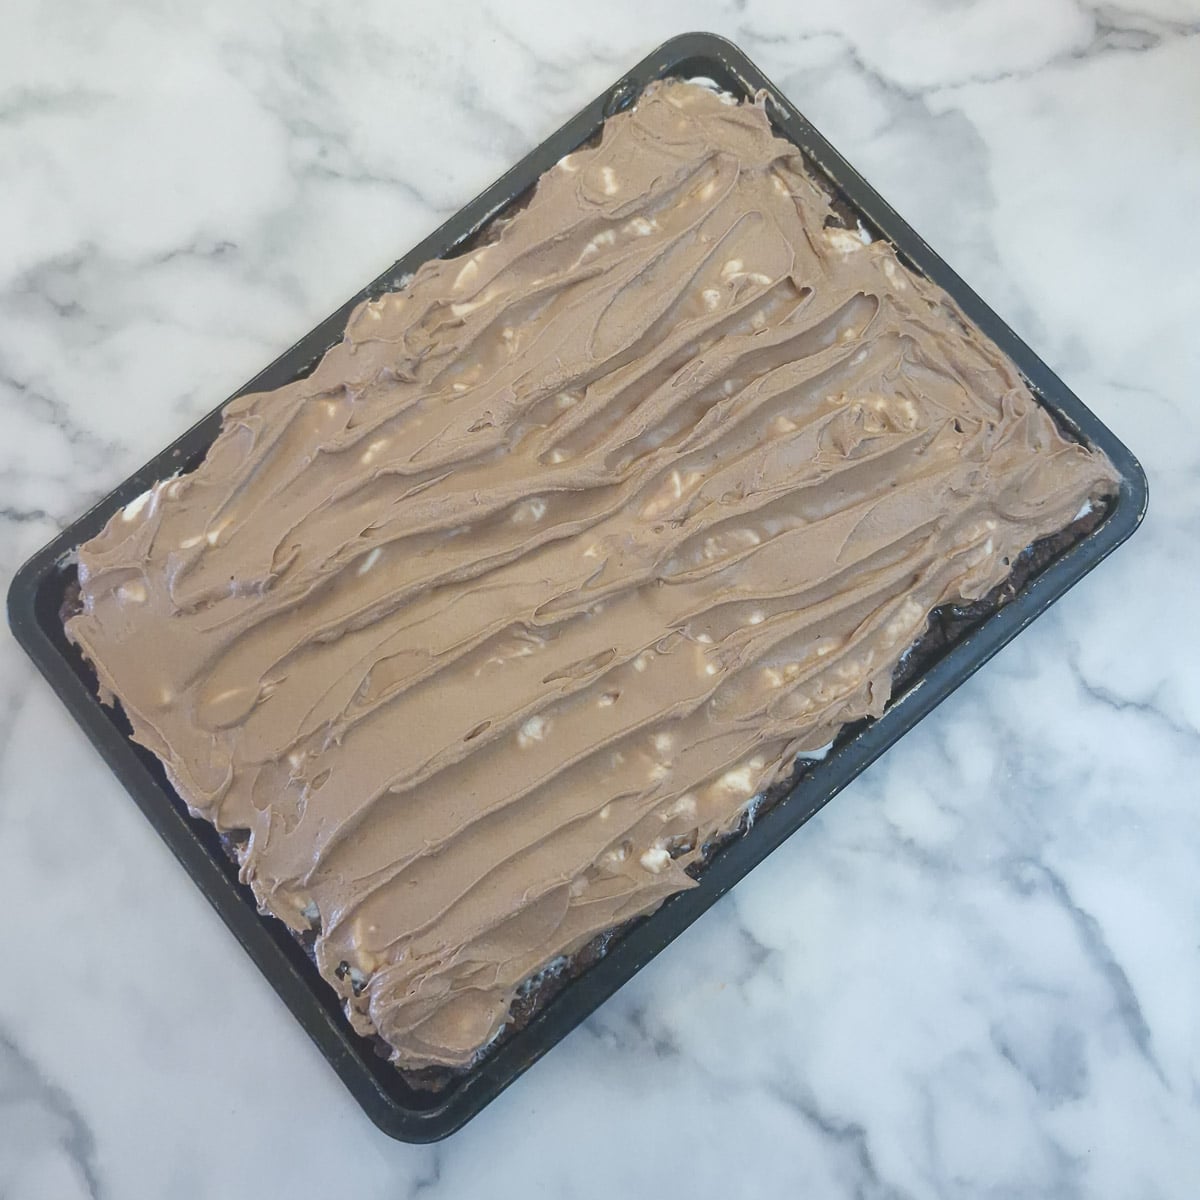
Step 16: Spread the whipped ganache over the marshmallows and store the tray bake in the refrigerator to allow the ganache to firm up. Cut into slices and serve chilled.
Tips for making a wagon wheel traybake
These top tips will help ensure your wagon wheel biscuit traybake always turns out perfectly.
- The pastry is quite soft, so it's not suitable for rolling out and transferring to the baking tray. It can also be tricky to get the exact size right this way. The easiest method is to flatten the pastry directly onto the tray, then use your fingers to press it evenly across the base, making sure to work it into the corners. Try to keep the layer as even as possible, and if needed, use the flat base of a drinking glass to help smooth and level the surface.
- Spread the marshmallow while it is still warm. As soon as the marshmallows come out of the oven, use a palette knife or the back of a spoon to smooth them into an even layer before they start to set.
- Don't get the hot jam onto your fingers. Take care when spreading the marshmallows - keep your fingers away from the hot jam. It can cause a nasty burn.
- Chill the ganache before whipping. If you try to whip the ganache while it is still warm, it won't thicken properly. It should be cold before you start to beat it.
- Don't overwhip the ganache. Stop whisking as soon as the ganache is thick and spreadable. Overbeating can cause it to turn grainy.
- Don't forget to remove the baking parchment before spreading on the ganache!
Variations
- Instead of covering the marshmallows with chocolate ganache, drizzle them with melted chocolate.
- Swap out the strawberry jam for your choice of flavour.
- Use plain flour instead of wholemeal flour.
Equipment
To make this marshmallow wagon wheel traybake, you will need the following main items of equipment:
- Mixing bowls - a large one for mixing the pastry, and a smaller one for making the ganache.
- Baking tray. The recipe as written fits perfectly into an 8-inch x 12-inch baking tray (or 20 x 30 centimetres).
- Baking parchment. This is optional, but I like to line my try with baking parchment; it prevents sticking, and it makes getting the slice out of the tray so much easier.
- Electric hand beater. This makes short work of beating the ganache. You could use a hand whisk, but it will take much longer.
- Palette knife - for spreading the marshmallows.
Storing and freezing
- Refrigerator. Because of the ganache, it is advisable to store this traybake in the refrigerator. You can slice it and store the slices in a covered plastic (or Tupperware container).
- Freezer. Chill before slicing, then wrap individual slices in cling film and place in an airtight container or freezer bag. You can freeze for up to 3 months for the best quality.
- Defrosting. Defrost frozen slices in the refrigerator.
Troubleshooting and FAQ
This usually happens if the dough is too dry or hasn't been pressed firmly enough into the tray. Make sure the mixture comes together in a soft dough, and press it evenly into the tin to create a compact base.
The marshmallows have to be smoothed while still warm from the oven. Once they start to set, they become sticky and harder to spread evenly. Pop them back into the oven for a minute or two, then spread them quickly using a palette knife or a spoon.
It's likely that the ganache wasn't chilled enough. It needs to be completely cold and quite firm before whipping. Return it to the fridge for another 15 minutes or so, and try again.
This usually means it's been over-whipped. Stop beating as soon as it thickens to a soft, spreadable consistency.
A bit of trivia for you! Wagon Wheels were first created in the UK in post-war Britain, as food rationing was coming to an end and sweeter treats were starting to reappear on the shelves. They later became popular in other countries such as Australia and Canada, where they've gone on to become a nostalgic classic.
Save for later
If you'd like to try this wagon wheel traybake, why not save the recipe to one of your Pinterest boards so you can find it easily? Just click the image below.
Alternatively, you can save the recipe by clicking on the floating heart icon on the right-hand side of the screen.
Related recipes
Visit my cake recipes page for other tasty homemade treats. Here are a few you might enjoy.


📋The recipe
Wagon Wheel traybake
(Click the stars to rate this recipe)
Equipment
- 2 Mixing Bowls one for pastry / one for ganache
- Baking tray 8" x 12" or 20 x 30 cm
- Baking parchment optional
- Electric hand beater optional but recommended. Use a hand whisk instead.
- Palette knife to spread the marshmallow
Ask a Question
If you have a question about this recipe that has not been answered, please use the box below to ask it.
Use this with care. This is an AI-generated result and may contain errors or inaccuracies. I cannot be held responsible for the information returned.
Ingredients
Pastry base
- 1½ cups / 210 grams wholemeal flour substitute with white flour or a mixture of the 2.
- ½ cup / 100 grams white sugar
- ¼ cup /25 grams unsweetened cocoa powder
- ½ teaspoon bicarbonate of soda
- ¼ teaspoon salt
- 3½ ounces / 100 grams margarine use butter if preferred
- 2 tablespoons golden syrup
- 4 tablespoons water
Filling
- ⅓ cup / 80 grams seedless strawberry jam or other jam of your choice
- 5½ ounces / 150 grams marshmallows See notes for link to make your own marshmallows
Topping
- 5½ ounces / 150 grams chocolate Cadbury's is fine
- 1 cup / 240 ml double or heavy (whipping) creaqm don't use single creaam
Instructions
Make the pastry base
- Preheat oven to 180°C (160°C (fan)) / 360°F (325°F (fan))
- Use a spatula to combine the flour, sugar, cocoa powder, bicarbonate of soda and salt in a mixing bowl.1½ cups / 210 grams wholemeal flour, ½ cup / 100 grams white sugar, ¼ cup /25 grams unsweetened cocoa powder, ½ teaspoon bicarbonate of soda, ¼ teaspoon salt
- Cut the margarine (or butter if using) into cubes and add them to the dry ingredients.3½ ounces / 100 grams margarine
- Use your fingertips to rub the margarine into the dry ingredients. Once the margarine has been incorporated the mixture should resemble breadcrumbs or coarse sand.
- Add the golden syrup2 tablespoons golden syrup
- Add approximately one-quarter cup or 4 tablespoons of water to the bowl and mix it together to form a soft ball.4 tablespoons water
- Transfer the dough to a baking sheet which has been lined with baking parchment. Leave a little overhang at both ends to help you remove the cooked pastry from the tray. If you don't have baking parchment, be sure to rub the tray with a little cooking oil to prevent the pastry from sticking.
- Use your fingers and press the dough evenly onto the baking parchment. It should be approximately ⅛-inch in thickness. Prick the dough all over with a fork to prevent the pastry from rising too much. It will rise a little in the oven, but that's OK.
- Bake the pastry base for 15 minutes in a preheated oven -180C (160C (fan)) / 360F (325F (fan)). Remove from the oven and allow to cool for a few minutes.
- **You can remove the baking parchment once the pastry has cooled, or wait until the marshmallow has been added and chilled and remove the baking parchment then. See notes for instructions.
- Use a flat knife to spread the jam in a thin even layer all over the pastry.⅓ cup / 80 grams seedless strawberry jam
- Arrange the marshmallows evenly all over the jam. If you've made your own marshmallow, just spread it evenly on top and skip the next step.5½ ounces / 150 grams marshmallows
- Place the tray back into the oven and leave for 5 minutes to melt the marshmallows. Use a flat knife to smooth them out and fill in any holes, so the jam is completely covered. Leave in the refrigerator to cool.
- **If you haven't already removed the baking parchment you can remove it now. See notes for instructions.
Topping
- Chop the chocolate into small pieces and transfer to a bowl. Heat the cream in a saucepan on the stove until just before boiling point, pour it over the chocolate and allow it to stand for 3 to 4 minutes to soften.5½ ounces / 150 grams chocolate
- Stir the chocolate and cream mixture gently until it becomes smooth, then place it in the refrigerator for 30 minutes to chill.1 cup / 240 ml double or heavy (whipping) creaqm
- Once cold, beat the cream and chocolate with an electric hand blender until it thickens and holds its shape. This will take 3 to 5 minutes, depending on how cold the mixture is.
- Spread the whipped ganache over the marshmallows and store the tray bake in the refrigerator to allow the ganache to firm up. Cut into slices and serve chilled.
Notes
Recipe tips:
- get the exact size right this way. The easiest method is to flatten the pastry directly onto the tray, then use your fingers to press it evenly across the base, making sure to work it into the corners. Try to keep the layer as even as possible, and if needed, use the flat base of a drinking glass to help smooth and level the surface.
- Spread the marshmallow while it is still warm. As soon as the marshmallows come out of the oven, use a palette knife or the back of a spoon to smooth them into an even layer before they start to set.
- Don't get the hot jam onto your fingers. Take care when spreading the marshmallows - keep your fingers away from the hot jam. It can cause a nasty burn.
- Chill the ganache before whipping. If you try to whip the ganache while it is still warm, it won't thicken properly. It should be cold before you start to beat it.
- Don't overwhip the ganache. Stop whisking as soon as the ganache is thick and spreadable. Overbeating can cause it to turn grainy.
- Don't forget to remove the baking parchment before spreading on the ganache! Storage and freezing:
- Refrigerator. Because of the ganache, it is advisable to store this traybake in the refrigerator. You can slice it and store the slices in a covered plastic (or Tupperware container).
- Freezer. Chill before slicing, then wrap individual slices in cling film and place in an airtight container or freezer bag. You can freeze for up to 3 months for the best quality.
- Defrosting. Defrost frozen slices in the refrigerator.
Nutrition
I am not a nutritionist. The nutrition information has been calculated using an on-line calculator, and is intended for information and guidance purposes only. If the nutrition information is important to you, you should consider calculating it yourself, using your preferred tool.
If you made this recipe and enjoyed it, I'd love it if you could give me a star rating in the comments below. And if you'd like to get in touch, you can email me at [email protected]. I'd love to hear from you. And don't forget to subscribe to my mailing list so you can grab yourself a copy of my FREE COOKBOOK!
If you'd like to continue browsing, just click on this link to all my recipes.


Did you make this recipe? Let me know!