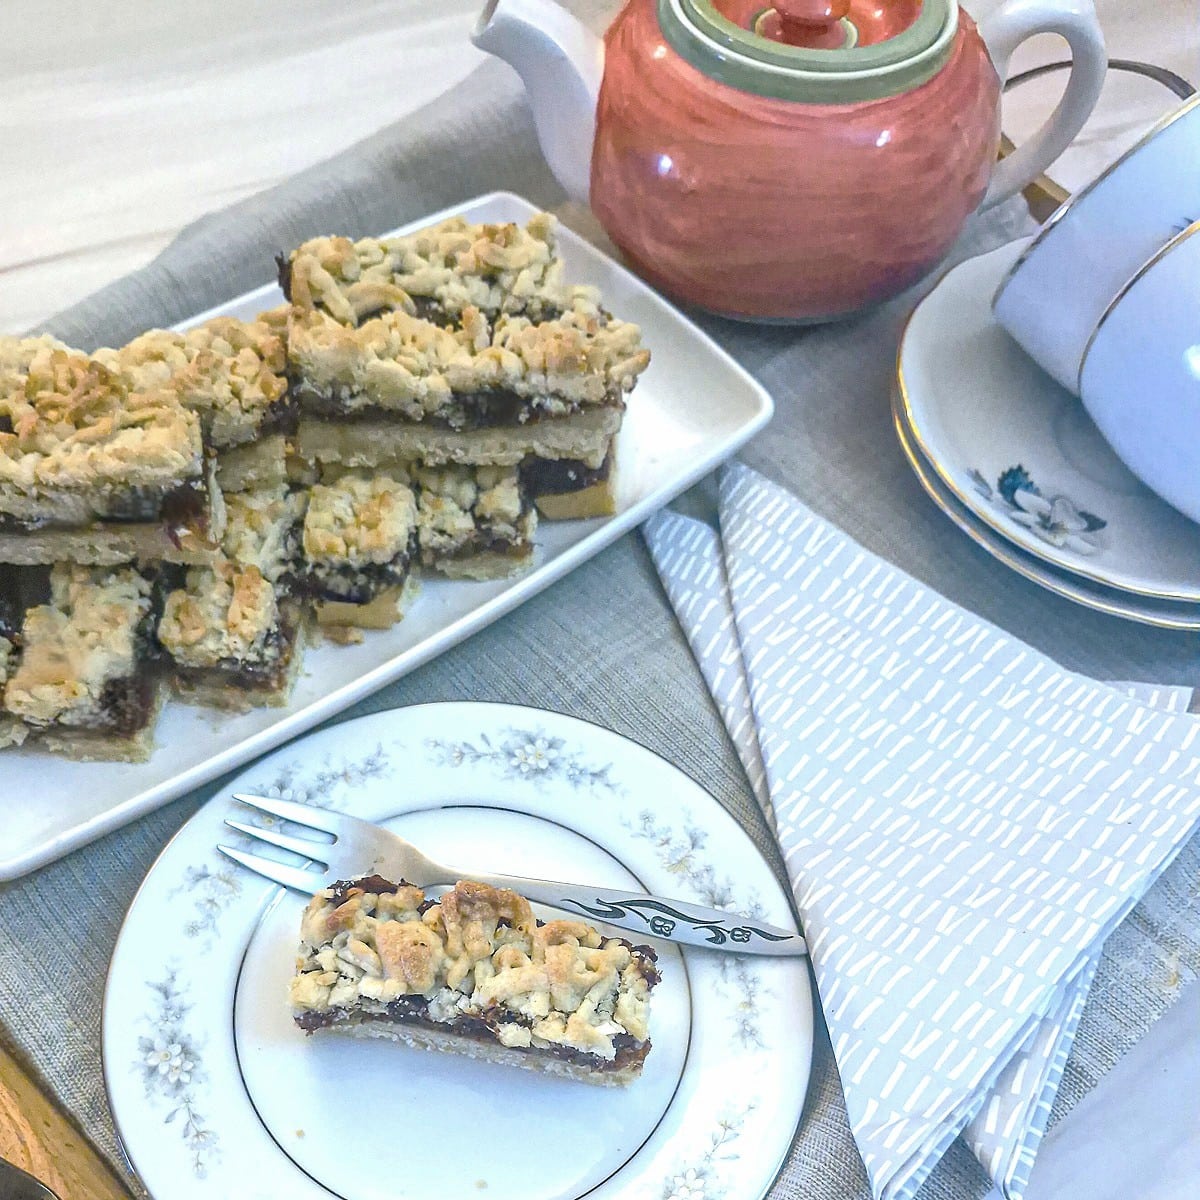
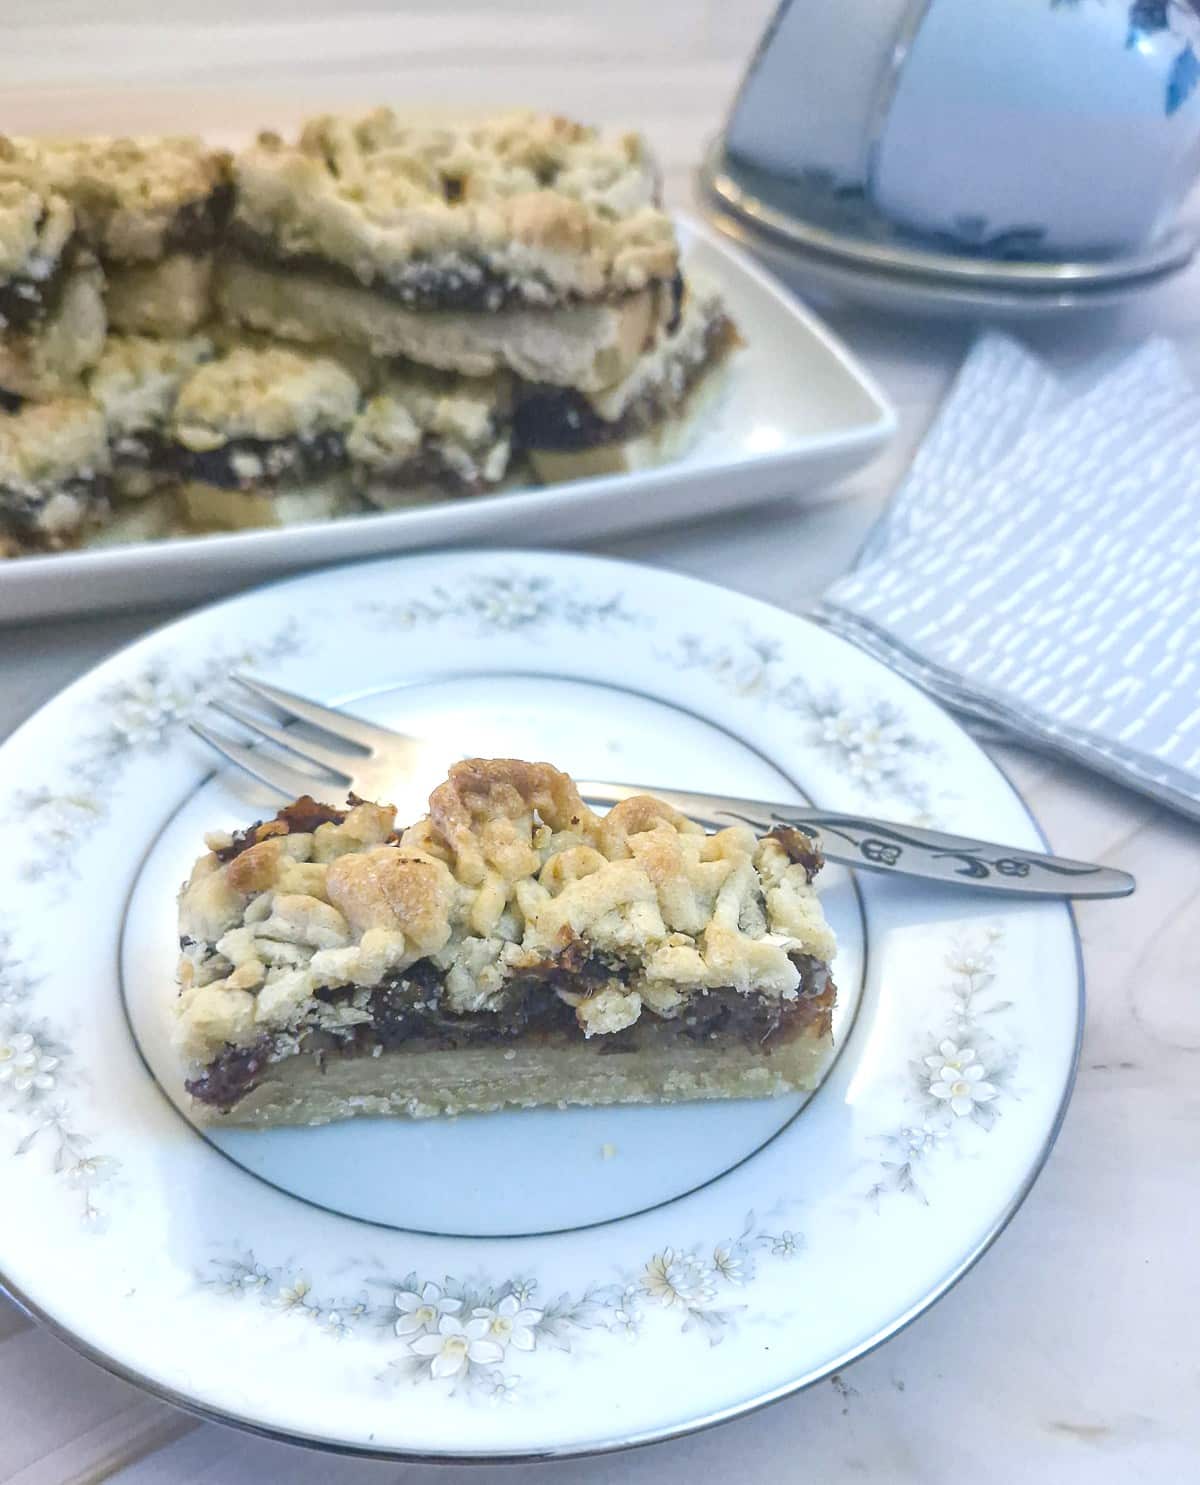
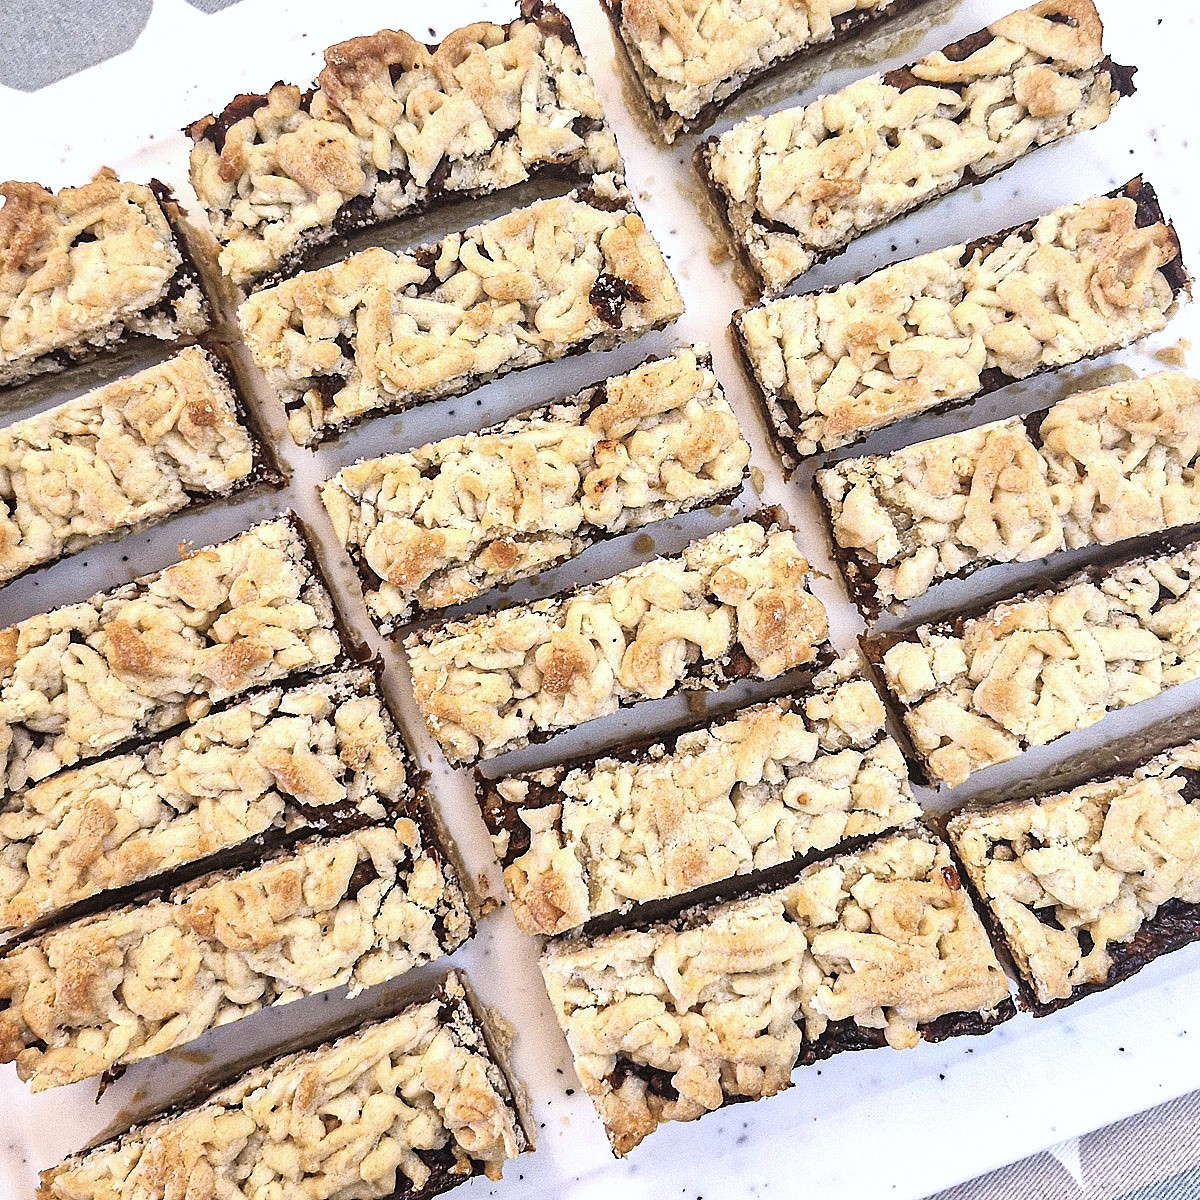
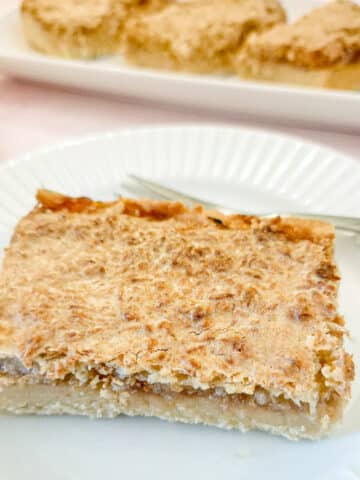
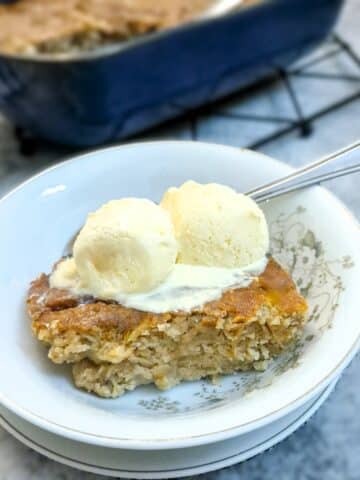
With sweet, sticky dates and crunchy walnuts, sandwiched between a shortbread base and a crumbly pastry topping, these date and walnut crumble bars are perfect for an easy tea-time treat or a quick midday sugar boost! I'm obsessed - I can't stop eating them!
Jump to:
Date and walnut bars at a glance
- How date and walnut bars are made: Mix up a quick buttery pastry and layer ⅔ of it in a baking tray. Top with a filling made with dates and chopped walnuts, and grate the remaining pastry over the top. Bake until golden.
- Main ingredients: Dates, walnuts, buttery pastry.
- Prep time: 30 minutes - which is enough time to make the pastry, and put it into the fridge to chill. You can make the filling while the pastry is chilling.
- Cooking time: 35 minutes.
- Yield: 18 bars
How did date and walnut bars originate?
This recipe started life as my attempt to re-create the fig roll biscuits (US - cookies) that you can find in any UK supermarket, and made with a soft, buttery pastry wrapped around a filling of tasty figs. Unfortunately, I didn't have any figs, but I did have some juicy dates, so I changed my mind and made date and walnut bars instead.
But don't worry - as soon as I find some figs in the supermarket, I'll give them a go - in the meantime, these date fingers make a delicious substitute. And they don't taste too dissimilar to fig rolls either!
The dates make a lovely sticky filling, enclosed in the soft buttery pastry, while the walnuts add just the right amount of crunch. And because I've made them as a tray bake rather than individual cookies, they take no time at all to get into the oven.
Why I think you'll love this recipe
- So easy to make. All you have to do is make a buttery pastry, boil up a date-and-walnut filling, layer it between the pastry and pop the dish into the oven for half an hour.
- Perfect tea-time treat. The sweetness of the dates, the crunch of the walnuts and the soft buttery pastry make a delicious slice that can be enjoyed any time.
- Perfect as a dessert or simply as a slice with cuppa! You could also pour some custard over a slice of this delicious crumble and turn it into a tasty dessert.
- Don't forget the lunch box. A slice of date and walnut crumble is ideal for slipping into a lunch box for a midday energy boost.
Ingredients for date and walnut crumble
**Find the exact ingredient quantities for this tasty crumble slice on the printable recipe card at the end of this post.**
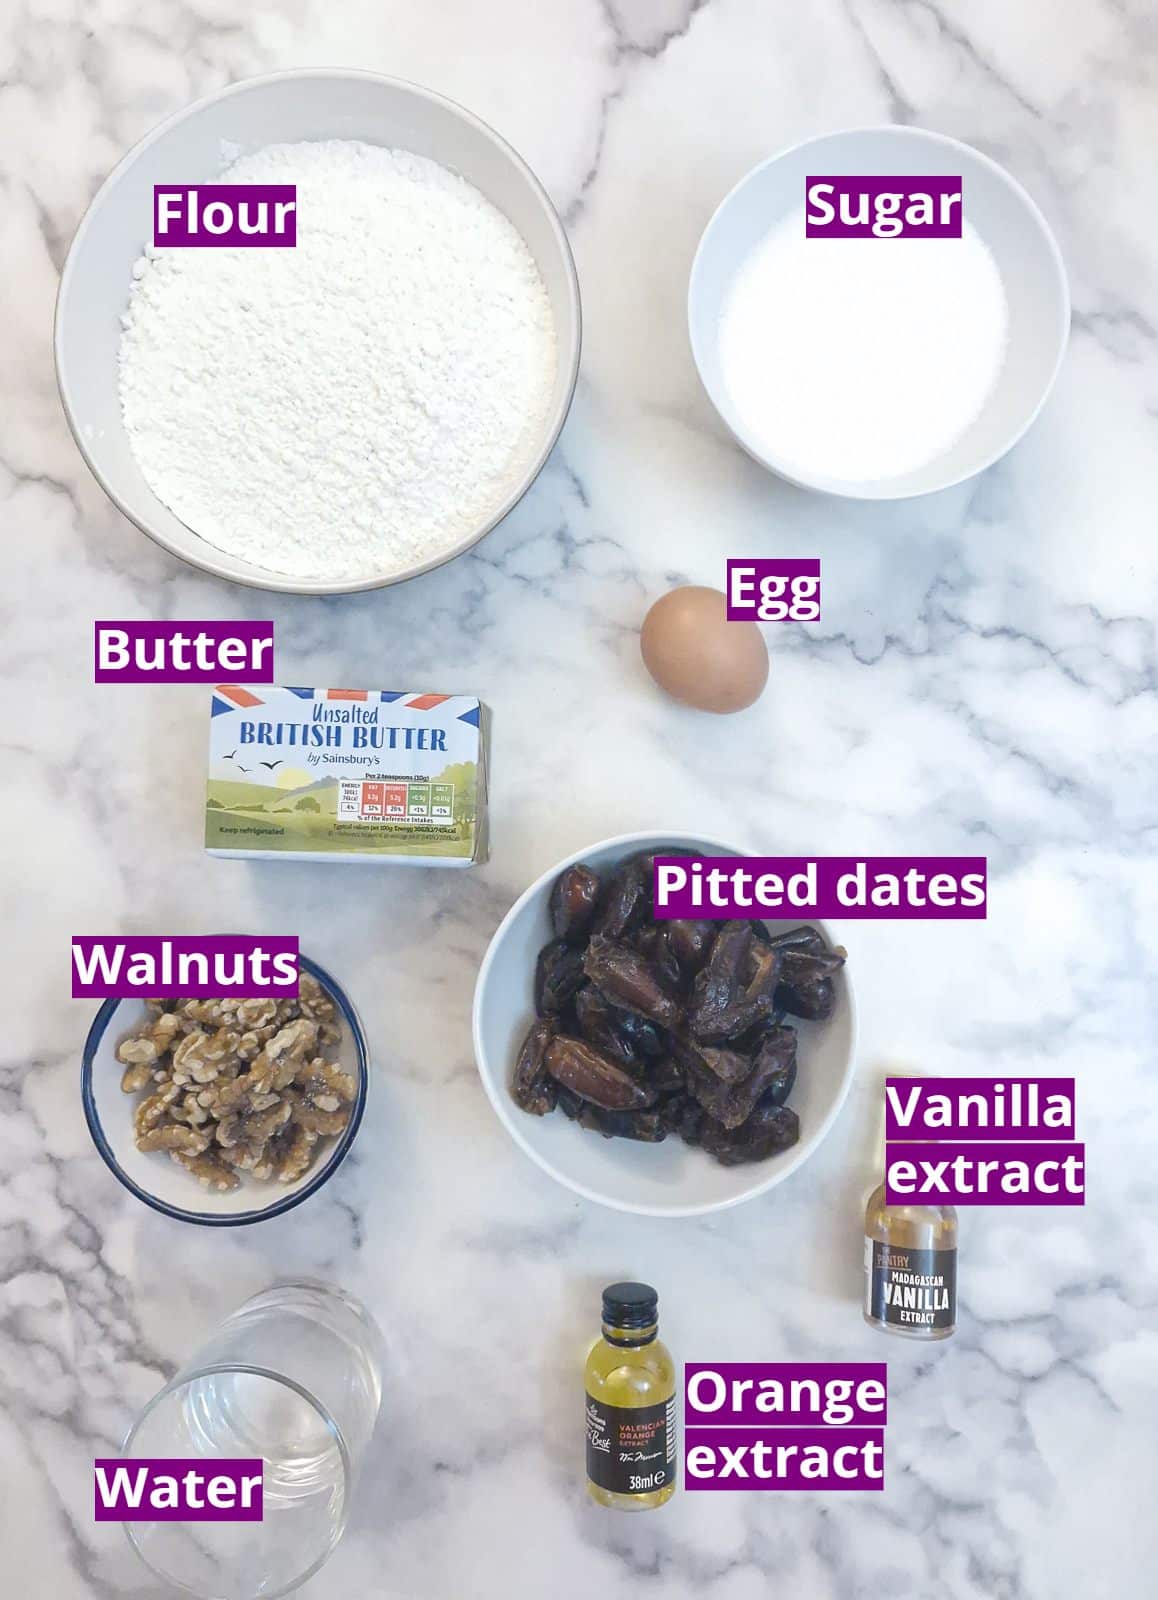
Pastry
This is a very soft, buttery pastry.
- Flour. Use plain or all-purpose flour. We don't need self-raising flour or any raising agent for this pastry. It's not supposed to rise like a cake.
- Icing sugar. This is used in place of caster sugar - and helps create a lighter texture. If you don't have icing sugar, you can substitute it with caster sugar. For US readers, you may know icing sugar as either powdered sugar or confectioner's sugar.
- Butter. Because I used unsalted butter, I added a pinch of salt to the flour. If you use salted butter, you could leave the salt out. For easy mixing, the butter should be cut into cubes.
- Egg. The egg adds softness and extra richness to the pastry. You could leave it out and use extra water instead.
- Water. This should be ice-cold. You will need just enough to bind the pastry into a soft dough. The actual amount you will need depends on the strength (i.e. the absorbency) of the flour and the size of the egg you used.
Date and walnut filling
- Dates. I used soft, ready-pitted dates. If your dates still have the pips in, you should remove them before making the filling.
- Walnuts. These should be finely chopped. They add texture to the filling, preventing it from being too paste-like, and also cut through the sweetness of the dates, adding a slight bitterness. Substitute for chopped cashews, pecans or hazelnuts.
- Juice of half a lemon. This helps cut through the sweetness of the dates and adds a fresh citrus element. (Oops - I forgot to add the lemon to the image)!
- Vanilla and orange extract. For extra flavour. The orange extract in particular adds to the citrus flavour from the lemon juice.
- Water. This is used to soften the dates. The dates will be boiled with the lemon juice, vanilla and orange extracts for a few minutes to soften them into a smooth paste.
Instructions
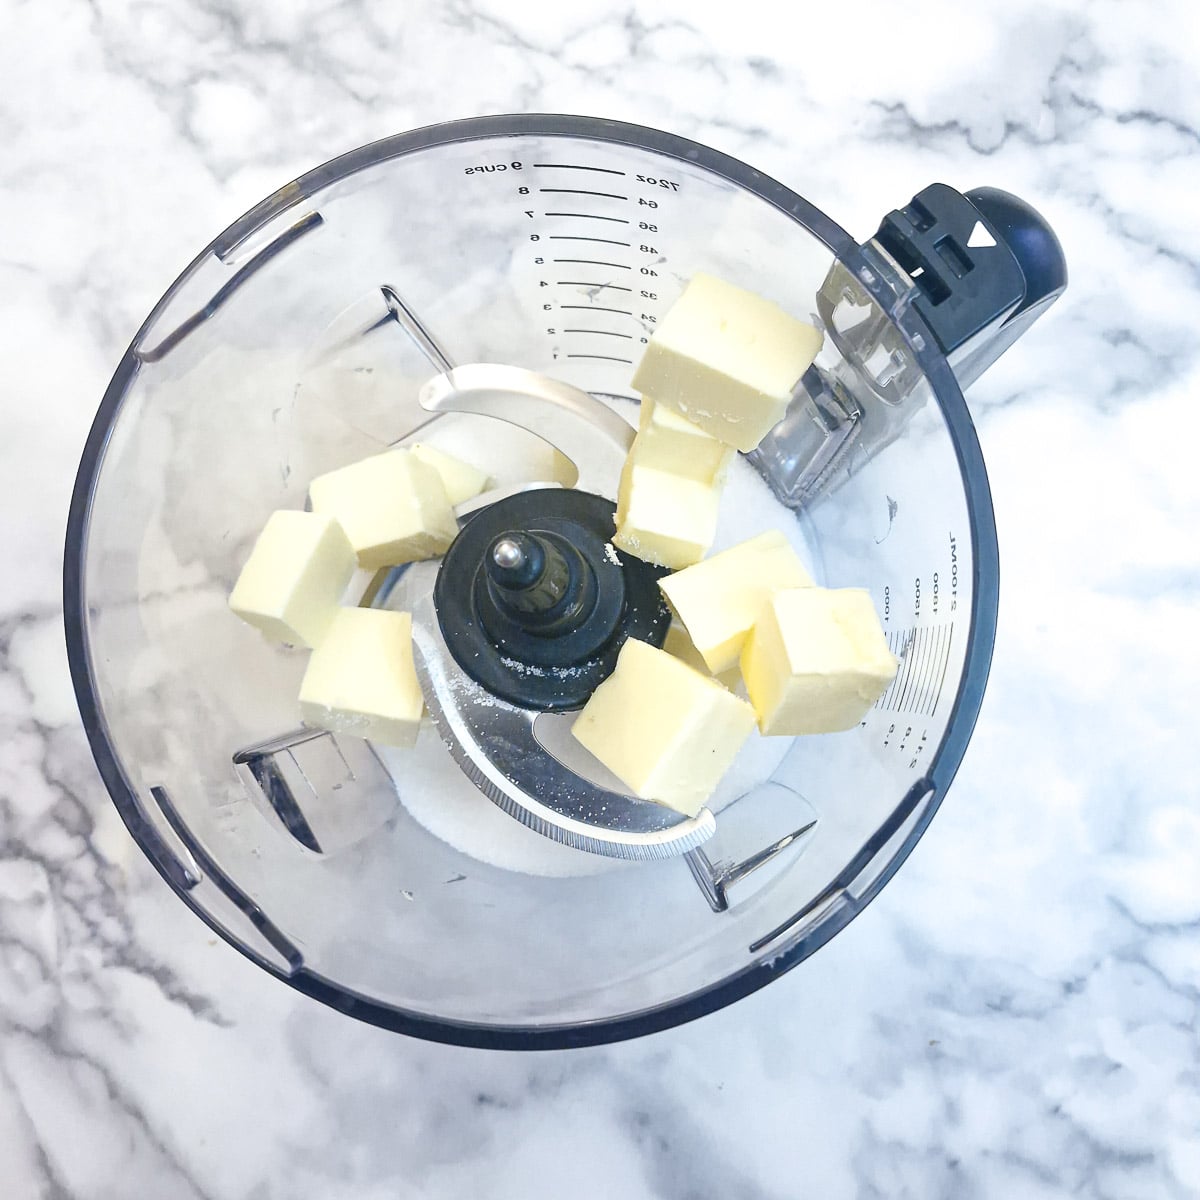
Step 1: Place the icing sugar and cubed butter into the bowl of a food processor. If you don't have a food processor, you can use a mixing bowl with a wooden spoon instead.
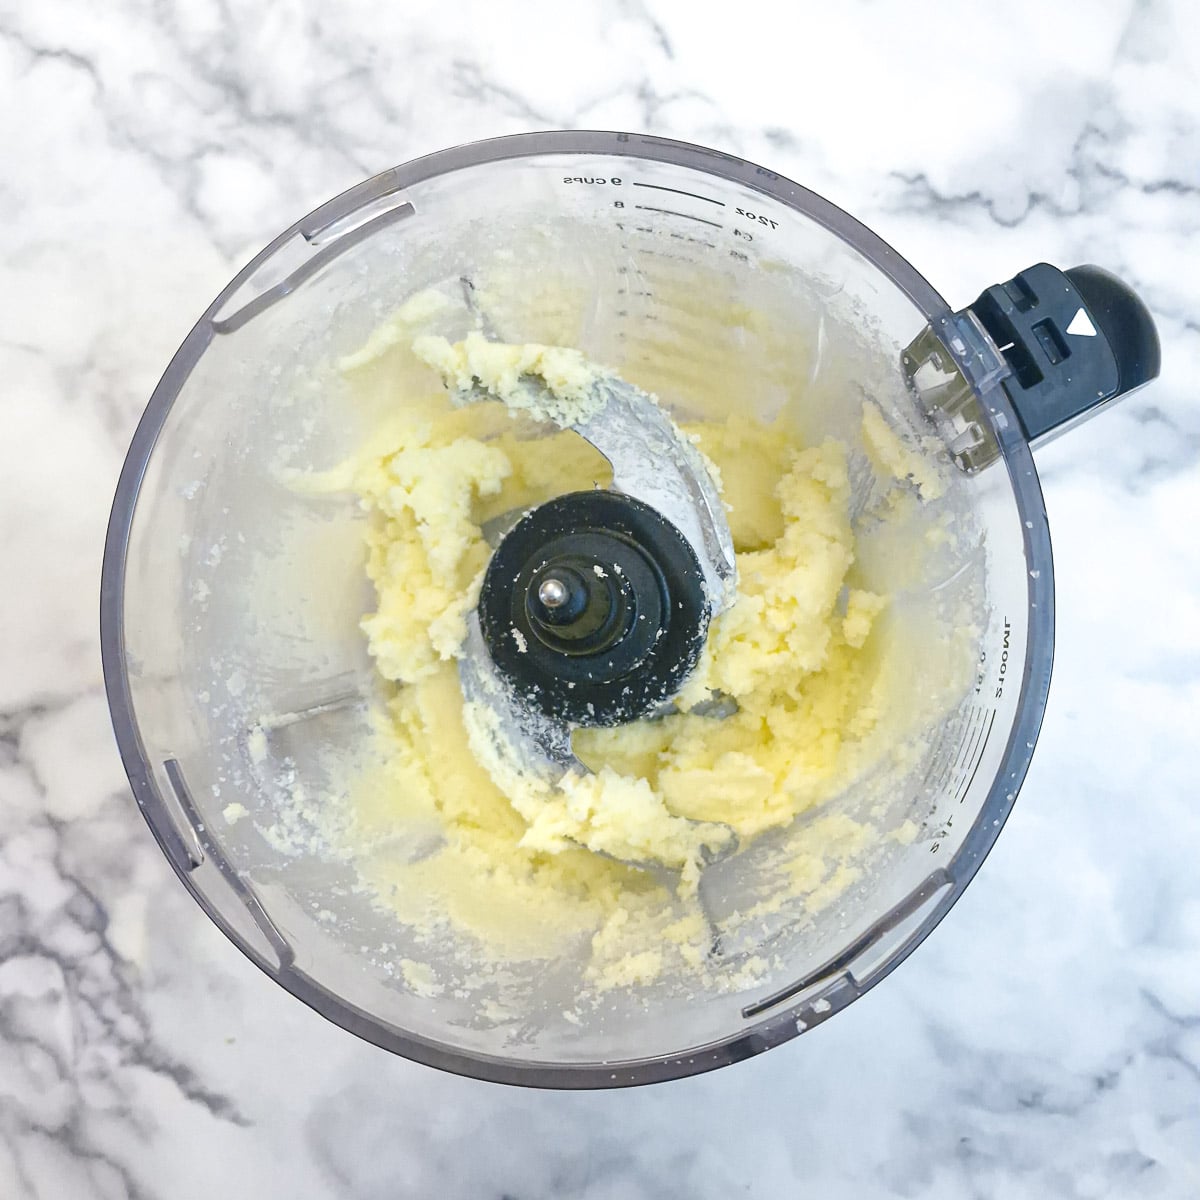
Step 2: Blend until the butter and icing sugar have been combined.
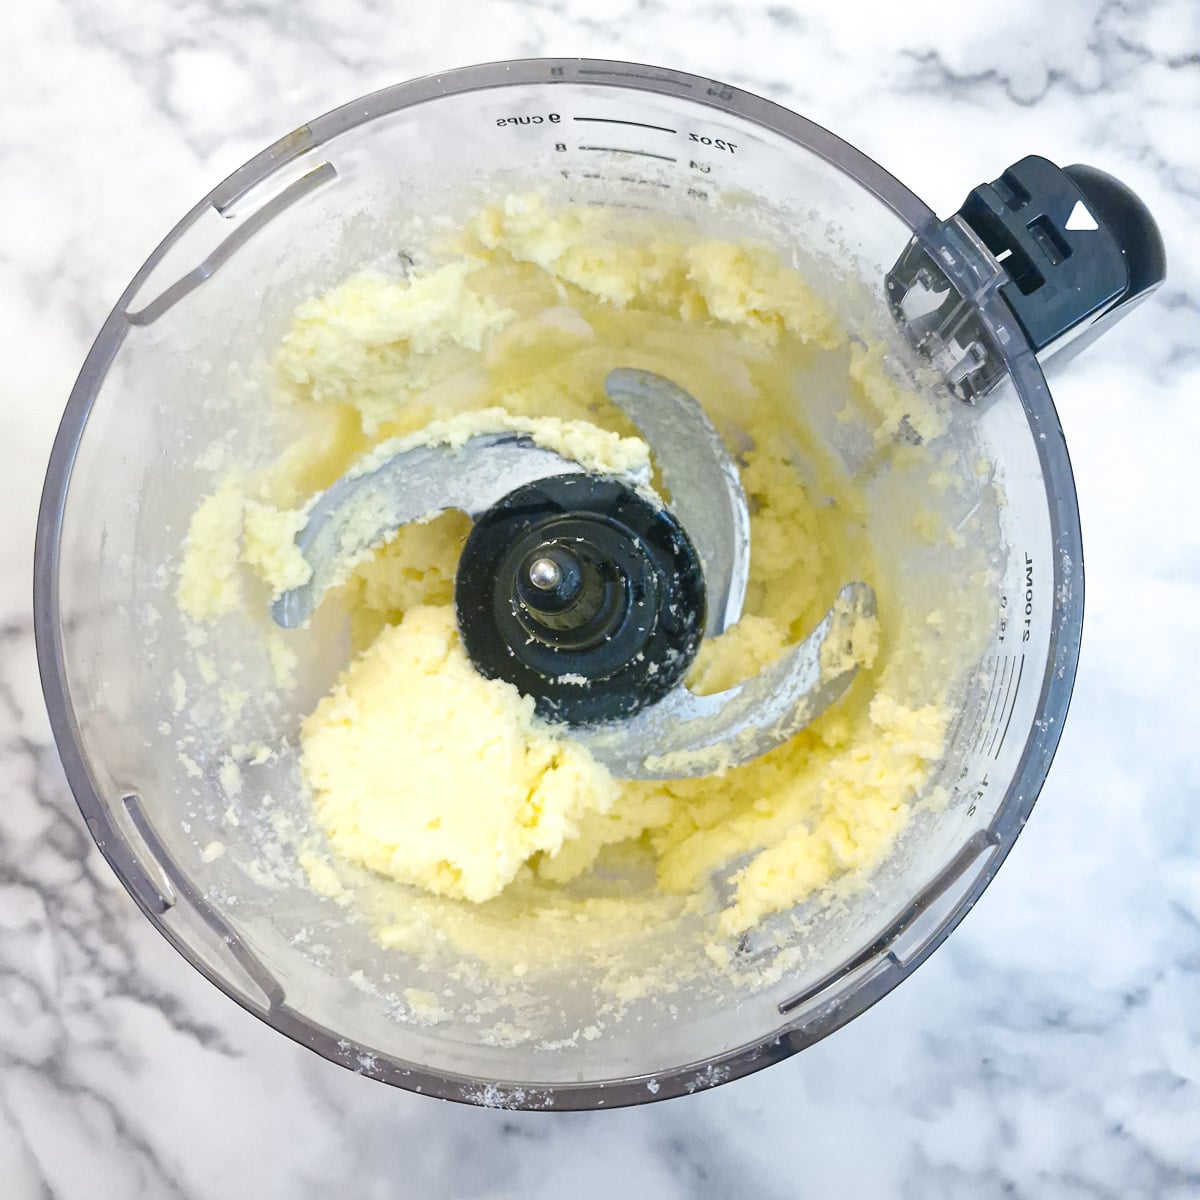
Step 3: Add the egg and pulse until the egg has combined with the sugar and butter mixture.
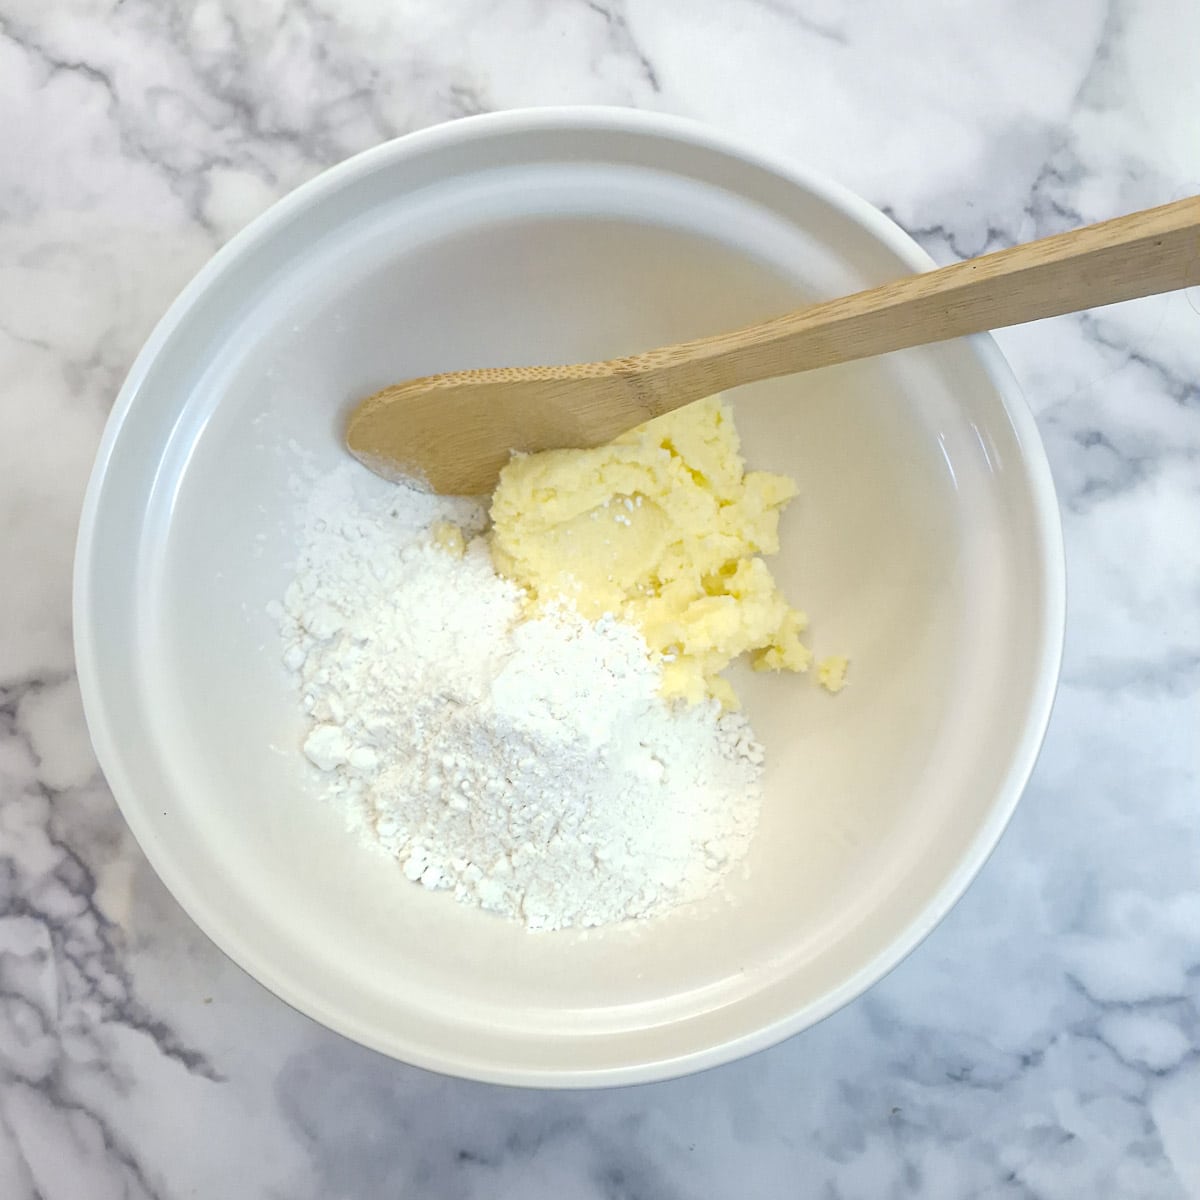
Step 4: Transfer the mixture to a bowl and add the flour and three-quarters of the water.

Step 5: Use a wooden spoon or spatula to mix the pastry into a shaggy dough.
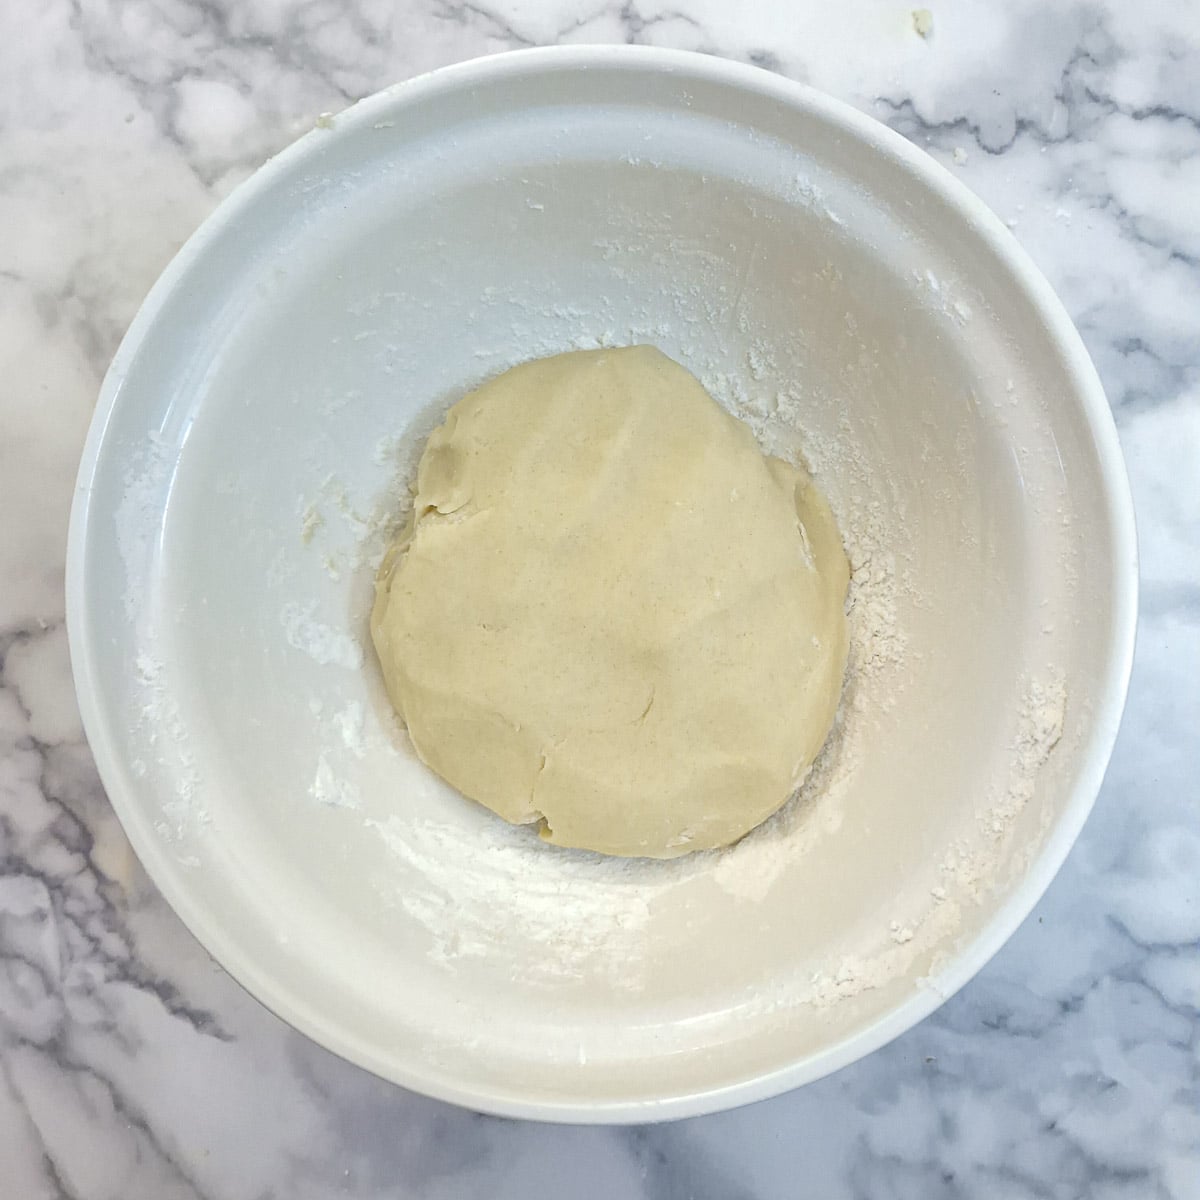
Step 6: Use your hands to press the pastry together into a smooth, soft ball. Add the remaining water if needed.

Step 7: Line a 7" x 11" baking dish with baking parchment, leaving an overhang large enough to cover the pastry. Cut one-third of the dough and set it aside. Press the remaining two-thirds of the dough into the baking dish.
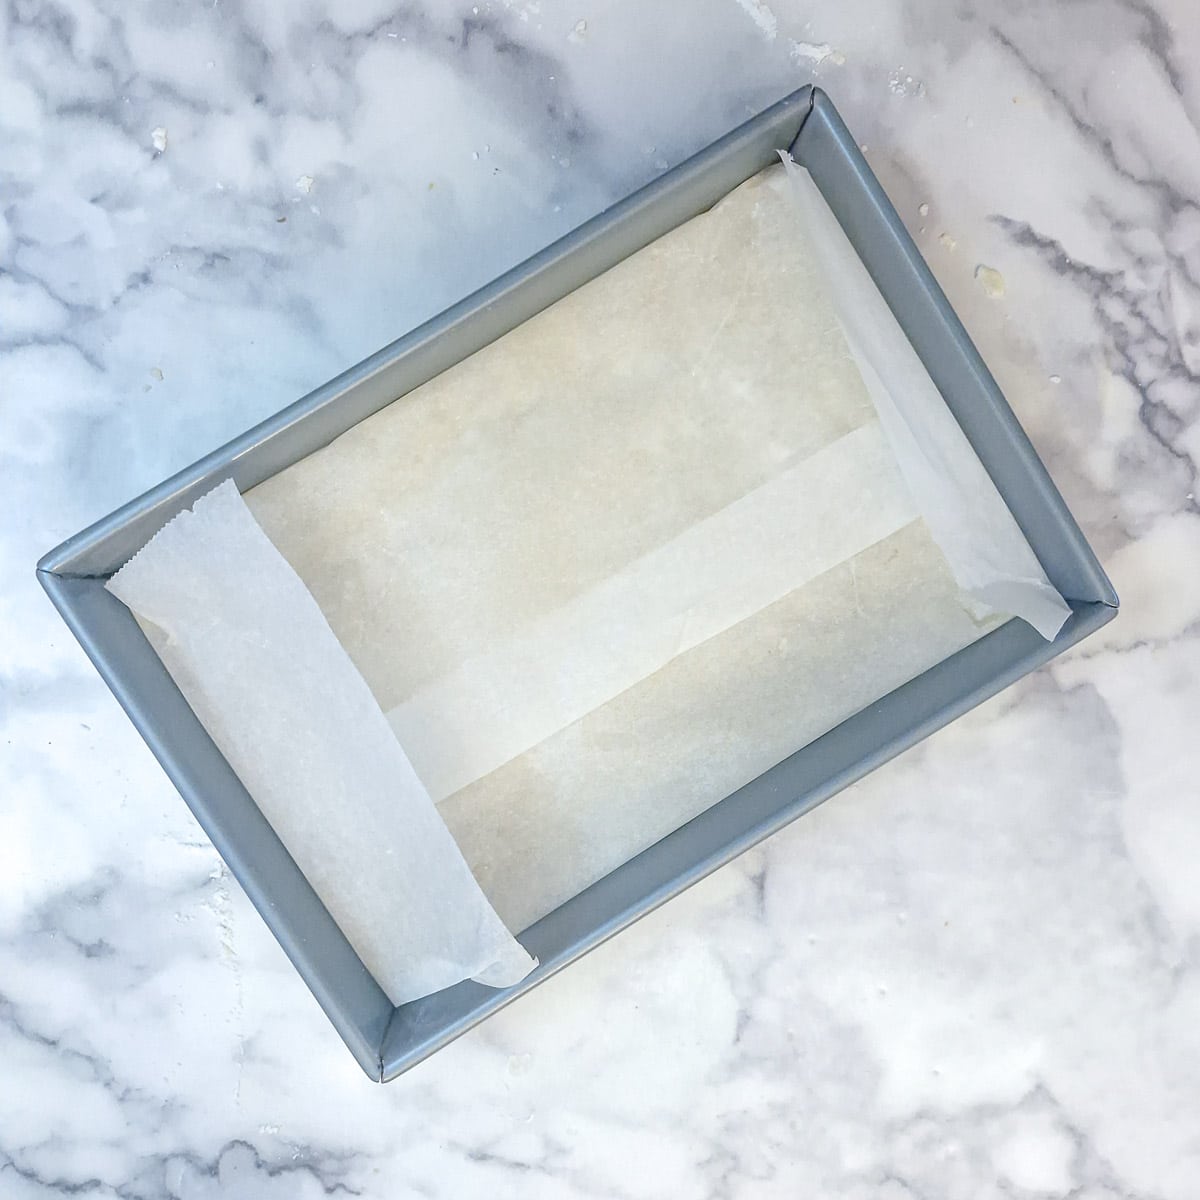
Step 8: Fold the overhanging greaseproof paper over the pastry and place the dish into the refrigerator to rest for 30 minutes. Cover the remaining one-third of the pastry with plastic wrap and place it in the freezer for 30 minutes.
Make the filling
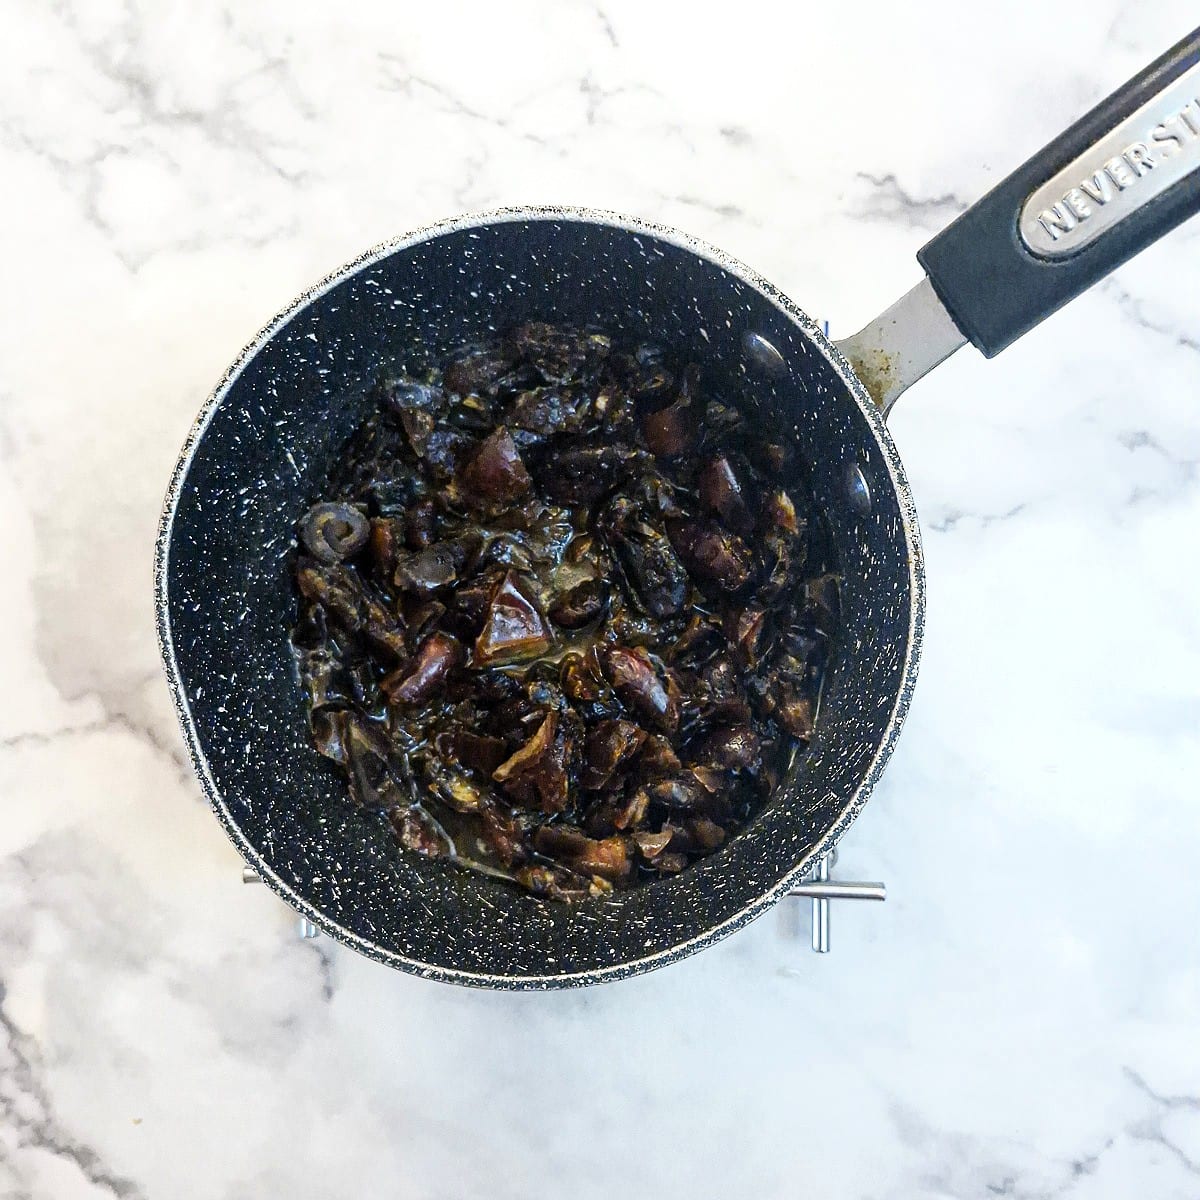
Step 9: Put all the filling ingredients (except the walnuts) into a small saucepan and bring them to a boil.
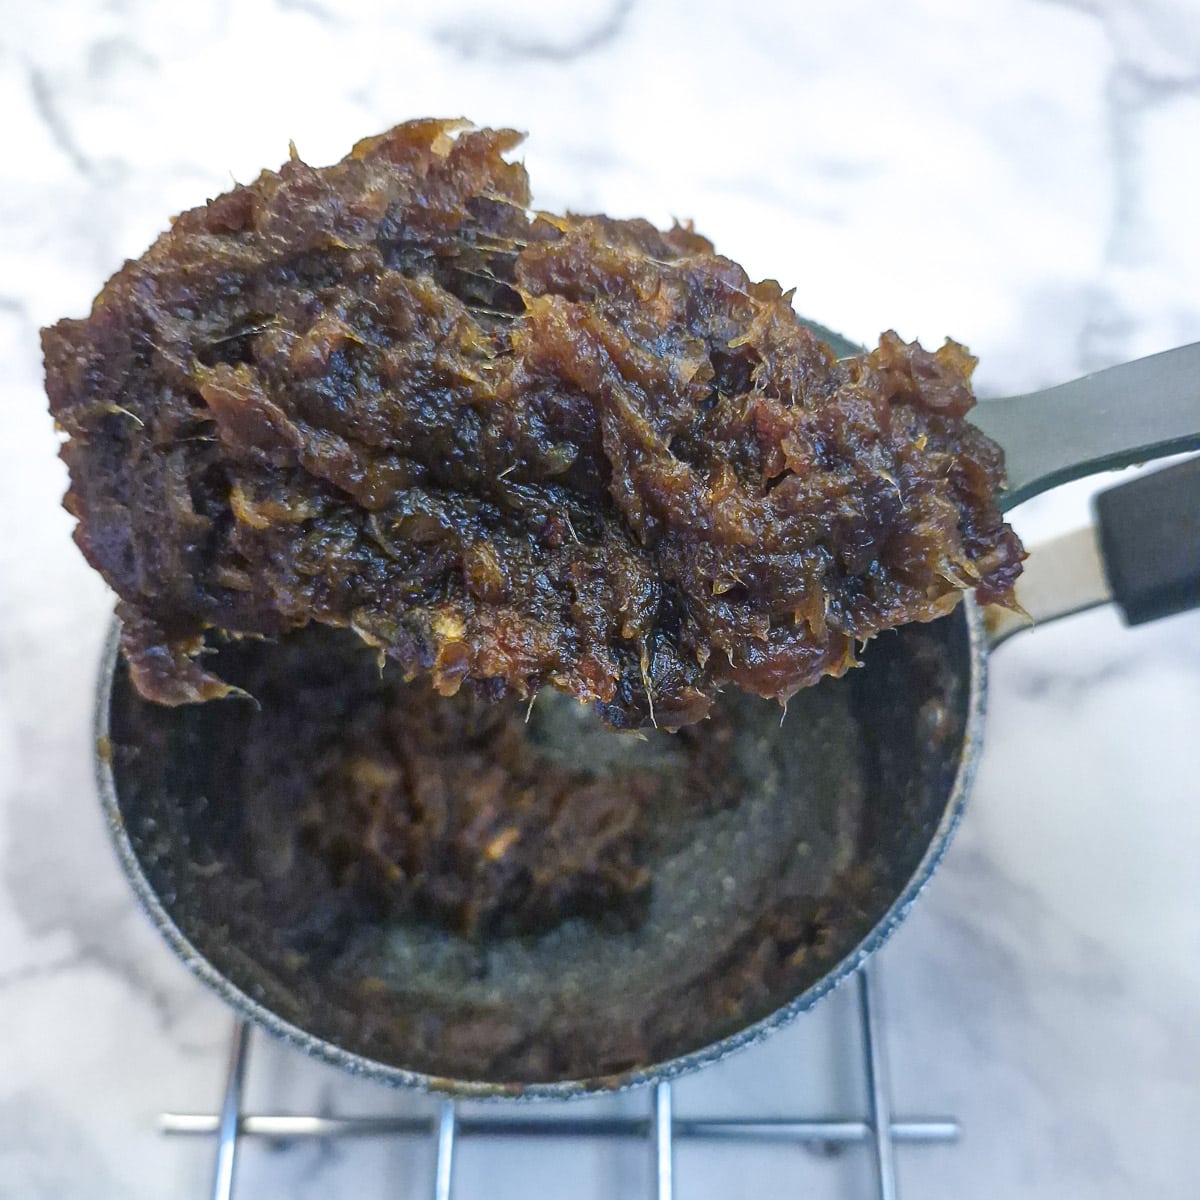
Step 10: Turn the heat to simmer, and stir for 3 to 4 minutes until the water is absorbed and the mixture turns into a soft paste.
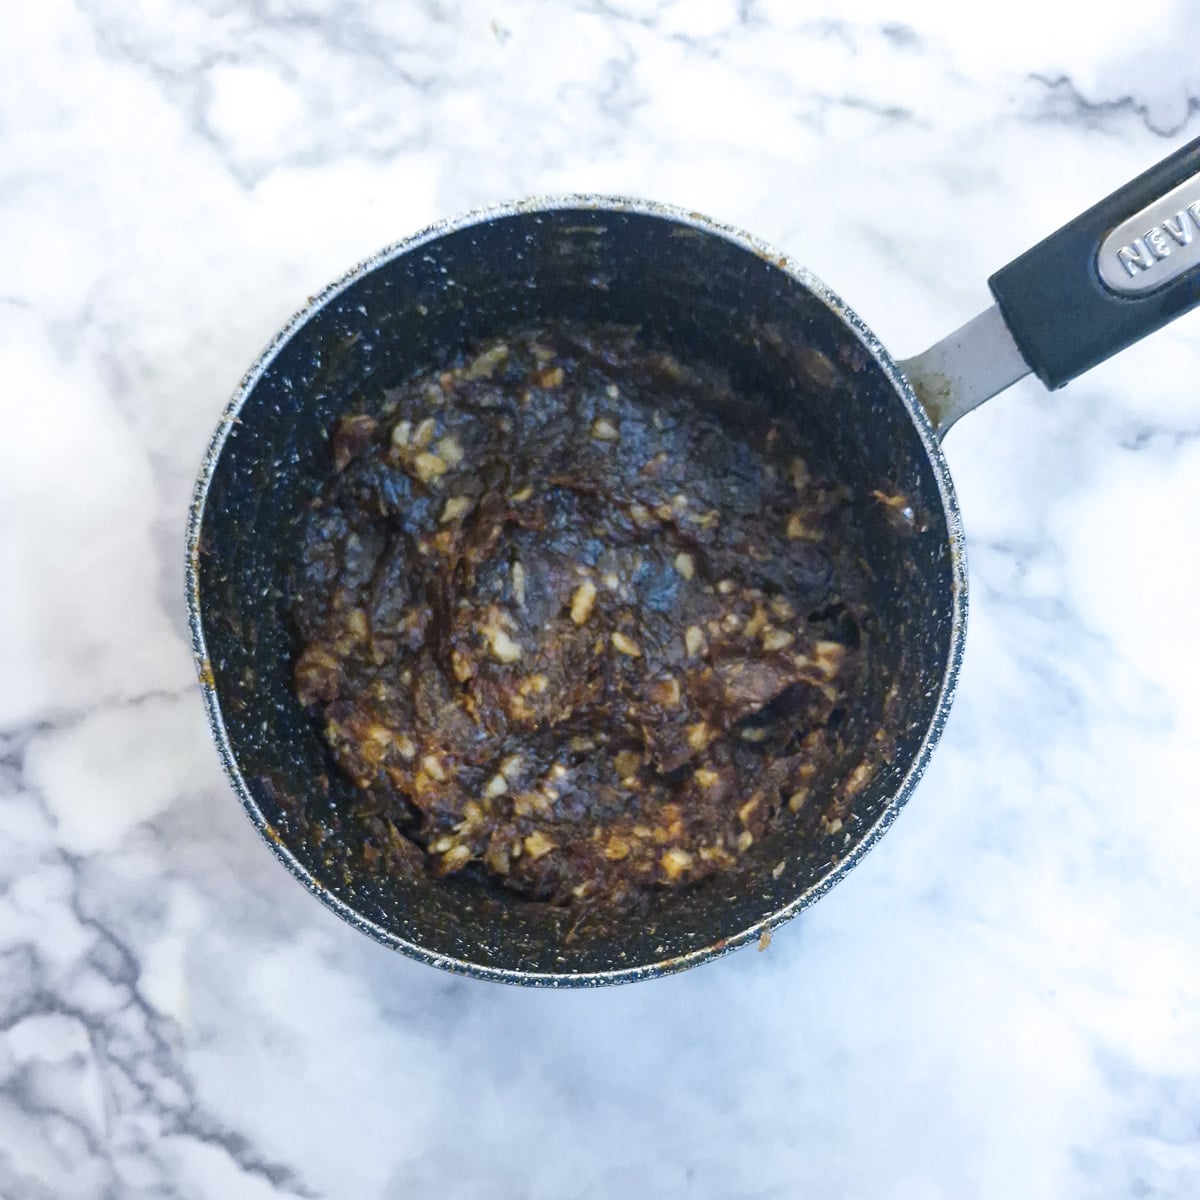
Step 11: Stir in the chopped walnuts and leave to cool.
Assemble and bake
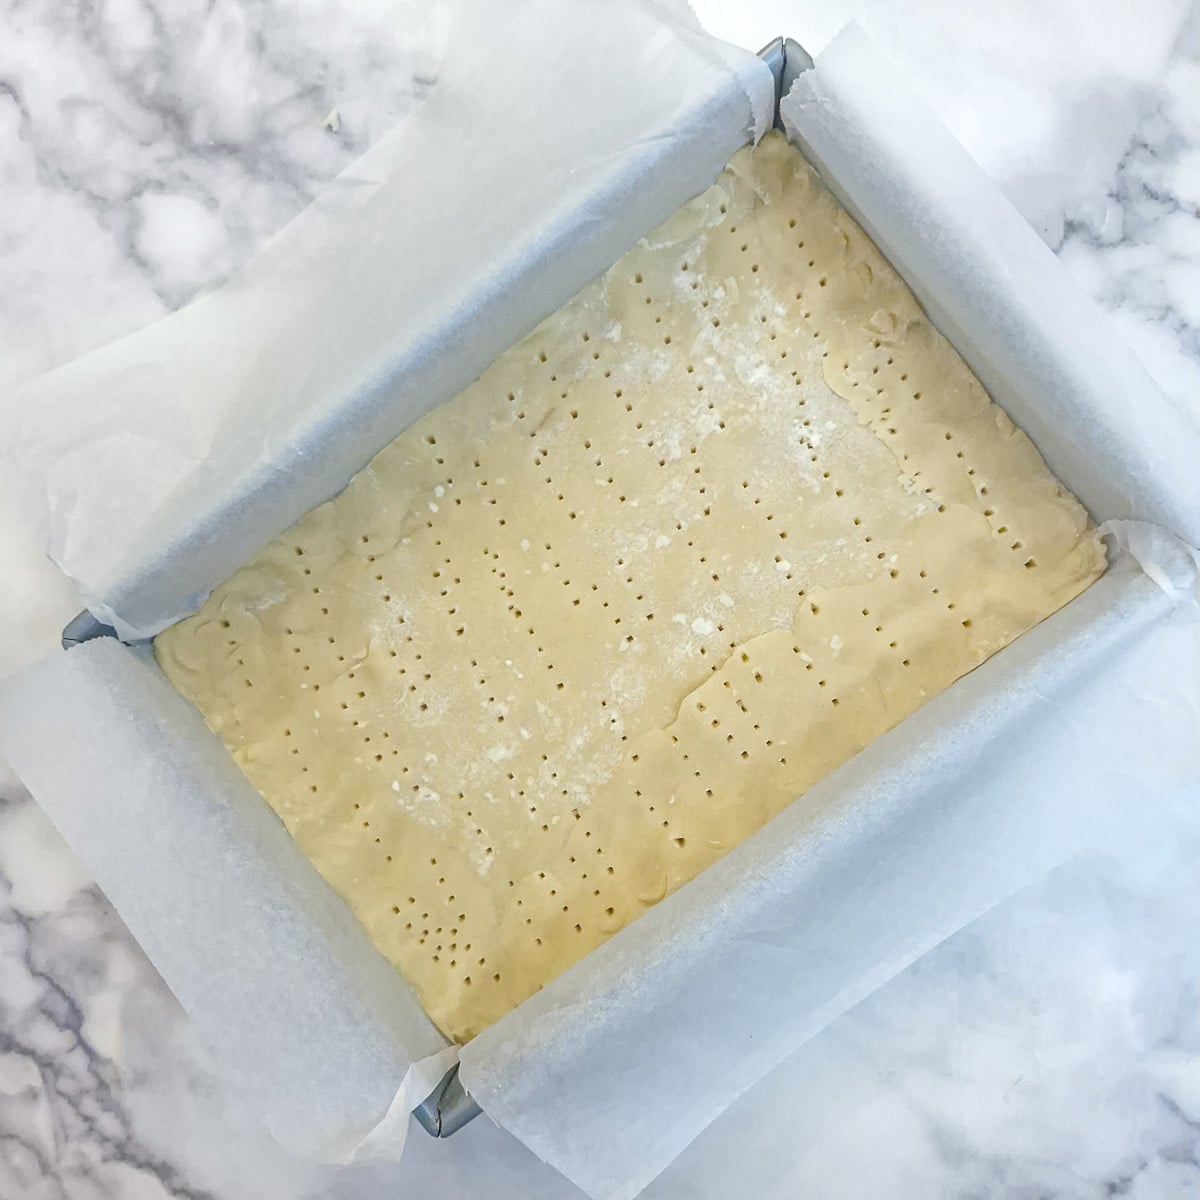
Step 12: Remove the chilled pastry from the refrigerator, prick it all over with a fork and bake in a preheated oven for 10 minutes. (This just gives the pastry a head start in the cooking process).
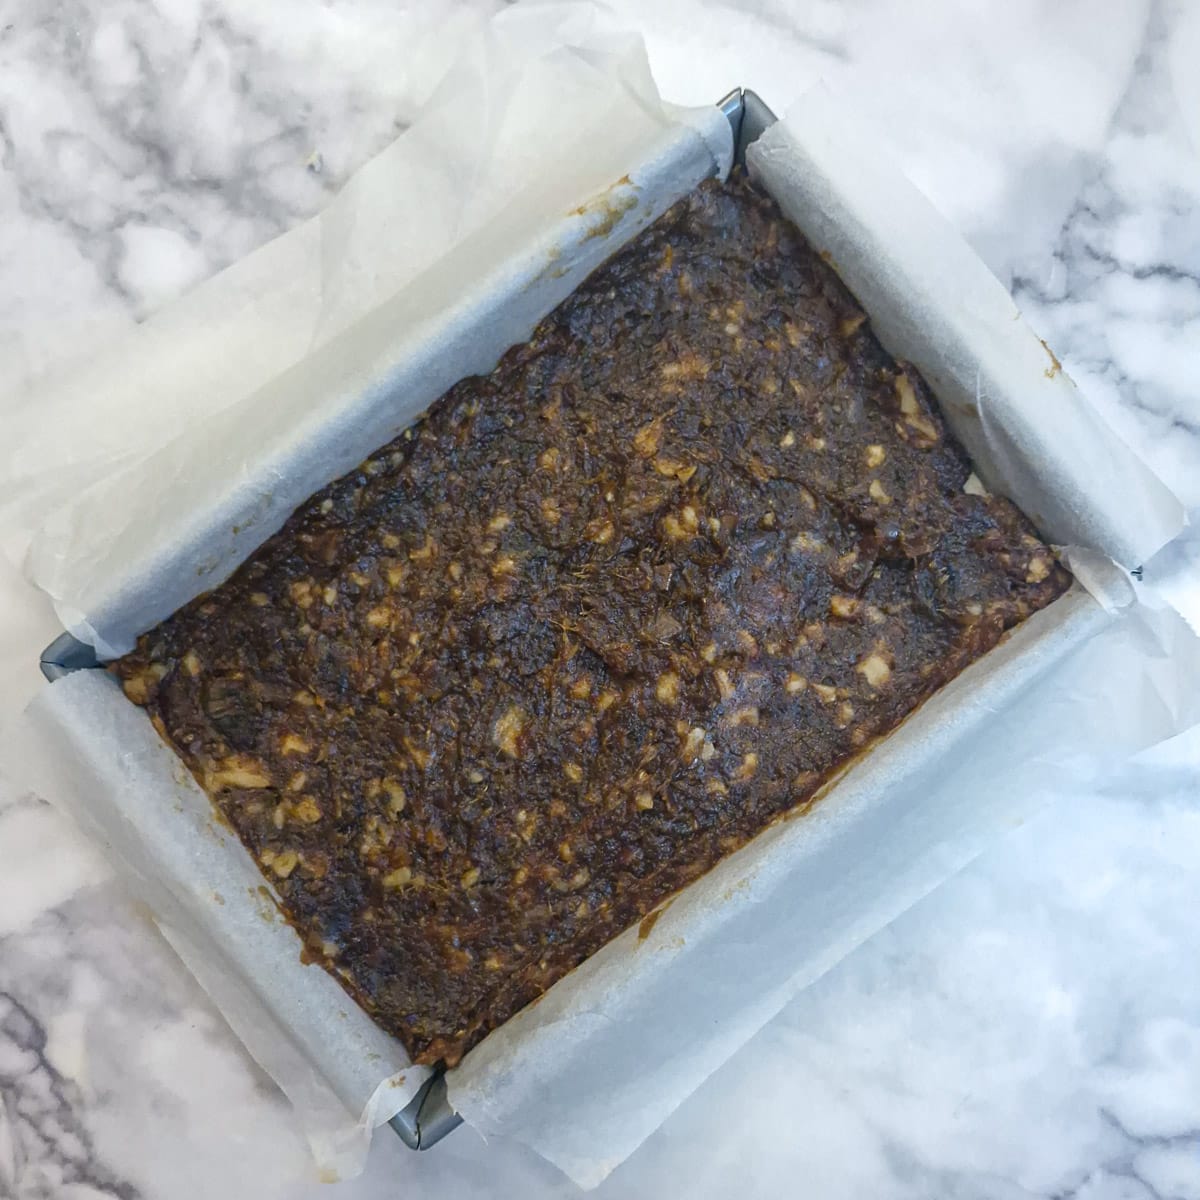
Step 13: Allow the pastry to cool for 5 minutes, then spread it with the cooled date and walnut mixture.
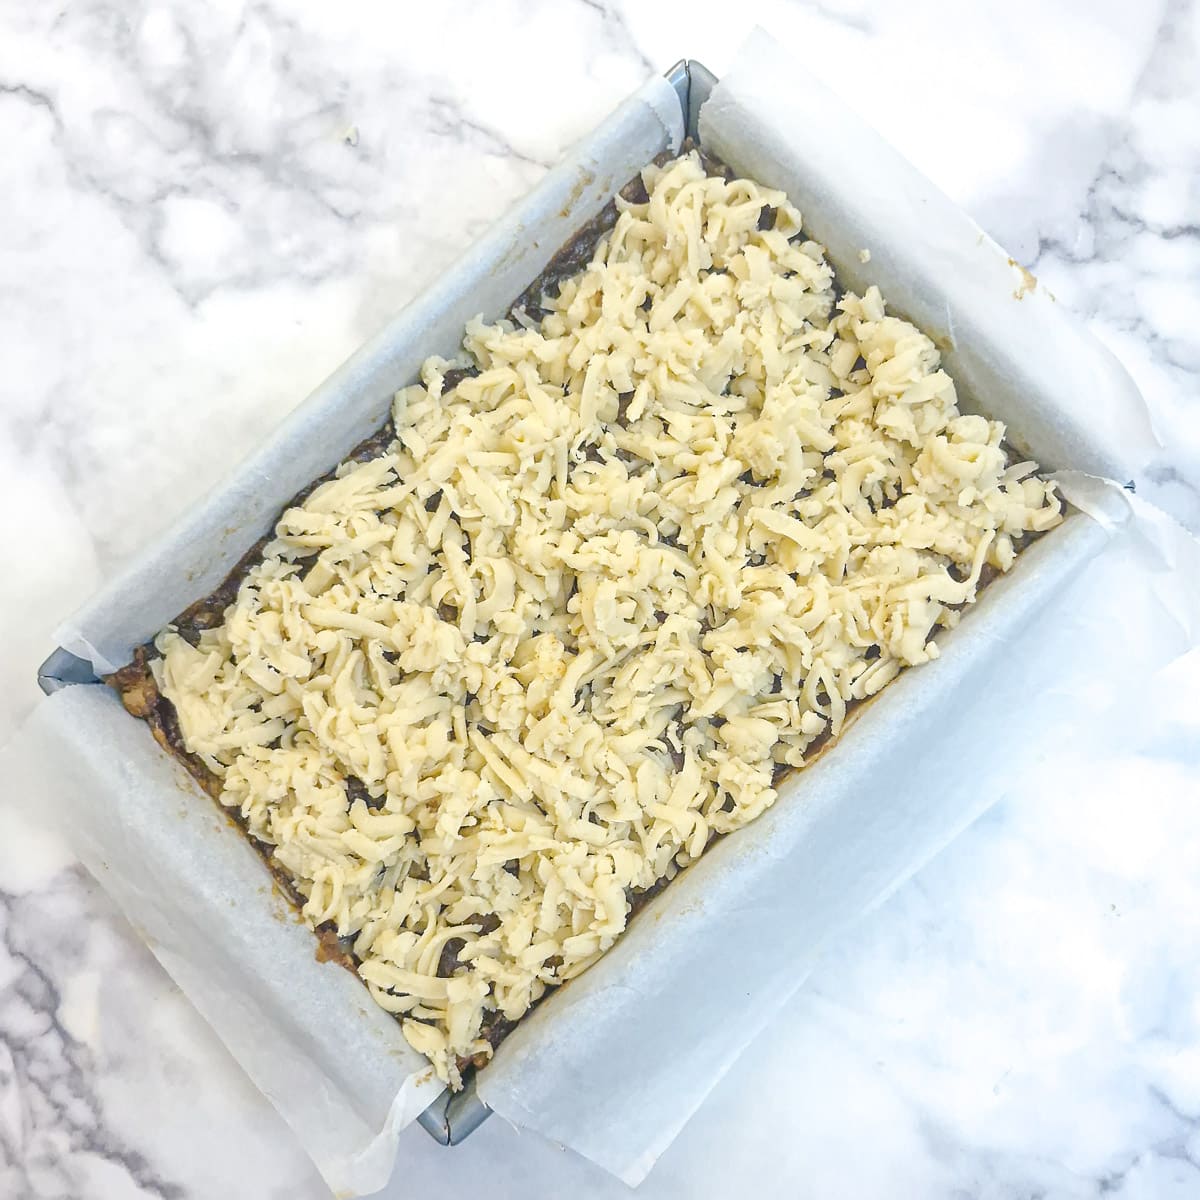
Step 14: Remove the semi-frozen pastry from the freezer, grate it evenly over the top of the dates. Do not press it down.
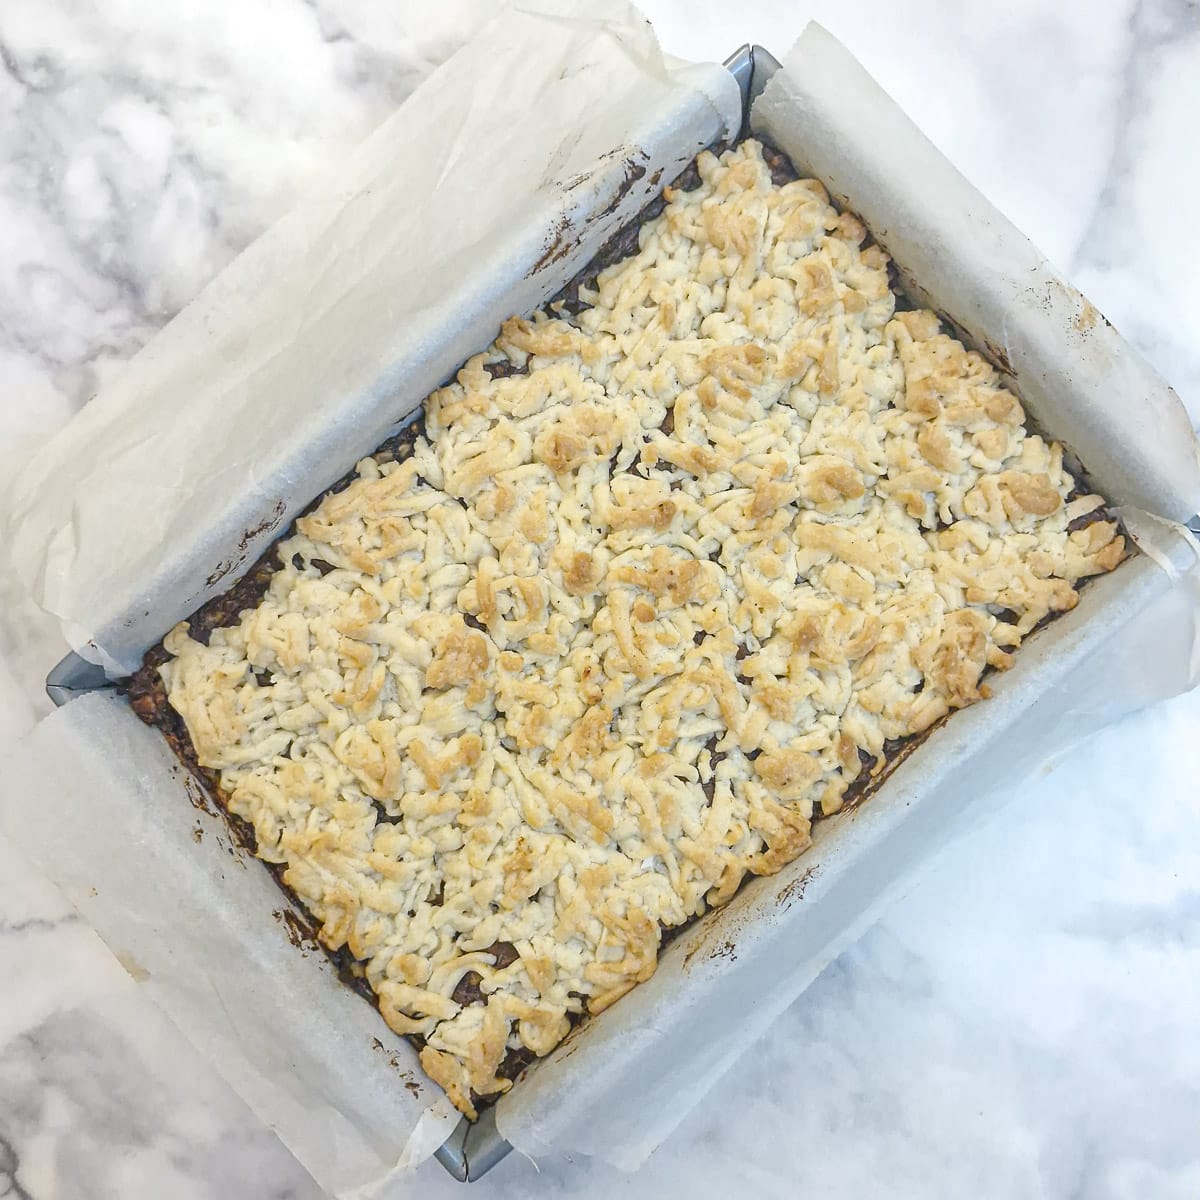
Step 15: Bake in a preheated oven for 20 to 25 minutes until the top is golden brown.
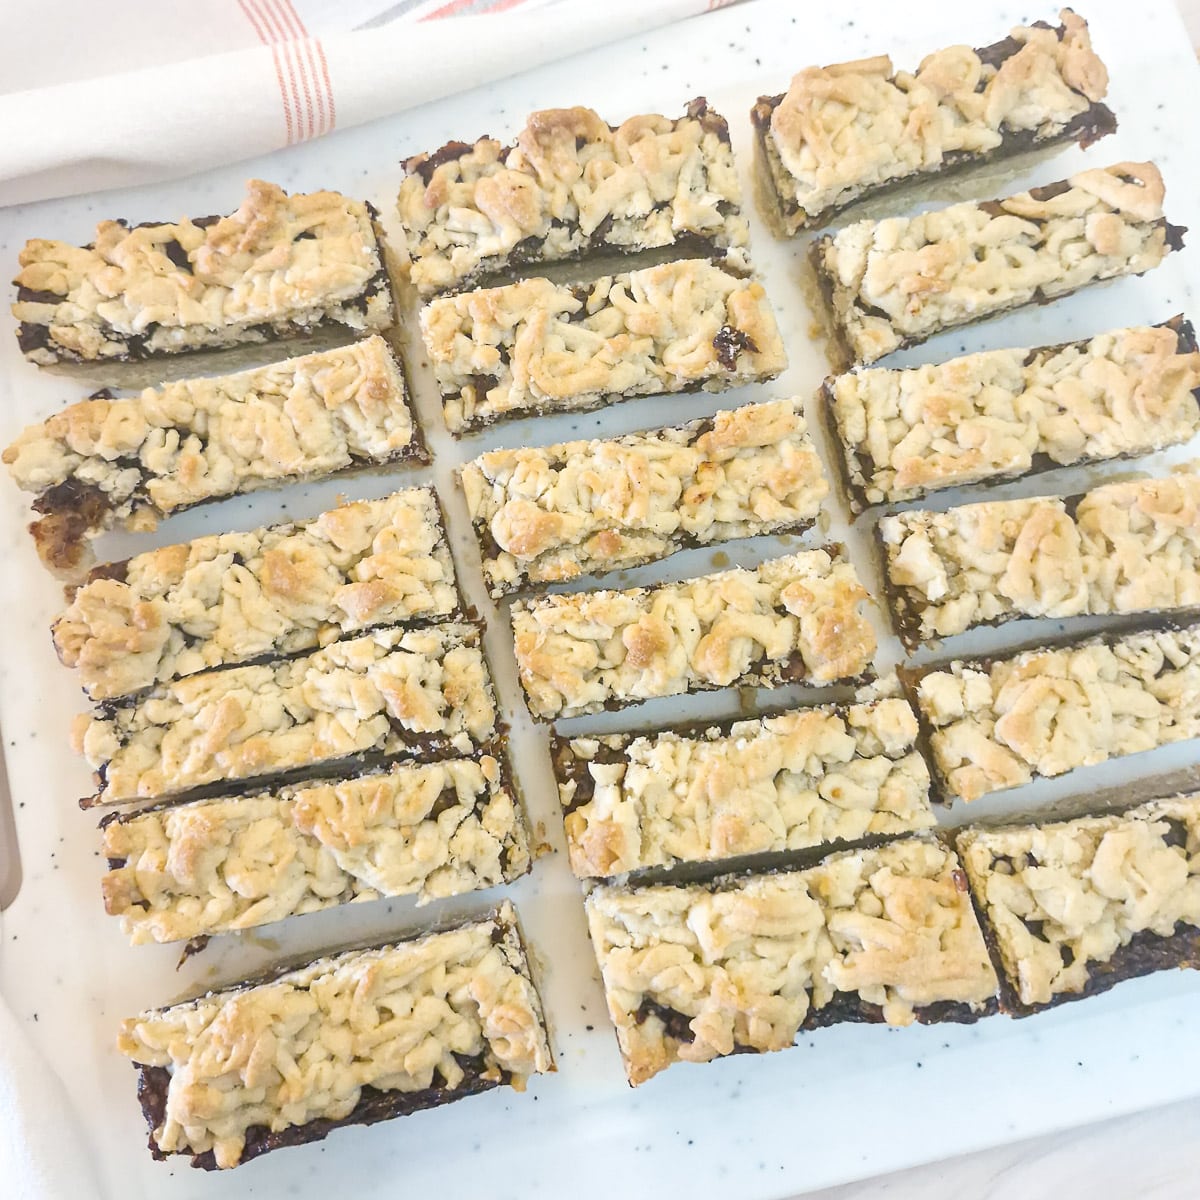
Step 16: Allow the date and walnut crumble to cool before lifting from the tin (use the baking parchment to help you) and cutting into slices.
Tips for a successful outcome
Here are my top tips to ensure your date and walnut crumble bars always turn out perfectly:
- No food processor - no problem. Simply mix the ingredients in a mixing bowl using a wooden spoon. It will just take a couple of minutes longer, but the final result will be the same.
- Be careful adding the water to the dough. You may not need all the water stated in the recipe. Add less water in the beginning and add the remainder a tablespoon at a time until the dough comes together in a soft, non-sticky ball.
- Don't overcook the filling. The dates take minutes to soften and form a sticky paste. Just stir them over a low heat until they come together in a ball. Then stir in the chopped walnuts and leave to cool.
- Don't skip the step of par-baking the pastry. 10 minutes in the oven before adding the date filling is the difference between soggy pastry and a crispy slice!
- Grate the semi-frozen pastry onto a plate. You may find it easier to grate the pastry for the topping onto a plate and then scatter it evenly onto the dates with your fingers. But whether you grate it onto a plate or directly onto the dates, do not press it down. The idea is to get a thin layer of grated pastry over the dates.
Variations
I've given you the basic recipe, but there are plenty of ways to tweak it to suit your own taste:
- Fruity - stir a handful of raisins or sultanas into the date mixture with the walnuts.
- Crunchy topping - sprinkle a handful of flaked almonds over the grated pastry topping before putting it into the oven.
- Coconut - for extra taste and texture, add 2 tablespoons of desiccated coconut to the filling.
Equipment
These are the main items of equipment you will need:
- Food processor. If you have one, this will make short work of creaming the butter and sugar. Alternatively, cream the butter and sugar in a mixing bowl, using a wooden spoon.
- Mixing bowl. I like to transfer the mixture to a mixing bowl before adding the liquid. I find that if I mix the pastry with my hands, I can get a better 'feel' for the amount of water I need to use.
- 7" x 11" metal baking tray. I like to use a metal pan when making pastry as I feel the metal conducts heat more evenly than glass or ceramic.
- Small saucepan. We use this for making the date filling.
Storage and freezing
- Pantry. Once cool and cut into bars, store the bars in an airtight container in the pantry. They will stay fresh for 4 or 5 days. There is no need to refrigerate them.
- Freezing. The date and walnut bars freeze well. Allow them to cool, then arrange them in layers in a rigid container (Tupperware or similar). Separate the layers with wax paper. You can freeze these date bars for 3 to 4 months.
- Defrosting. Remove as many slices as you need from the freezer container and place them on a plate on the counter, covered with a layer of aluminium foil or a clean tea towel. Leave them to defrost. The time it takes will depend on the temperature of your kitchen, but is normally only a couple of hours.
FAQ
You didn't add sufficient water, or you cooked it for too long. Stir in warm water a teaspoon at a time, until spreadable.
You added too much liquid, or you didn't cook it for long enough. Return the pan to the heat and cook gently for a few minutes, stirring often.
You want a thick, paste-like consistency - a bit like peanut butter.
For best results, the answer is yes. Pre-baking the base helps firm up the pastry before the filling is added, which prevents the base from soaking up liquid and becoming soft or soggy.
This is important when using a moist filling such as dates.
This normally happens when you don't add sufficient liquid to the dough. Add extra water, a tablespoon at a time, and work it through gently. Try not to handle the dough too much, or it will become hard when it bakes.
Luckily, this recipe doesn't depend on the pastry looking amazing. You can patch it in the tin - no one will know.
I wouldn't recommend skipping either of these steps.
Chilling the pastry base firms up the butter and gives a crispier baked result.
Freezing the pastry topping makes it much easier to handle and grate. If you try to grate pastry which is still soft, you'll end up with a grater smeared in dough.
Save for later
If you would like to make these date and walnut bars, why not save the recipe to one of your Pinterest boards so you can find it easily? Just click on the image below.
Alternatively, you can save the recipe by clicking on the floating heart icon on the right-hand side of the screen.
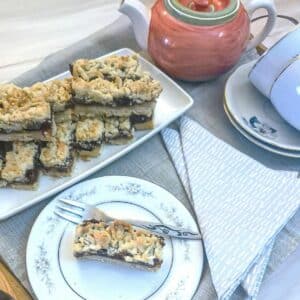
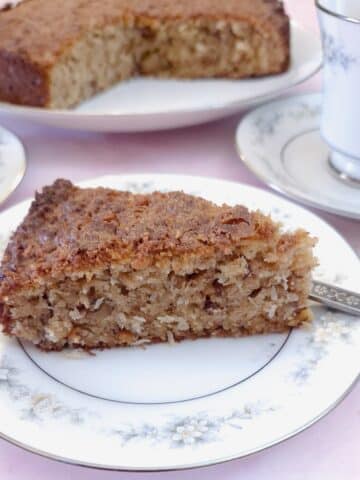
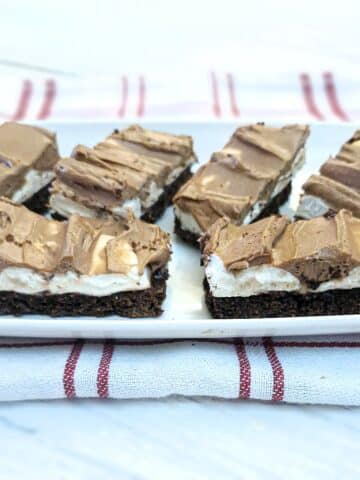
Related recipes
Visit my cakes, biscuits and dessert recipes page for other tasty bakes. Here are a few you might enjoy.

📋The recipe
Date and walnut crumble bars
(Click the stars to rate this recipe)
Equipment
- Food processor optional
- Large mixing bowl
- Metal baking dish 7" x 11" x 1"
- Small saucepan
- Wooden spoon
- Spatual
Ask a Question
If you have a question about this recipe that has not been answered, please use the box below to ask it.
Use this with care. This is an AI-generated result and may contain errors or inaccuracies. I cannot be held responsible for the information returned.
Ingredients
Pastry
- ¾ cup / 170 grams butter cubed
- ¾ cup / 90 grams icing sugar/powdered sugar
- 1 large egg
- 2½ cups / 350 grams plain or all-purpose flour
- 2 - 4 tablespoons ice cold water
Date and walnut filling
- 1½ cups / 250 grams soft pitted dates (chopped) tightly packed if measuring in cups
- ½ cup / 50 grams walnuts finely chopped
- ½ cup / 120 ml water
- 1 teaspoon vanilla extract
- ½ teaspoon orange extract optional
- ½ small lemon (juice only)
Instructions
Pastry
- Place the icing sugar and cubed butter into the bowl of a food processor. If you don't have a food processor, you can use a mixing bowl with a wooden spoon instead.¾ cup / 170 grams butter, ¾ cup / 90 grams icing sugar/powdered sugar
- Blend until the butter and icing sugar have been combined.
- Add the egg and pulse until the egg has combined with the sugar and butter mixture.1 large egg
- Transfer the mixture to a bowl and add the flour and 2 tablespoons of water2½ cups / 350 grams plain or all-purpose flour
- Use a wooden spoon or spatula to mix the pastry into a shaggy dough.
- Use your hands to press the pastry together into a smooth, soft ball. Add the remaining water (1 tablespoon at a time) if needed.
- Line a 7" x 11" baking dish with baking parchment, leaving an overhang large enough to cover the pastry.
- Cut one-third of the dough and set it aside. Press the remaining two-thirds of the dough into the baking dish.
- Fold the overhanging greaseproof paper over the pastry and place the dish into the refrigerator to rest for 30 minutes. Cover the remaining one-third of the pastry with plastic wrap and place it in the freezer for 30 minutes.
Date and walnut filling
- Put all the filling ingredients (except the walnuts) into a small saucepan and bring them to a boil.1½ cups / 250 grams soft pitted dates (chopped), ½ cup / 120 ml water, 1 teaspoon vanilla extract, ½ teaspoon orange extract, ½ small lemon (juice only)
- Turn the heat to simmer, and stir for 3 to 4 minutes until the water is absorbed and the mixture turns into a soft paste. The consistency should be thick and spreadable, similar to soft peanut butter.
- Stir in the chopped walnuts and leave to cool.½ cup / 50 grams walnuts
Assemble and bake
- Preheat oven to 180°C/355°F (conventional) or 160°C/320°F (fan).
- Remove the chilled pastry from the refrigerator, prick it all over with a fork and bake in a preheated oven for 10 minutes. (This just gives the pastry a head start in the cooking process).
- Allow the pastry to cool for 5 minutes, then spread it with the cooled date and walnut mixture.
- Remove the semi-frozen pastry from the freezer, grate it evenly over the top of the dates. Do not press it down.
- Bake in a preheated oven for 20 to 25 minutes until the top is golden brown.
- Allow the date and walnut crumble to cool before lifting from the tin (use the baking parchment to help you).
- Cut the date and walnut traybake into 3 (lengthwise), then cut across into 6 (widthwise), giving you 18 slices in total.
Notes
- No food processor - no problem. Simply mix the ingredients in a mixing bowl using a wooden spoon. It will just take a couple of minutes longer, but the final result will be the same.
- Be careful adding the water to the dough. You may not need all the water stated in the recipe. Add less water in the beginning and add the remainder a tablespoon at a time until the dough comes together in a soft, non-sticky ball.
- Don't overcook the filling. The dates take minutes to soften and form a sticky paste. Just stir them over a low heat until they come together in a ball. Then stir in the chopped walnuts and leave to cool.
- Don't skip the step of par-baking the pastry. 10 minutes in the oven before adding the date filling is the difference between soggy pastry and a crispy slice!
- Grate the semi-frozen pastry onto a plate. You may find it easier to grate the pastry for the topping onto a plate and then scatter it evenly onto the dates with your fingers. But whether you grate it onto a plate or directly onto the dates, do not press it down. The idea is to get a thin layer of grated pastry over the dates.
Nutrition
I am not a nutritionist. The nutrition information has been calculated using an on-line calculator, and is intended for information and guidance purposes only. If the nutrition information is important to you, you should consider calculating it yourself, using your preferred tool.
If you made this recipe and enjoyed it, I'd love it if you could give me a star rating in the comments below. And if you'd like to get in touch, you can email me at [email protected]. I'd love to hear from you. And don't forget to subscribe to my mailing list so you can grab yourself a copy of my FREE COOKBOOK!
If you'd like to continue browsing, just click on this link to all my recipes.

Did you make this recipe? Let me know!