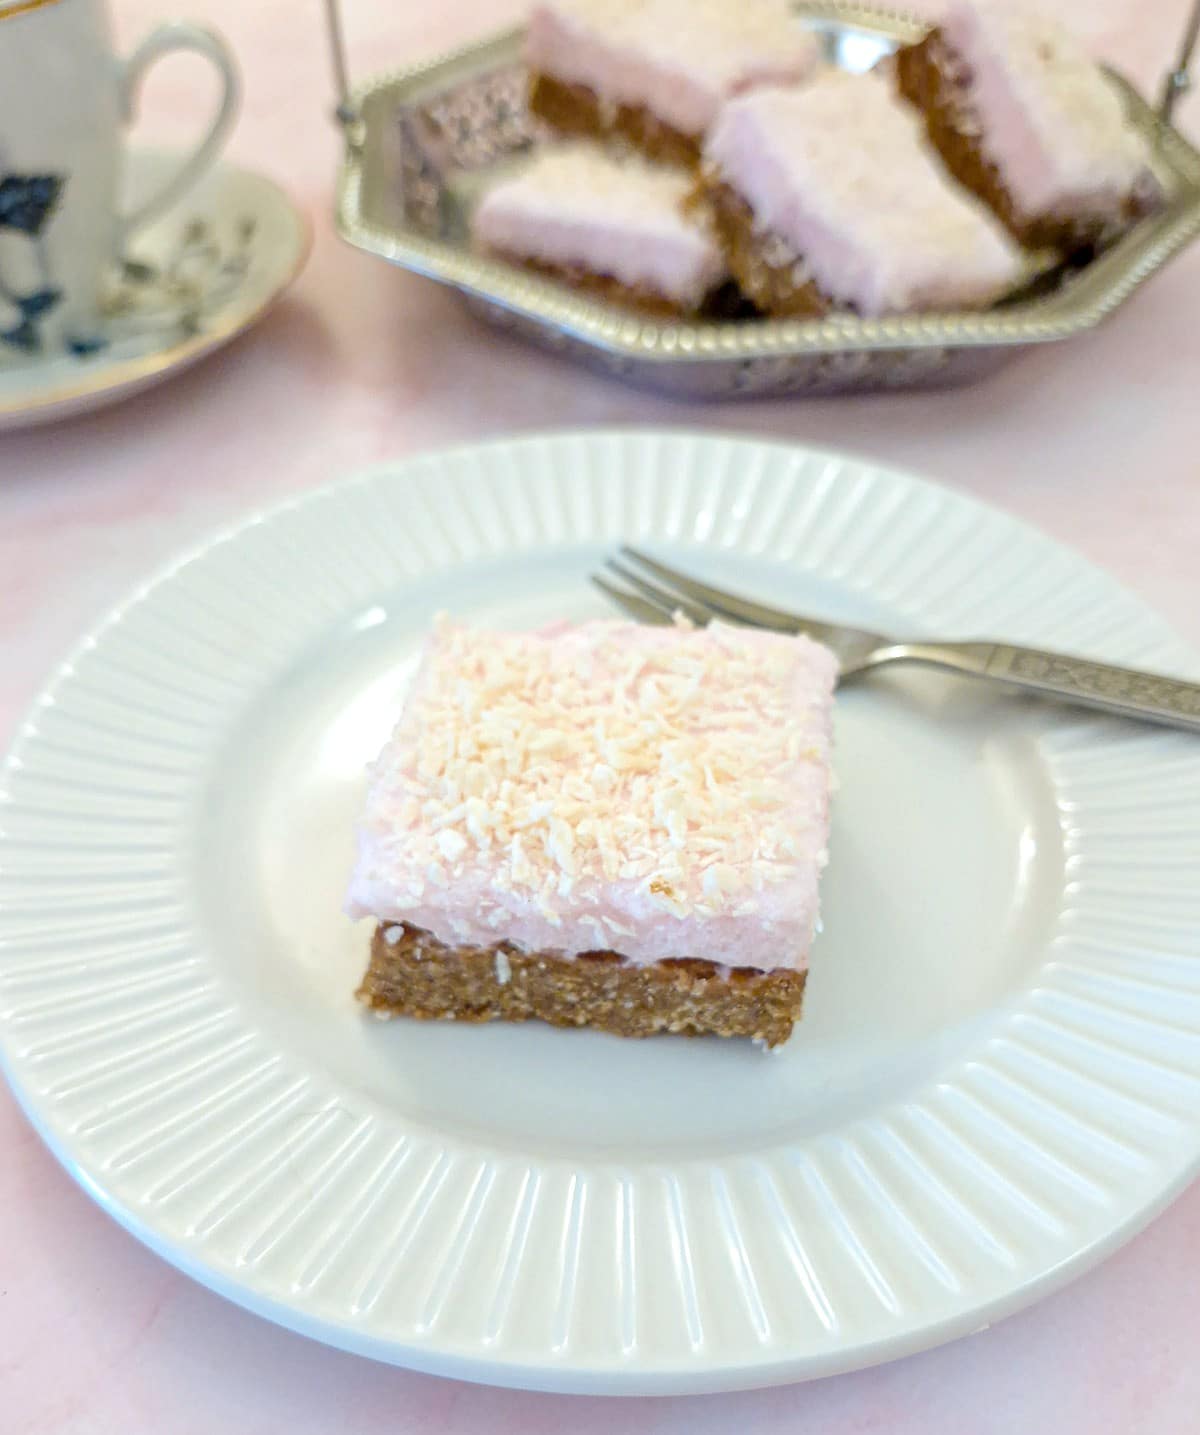
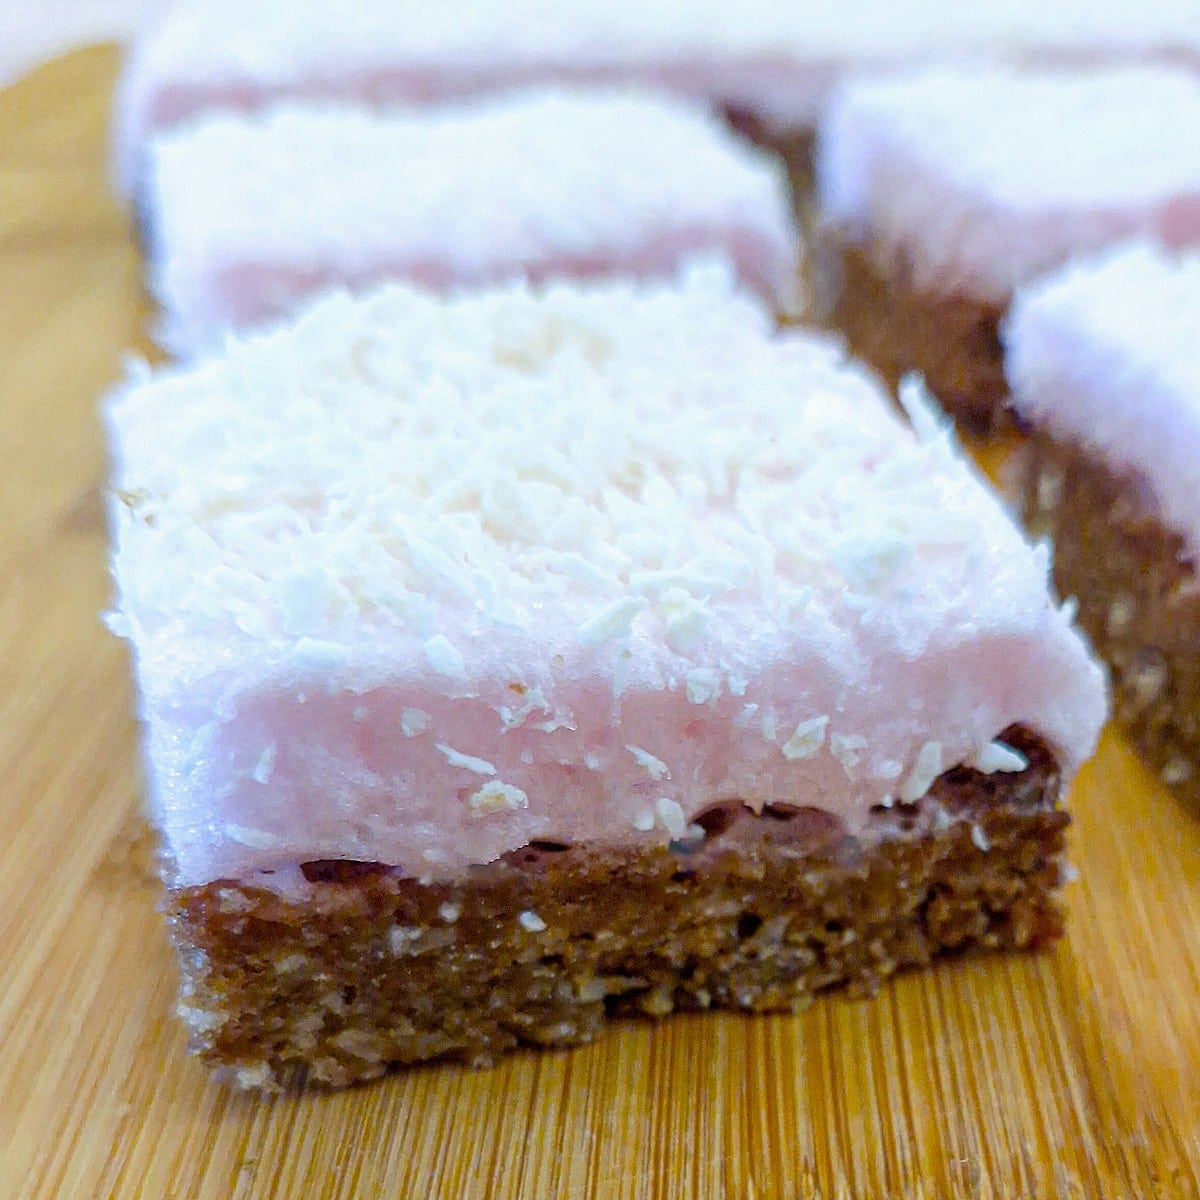
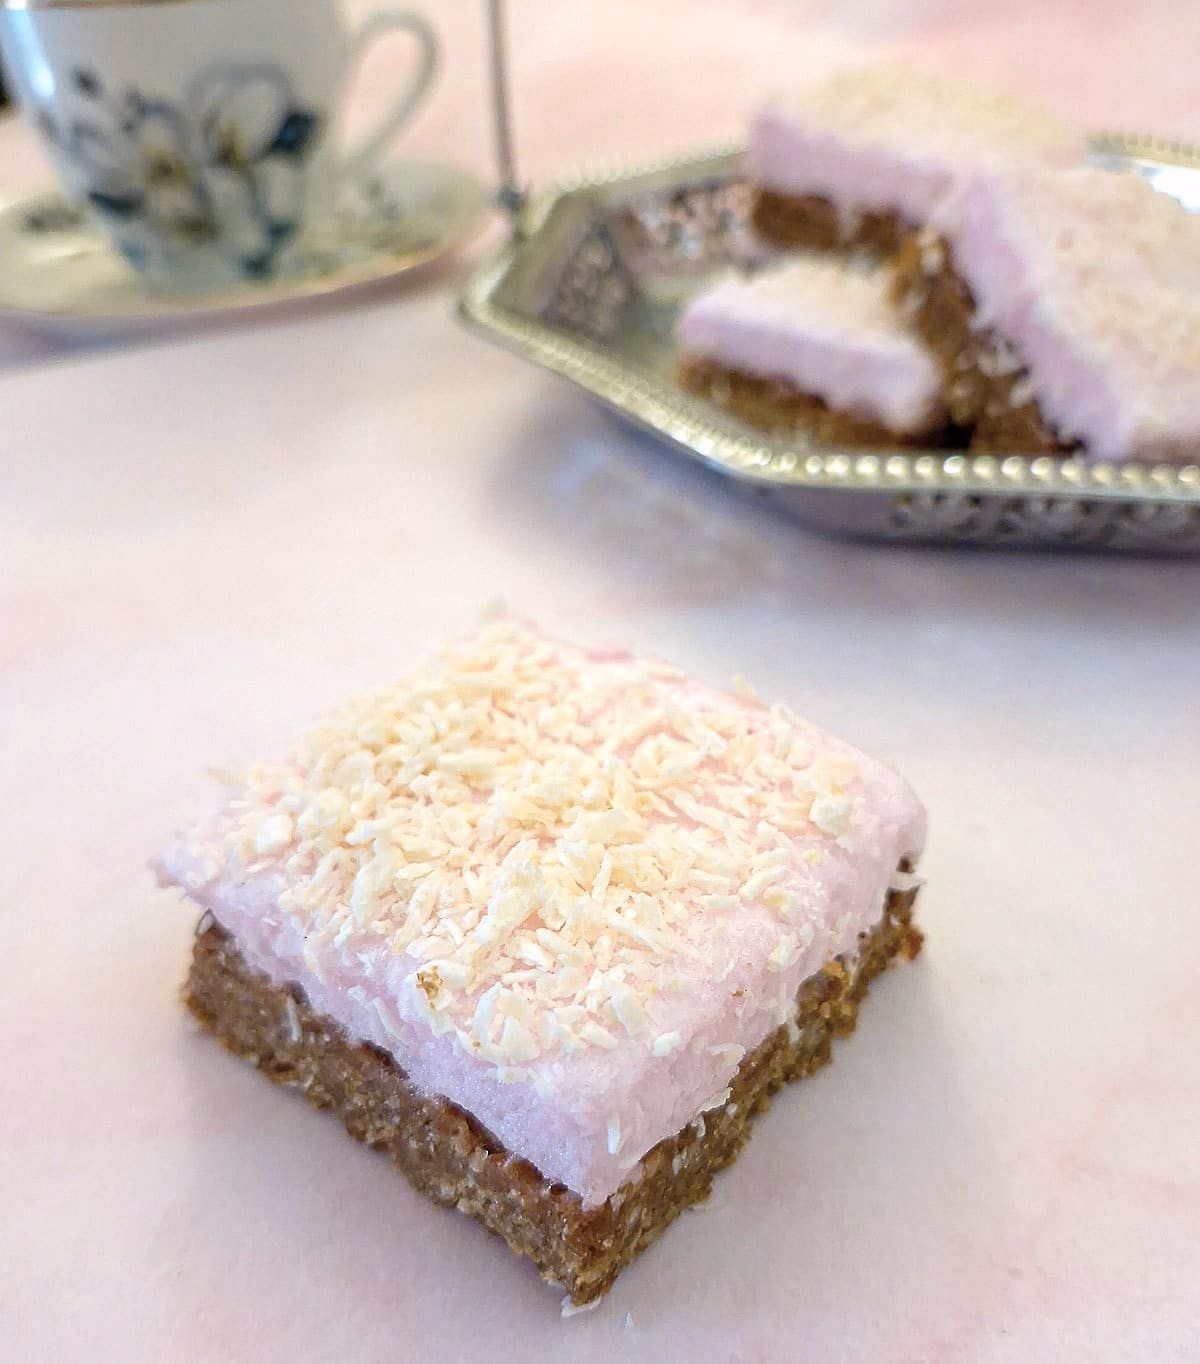
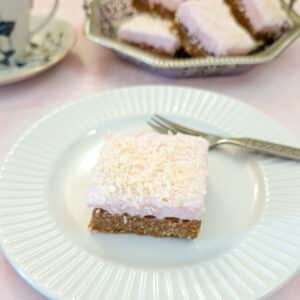
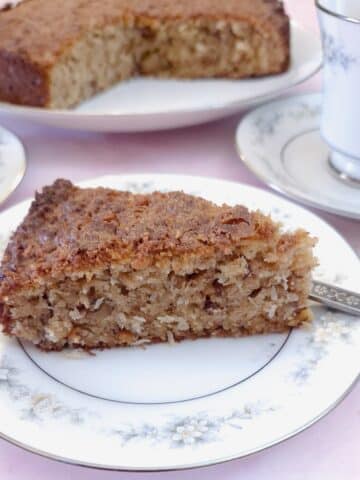
This coconut marshmallow Weet-bix slice is a retro classic that's making a welcome comeback. With soft, squidgy marshmallow on a tasty coconut biscuit base, this slice is perfect for afternoon tea, a midday boost packed into a lunch box, or just as a treat when you need something sweet!
I'm ashamed to admit it, but I've never made marshmallows before! I thought they were fiddly and difficult. I couldn't have been more wrong. Marshmallows are the easiest thing in the world to make - although they do involve standing over a mixing bowl, holding a hand mixer for 15 minutes 🙂 .
I saw a recipe for these Weet-bix marshmallow slices on Australia's Best Recipes website, and it brought back a lot of memories. We used to buy these coconut-covered slices from the local bakery years ago on our way back from school. They were delicious, with a slightly chewy coconut base and a soft marshmallow top sprinkled with extra coconut. I just had to make some and see if they were as I remembered!
The recipe I found contained far too much sugar for my taste, so I modified it and had a couple of trial runs to make something more to my taste. This coconut and marshmallow Weet-bix slice recipe is the result. It's still sweet (as it's supposed to be) but not overpoweringly so. And the marshmallow slice tastes just as I remember!
The final result is a biscuit base, reminiscent of a soft Hobnob biscuit, topped with cloud-soft marshmallow. I might even rename these to 'heavenly Weet-bix slices'!
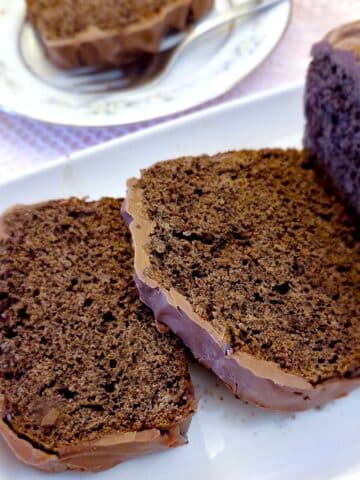
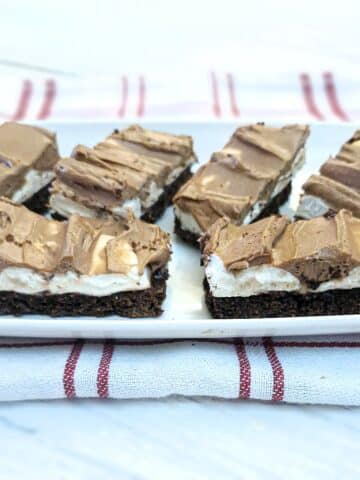
You might like to try this chocolate Weet-bix crumble slice too, although this one has a more cake-like texture and is topped with chocolate buttercream rather than marshmallow.
Jump to:
Why you should try this recipe
- It's easier than you might think! For years, I put off making something like this marshmallow slice (using gelatine) because I thought it was too fiddly and difficult. Which just shows how preconceptions cloud your creativity!
- The coconut marshmallow slice is made with simple pantry ingredients. Other than the gelatine, and even that is readily available in supermarkets, you probably have everything in the cupboard already.
- It's a nostalgic bake that brings back childhood memories.
Recipe information
Prep time:
- Biscuit base - 5 minutes
- Marshmallow topping - 25 minutes (5 minutes to melt the sugar and 20 minutes to beat the marshmallow. However, you do need to allow the sugar to cool before beating it.
Cooking time : 15 minutes for the biscuit base.
Chilling time: 1 to 2 hours to allow the marshmallow to set.
Yield: 16 largish slices - or a 9" x 9" slice.
Ingredients for a coconut marshmallow Weetbix slice
**See the printable recipe card at the end of this post for the exact ingredient quantities.**
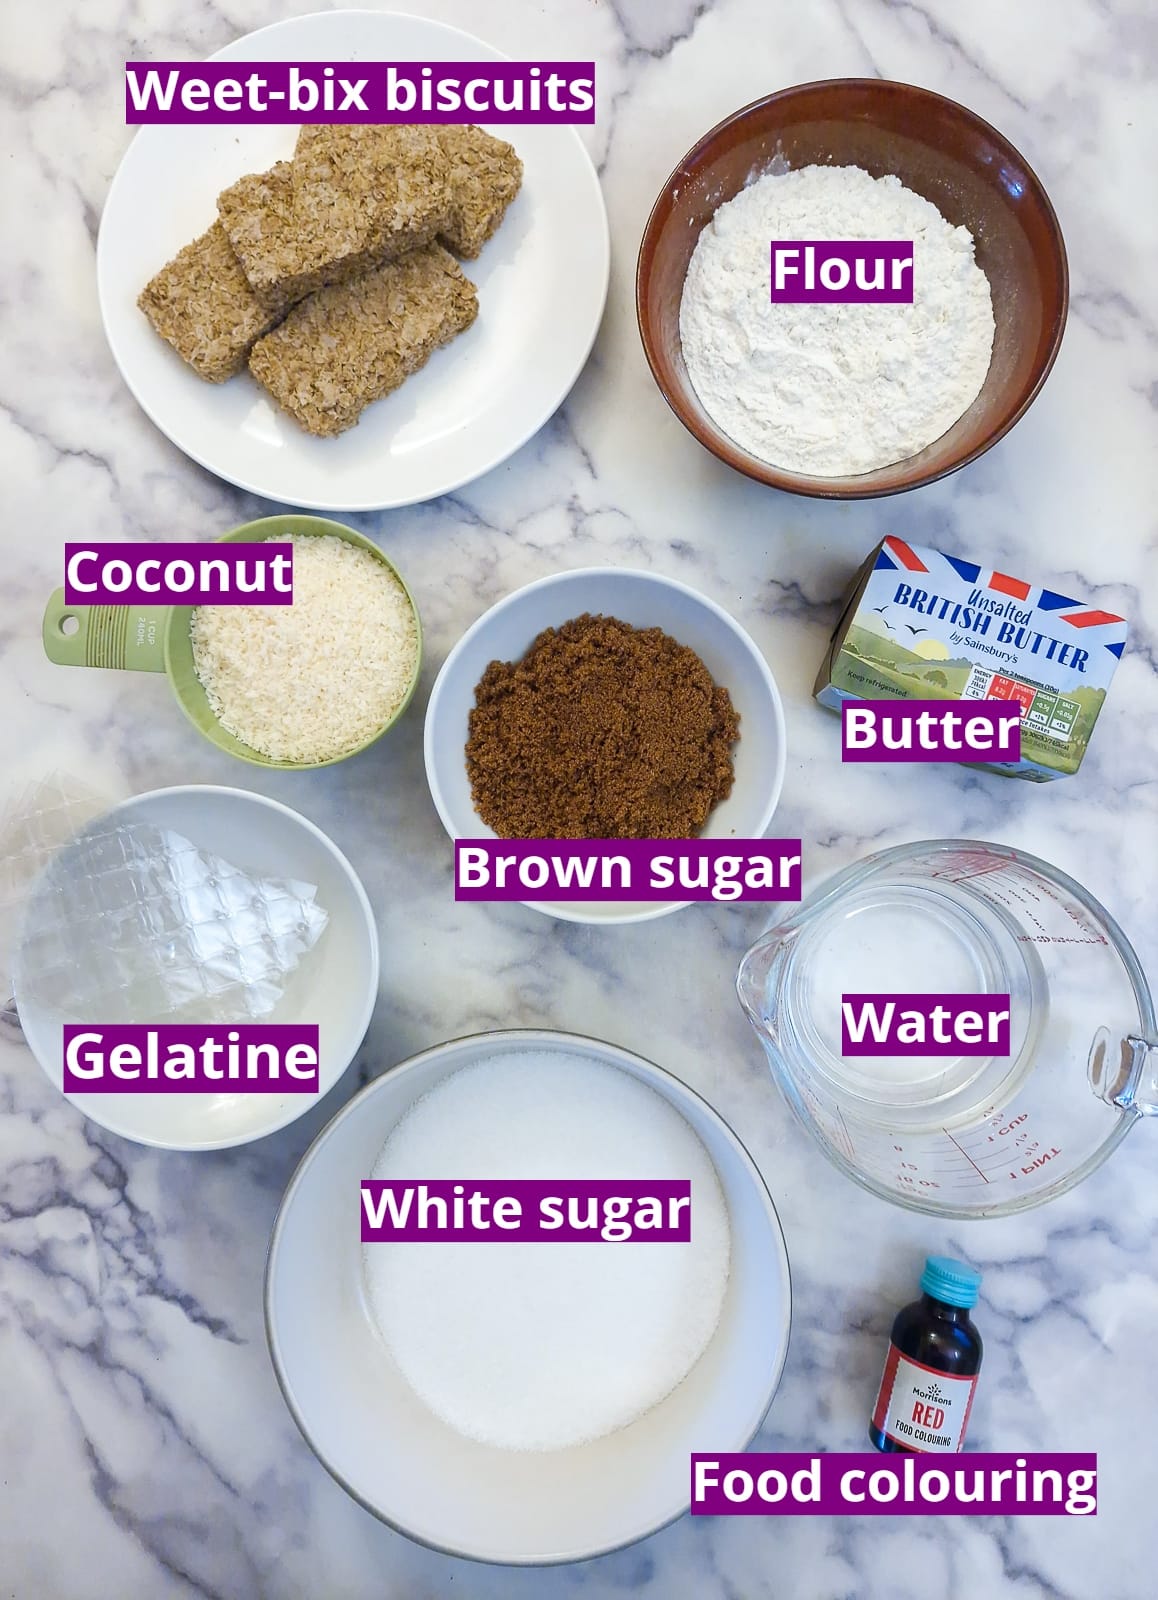
Weetbix base
- Weetbix biscuits - you will need 3 or 4 biscuits depending on the size. They should be crushed into crumbs, which should yield just over a cup of tightly packed crumbs. The Weet-Bix I used were quite small as they were supermarket 'own brand', so I used 4 of them. Branded Weet-bix are slightly larger, so you could get away with using only 3.
- Brown sugar - you could use white sugar instead, but brown sugar gives a nice caramel taste to the biscuit base.
- Desiccated coconut - unsweetened coconut is preferable, as there is sufficient sugar in the recipe, but sweetened coconut will be fine if that's all you have. It won't make any difference to the outcome of the biscuit base - it will just be slightly sweeter.
- Flour - I used self-raising flour. You can use plain or all-purpose flour instead and add a teaspoon of baking powder.
- Butter - this should be melted. I melt my butter in the microwave on half power for 2 minutes, checking after the first minute.
Marshmallow
- White sugar - don't use brown sugar for the marshmallow - we don't want the marshmallow to have a brown tinge.
- Water - cold tap water is fine.
- Gelatine - I used 4 sheets of platinum brand leaf gelatine. The packet said that this would be sufficient to set one pint or 2 cups of liquid. You could use 1 tablespoon of powdered gelatine instead. Leaf gelatine should be soaked in cold water for 5 minutes to soften it; powdered gelatine doesn't need to be soaked.
- Food colouring - for a nice pink colour in the marshmallow, add a few drops of red food colouring.
Instructions
Weetbix base
The base has to bake in the oven for 15 minutes, so we'll make this first.
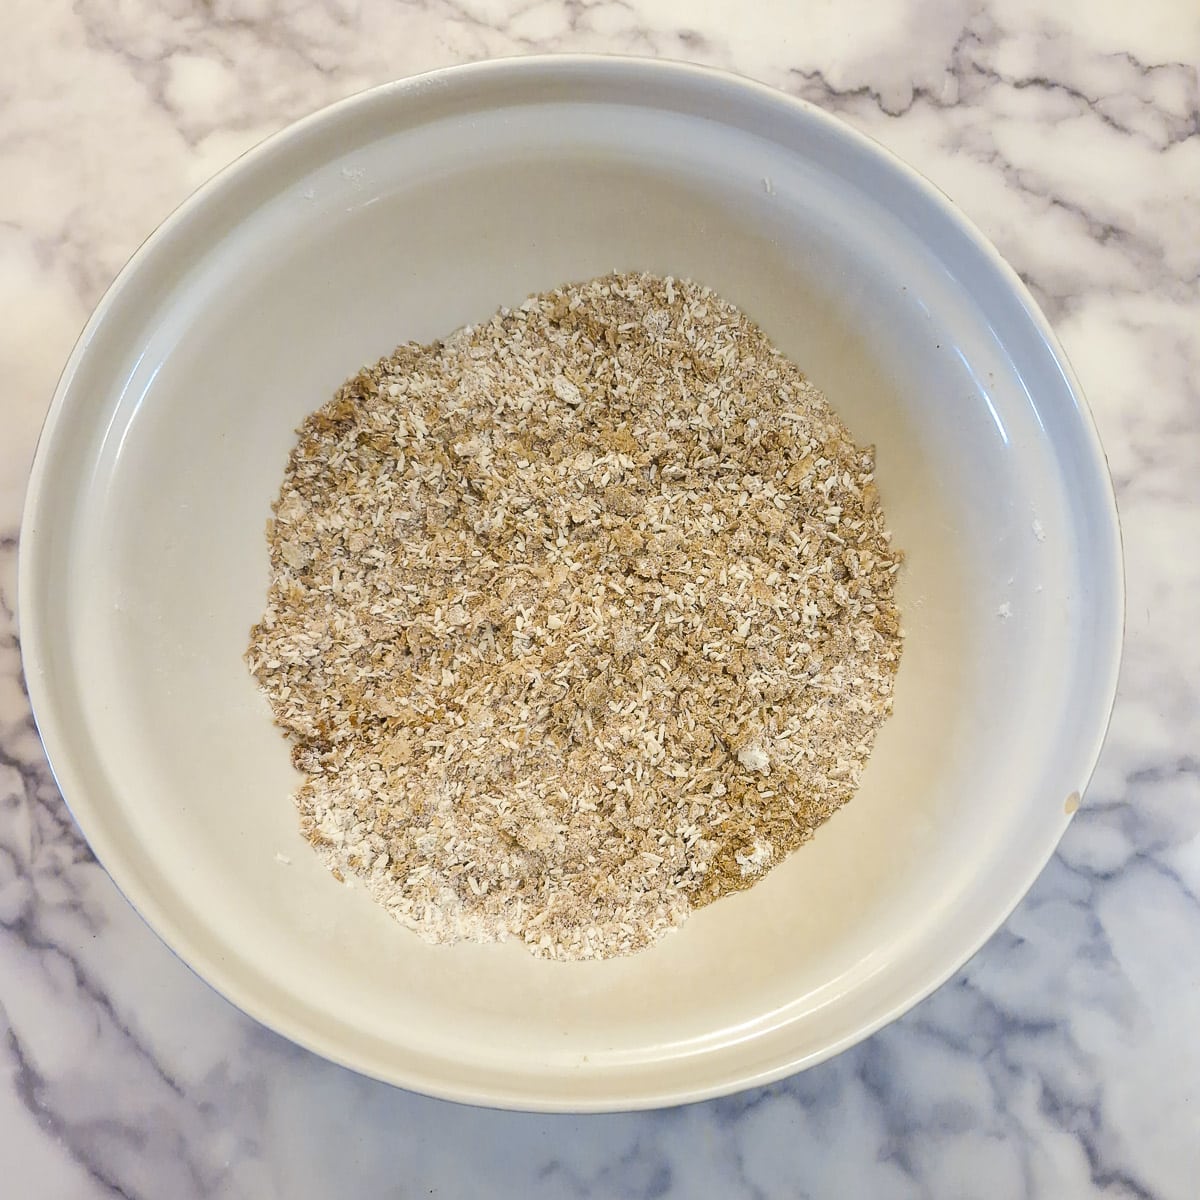
Step 1: Combine the dry ingredients (crushed Weet-bix, flour, coconut and brown sugar) in a mixing bowl.
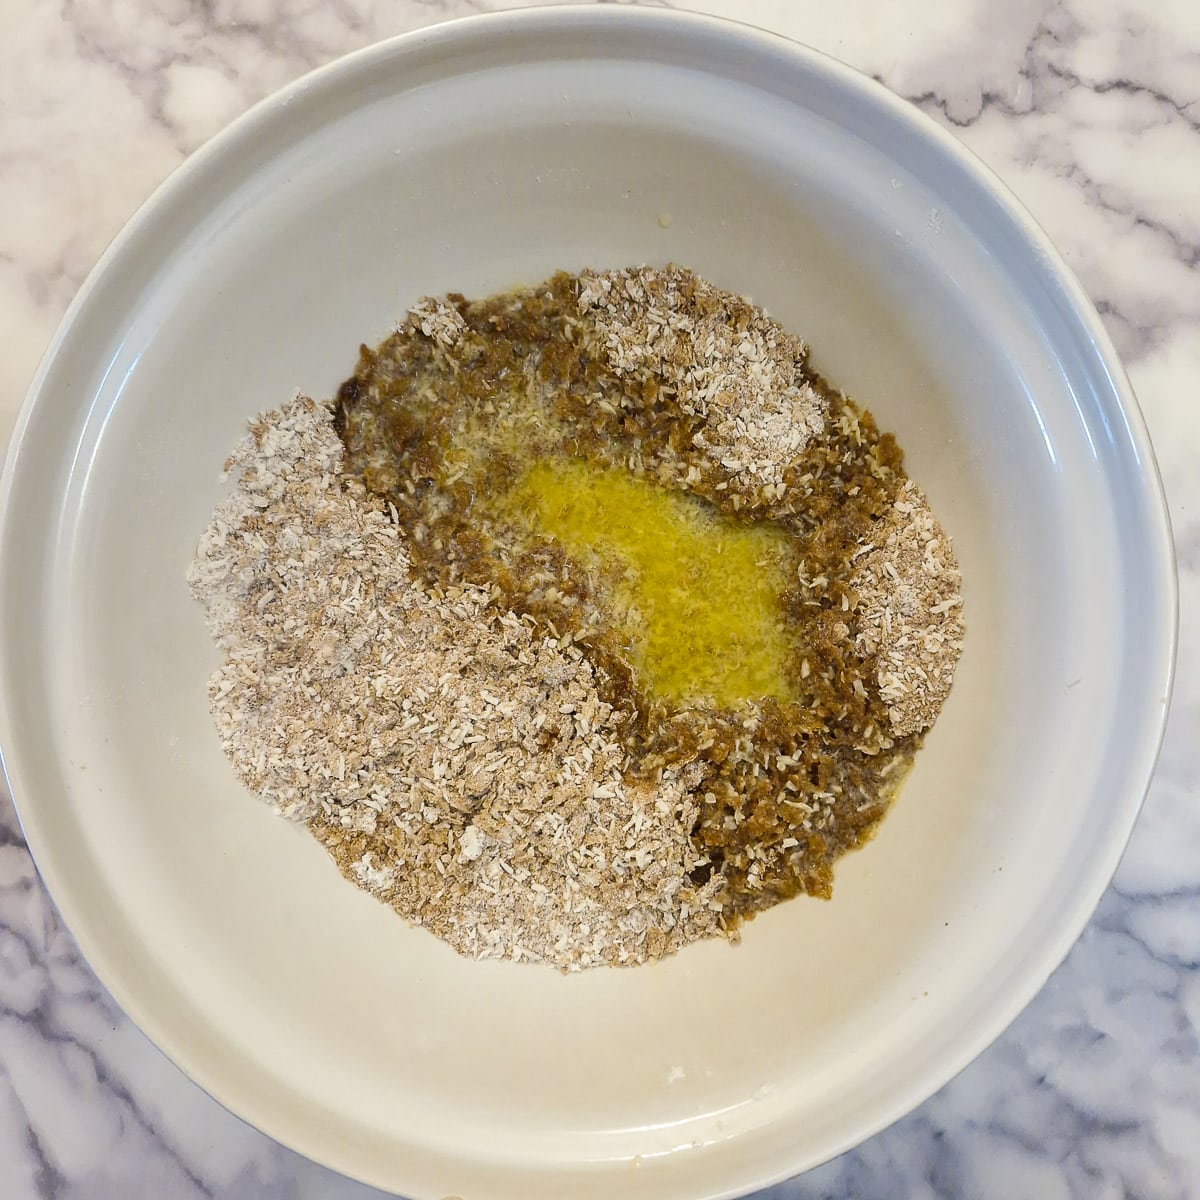
Step 2: Pour in the melted butter.
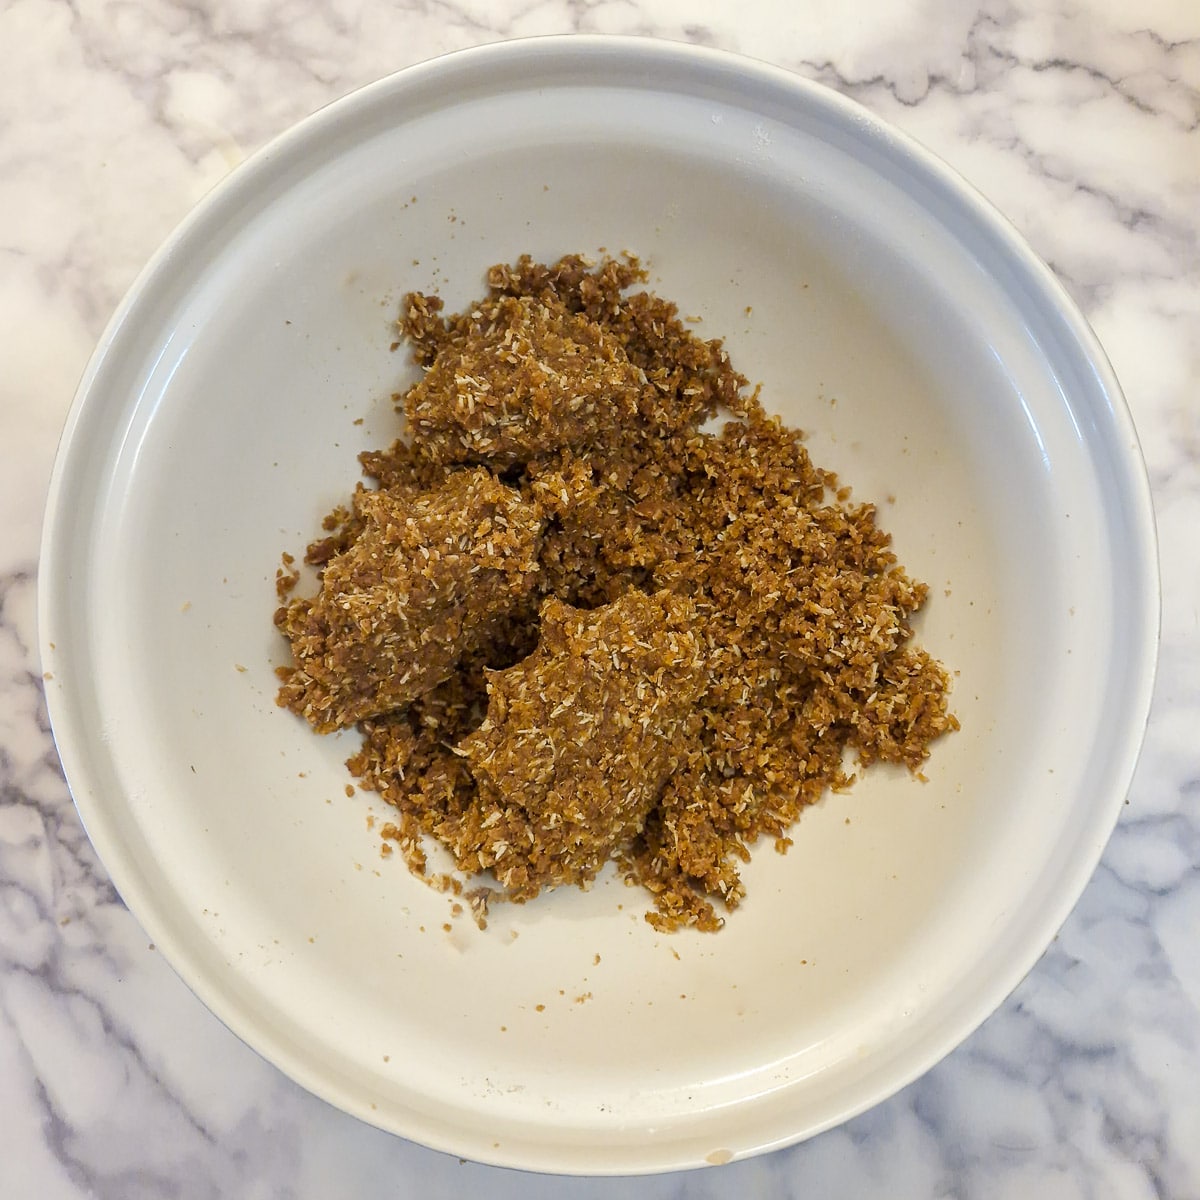
Step 3: Mix well until the mixture holds its shape when squeezed together. If the mixture is too dry, add a splash of milk.
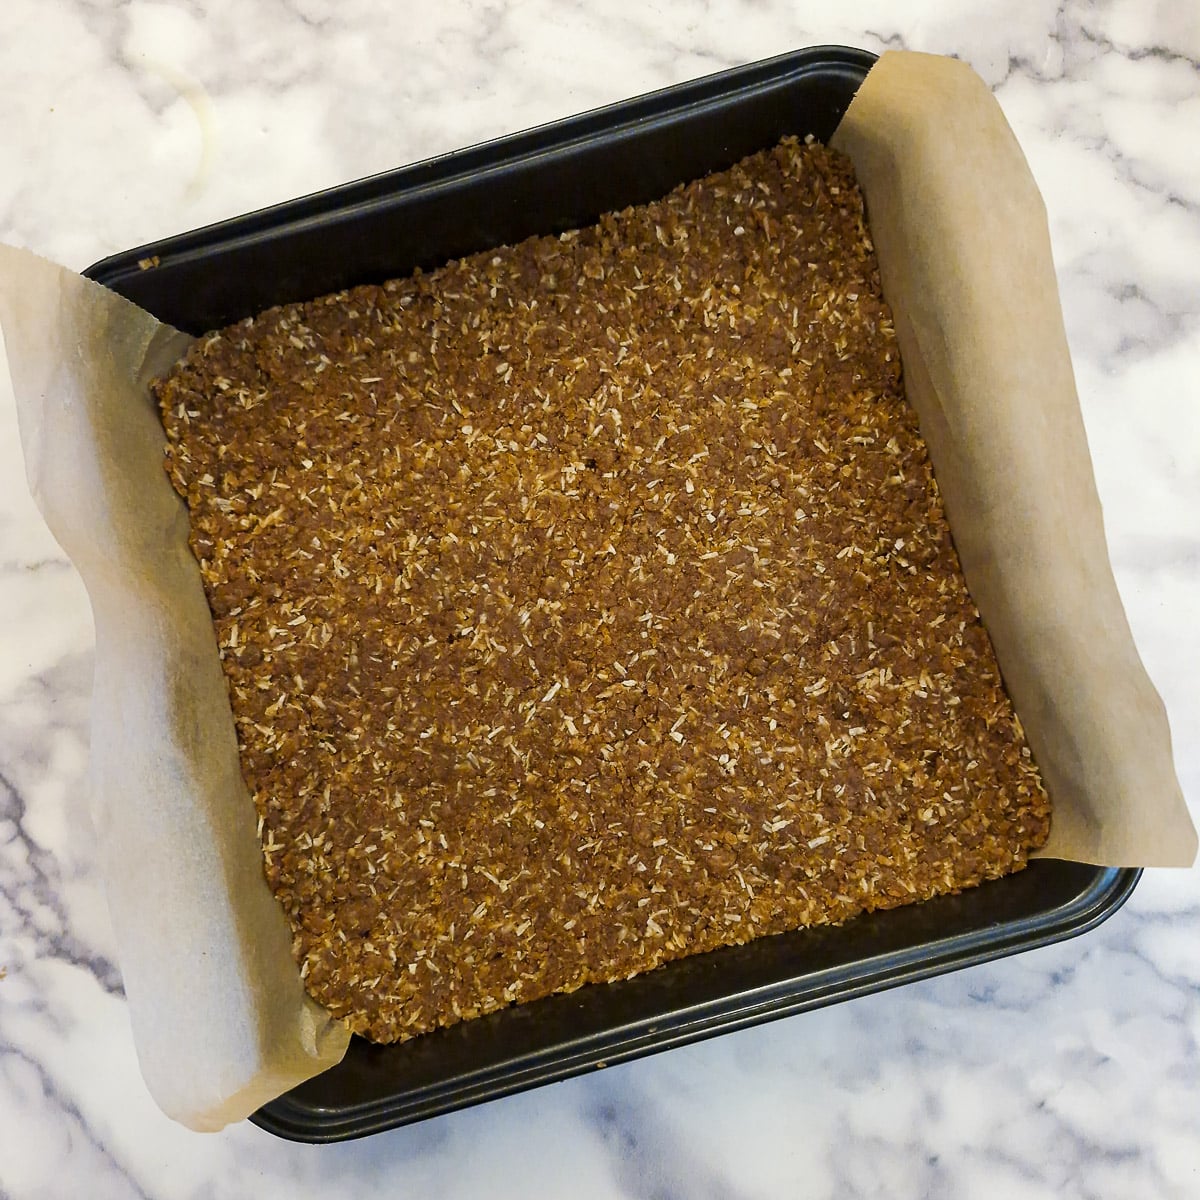
Step 4: Transfer the mixture to a 9" x 9" lined pan and press it down evenly with your fingers (or use a flat-bottomed drinking glass).
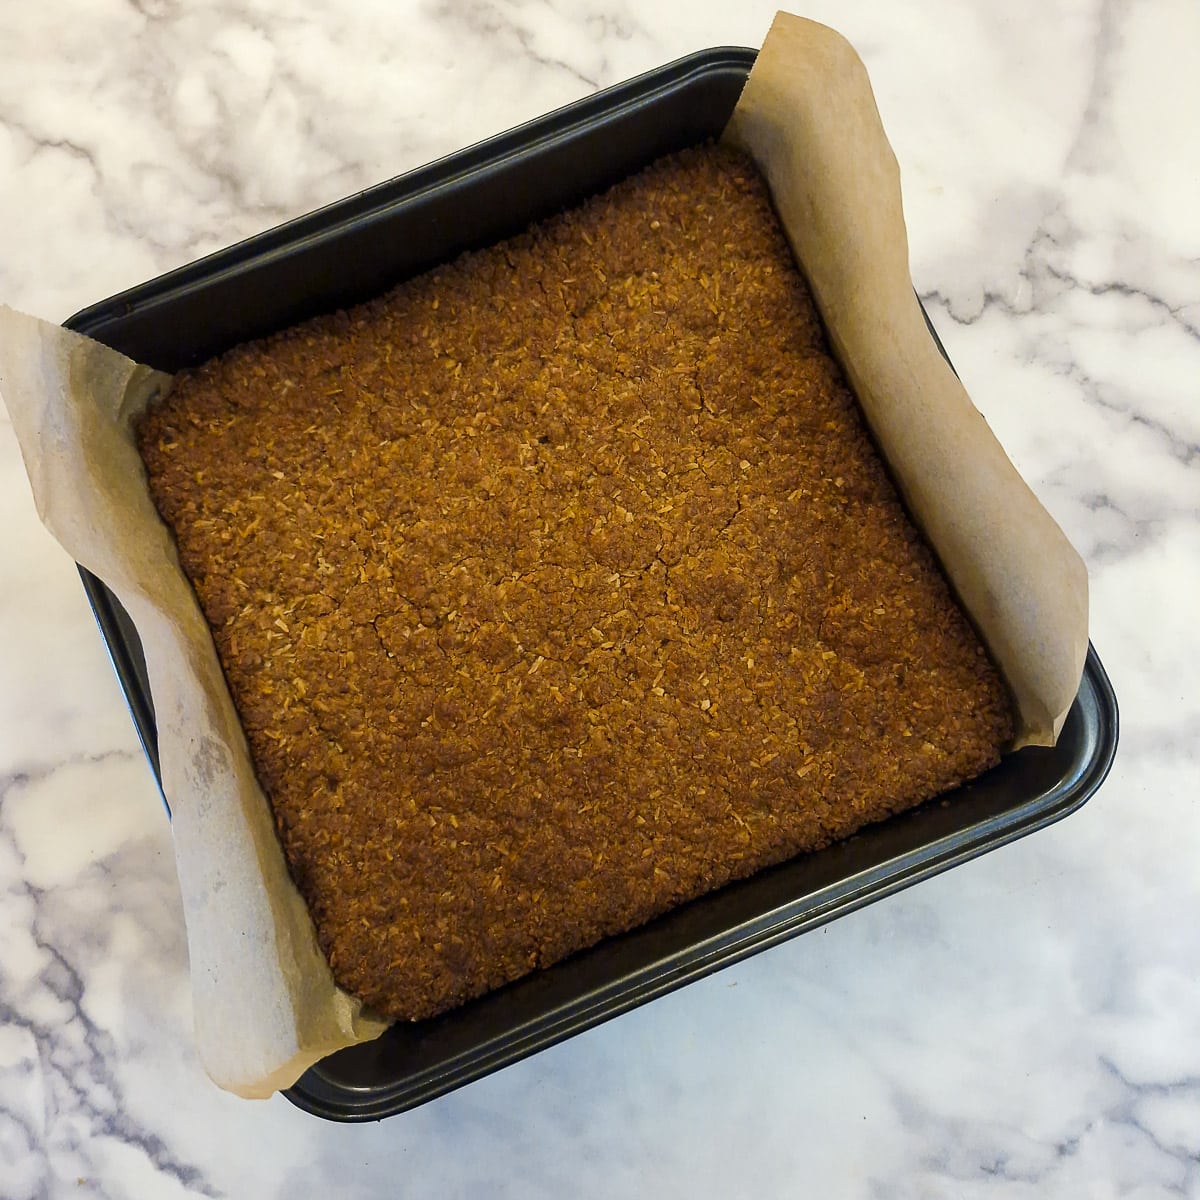
Step 5: Bake in a preheated oven (200C / 400F) for 15 minutes. Remove from the oven and set aside to cool.
Marshmallow
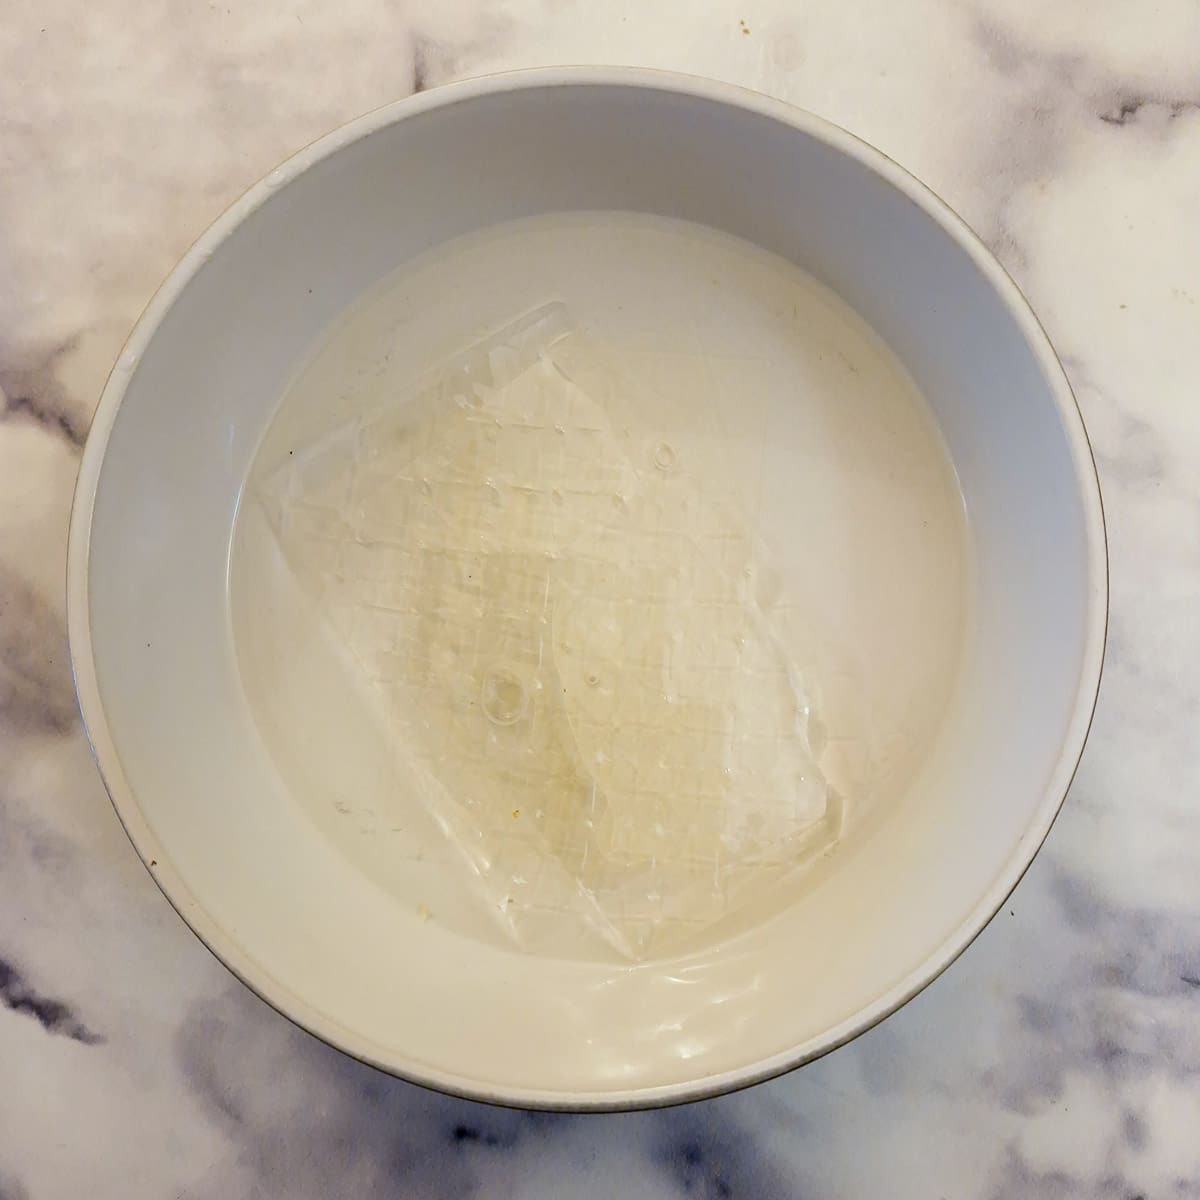
Step 6: Soak the gelatine sheets in a dish of cold water (this is extra - not the water mentioned in the recipe) and leave for 5 minutes to soften. If you are using powdered gelatine, you can skip this step.

Step 7: While the gelatine is softening, heat the water and sugar (and powdered gelatine if using) slowly in a saucepan, stirring to allow the sugar (and gelatine) to melt.
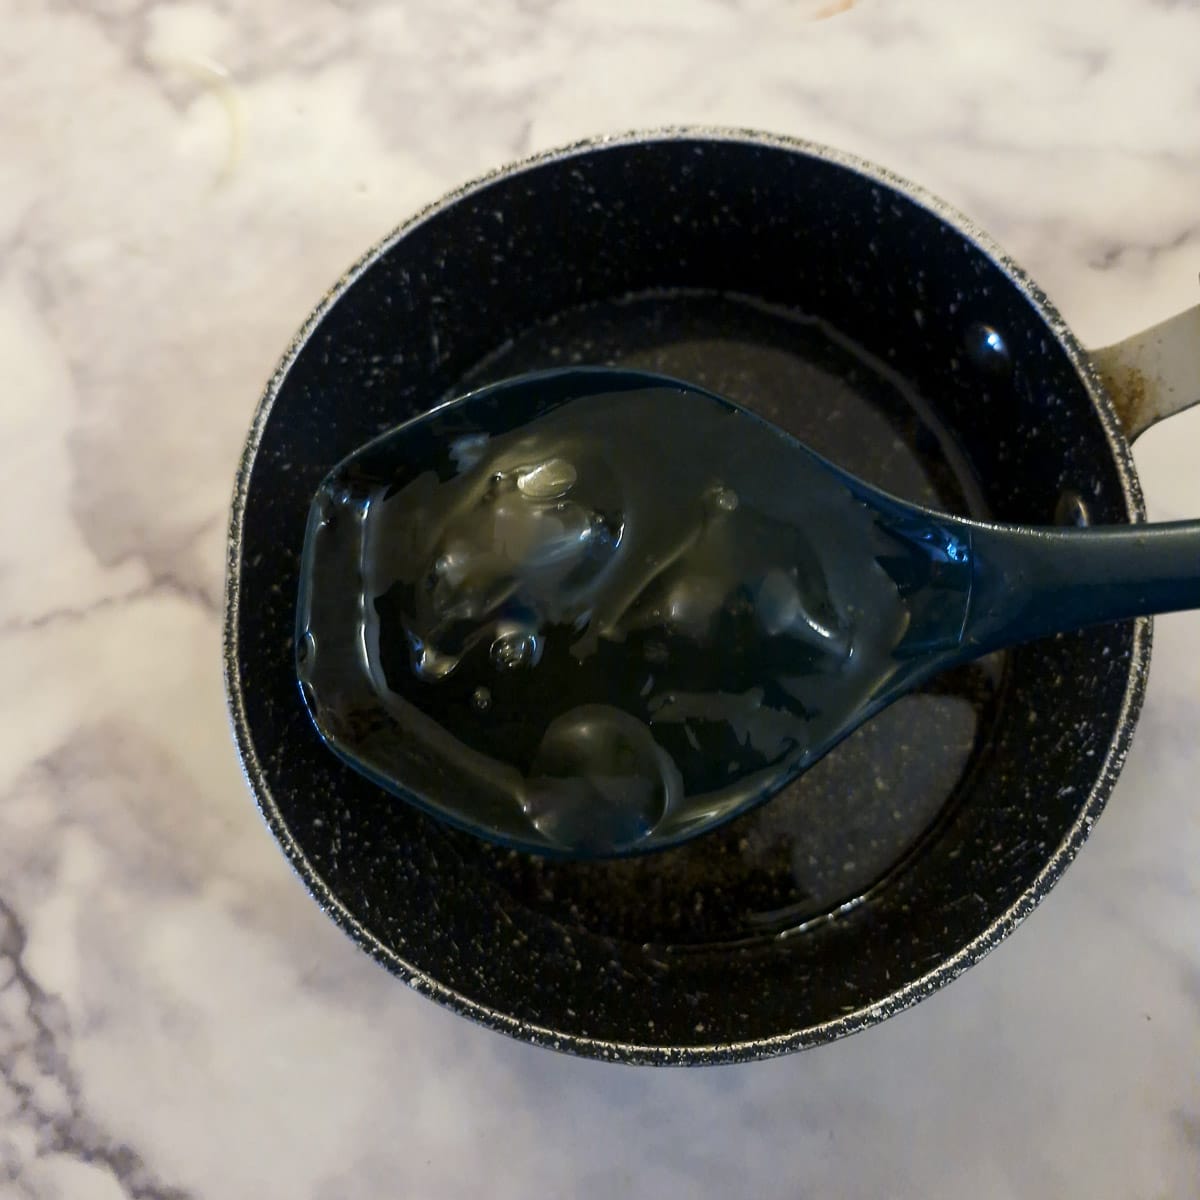
Step 8: If using leaf gelatine, add the softened gelatine to the sugar mixture (discard the water used to soak it) and continue to stir over low heat until the gelatine has dissolved.
In both cases (powdered or leaf gelatine), bring the mixture to a boil, then remove from the heat and allow to cool.
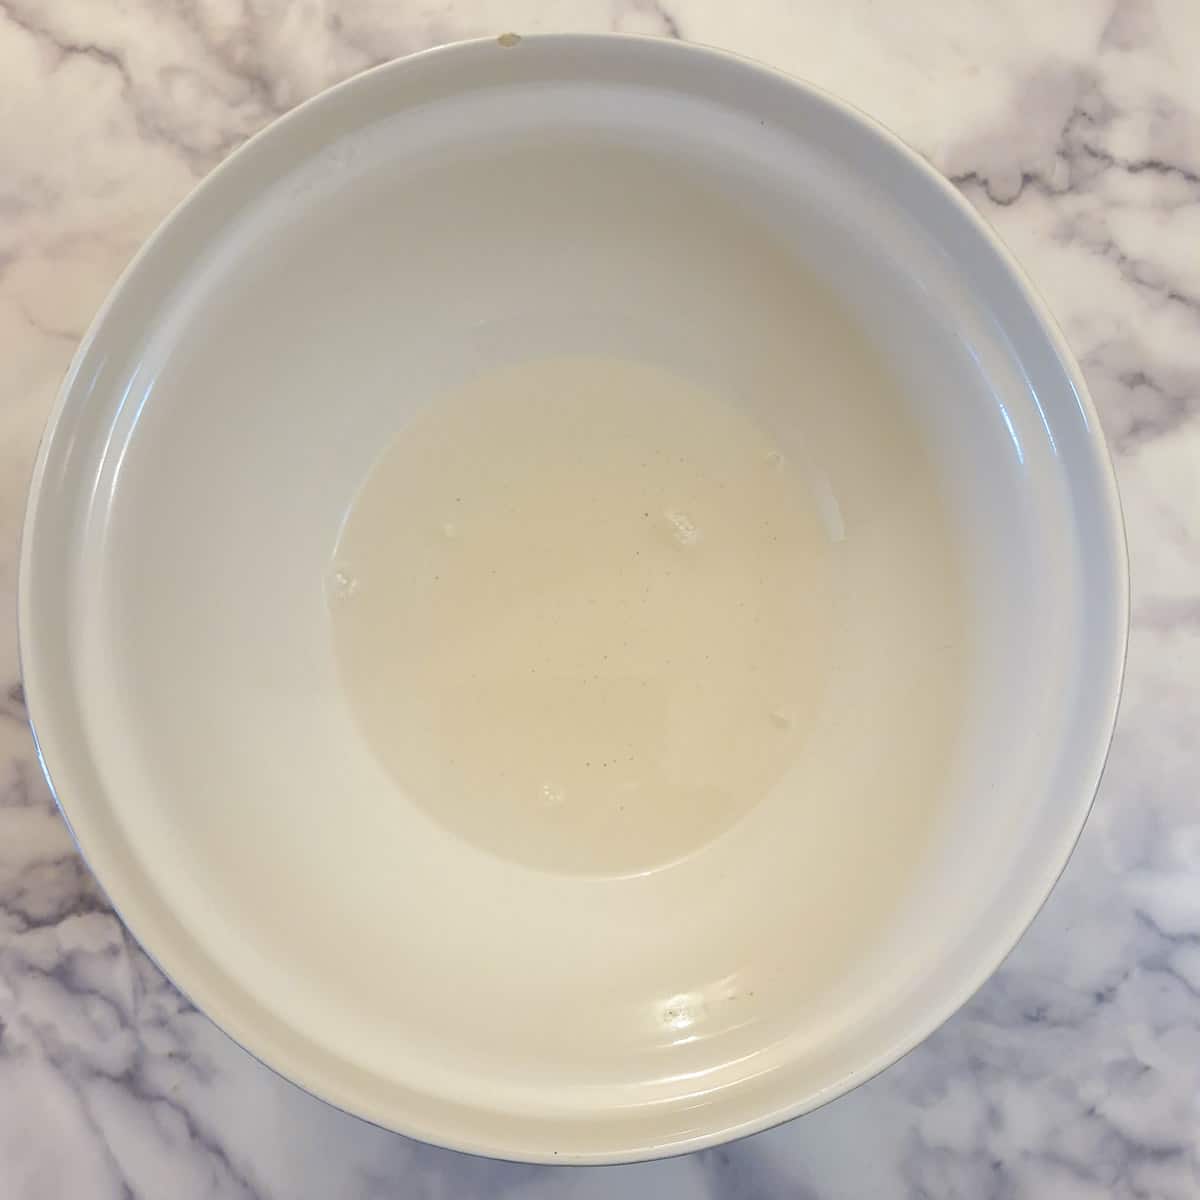
Step 9: Pour the cooled sugar/gelatine mixture into a mixing bowl.
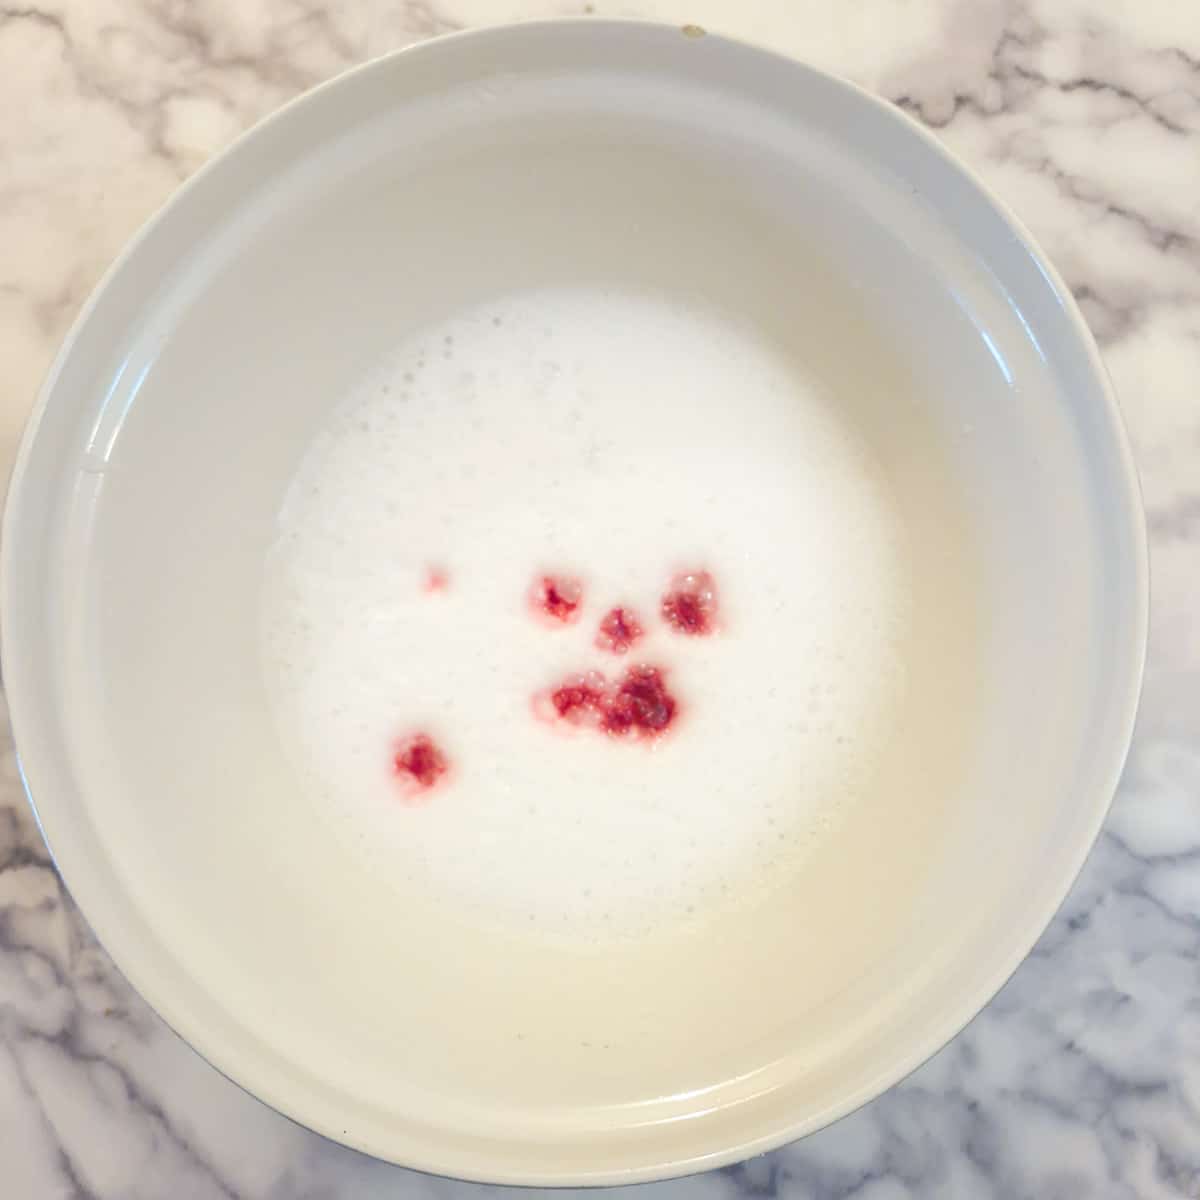
Step 10: Beat the mixture with an electric hand mixer (or use a stand mixer) for 5 minutes, then add one-quarter of a teaspoon of red food colouring.
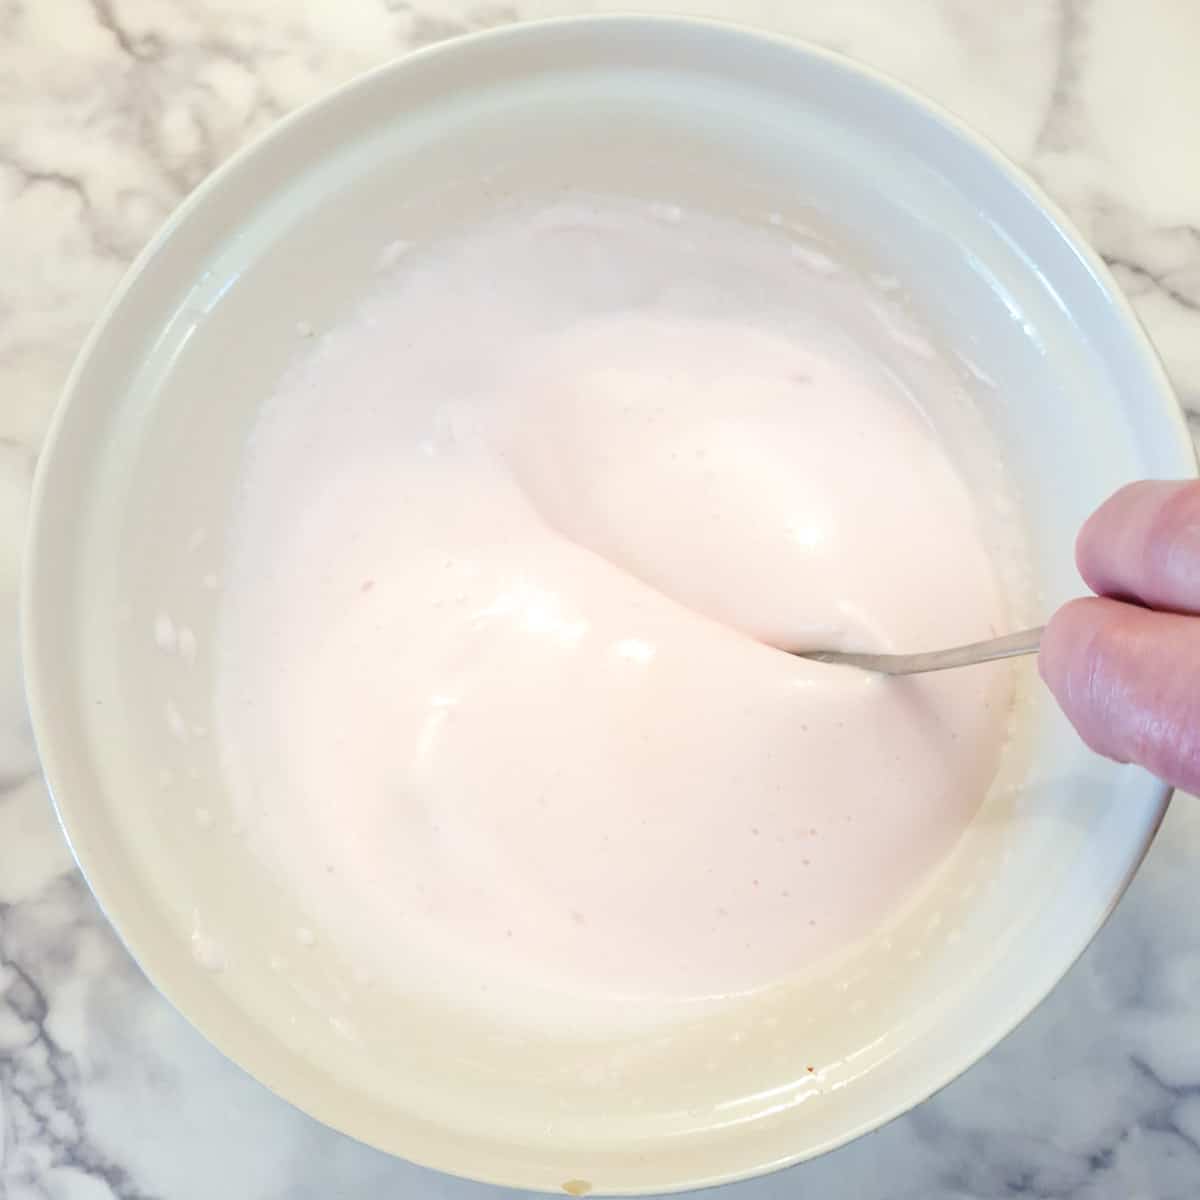
Step 11: Continue to beat until the mixture is thick and glossy. This will take anything up to 10 minutes longer.
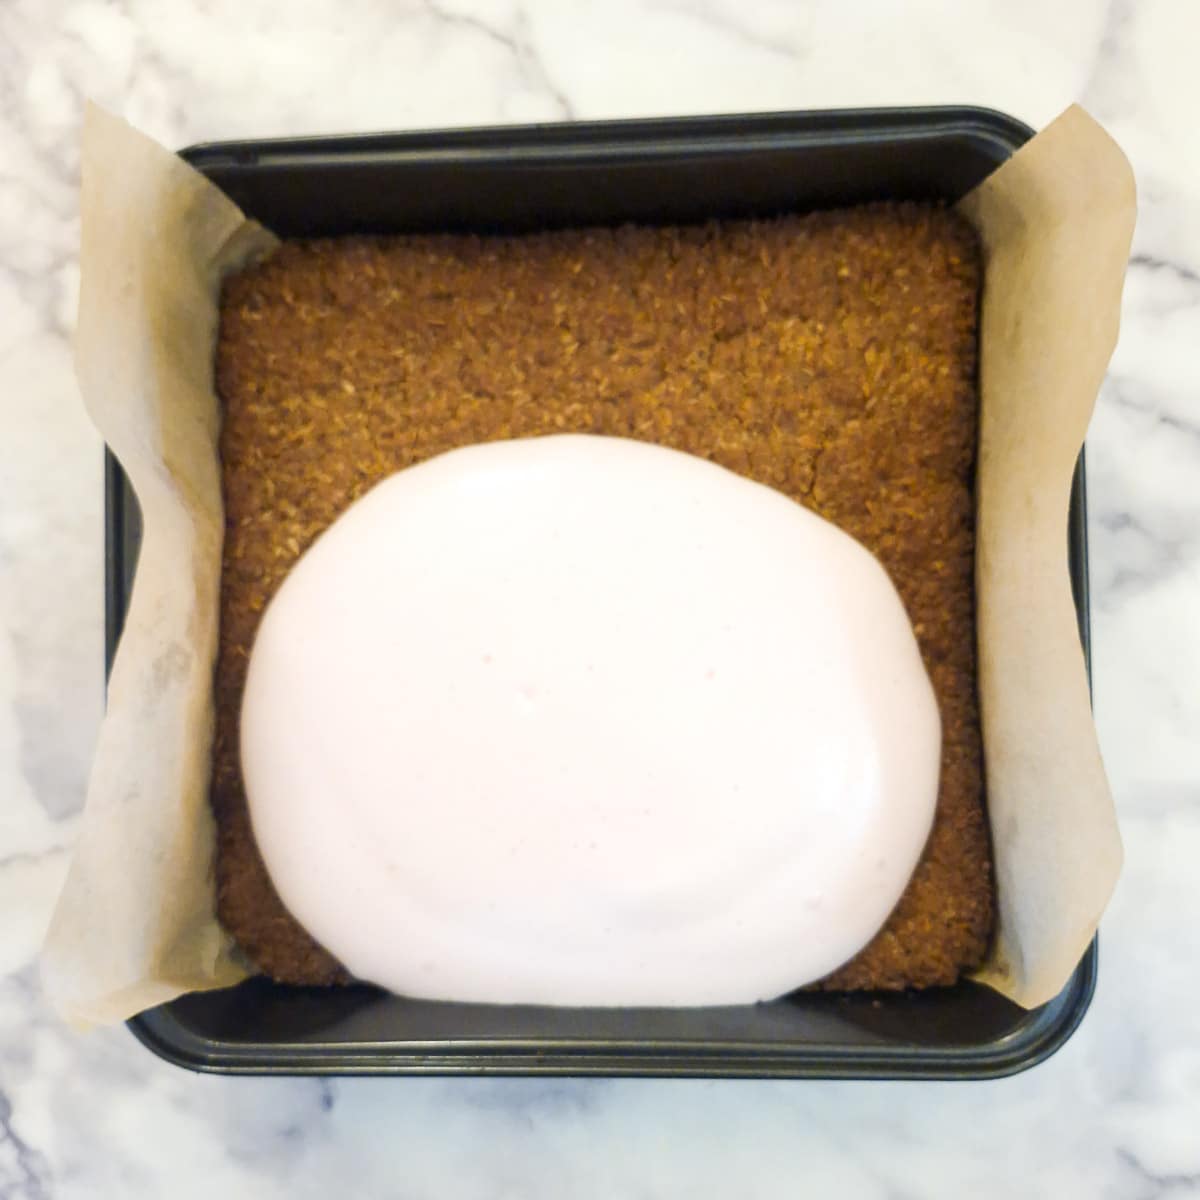
Step 12: Pour the marshmallow mixture onto the cooled biscuit base.
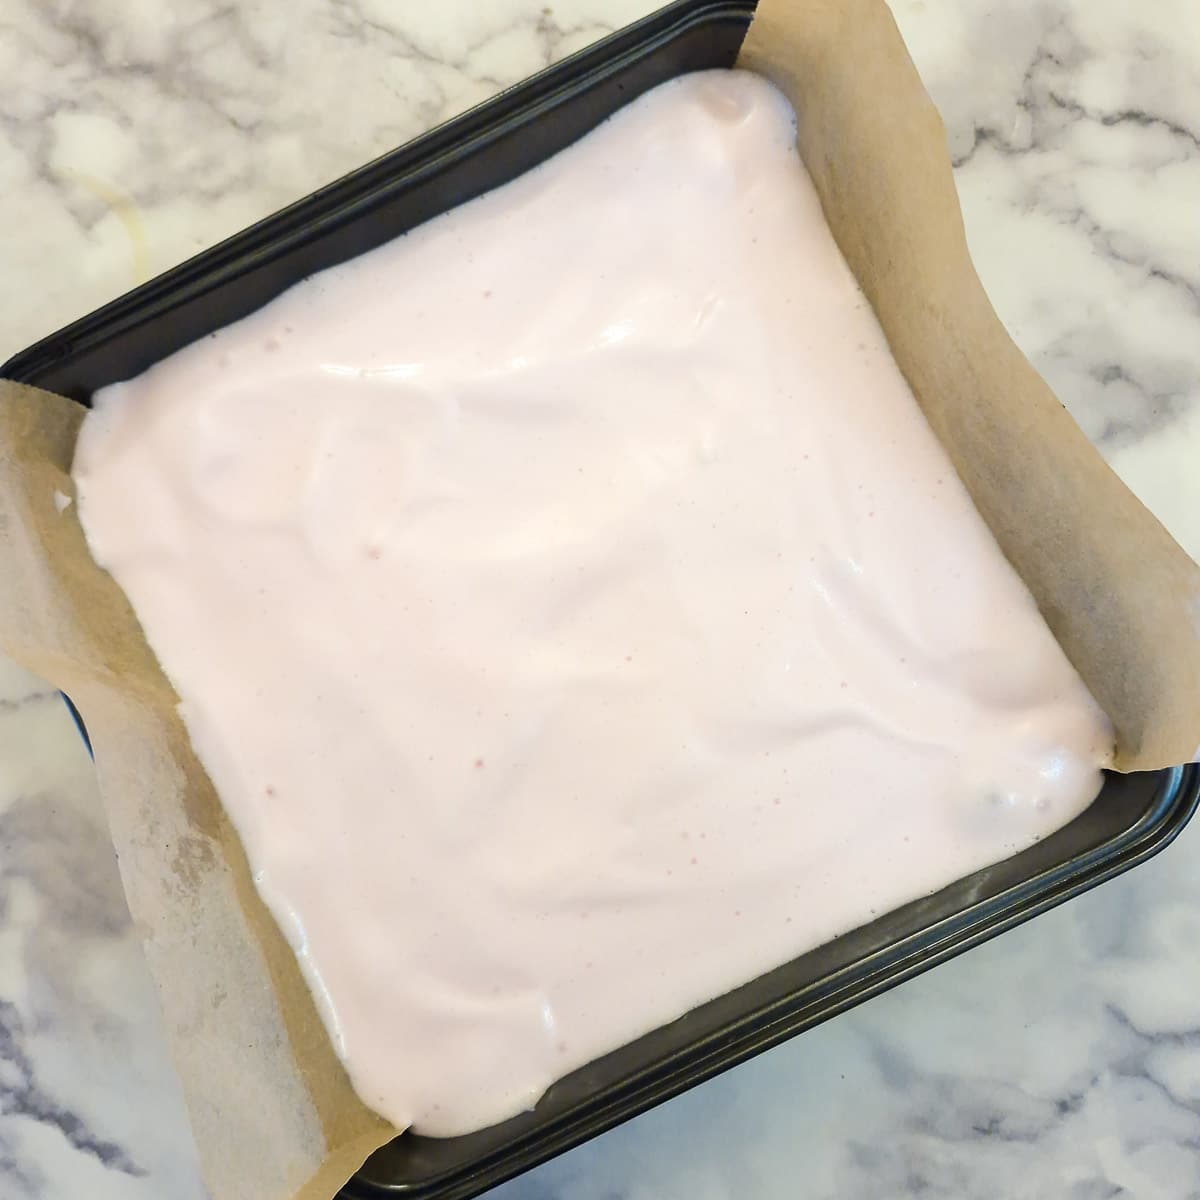
Step 13: Spread the marshmallow evenly over the top of the base and refrigerate for 1 to 2 hours until set. Optionally, sprinkle with extra coconut.
Tips for a successful outcome
Here are my top tips to ensure your coconut marshmallow slice always turns out perfectly:
Biscuit base
- Make sure the Weet-bix is completely crushed.
- You can use plain or all purpose flour in place of self-raising flour, but add a teaspoon of baking powder to the flour.
- When mixing in the melted butter, stir with a spatula until well combined and then mix with your hands until the mixture holds its shape when pressed together. If the mixture is too dry to hold together, add one or two tablespoons of milk.
- When lining the baking dish, allow the baking paper to stick out at the edges to help you remove the biscuit base easily from the dish.
Marshmallow
- As soon as the sugar/gelatine mixture has come to a boil and the sugar and gelatine have dissolved, remove it from the heat and allow it to cool.
- The marshmallow will whip up faster if it is completely cold before it is beaten. You could even allow it to chill in the refrigerator.
- Do not add too much food colouring (unless you are looking for a lurid pink colour). A few drops will be sufficient.
- Keep beating the marshmallow until it thickens and holds its shape. You may think it will never thicken, but persevere! It will thicken eventually.
- You will know the marshmallow is thick enough when you pour it onto the biscuit base. If it runs all over the biscuit base, it is too thin. It should hold its shape, and you should be able to spread it with a spatula.
- After an hour in the refrigerator, you should be able to press the marshmallow gently without your finger sinking into it.
- You will find that the marshmallow sticks to the sides of the pan and the baking parchment. Use a sharp knife to ease it away.
Variations
Here are a few suggestions to vary the recipe to suit your own taste;
- Lemon - add a teaspoon of lemon essence and a few drops of yellow food colouring for a lemon-flavoured marshmallow slice.
- Chocolate - add a tablespoon of cocoa powder to the base, leave out the red food colouring, and drizzle the marshmallow with melted chocolate.
- Jam - spread the biscuit base with a thin layer of seedless raspberry or strawberry jam before adding the marshmallow.
Equipment
These are the main items of equipment you will need for making this coconut marshmallow slice;
- Mixing bowl - for mixing the biscuit base.
- 9" x 9" baking dish - I used a 9" square baking pan - you could use a similar-sized rectangular pan instead.
- Saucepan - for melting the sugar, water and gelatine when making the marshmallow.
- Electric hand mixer or stand mixer - for beating the marshmallow. Please note that a balloon whisk will not be suitable for beating the marshmallow. You need something more heavy duty!
Storage
This marshmallow slice is best stored in the refrigerator.
It is not suitable for freezing.
FAQ
Yes, but the texture will be different. If you do use them, melt them over gentle heat with a splash of milk before spreading them over the biscuit base. Please note, I haven't tried this myself, so I can't guarantee the results.
You could use crushed bran flakes or even corn flakes. Just keep the volume the same.
This marshmallow slice will stay fresh in an airtight container in the refrigerator for 5 to 7 days. The base softens slightly over time, but the flavour remains the same. I actually prefer the texture of the marshmallow after a couple of days, as it thickens and becomes more chewy with standing.
Save for later
If you would like to make this coconut marshmallow Weet-bix slice, why not save the recipe to one of your Pinterest boards so you can find it easily? Just click the image below.
Alternatively, you can save the recipe by clicking on the floating heart icon on the right-hand side of the screen.
Related recipes
Visit my cakes, biscuits and dessert recipes page for other sweet treats. Here are a few you might enjoy:


📋The recipe
Coconut and marshmallow Weet-bix slice
(Click the stars to rate this recipe)
Equipment
- Mixing bowl
- Baking dish 9" x 9" square or similar
- Saucepan
- Spatula
- Electric hand mixer OR
- Stand mixer
Ask a Question
If you have a question about this recipe that has not been answered, please use the box below to ask it.
Use this with care. This is an AI-generated result and may contain errors or inaccuracies. I cannot be held responsible for the information returned.
Ingredients
Weetbix base
- 4 Weet-bix biscuits crushed
- 1 cup / 140 grams self-raising flour
- 1 cup desiccated coconut
- ½ cup / 100 grams dark brown sugar
- ⅔ cup / 160 grams butter
Marshmallow
- 1 cup / 200 grams white sugar
- ¾ cup water
- 4 sheets Platinum strength gelatine or 1 tablespoon powdered gelatine
- 3 drops food colouring optional
- Extra coconut to sprinkle optional
Instructions
Weetbix base
- Preheat the oven to 200C / 400F
- Place the dry ingredients for the Weetbix slice in a mixing bowl and stir to combine.4 Weet-bix biscuits, 1 cup / 140 grams self-raising flour, 1 cup desiccated coconut, ½ cup / 100 grams dark brown sugar
- Pour in the melted butter.⅔ cup / 160 grams butter
- Mix well until the mixture holds its shape when squeezed together. If the mixture is too dry, add a splash of milk.
- Transfer the mixture to a 9" x 9" lined pan and press it down evenly with your fingers (or use a flat-bottomed drinking glass).
- Bake in a preheated oven (200C / 400F) for 15 minutes. Remove from the oven and set aside to cool.
Marshmallow
- Soak the gelatine sheets in a dish of cold water (this is extra - not the water mentioned in the recipe, and it will be discarded when the gelatine has softened) and leave for 5 minutes to soften. If you are using powdered gelatine, you can skip this step.4 sheets Platinum strength gelatine
- While the gelatine is softening, heat the water and sugar (and powdered gelatine if using) slowly in a saucepan, stirring to allow the sugar (and gelatine) to melt.1 cup / 200 grams white sugar, ¾ cup water
- If using leaf gelatine, add the softened gelatine to the sugar mixture (discard the water used to soak it) and continue to stir over low heat until the gelatine has dissolved.In both cases (powdered or leaf gelatine), bring the mixture to a boil, then remove from the heat and allow to cool.
- Pour the cooled sugar/gelatine mixture into a mixing bowl.
- Beat the mixture with an electric hand mixer (or use a stand mixer) for 5 minutes, then add one-quarter of a teaspoon of red food colouring.3 drops food colouring
- Continue to beat until the mixture is thick and glossy. This will take anything up to 10 minutes longer.
- Pour the marshmallow over the Weet-bix biscuit base and leave in the refrigerator for 1 to 2 hours until set.
- Spread the marshmallow evenly over the top of the base and refrigerate for 1 to 2 hours until set. Optionally, sprinkle with extra coconut.Extra coconut to sprinkle
- I recommend storing this cake in the refrigerator.
Notes
- Make sure the Weet-bix is completely crushed.
- You can use plain or all purpose flour in place of self-raising flour, but add a teaspoon of baking powder to the flour.
- When mixing in the melted butter, stir with a spatula until well combined and then mix with your hands until the mixture holds its shape when pressed together. If the mixture is too dry to hold together, add one or two tablespoons of milk.
- When lining the baking dish, allow the baking paper to stick out at the edges to help you remove the biscuit base easily from the dish.
- As soon as the sugar/gelatine mixture has come to a boil and the sugar and gelatine have dissolved, remove it from the heat and allow it to cool.
- The marshmallow will whip up faster if it is completely cold before it is beaten. You could even allow it to chill in the refrigerator.
- Do not add too much food colouring (unless you are looking for a lurid pink colour). A few drops will be sufficient.
- Keep beating the marshmallow until it thickens and holds its shape. You may think it will never thicken, but persevere! It will thicken eventually.
- You will know the marshmallow is thick enough when you pour it onto the biscuit base. If it runs all over the biscuit base, it is too thin. It should hold its shape, and you should be able to spread it with a spatula.
- After an hour in the refrigerator, you should be able to press the marshmallow gently without your finger sinking into it.
- You will find that the marshmallow sticks to the sides of the pan and the baking parchment. Use a sharp knife to ease it away.
Nutrition
I am not a nutritionist. The nutrition information has been calculated using an on-line calculator, and is intended for information and guidance purposes only. If the nutrition information is important to you, you should consider calculating it yourself, using your preferred tool.
If you made this recipe and enjoyed it, I'd love it if you could give me a star rating in the comments below. And if you'd like to get in touch, you can email me at [email protected]. I'd love to hear from you. And don't forget to subscribe to my mailing list so you can grab yourself a copy of my FREE COOKBOOK!
If you'd like to continue browsing, just click on this link to all my recipes.

Did you make this recipe? Let me know!