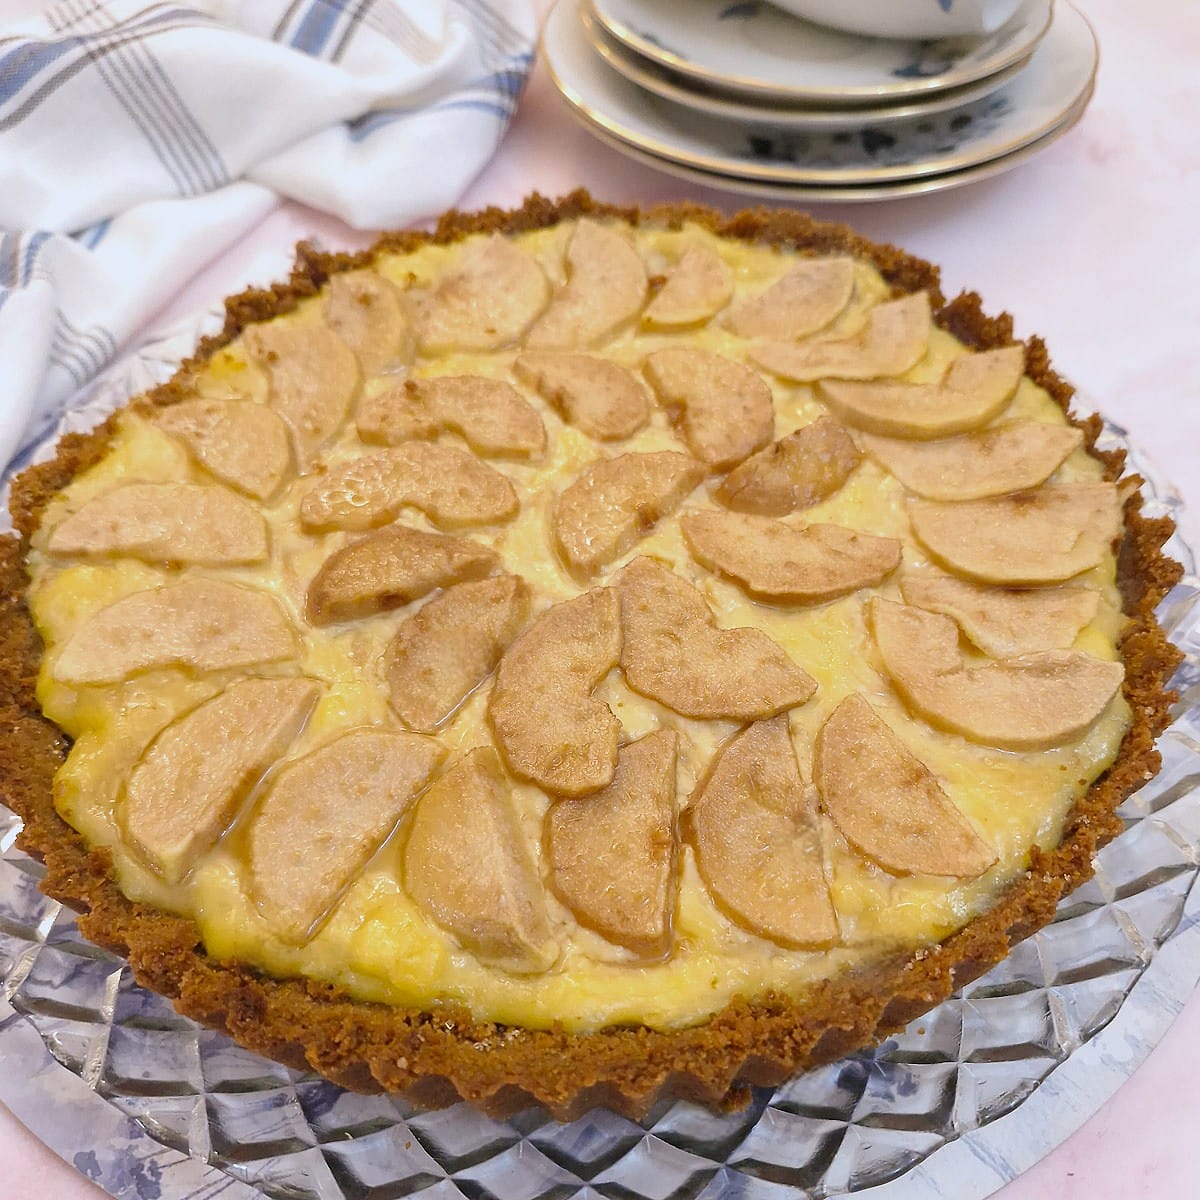
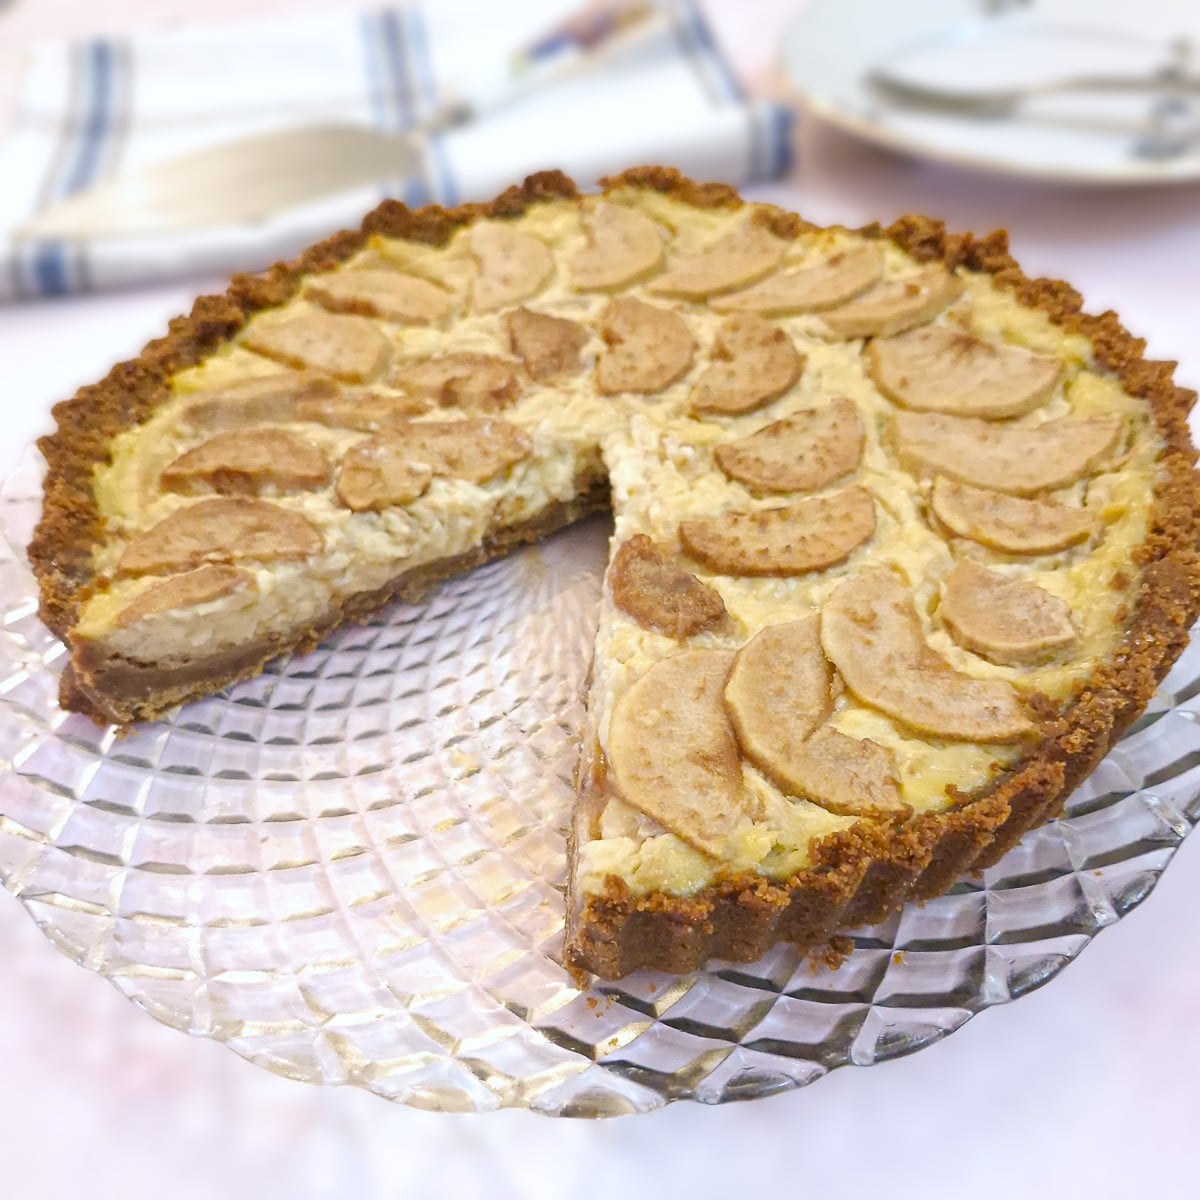
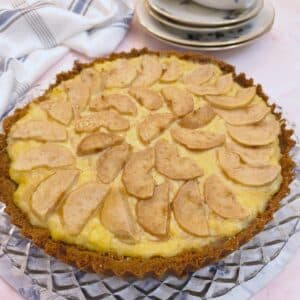
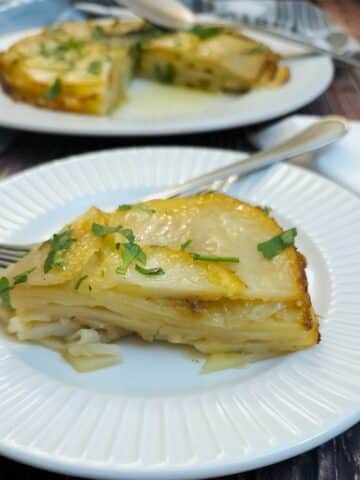
This baked pear and ginger custard tart is one of those desserts that everyone loves. With a crispy butter biscuit crust, a sweet pear and custard filling and a topping of baked pear slices, this amazing tart is equally at home served either as a delicious after-dinner dessert or on the afternoon tea table.
If you've got a few ripe pears and a packet of ginger biscuits and fancy something just a little bit different, this baked pear and ginger custard tart is just the thing. It's creamy, gently spiced and fresh - the sort of pudding that has everyone going back for seconds!
The crust is made by combining crushed ginger biscuits and melted butter, so there's no messing about with making pastry. It's baked briefly to give it a lovely crunch and to stop the biscuits from going soggy once the filling goes in. If you haven't tried making a ginger biscuit crust tart before, I heartily recommend you try it!
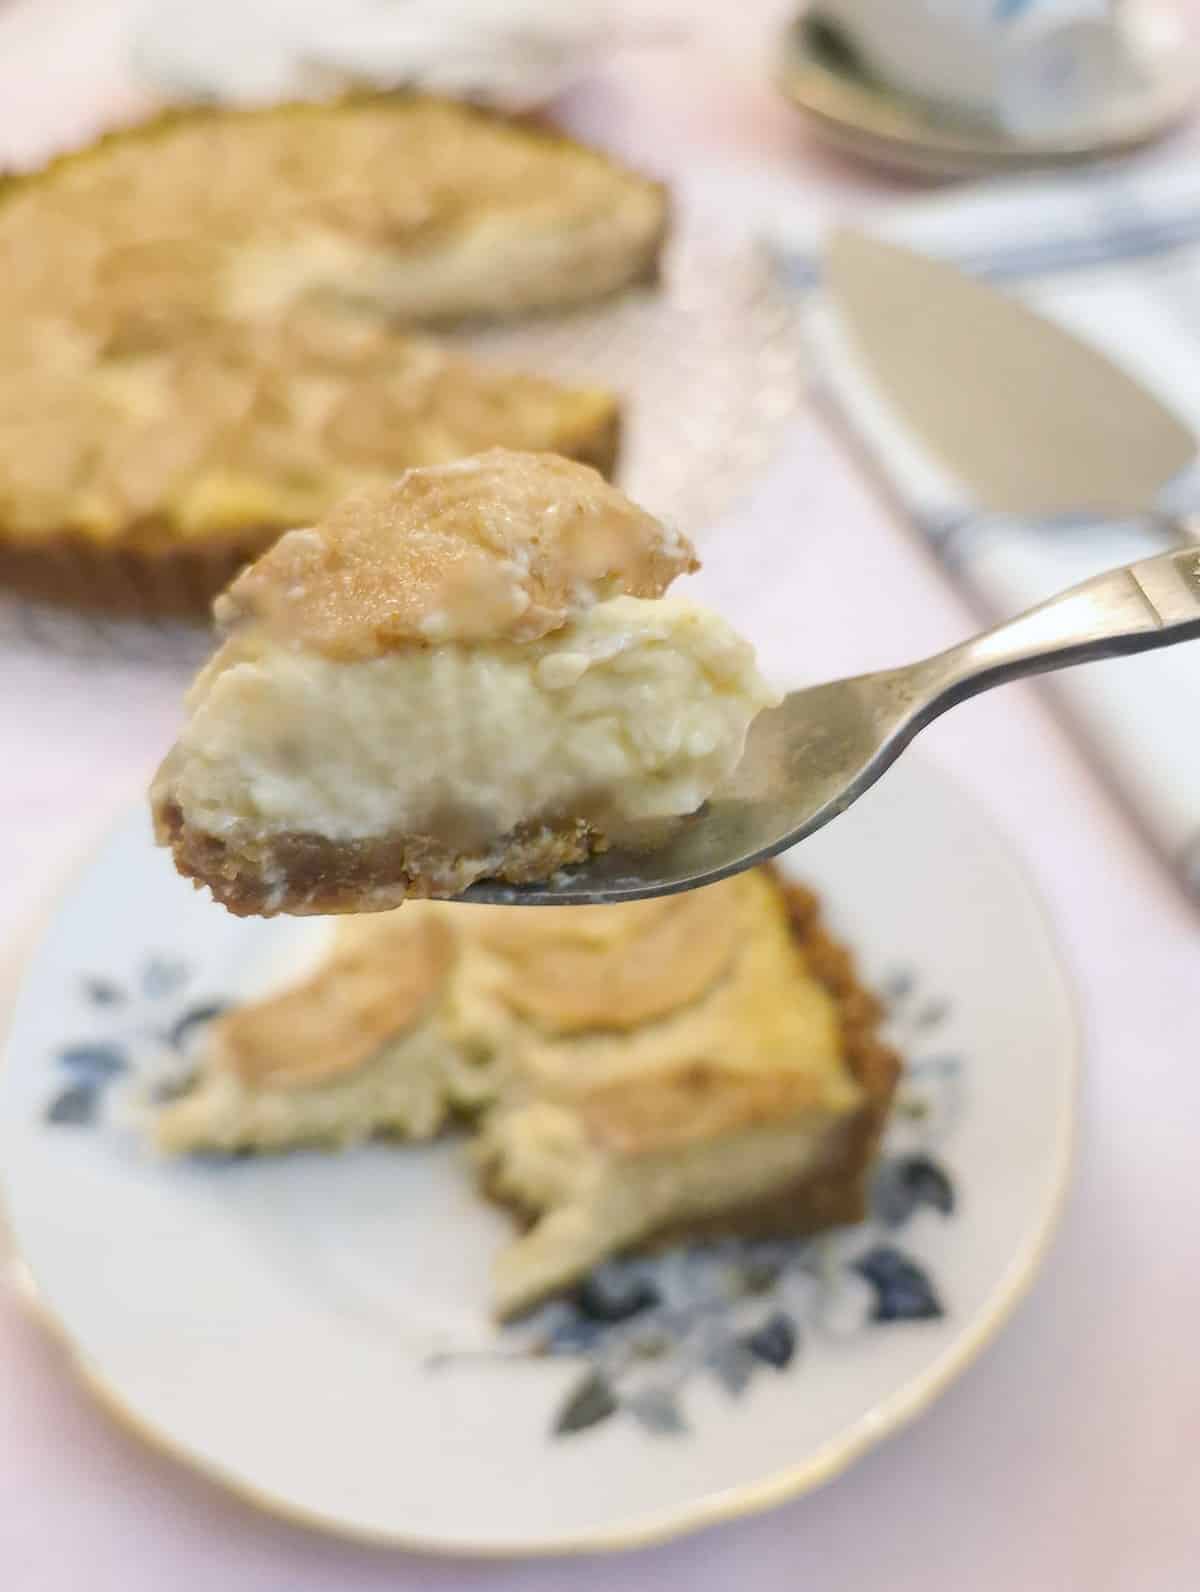
The filling is a light custard, similar to creme patissiere, combined with grated pears, so it stays soft and full of flavour without being heavy. It's topped with thin slices of pears and a sprinkle of demerara sugar, which helps them brown nicely in the oven.
Pears and ginger are, to my mind, a match made in heaven. The warmth of the ginger works so well with the freshness of the pears - one mouthful and you'll understand why this pear and ginger dessert doesn't last very long!
I got the idea for this pear and ginger custard tart from my Canterbury apple tart, which uses apples and sweetcrust pastry rather than crushed biscuits. Much as I love that version, I think this pear and ginger tart might just be my new favourite!
Jump to:
Why you should make this easy autumn dessert
There are so many reasons why you should try this easy pear tart recipe:
- ⭐ Firstly, because it's Autumn! There are a lot of pears around right now - especially if you are lucky enough to know someone with a pear tree!
- ⭐ Simple to make. This is a really easy dessert to make - a biscuit crumb base (no pastry) and a foolproof, no-fail egg-custard.
- ⭐ Stays fresh for ages. Provided you keep it in a covered container (or cover it with tin foil) in the refrigerator, this creamy pear tart will stay fresh for up to 5 days. (But I don't think it will last that long)!
- ⭐ Make-ahead friendly. I think the flavours improve on standing, so this is the ideal dessert to make a day ahead.
- ⭐ Perfect for any occasion. Serve it as a dessert-with-a-difference after supper, enjoy a slice at tea-time, or even impress your colleagues and take it into work on 'bring-a-cake' day.
Recipe information
- ⌚ Prep time - 25 minutes. Just a few minutes to make the biscuit base and get it into the oven, and while the base is baking, you can make the custard.
- ⌛ Cooking time - 20 minutes.
- 🍚 Yield - 1 x 9" round tart.
Ingredients for pear and ginger custard tart
**You can find the exact ingredient quantities on the printable recipe card at the end of this post**
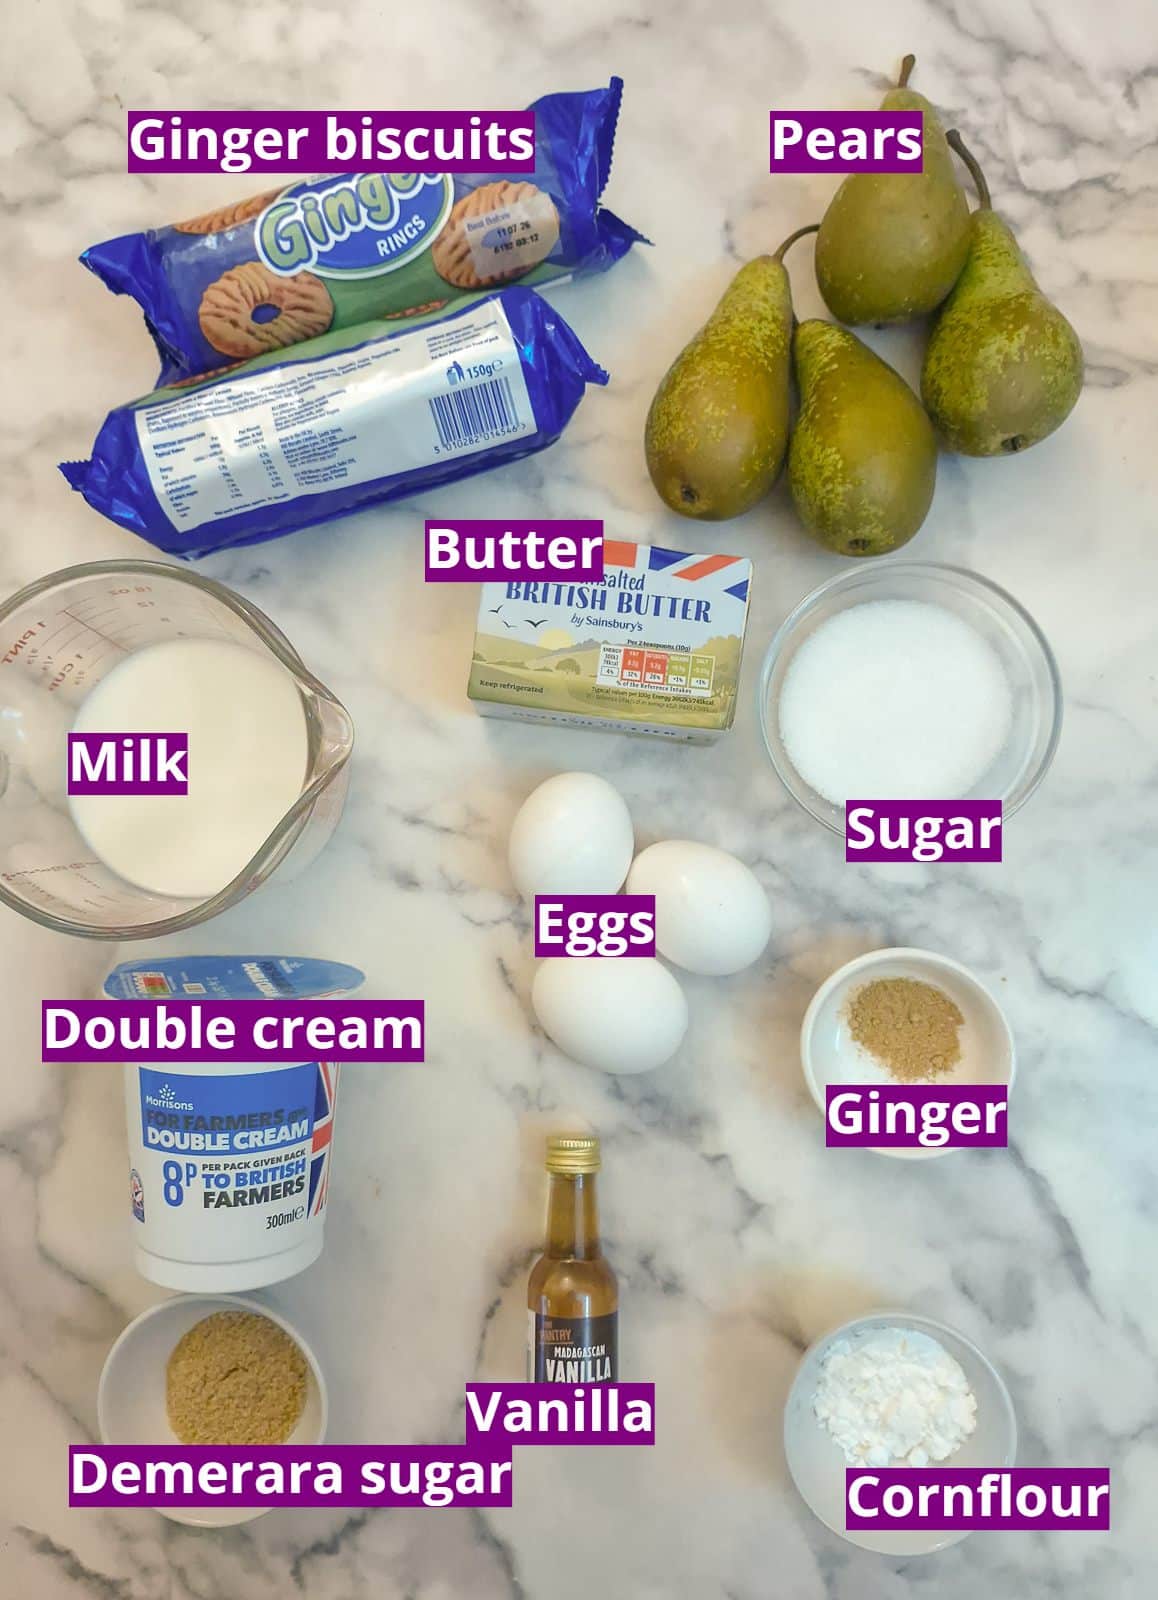
- Ginger biscuits. The type of biscuits you use is entirely up to you. I used ginger-flavoured shortbread biscuits, but ginger nuts or ginger snaps will work just as well. The biscuits will be crushed into crumbs.
- Butter. The butter will be mixed with the crushed ginger biscuits and used to form the crust of the tart.
- Pears. Use firm, ripe pears. They should be peeled and cored. 2 of the pears will be grated and mixed with the custard, the remaining pears will be sliced and arranged on top of the tart before it is baked.
- Eggs. These are large eggs, weighing about 2 ounces (or 56 grams) each, and are used to make the custard. You will need 2 whole eggs and one egg yolk.
- Sugar. Used to sweeten the custard. Caster sugar is preferable because it dissolves easily, but granulated sugar wiill be fine.
- Double (or heavy) whipping cream. Used for the custard. Double cream ensures the custard will set firmly. You can use single cream instead, but you should add an extra teaspoon of cornflour to ensure the custard sets firmly.
- Milk. Used for the custard.
- Cornflour or cornstarch. Helps thicken the custard.
- Ground ginger. This is optional, but I like to add a little ground ginger to the custard to enhance the flavour of the ginger crust.
- Vanilla. Optional, but adds extra flavour.
- Demerara sugar. This is sprinkled on top of the pears to help them brown in the oven.
Instructions
Make the ginger crust
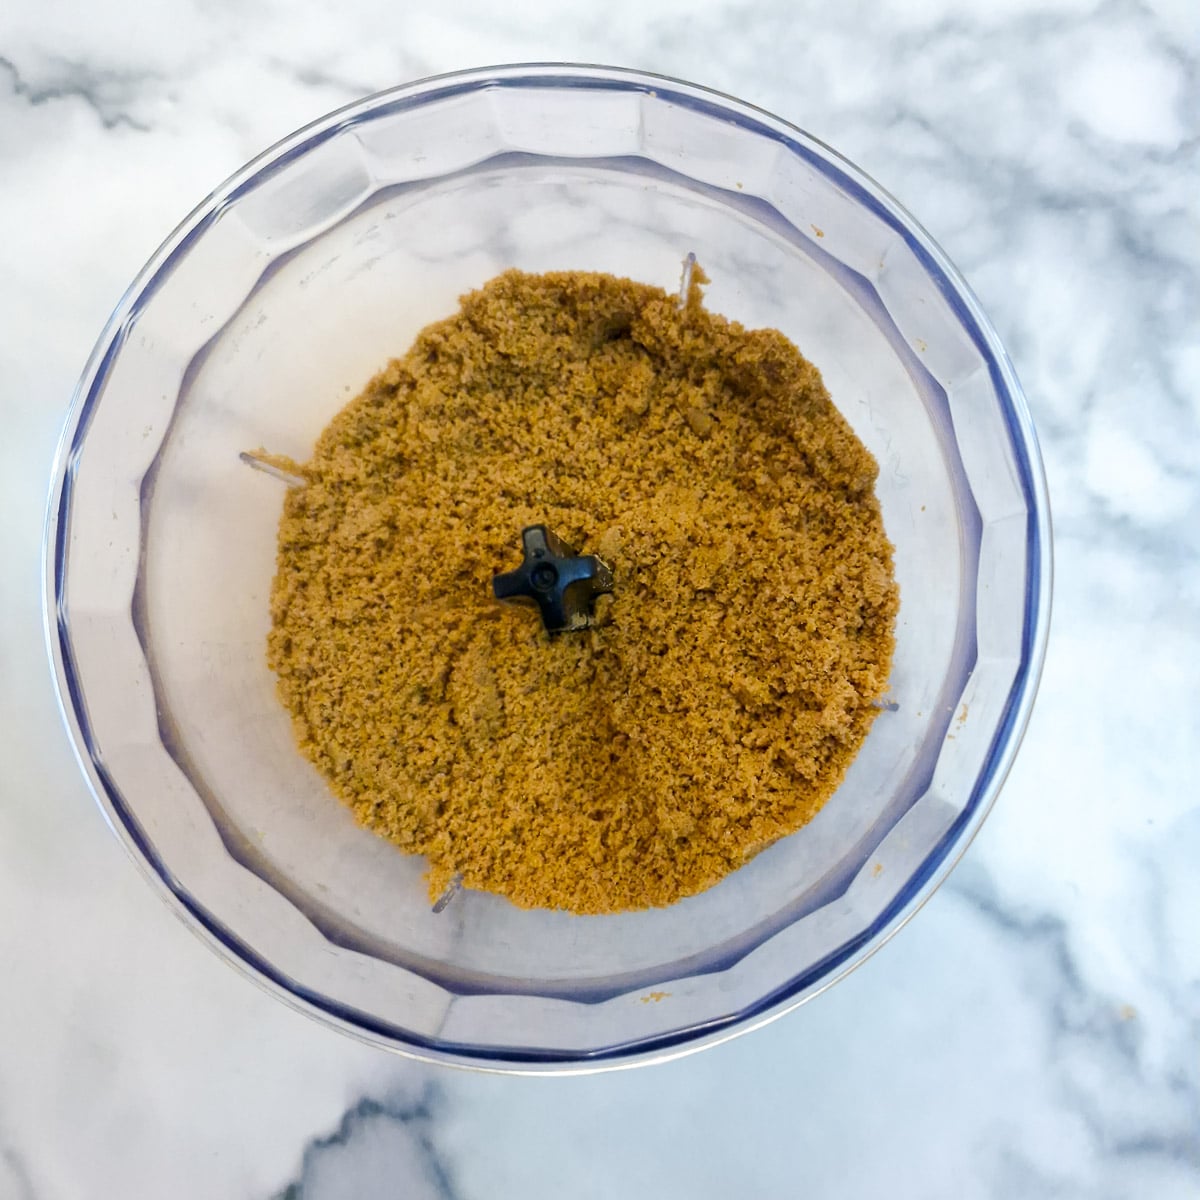
Step 1: Place the biscuits in a food processor and pulse until they have turned into fine crumbs.
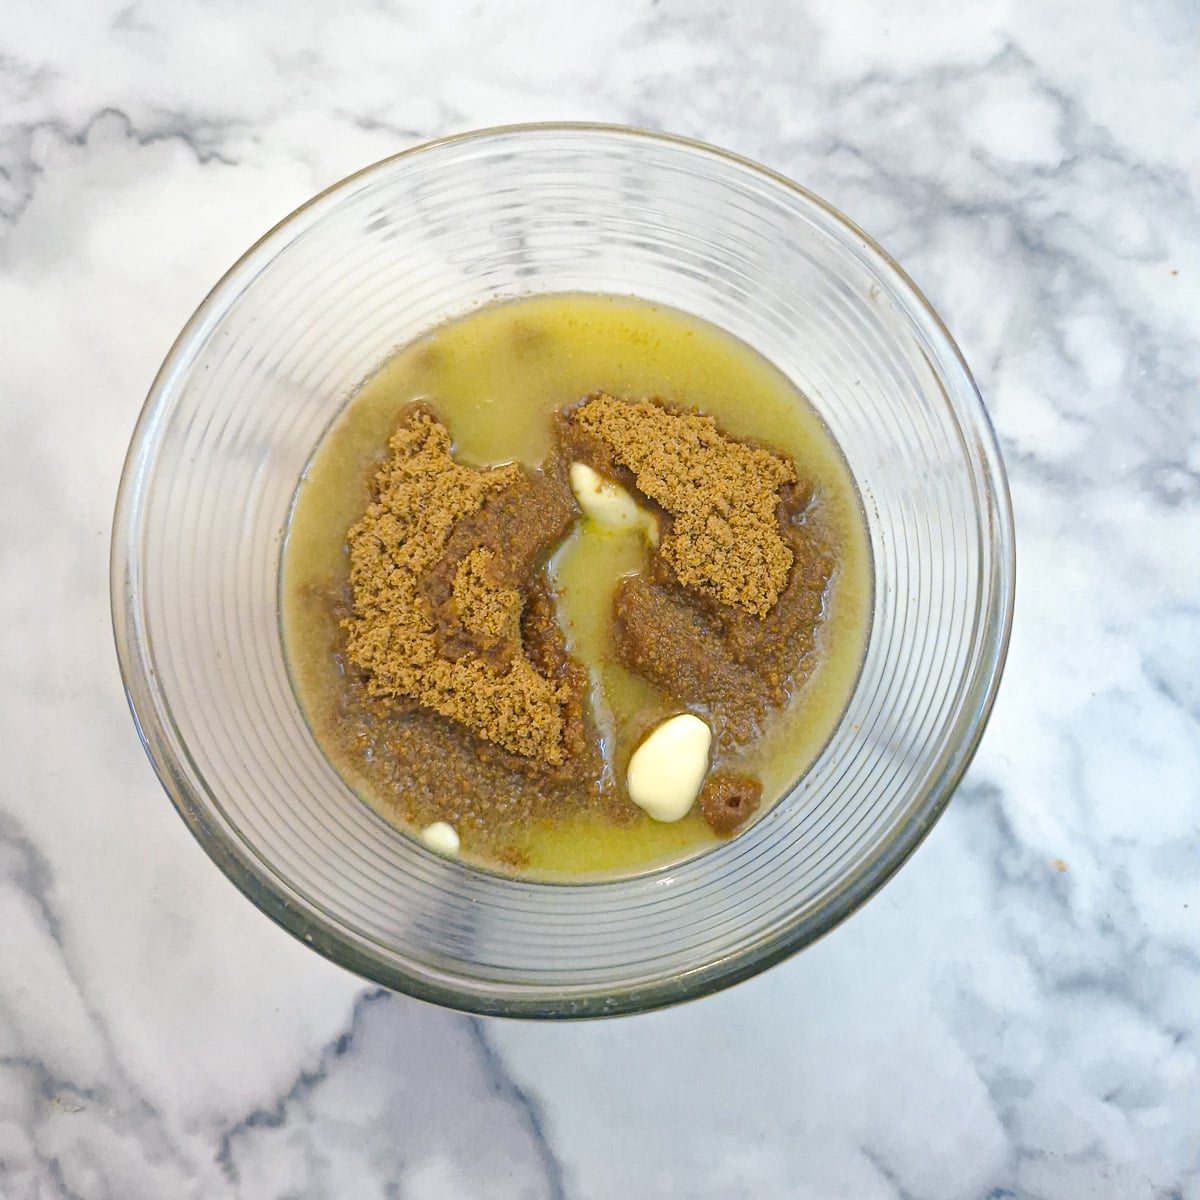
Step 2: Tip the biscuit crumbs into a bowl and combine with the melted butter.

Step 3: Press the biscuit crumbs evenly onto the base and sides of a 9-inch (23-cm) loose-bottomed tart tin.
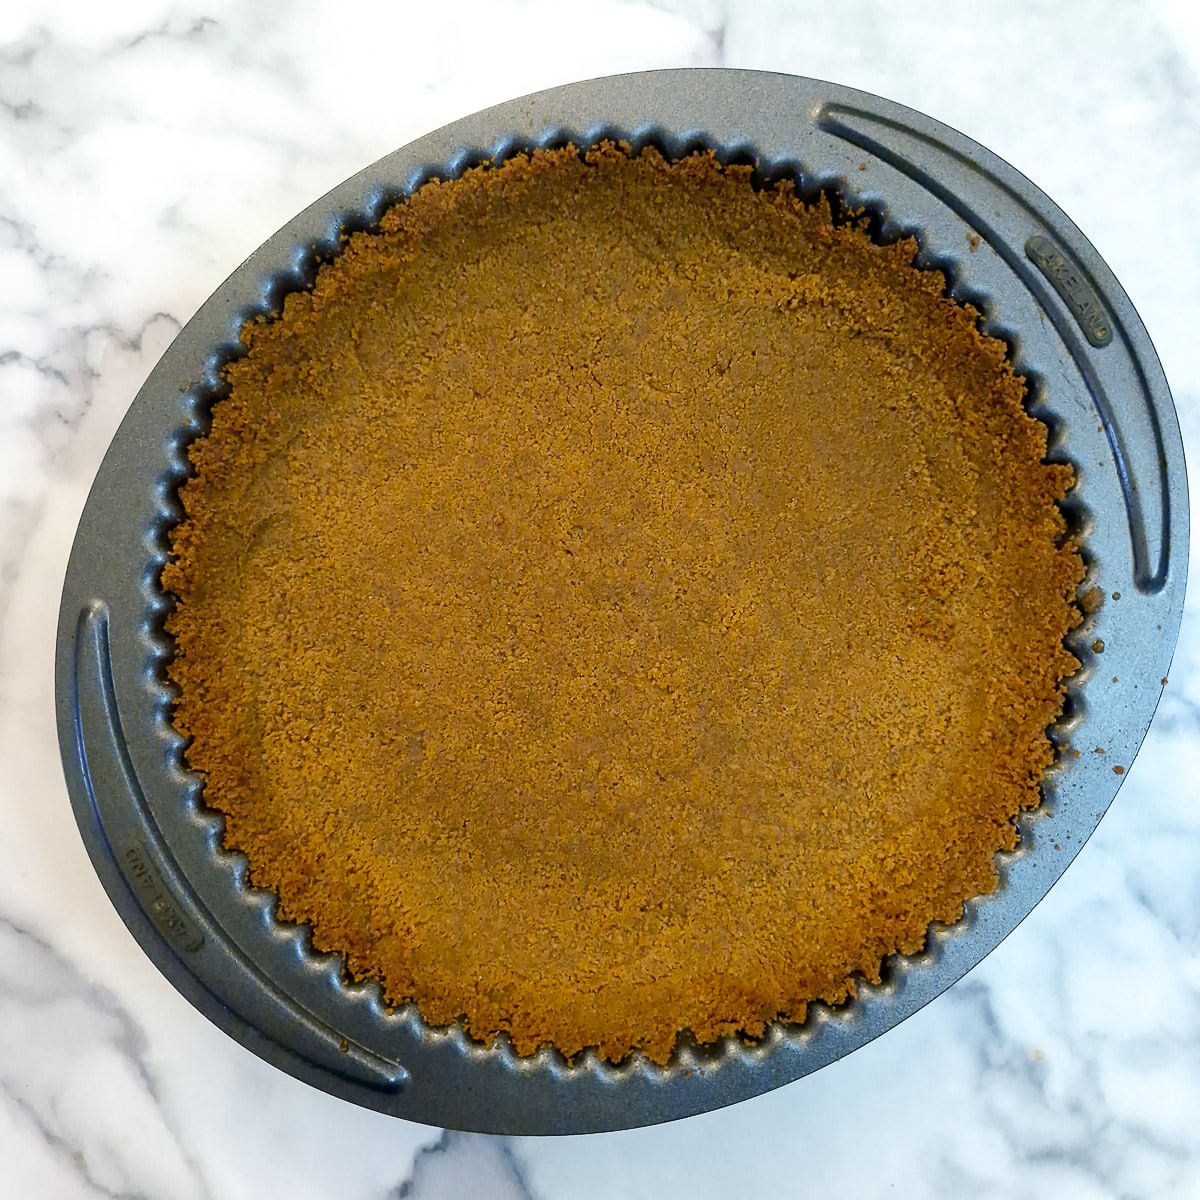
Step 4: Bake in a preheated oven (180C / 360F) for 10 minutes until firm. Remove from the oven and set aside to cool while you prepare the filling
Prepare the filling
Peel and grate 2 pears and set them aside. Do this just before making the custard so they don't have to stand too long and turn brown.
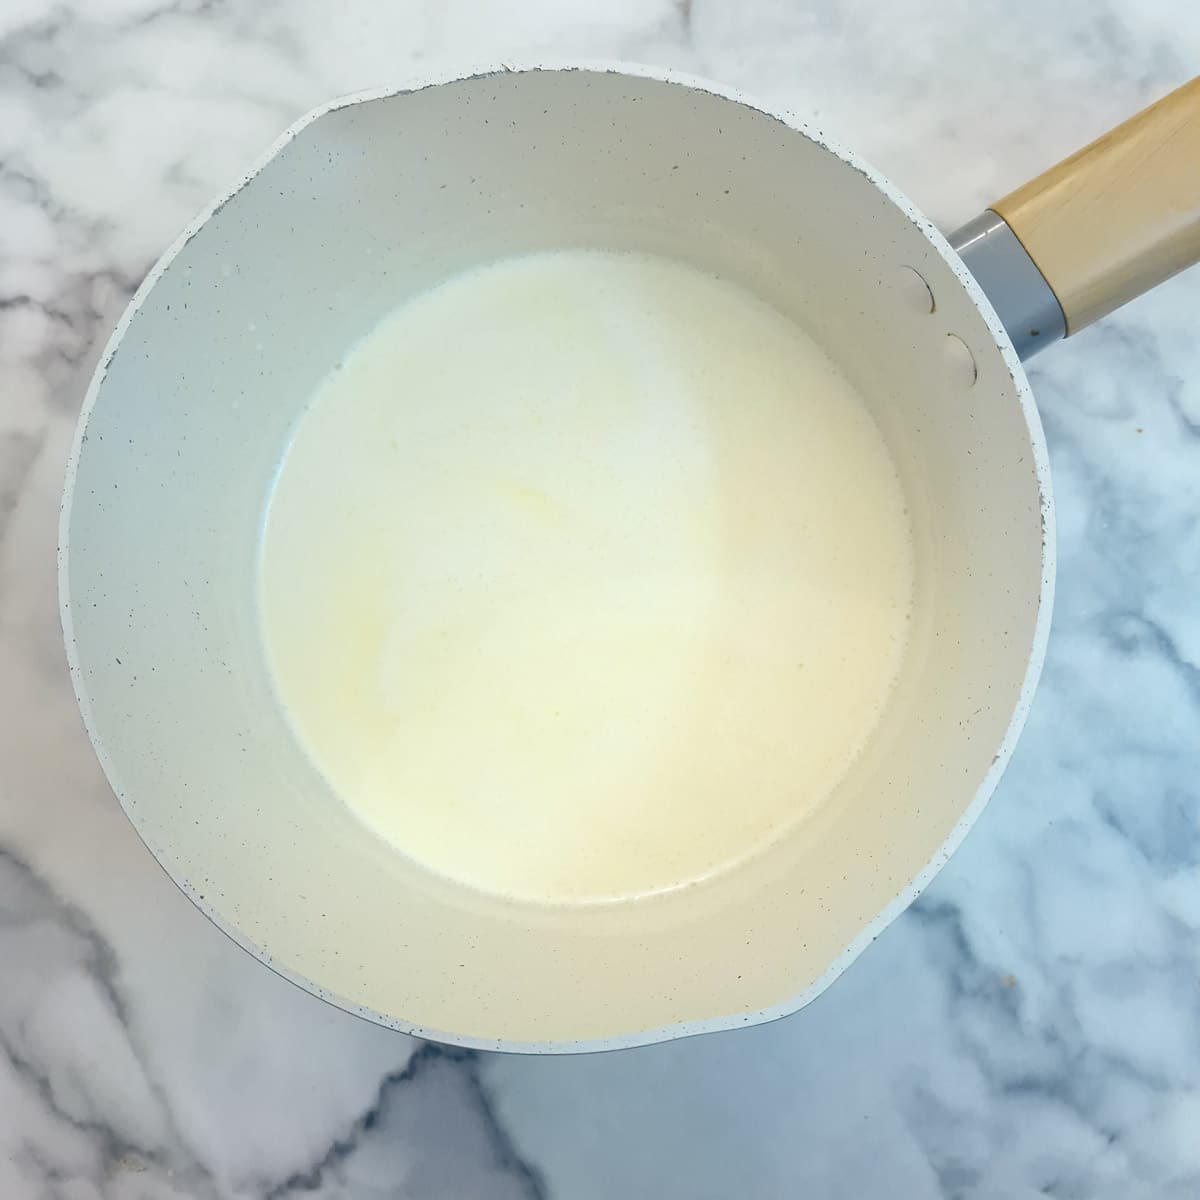
Step 5: Heat the cream and milk in a saucepan until it is almost boiling (don't bring to a full boil).
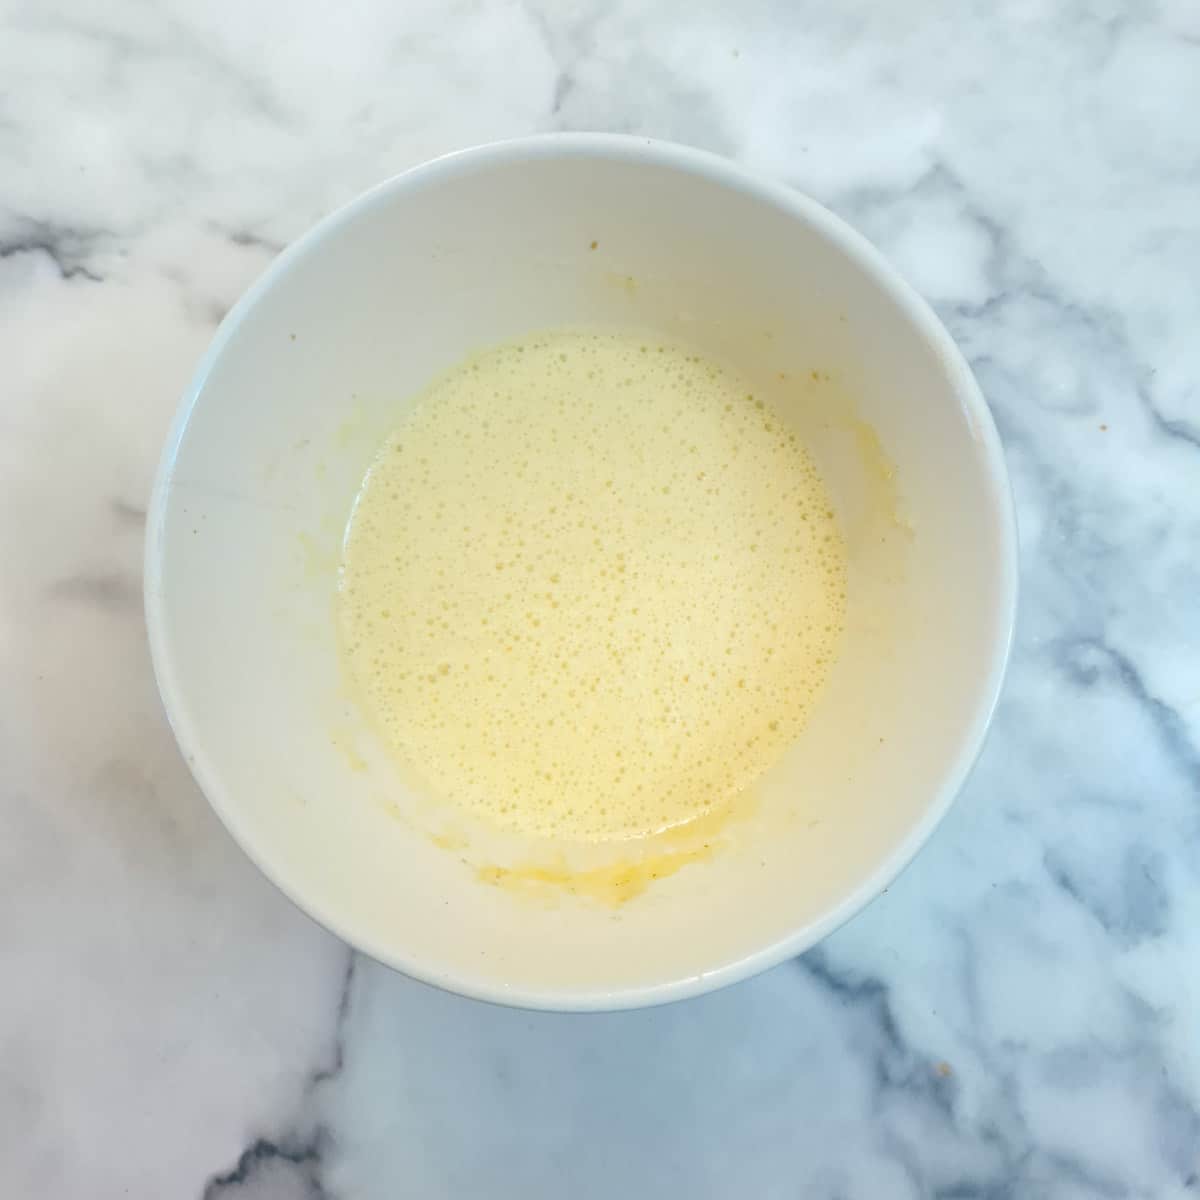
Step 6: While the milk is heating, whisk together the eggs, sugar, cornflour, vanilla and ginger.
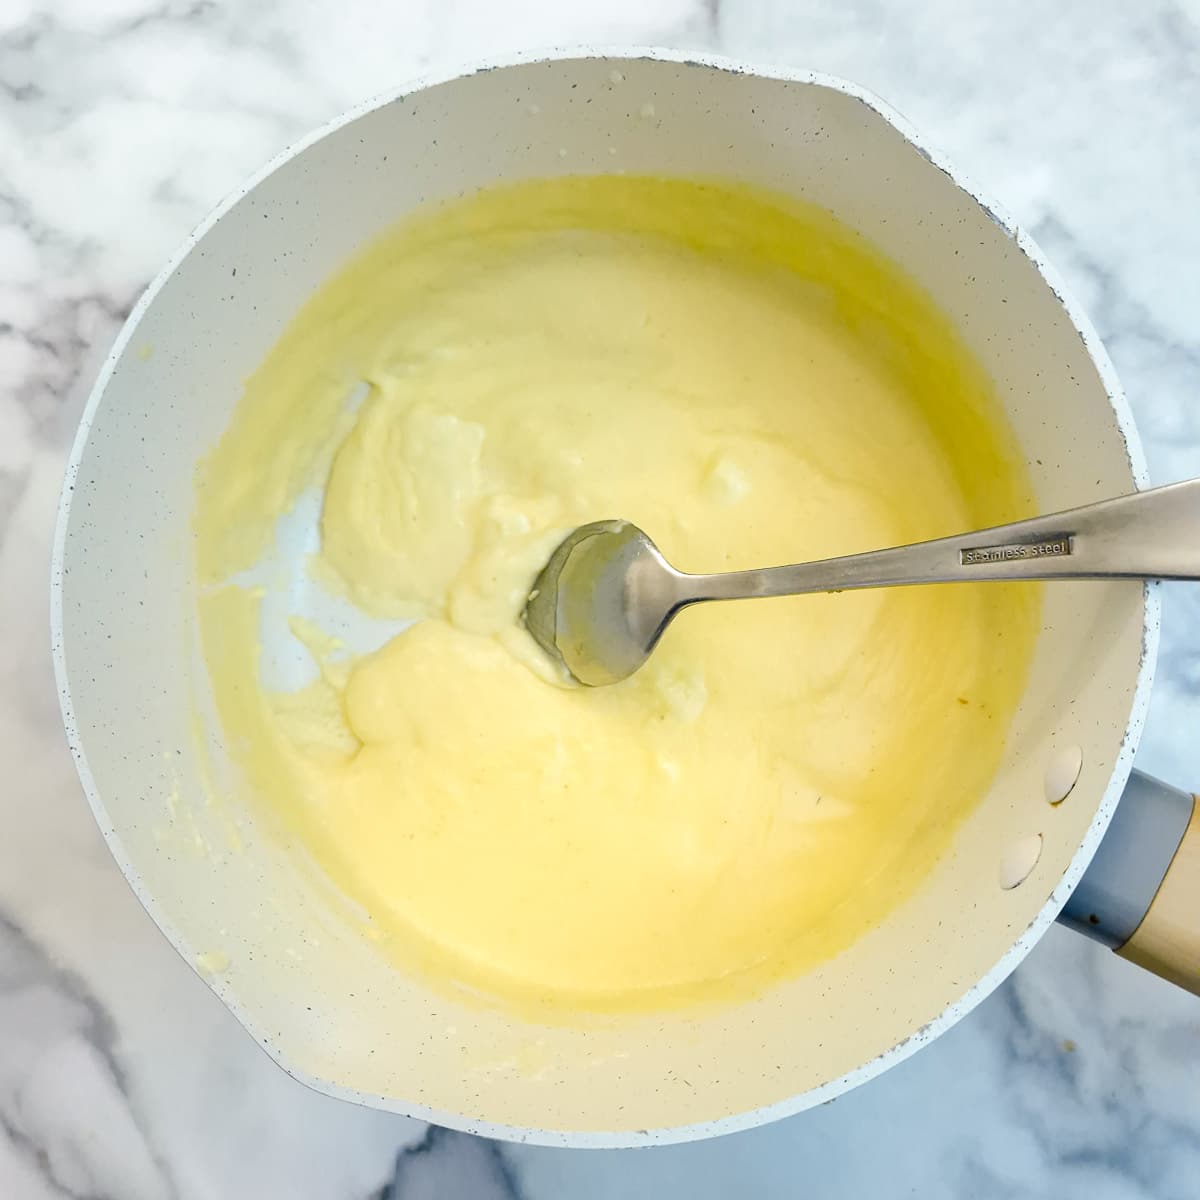
Step 7: Pour half a cup of the hot milk into the eggs, whisking continuously, then whisk the tempered egg mixture back into the remaining milk in the saucepan. Continue to stir over low to medium heat for 2 to 3 minutes until the custard thickens.
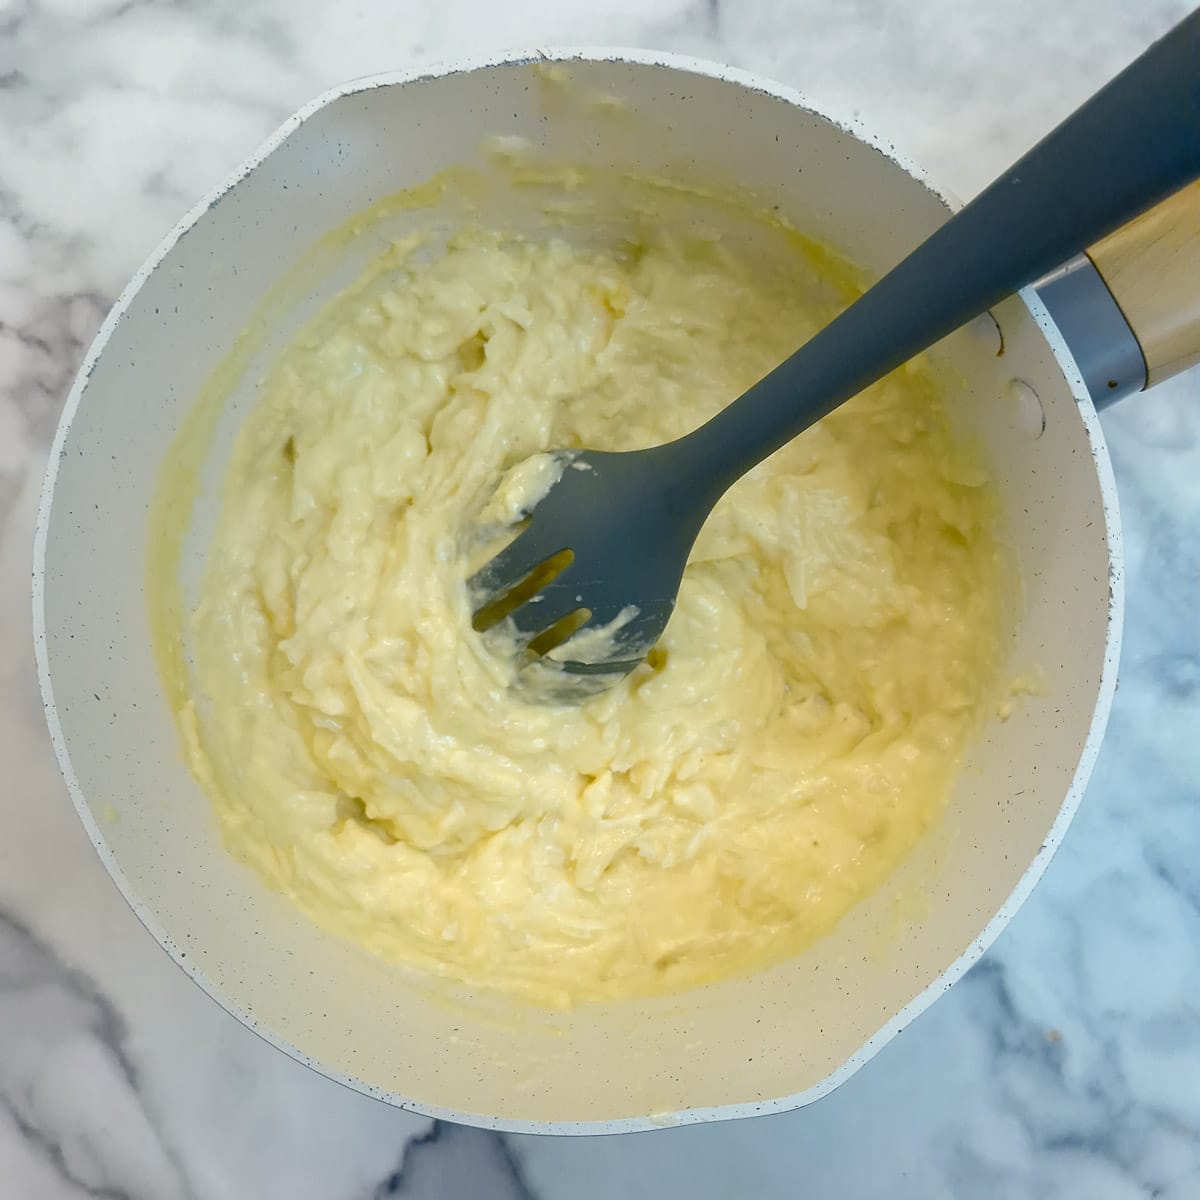
Step 8: Finally, stir in the grated pears.
Assemble and bake
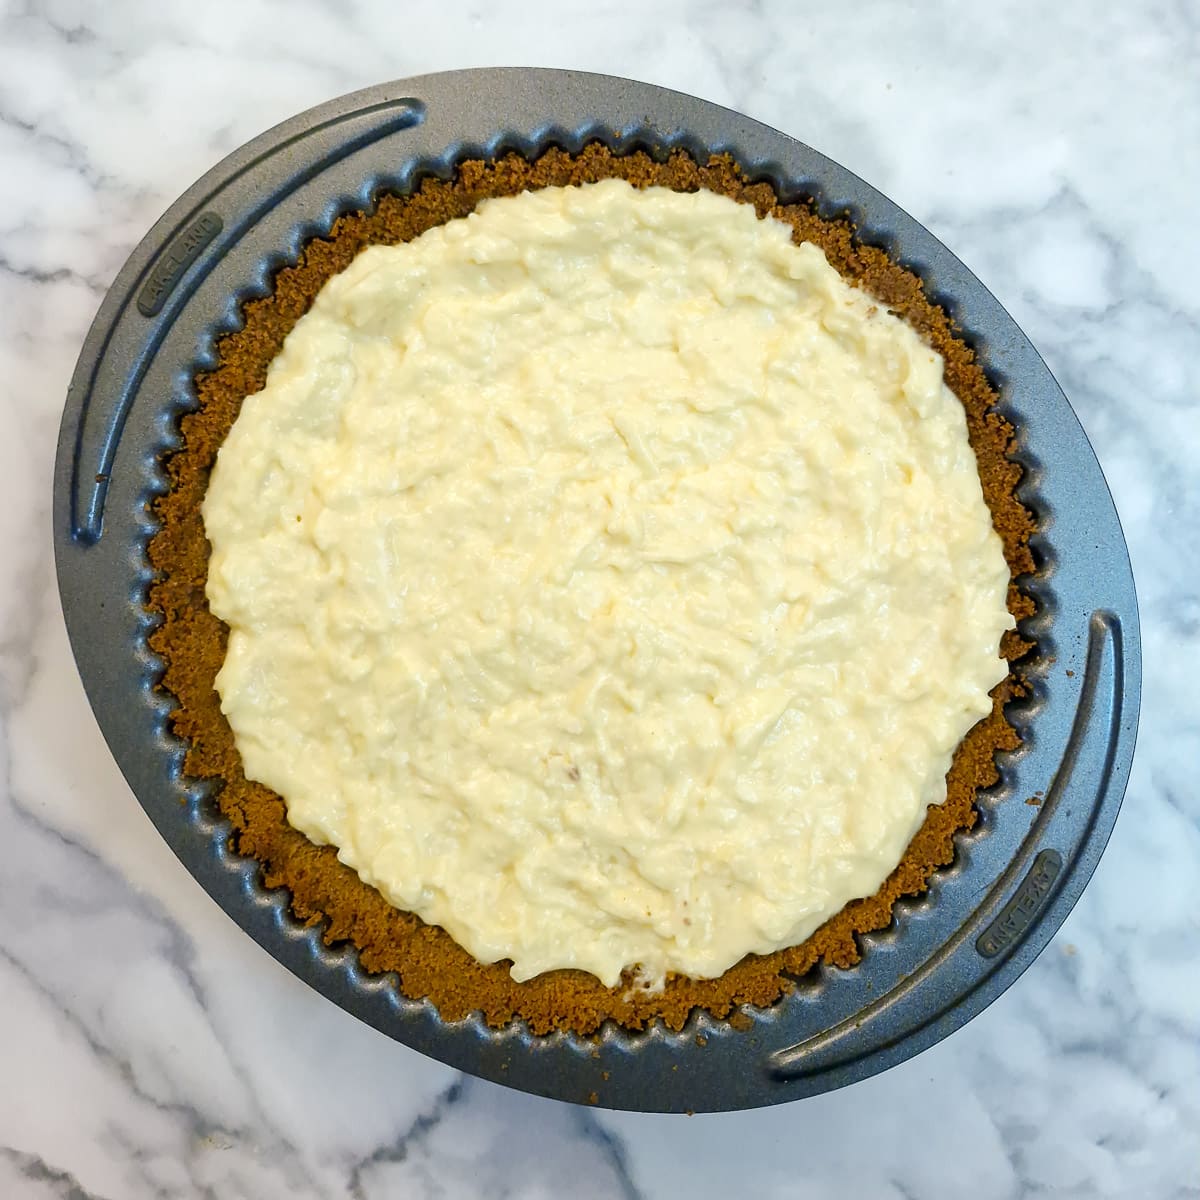
Step 9: Transfer the pear and custard mixture to your prepared pie crust.
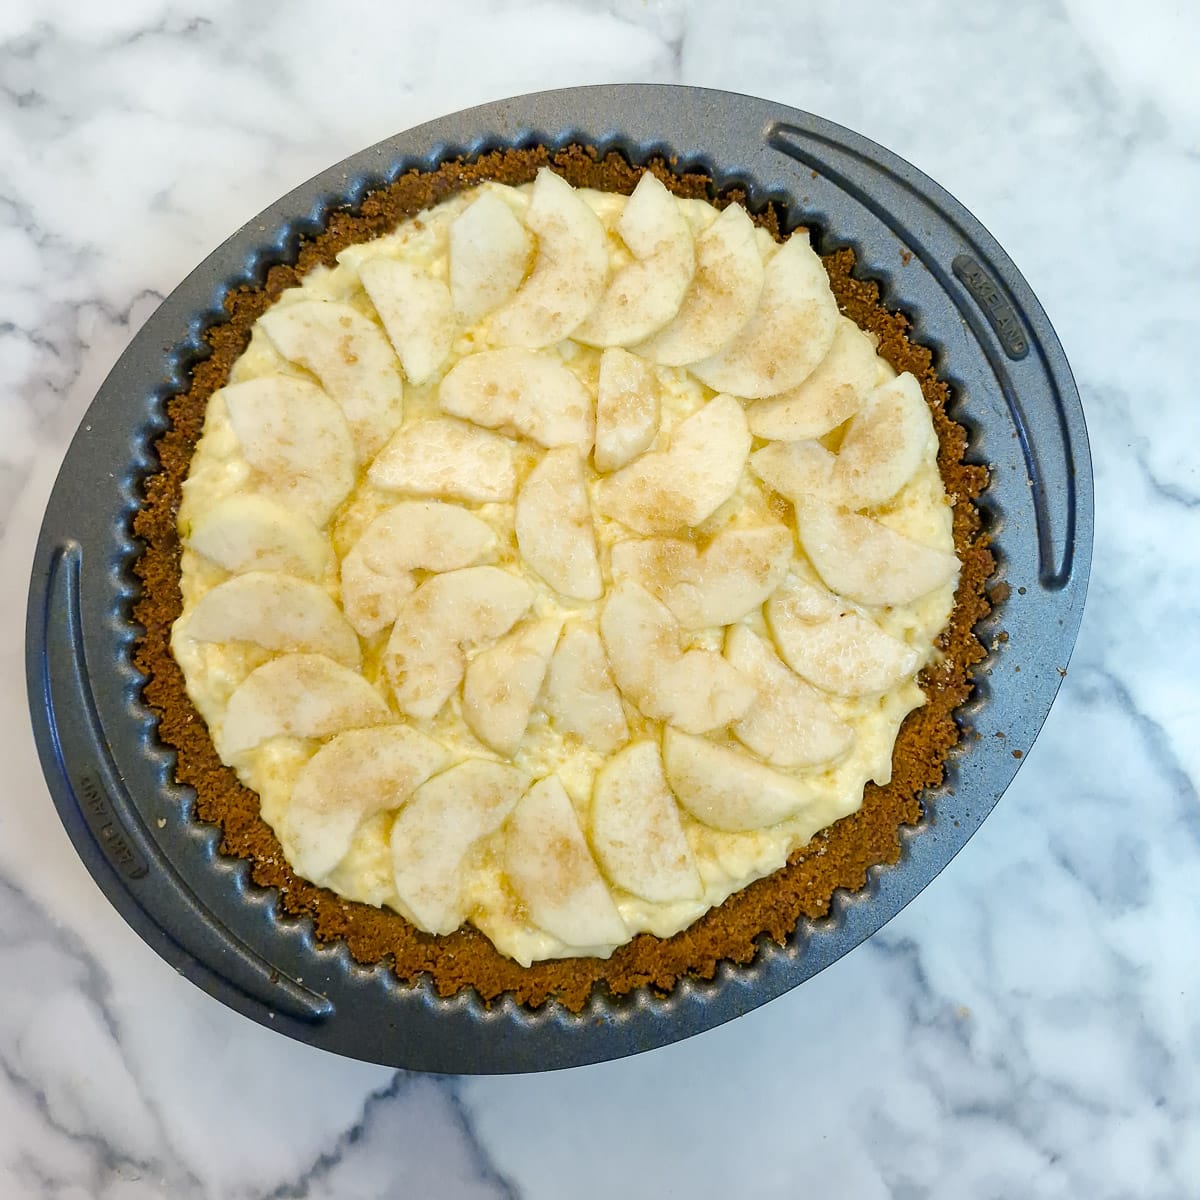
Step 10: Peel and slice one or two pears and arrange them on top of the custard. Sprinkle the pears lightly with demerara sugar to encourage them to brown.
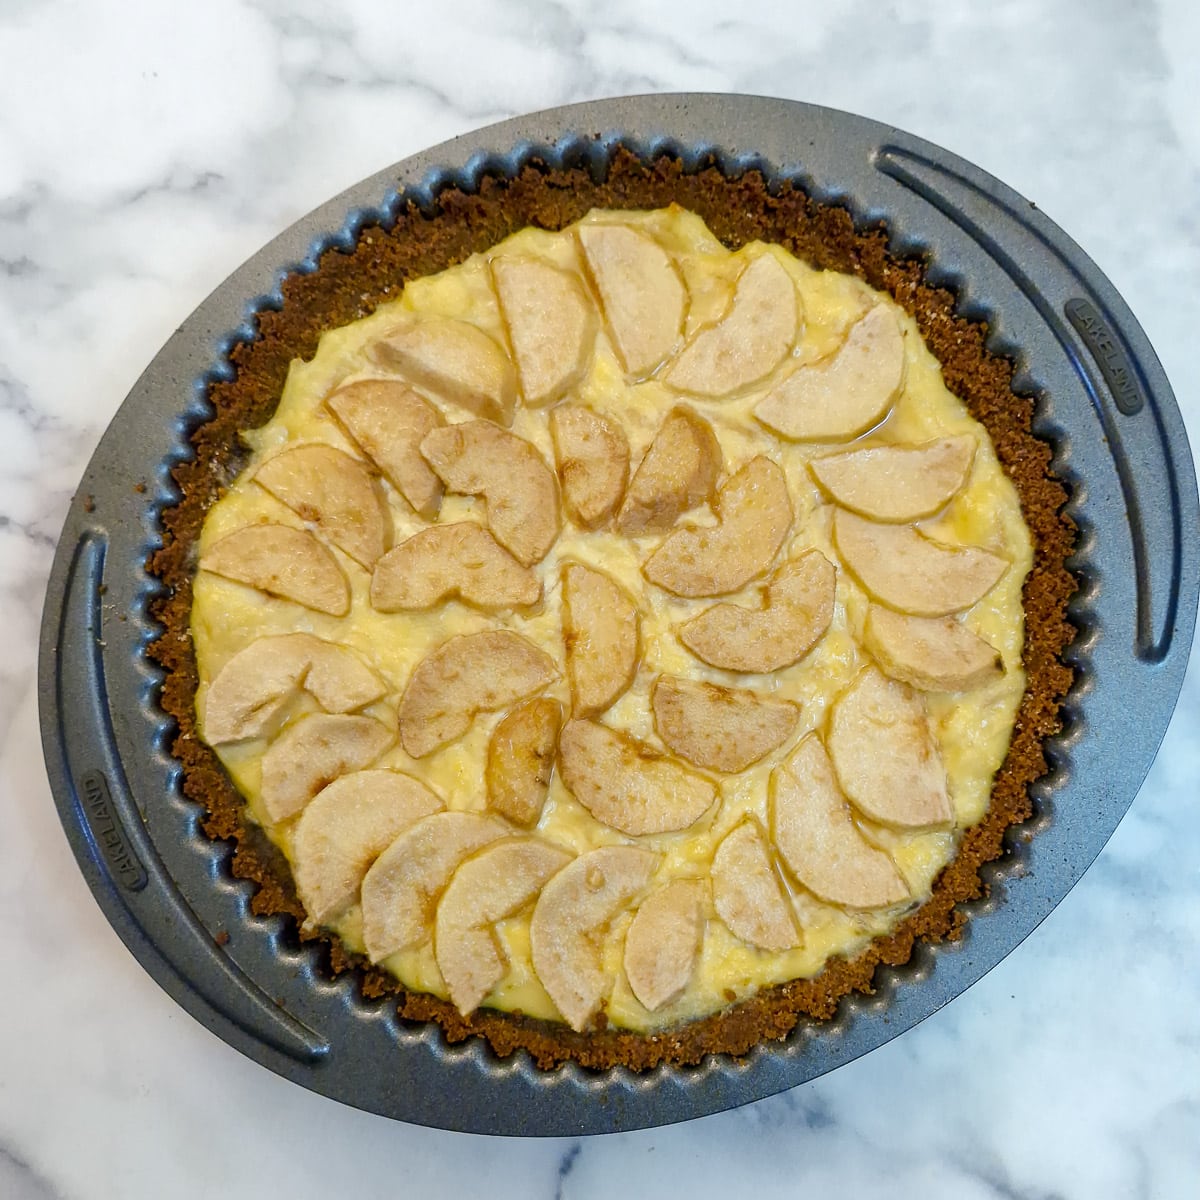
Step 11: Bake at 180C / 360F for 25 minutes until the custard is fully set and the pears on top have browned and softened.
- Remove the pear tart from the oven and allow it to cool in the tin.
- Once cool, refrigerate for at least 1 hour to give the custard time to firm up. This will make slicing easier.
- Serve chilled or at room temperature.
Tips for a successful outcome
Here are my top tips to ensure your creamy pear and ginger tart always turns out perfectly:
- Make sure the biscuits are completely crushed. This will make it easier to combine them with the melted butter.
- Use the back of a tablespoon to help you press the crumbs into the baking tin.
- A loose-bottomed pan will make it easier to get the tart out of the baking tin.
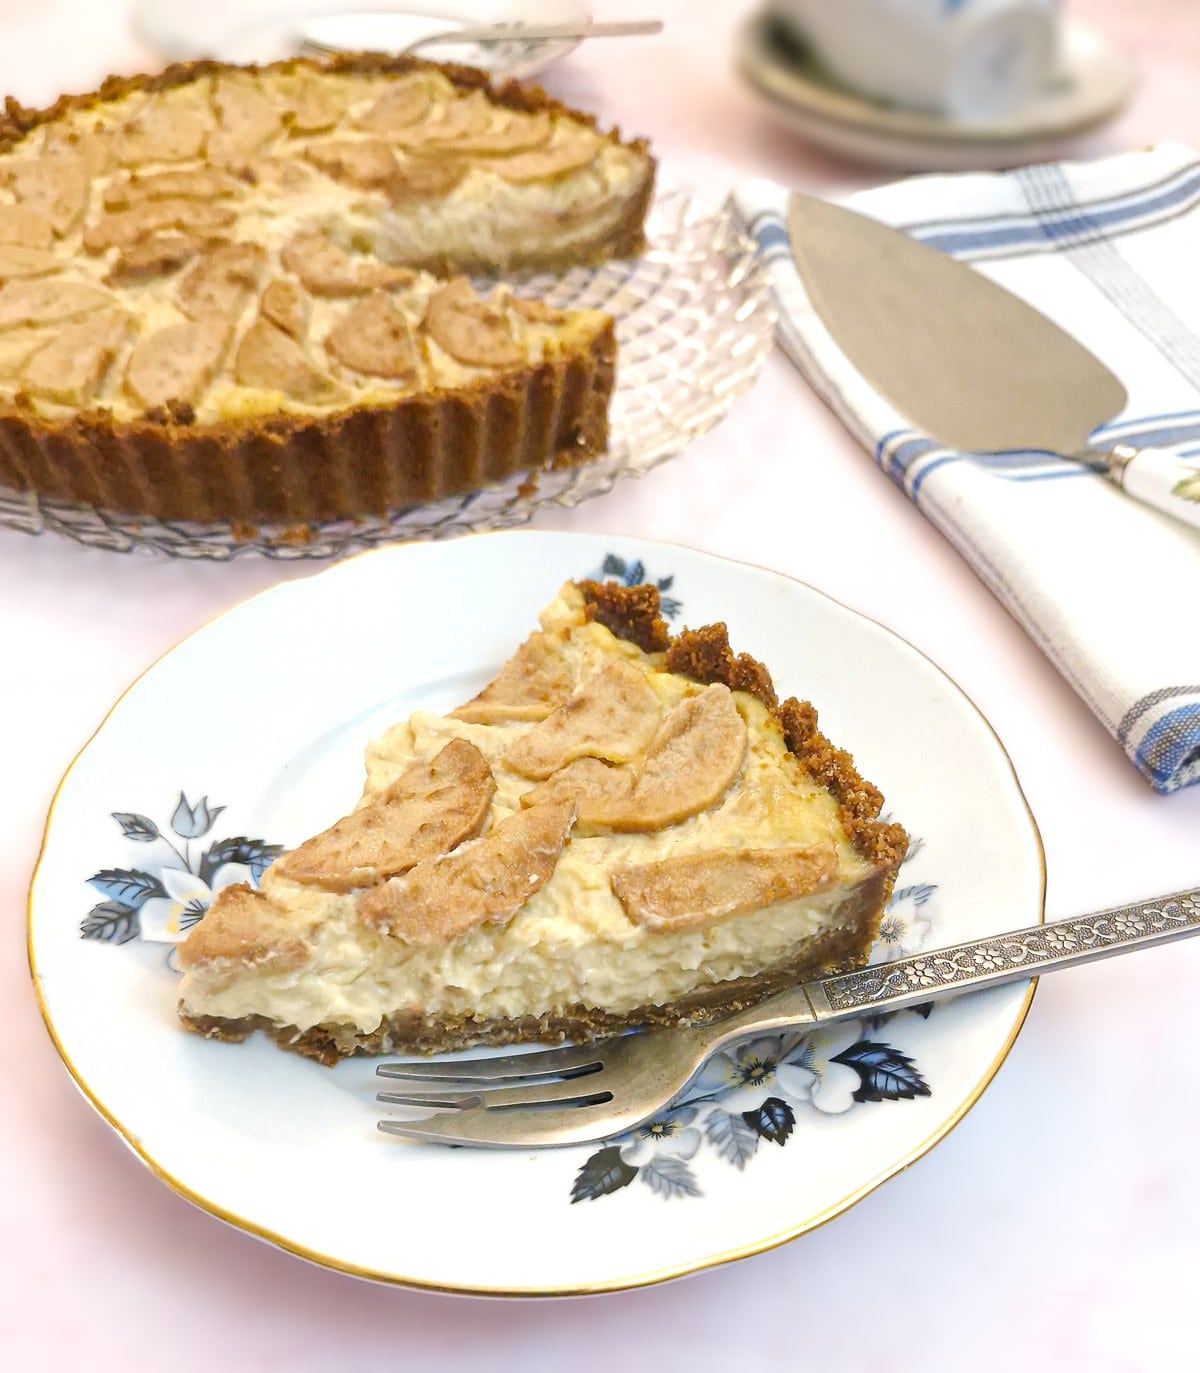
- The edges of the tart will be quite fragile - a serrated knife will help you cut clean slices.
- Don't prepare the pears too far in advance, or they will turn brown. You could peel the pears and leave them in a bowl of water with a tablespoon of lemon juice to prevent them from browning, but grate and slice the pears just before you need them.
- To prevent the custard from curdling, it is advisable to temper the eggs with a little hot milk, then stir the tempered eggs back into the remaining hot milk in the saucepan.
- The custard should thicken on the stove so that it leaves a distinct trail when you draw a spoon through it. This is the right time to add the grated pears. The custard will firm up more as it bakes in the oven.
Variations
Here are a few ways in which you could vary the recipe:
- Pear and almond tart. Stir 1 or 2 tablespoons of ground almonds into the custard filling and sprinkle a few flaked almonds on top before baking. The ground almonds will add a delicious nutty flavour.
- Pear and lemon tart. Add the finely grated zest of one lemon to the custard to add a bright citrus flavour.
- Spiced pear tart. Add a pinch of cinnamon or mixed spice to the custard along with the ginger.
- Use shortcrust pastry. Instead of the crushed ginger biscuit base, use shortcrust pastry instead - it works just as well. Make sure you blind-bake the pastry crust to prevent a soggy bottom!
Equipment
These are the main items of equipment you will need to make this baked pear and ginger custard tart:
- Food processor. This makes short work of turning the biscuits into crumbs. If you don't have one, place the biscuits in a sturdy plastic bag and use a rolling pin to crush them.
- Loose-bottomed tart tin. It's much easier to get the pear custard tart out of the tin if your baking tin has a loose bottom.
- Saucepan. For making the custard.
Serving and storage
- Serve warm or cold. This pear and custard tart tastes lovely while still slightly warm, but it is easier to slice once it is cool or chilled.
- With cream or ice cream. A spoonful of whipped cream or ice cream turns this tart into an amazing dessert.
- Storage. Keep covered in the refrigerator for 4 to 5 days.
- Freezing. This pear custard tart is unfortunately not suitable for freezing.
- Make-ahead. You can make this tart a day ahead. The flavours actually improve overnight as the pear and ginger flavours settle together.
Top Tip
If you use a loose-bottomed tart tin, place it on a baking tray before baking so it's easier to lift it in and out of the oven.
FAQ
Technically, yes, you can. However, there are a few things to bear in mind.
- Fresh pears are preferable to use - I haven't tried this recipe using canned pears, so I can't guarantee the result.
- Canned pears are much softer than fresh pears and will contain a lot of liquid. Drain the canned pears thoroughly before using.
- To ensure the custard thickens properly, add an extra teaspoon of cornflour.
- Try to get pears which have been canned in natural juice rather than syrup or the tart may be too sweet.
Make the base of the tart with Graham crackers, digestive biscuits or coconut biscuits. Leave out the ground ginger in the custard, or substitute it with ground cinnamon, mixed spice or a pinch of nutmeg.
Don't worry - the custard hasn't curdled! The lumpy-looking texture of the custard is due to the grated pears, and it's perfectly normal.
Save for later
If you would like to try this pear and ginger custard tart, why not save the recipe to one of your Pinterest boards so you can find it easily? Just click the image below.
Alternatively, you can save the recipe by clicking on the floating heart icon on the right-hand side of the screen.
Related recipes
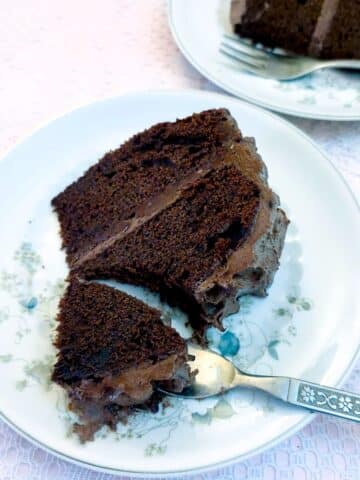
Visit my cakes, biscuits and dessert recipes page for other tasty bakes. Here are a few you might enjoy:

📋The recipe
Baked pear and ginger custard tart
(Click the stars to rate this recipe)
Equipment
- Food processor optional - crush the biscuits in a plastic bag with a rolling pin
- Loose-bottomed tart tin 9-inch or 23-cm diameter
- Saucepan
- Small mixing bowl
- Spatula
- Vegetable peeler
- Sharp Knife
Ask a Question
If you have a question about this recipe that has not been answered, please use the box below to ask it.
Use this with care. This is an AI-generated result and may contain errors or inaccuracies. I cannot be held responsible for the information returned.
Ingredients
Ginger biscuit crust
- 11 ounces / 300 grms ginger shortbread biscuits or ginger nut biscuits
- 3½ ounces / 100 grams butter melted
Pear and custard filling
- 2 medium firm ripe pears peeled and grated
- 1 cup / 240 ml double (or heavy) cream
- ½ cup / 120 ml milk
- 2 large eggs
- 1 large egg yolk
- 5 tablespoons / 60 grams caster sugar
- 1 tablespoon / 8 grams cornflour or cornstarch
- ½ teaspoon vanilla extract
- ½ teaspoon ground ginger optional
Topping
- 1 - 2 medium firm ripe pears peeled, cored and finely sliced
- 1 tablespoon demerara sugar
Instructions
Ginger biscuit crust
- Preheat the oven to 180°C / 360°F.
- Place the biscuits in a food processor and pulse until they have turned into fine crumbs.11 ounces / 300 grms ginger shortbread biscuits
- Tip the biscuit crumbs into a bowl and combine with the melted butter.3½ ounces / 100 grams butter
- Press the biscuit crumbs evenly onto the base and sides of a 9-inch (23-cm) loose-bottomed tart tin.
- Bake in a preheated oven (180°C / 360°F) for 10 minutes until firm. Remove from the oven and set aside to cool while you prepare the filling
Pear and custard filling
- Heat the cream and milk in a saucepan until it is almost boiling (don't bring to a full boil).1 cup / 240 ml double (or heavy) cream, ½ cup / 120 ml milk
- While the milk is heating, whisk together the eggs, sugar, cornflour, vanilla and ginger in a small mixing bowl.2 large eggs, 1 large egg yolk, 5 tablespoons / 60 grams caster sugar, 1 tablespoon / 8 grams cornflour or cornstarch, ½ teaspoon vanilla extract, ½ teaspoon ground ginger
- Pour half a cup of the hot milk into the eggs, whisking continuously, then whisk the tempered egg mixture back into the remaining milk in the saucepan. Continue to stir over low to medium heat for 2 to 3 minutes until the custard thickens.
- Stir in the grated pears.2 medium firm ripe pears
Assemble and bake
- Transfer the pear and custard mixture into the prepared pie crust.
- Peel and slice one or two pears and arrange them on top of the custard. Sprinkle the pears lightly with demerara sugar to encourage them to brown.1 - 2 medium firm ripe pears, 1 tablespoon demerara sugar
- Bake at 180°C / 360°F for 25 minutes until the custard is fully set and the pears on top have browned and softened.
- Remove the pear tart from the oven and allow it to cool in the tin.
- Once cool, refrigerate for at least 1 hour to give the custard time to firm up. This will make slicing easier.
- Serve chilled or at room temperature.
Notes
- Crush the biscuits finely so they mix easily with the melted butter.
- Press the crumbs firmly into the tin using the back of a spoon.
- A loose-bottomed tin makes it much easier to remove the tart.
- The edges are delicate - use a serrated knife for neat slices.
- Don't prep the pears too early, or they'll brown. If needed, keep peeled pears in water with a splash of lemon juice until ready to grate or slice.
- Temper the eggs with a little hot milk before adding them to the pan to stop the custard from curdling.
- Cook the custard until it thickens enough to coat the back of a spoon before stirring in the grated pears.
- Serve warm or cold - it slices more easily when cooled.
- Add a spoonful of cream or custard.
- Store covered in the refrigerator for 4 to 5 days - it will become soggy after that.
- Freezing. This tart is unfortunately not suitable for freezing.
- You can make this tart a day ahead. The flavours actually improve overnight as the pear and ginger flavours settle together.
- Make the base of the tart with Graham crackers, digestive biscuits or coconut biscuits.
- Leave out the ground ginger in the custard, or substitute it with ground cinnamon, mixed spice or a pinch of nutmeg.
Nutrition
I am not a nutritionist. The nutrition information has been calculated using an on-line calculator, and is intended for information and guidance purposes only. If the nutrition information is important to you, you should consider calculating it yourself, using your preferred tool.
If you made this recipe and enjoyed it, I'd love it if you could give me a star rating in the comments below. And if you'd like to get in touch, you can email me at [email protected]. I'd love to hear from you. And don't forget to subscribe to my mailing list so you can grab yourself a copy of my FREE COOKBOOK!
If you'd like to continue browsing, just click on this link to all my recipes.


Did you make this recipe? Let me know!