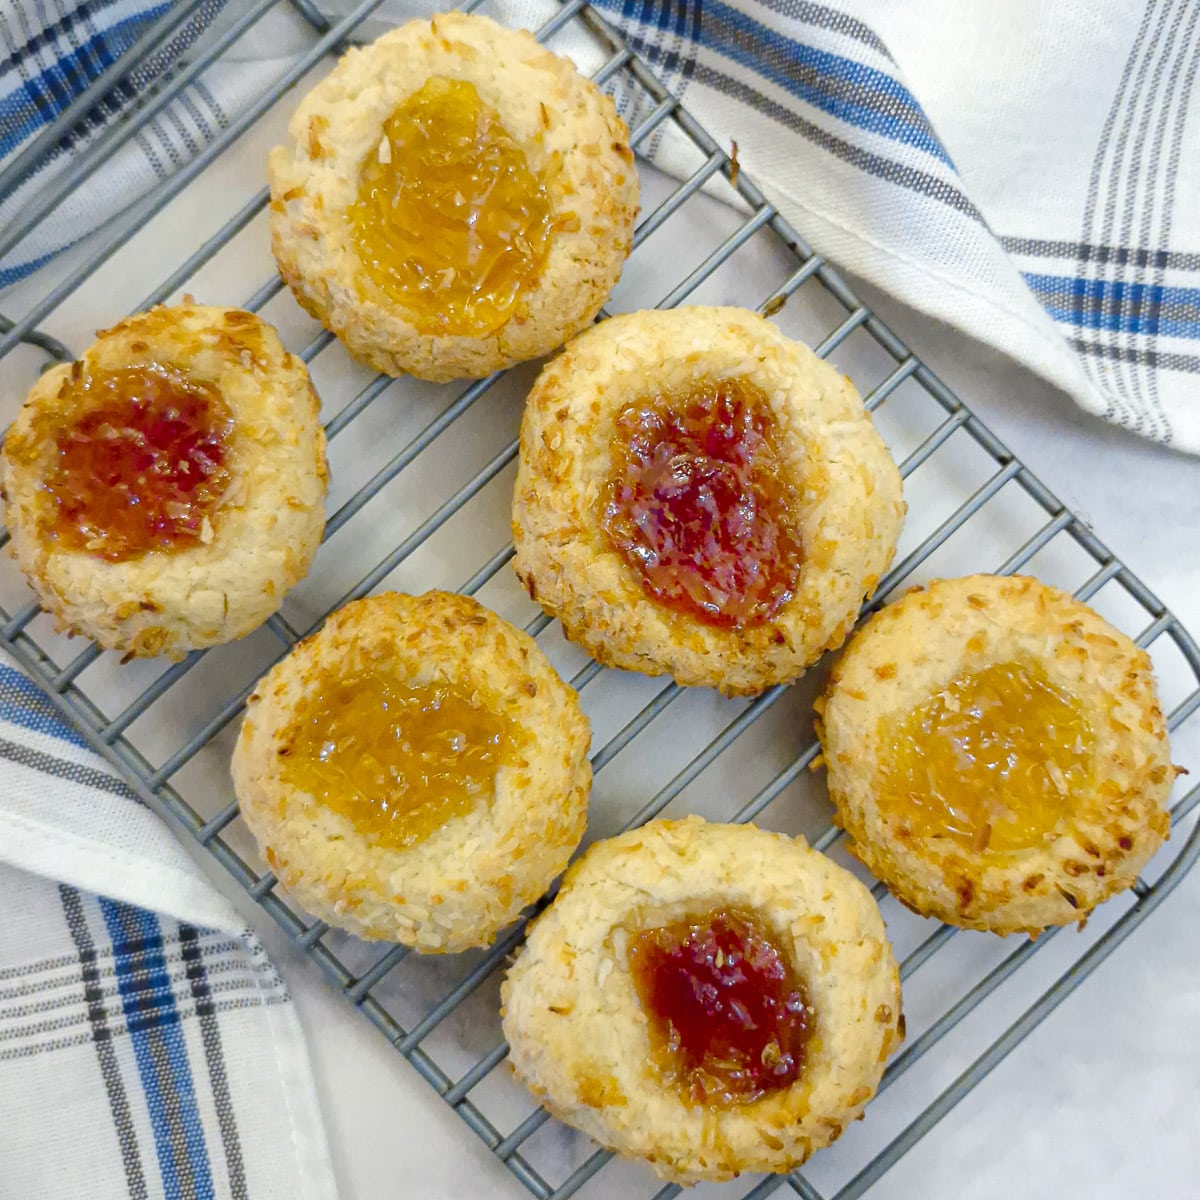
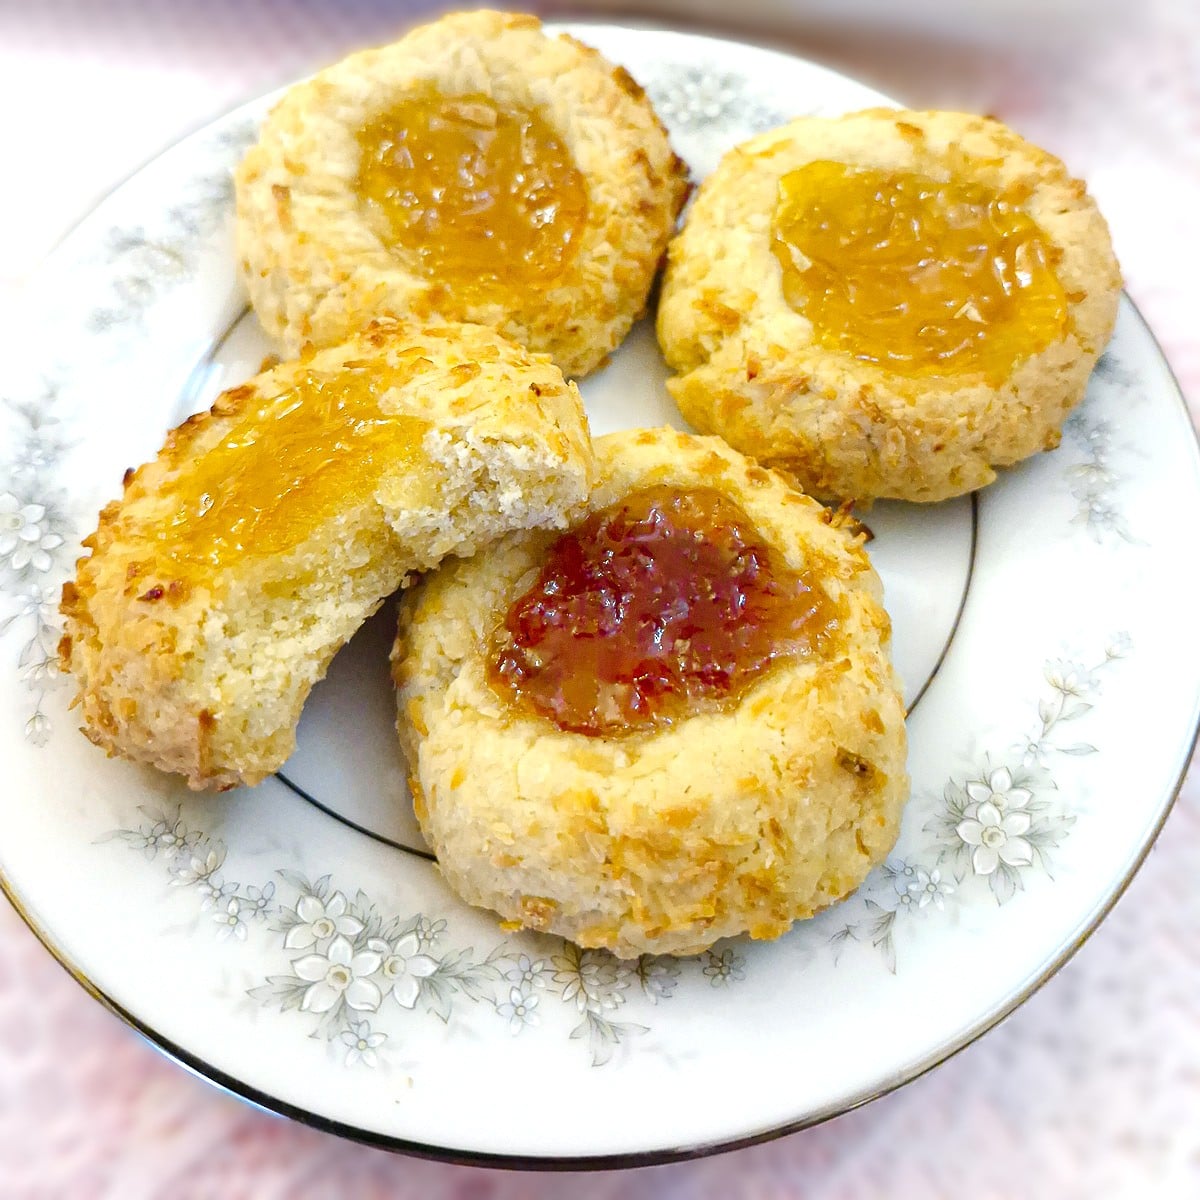
Coconut jam thumbprint cookies are a cross between a buttery shortbread biscuit and a classic jam tart. With a little coconut added to the dough for extra texture, these tasty morsels will transport you straight back to your childhood teatimes!

These jammy coconut biscuits have to be one of my favourite childhood memories. My granny used to make them, my mum made them, I made them for my children, and now you can make a batch of coconut jam thumbprint cookies too!
These little coconut jam biscuits are so easy to make. They take only a few minutes to mix; simply cream the butter and sugar, beat in the egg and stir in the flour and coconut.
The most time-consuming part of making these coconut jam tarts is rolling them into shape and filling them with jam. But even that only takes about 15 minutes. And with the school holidays looming, I'm sure you'll have plenty of willing (or not so willing 🙂 ) helpers!
For a toasty coconut flavour (and extra texture), I like to roll balls of the dough into coconut before pressing indentations into the cookie dough with a teaspoon. Of course, you could use your thumb to press them, but I find a teaspoon gives a neater finish.
What you end up with is a coconut-flavoured buttery biscuit, filled with tasty jam. And if you don't want to go to the trouble of rolling the dough in coconut, then don't! Just leave them uncoated. They will still taste delicious.
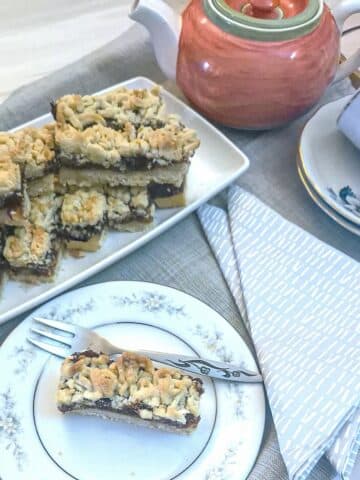
I love the taste of coconut in a cake or dessert! If you do too, you might like to try these coconut marshmallow slices, this delicious coconut jam slice or even these simple 4-ingredient coconut macaroons dipped in chocolate.
Jump to:
Why you'll love these jammy coconut cookies
- Perfect texture. A soft, buttery biscuit, filled with sweet jam and just the right amount of crunch from the toasted coconut.
- Easy to make. No fancy equipment, and no chilling required. Just mix, roll, fill and bake.
- Customisable. Use your favourite jam - raspberry, strawberry, apricot or even lemon curd.
- A great tea-time treat. Love by kids and grown-ups alike, these easy thumbprint cookies are a great crowd-pleaser.
Recipe information
Prep time: 5 minutes to mix; 15 minutes to roll and form.
Cooking time: 18 to 20 minutes.
Yield: 20 coconut jam thumbprint biscuits.
Ingredients
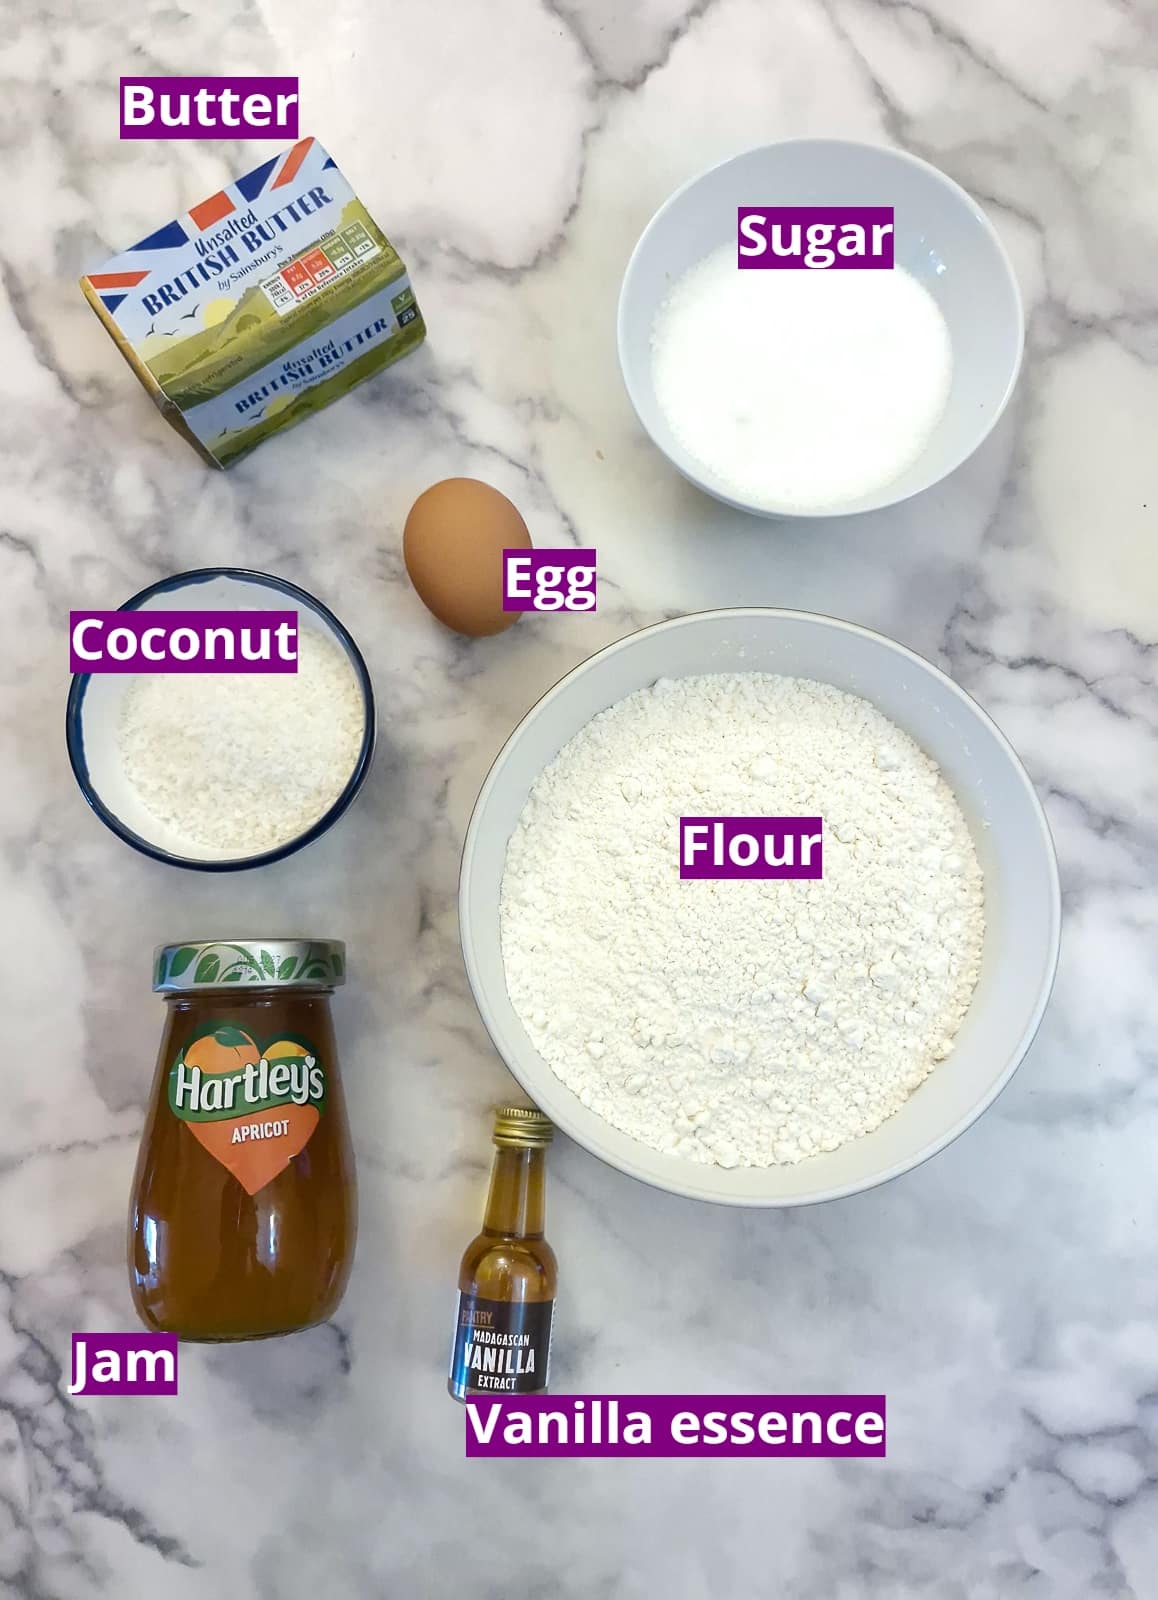
- Butter. Use unsalted butter, or use salted butter and omit the salt from the recipe. You could also substitute the butter with a good quality baking block such as Stork.
- Sugar. Caster sugar blends more easily into the butter when you cream it. You could use granulated sugar and beat the sugar and butter for a little longer to ensure the sugar is dissolved.
- Egg. This is used to bind the dough. There is no other liquid needed. I used a whole egg (both the white and the yolk.
- Vanilla extract. For extra flavour. Leave it out if you don't have any, or substitute with another extract, such as lemon. This would be particularly good if you intend to use lemon curd to fill the thumbprint cookies.
- Flour. Use plain or all-purpose flour. Don't use self-raising flour - we don't want to introduce any raising agents into these biscuits.
- Coconut. This is used both in the dough and also (optionally) to roll the balls of dough in before baking. Not everyone enjoys coconut. If you prefer not to use it, add an extra one-quarter of a cup of flour to the dough.
- Jam - use your favourite flavour of jam for filling the cookies. I used seedless strawberry and smooth apricot jam for my cookies.
- Salt. A pinch of salt added with the flour brings out the flavour. Leave it out if you don't want to use salt.
Instructions
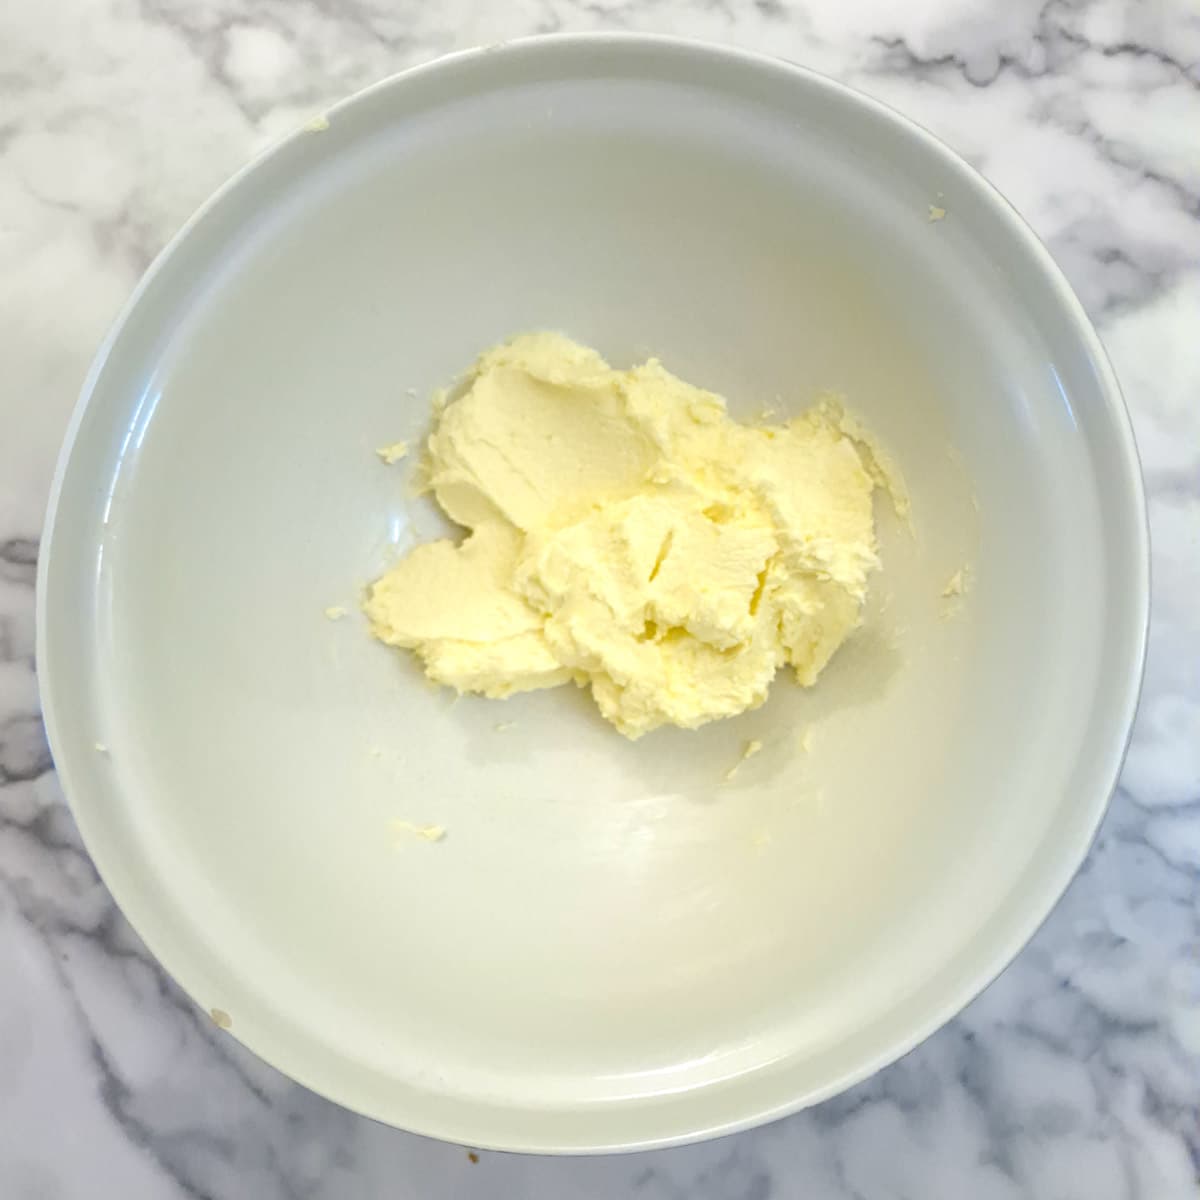
Step 1: Cream butter and sugar together until light and fluffy.
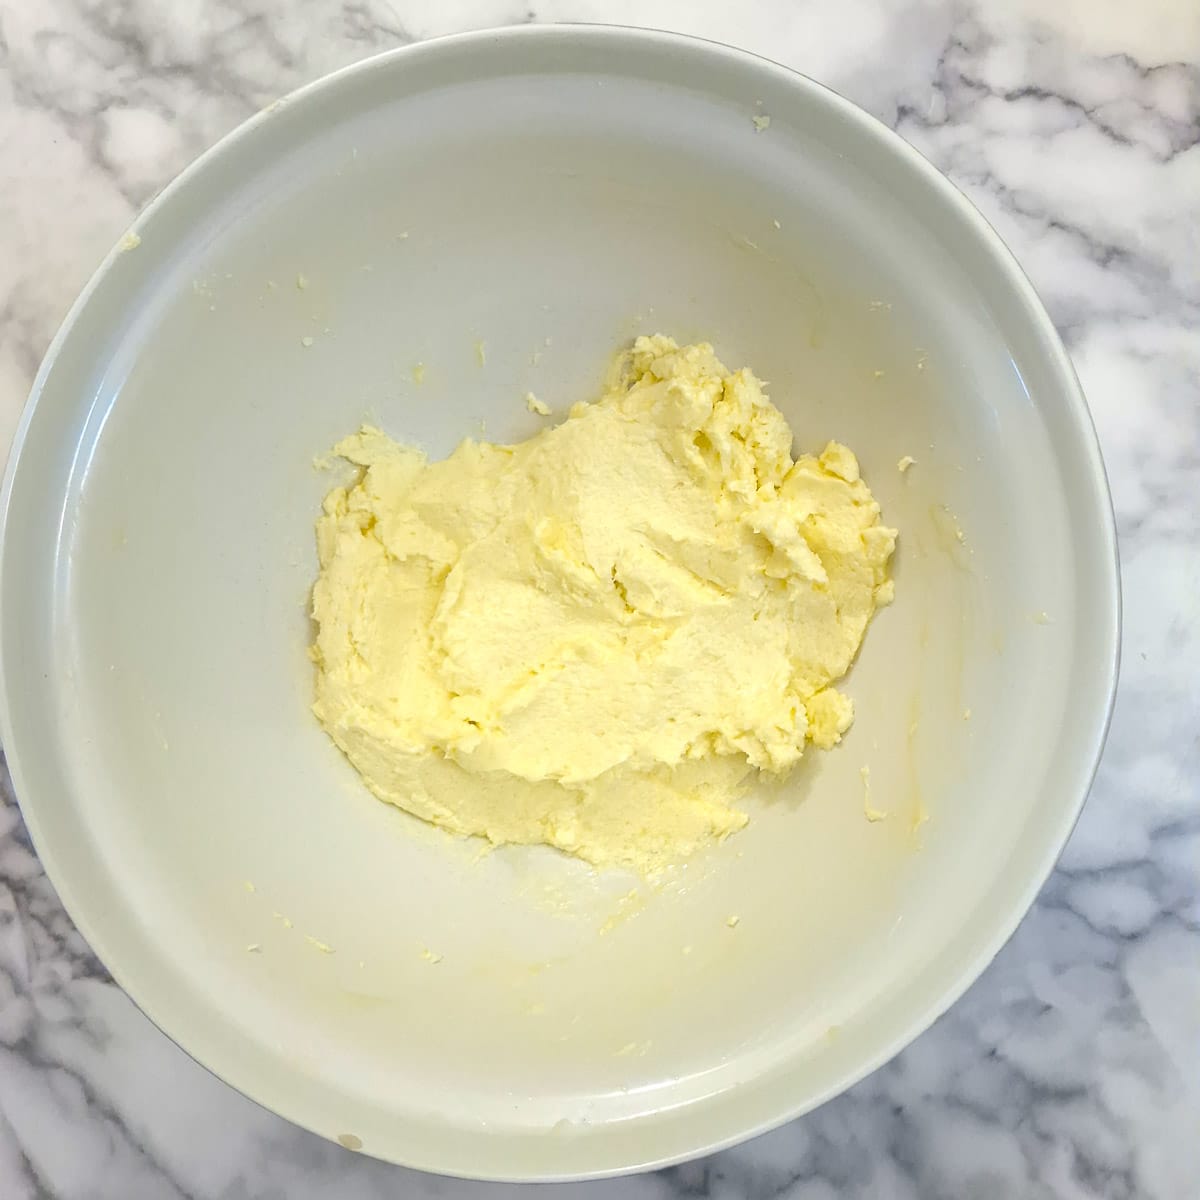
Step 2: Add the egg and vanilla and beat until well combined.

Step 3: Add the flour and coconut and mix with a wooden spoon until the flour is mostly combined. Then get your hands in and press the dough together into a soft ball.
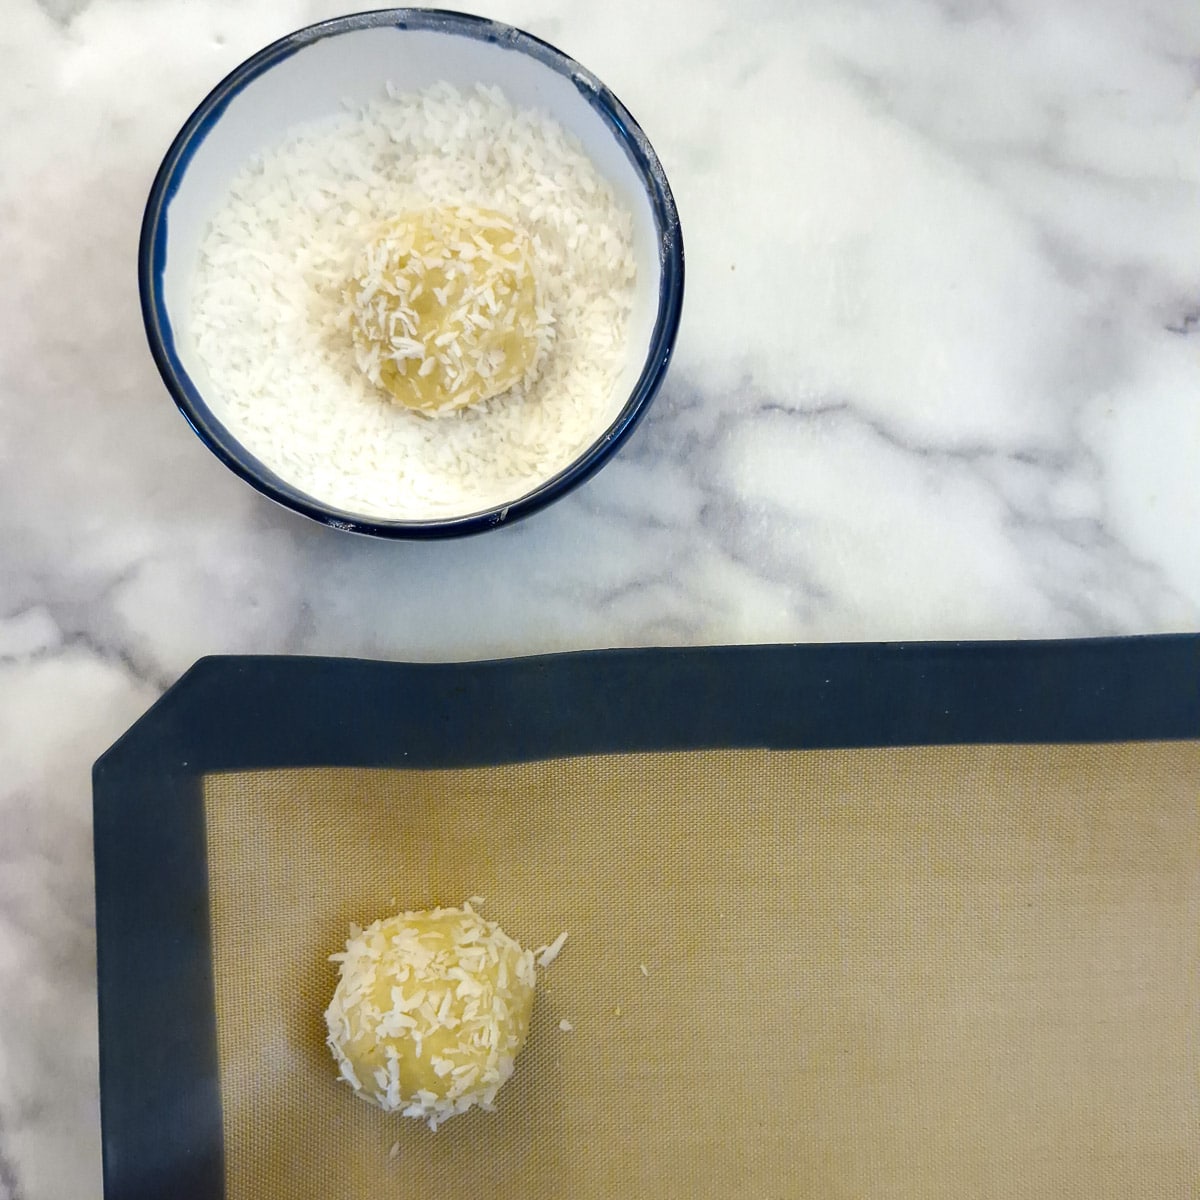
Step 4: Take ping-pong ball-sized pieces of dough (about a tablespoonful) and roll them into balls in the palms of your hand. Roll a ball of dough into coconut and place it on a baking sheet lined with baking paper or a silicone mat.
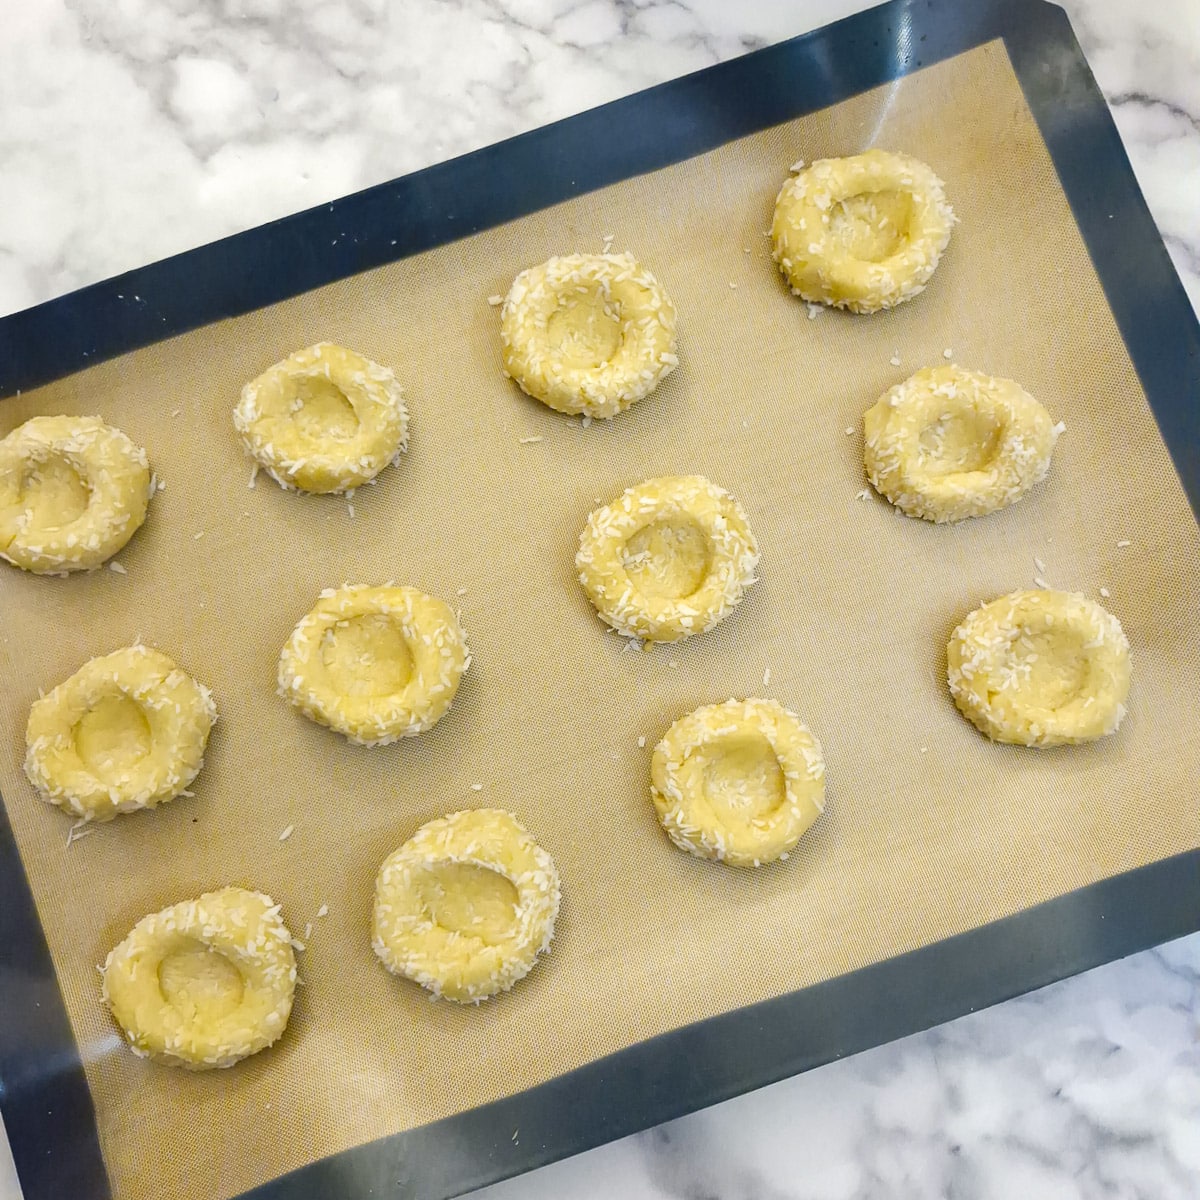
Step 5: Use a teaspoon (or your thumb) to press an indentation into each ball of dough.
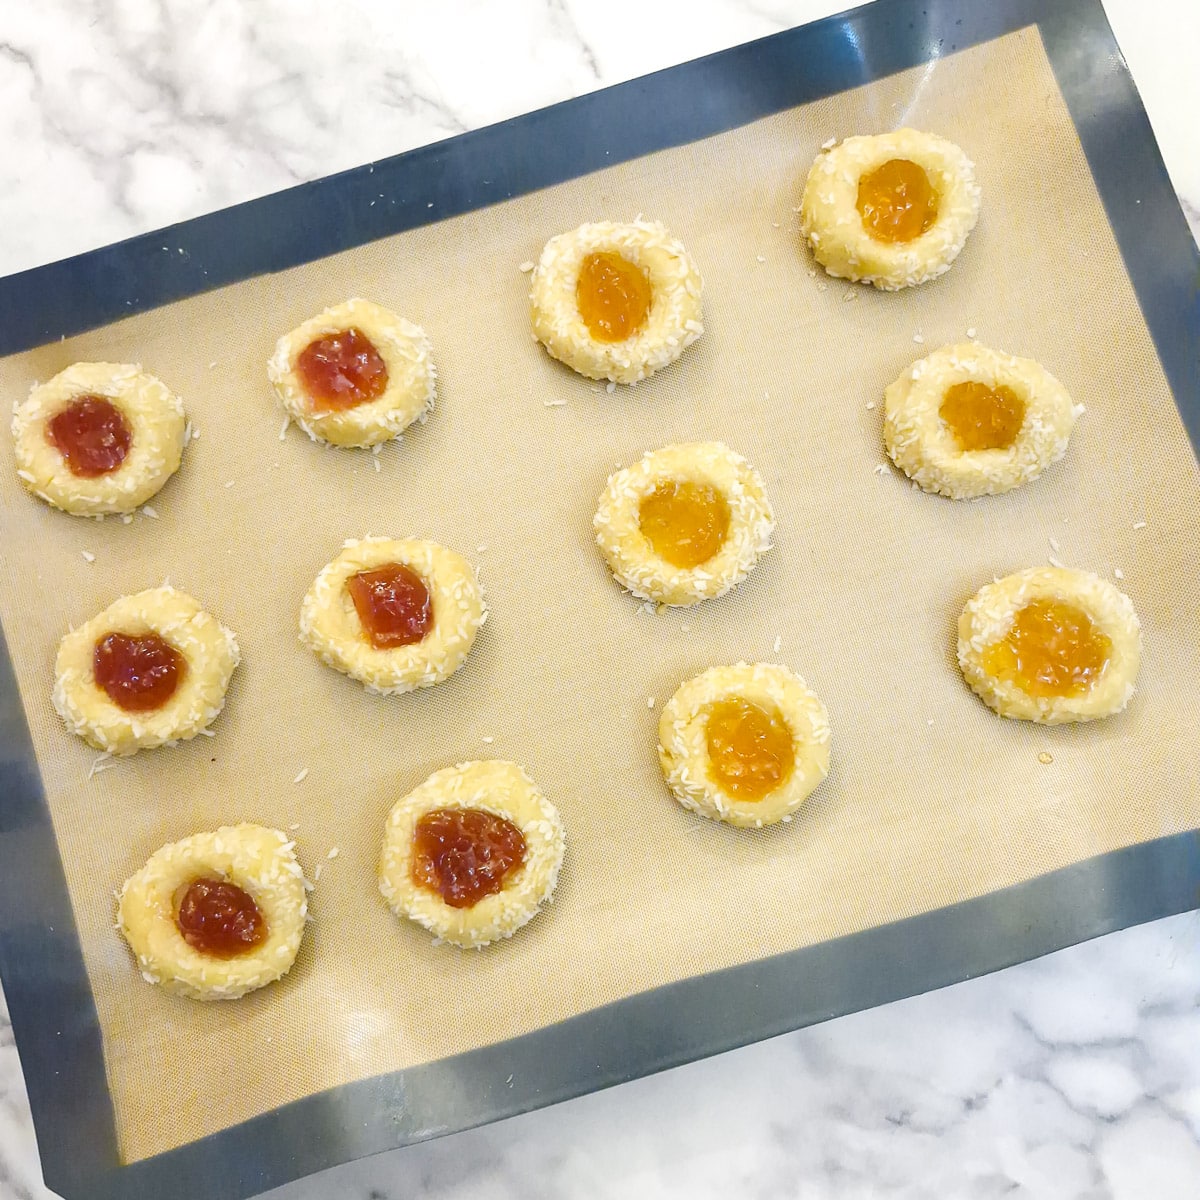
Step 6: Carefully add half a teaspoon of jam to each dough ball.
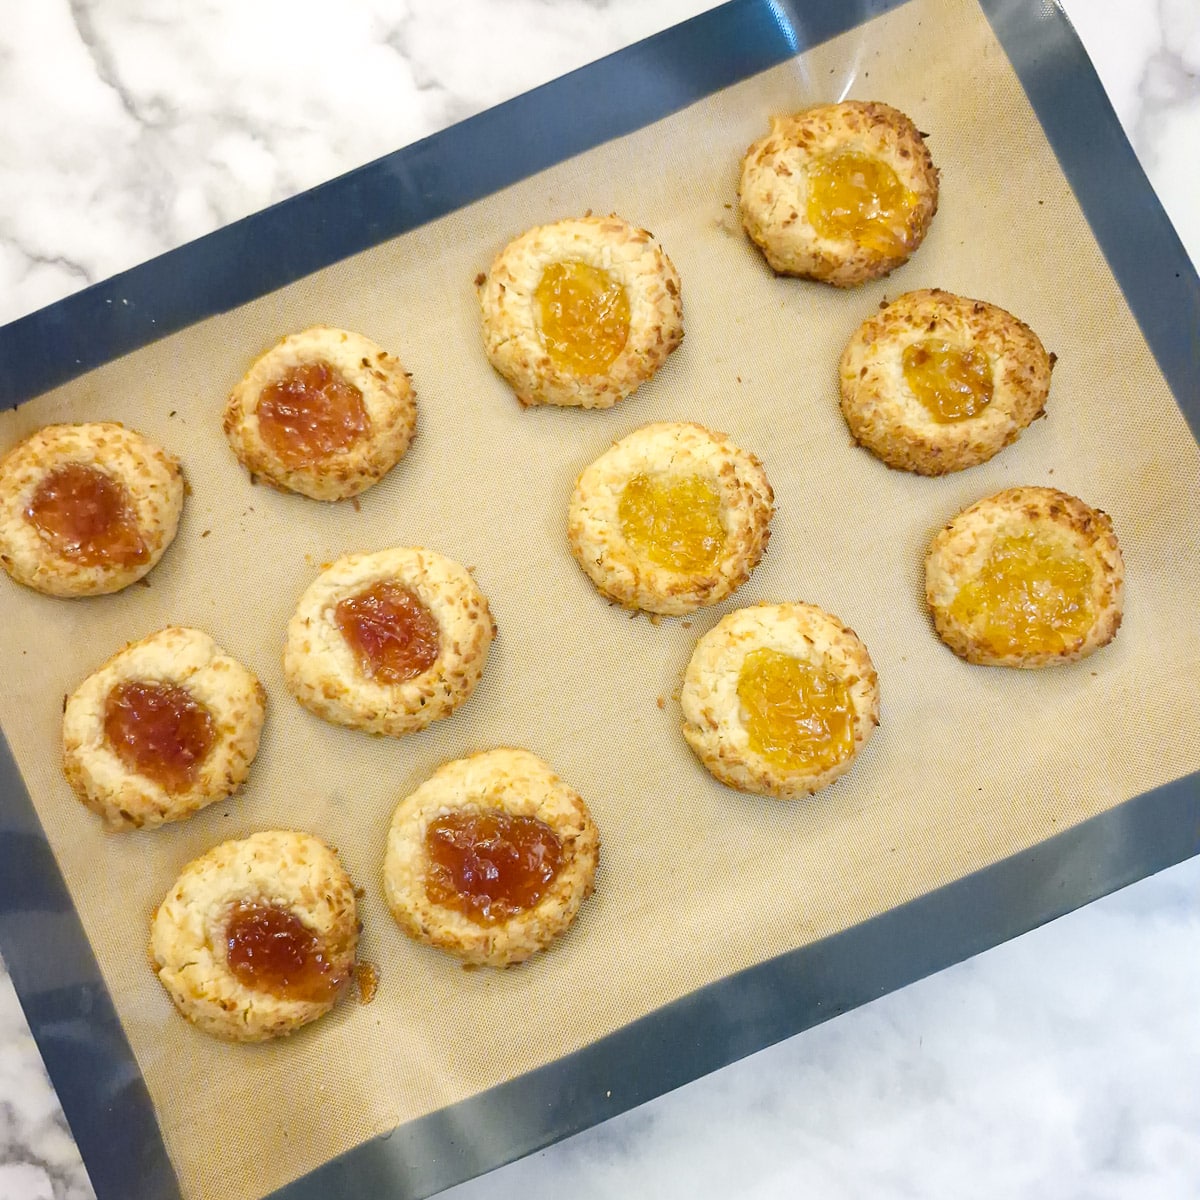
Step 7: Bake in a preheated oven (175°C / 350°F) for 18 to 20 minutes or until the edges are lightly browned.
Tips for a successful outcome
Here are my top tips to ensure your jam thumbprint cookies always turn out perfectly:
- Caster sugar creams (and dissolves) more easily into the butter; if using granulated sugar, you will have to cream for a little longer.
- Room temperature butter will also cream more easily.
- An electric hand mixer will make it easier to cream the butter and sugar. If you don't have one, a wooden spoon and a little elbow grease will do the trick.
- When adding the flour, don't try to use an electric hand mixer - you'll get flour all over the kitchen. Use a wooden spoon or spatula to combine the flour, and once it is mostly combined, get your hands in to press the dough together into a smooth ball.
- The cookies don't spread very much when baked, but do leave a small gap between each ball.
- The dough for these cookies does not need to chill before being rolled. However, if your kitchen is very warm, or the dough feels too soft, you may like to refrigerate it for half an hour to allow it to firm up.
- When making the indentations, you could use your thumb. I find I get a nice, evenly shaped indentation if I press a teaspoon onto the dough, then give the teaspoon a 180-degree turn and press it again.
- Don't be too generous with the jam, or you might find it overflows when the cookies bake. Half a teaspoon is more than sufficient.
Note: The recipe has been tested using measurements in grams and is based on one cup of flour weighing 140 grams. For best results when baking, I would strongly recommend buying a set of kitchen scales and weighing your ingredients.
Equipment
These are the main items of equipment you will need to make these coconut jam biscuits:
- Mixing bowl - to mix the dough.
- Electric hand mixer or wooden spoon for mixing.
- Baking tray large enough to hold 20 cookies. If you only have 2 small trays, you can bake them at the same time on 2 shelves. Halfway through the cooking time, swap the position of the trays in the oven - ie swap the upper tray with the lower one.
- Baking parchment or a silicone mat to prevent the cookies from sticking to the tray.
- Small bowl to hold the coconut (if you intend to roll the dough in coconut before baking).
- Teaspoon to press the indentation into the dough and also to spoon in the jam.
Storage
Store the cookies in an airtight container in the kitchen. They will stay fresh for up to 3 days.
You can also freeze these jam thumbprint cookies. Open-freeze them on a baking tray until solid, then transfer them to a suitable freezer container and freeze for up to 4 months. Allow them to defrost and come to room temperature on the kitchen counter before eating.
FAQ
Absolutely, homemade jam makes these thumbprint cookies even more special. Why not try using this homemade strawberry jam or this easy microwave lemon curd?
Save for later
If you would like to make these coconut jam thumbprint cookies, why not save the recipe to one of your Pinterest boards so you can find it easily? Just click on the image below.
Alternatively, you can save the recipe by clicking on the floating heart icon on the right-hand side of the screen.
Related recipes
Visit my cakes, biscuits and dessert recipes page for other easy bakes. Here are a few you might enjoy:


📋The recipe

Coconut jam thumbprint cookies
(Click the stars to rate this recipe)
Equipment
- Mixing bowl
- Electric hand mixer OR
- Wooden spoon
- Large baking tray
- Baking parchment
- Small bowl
Ask a Question
If you have a question about this recipe that has not been answered, please use the box below to ask it.
Use this with care. This is an AI-generated result and may contain errors or inaccuracies. I cannot be held responsible for the information returned.
Ingredients
- 1 cup / 225 grams butter at room temperature
- ⅔ cup / 135 grams sugar
- 1 large egg
- 1 teaspoon vanilla essence
- 2¼ cups / 315 grams plain or all-purpose flour don't use self-raising flour
- ½ cup / 40 grams desiccated coconut
- ¼ teaspoon salt optional
- ½ cup jam your flavour of preference
- ½ cup /40 grams dessicated coconut optional for rolling the cookies before bakng
Instructions
- Preheat oven to 175°C / 350°F
- In a mixing bowl, beat the butter and sugar together until light and creamy. Use an electric handmixer if you have one; otherwise, use a wooden spoon.1 cup / 225 grams butter, ⅔ cup / 135 grams sugar
- Add the egg and vanilla and beat until well combined.1 large egg, 1 teaspoon vanilla essence
- Add the flour and coconut and mix with a wooden spoon until the flour is mostly combined. Then get your hands in and press the dough together into a soft ball.2¼ cups / 315 grams plain or all-purpose flour, ½ cup / 40 grams desiccated coconut, ¼ teaspoon salt
- Take ping-pong ball-sized pieces of dough (about a tablespoonful) and roll them into balls in the palms of your hand. Roll a ball of dough into coconut and place it on a baking sheet lined with baking paper or a silicone mat.½ cup /40 grams dessicated coconut
- Use a teaspoon (or your thumb) to press an indentation into each ball of dough.
- Carefully spoon half a teaspoon of jam into each indentation.½ cup jam
- Bake in a preheated oven (175°C / 350°F) for 18 to 20 minutes or until the edges are lightly browned.
- Remove from the oven and allow to cool before eating.
Notes
Nutrition
I am not a nutritionist. The nutrition information has been calculated using an on-line calculator, and is intended for information and guidance purposes only. If the nutrition information is important to you, you should consider calculating it yourself, using your preferred tool.
If you made this recipe and enjoyed it, I'd love it if you could give me a star rating in the comments below. And if you'd like to get in touch, you can email me at [email protected]. I'd love to hear from you. And don't forget to subscribe to my mailing list so you can grab yourself a copy of my FREE COOKBOOK!
If you'd like to continue browsing, just click on this link to all my recipes.

Did you make this recipe? Let me know!