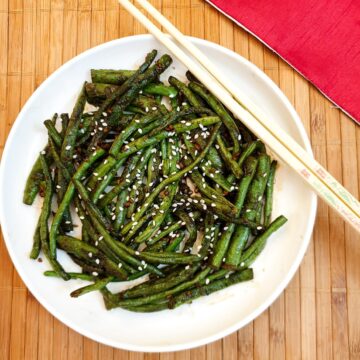
Whenever I eat at a Chinese buffet restaurant, I always make a beeline for the garlic green beans. Here's how to make Chinese garlic green beans at home so you can enjoy them any time the craving hits!
Jump to:
Chinese green beans
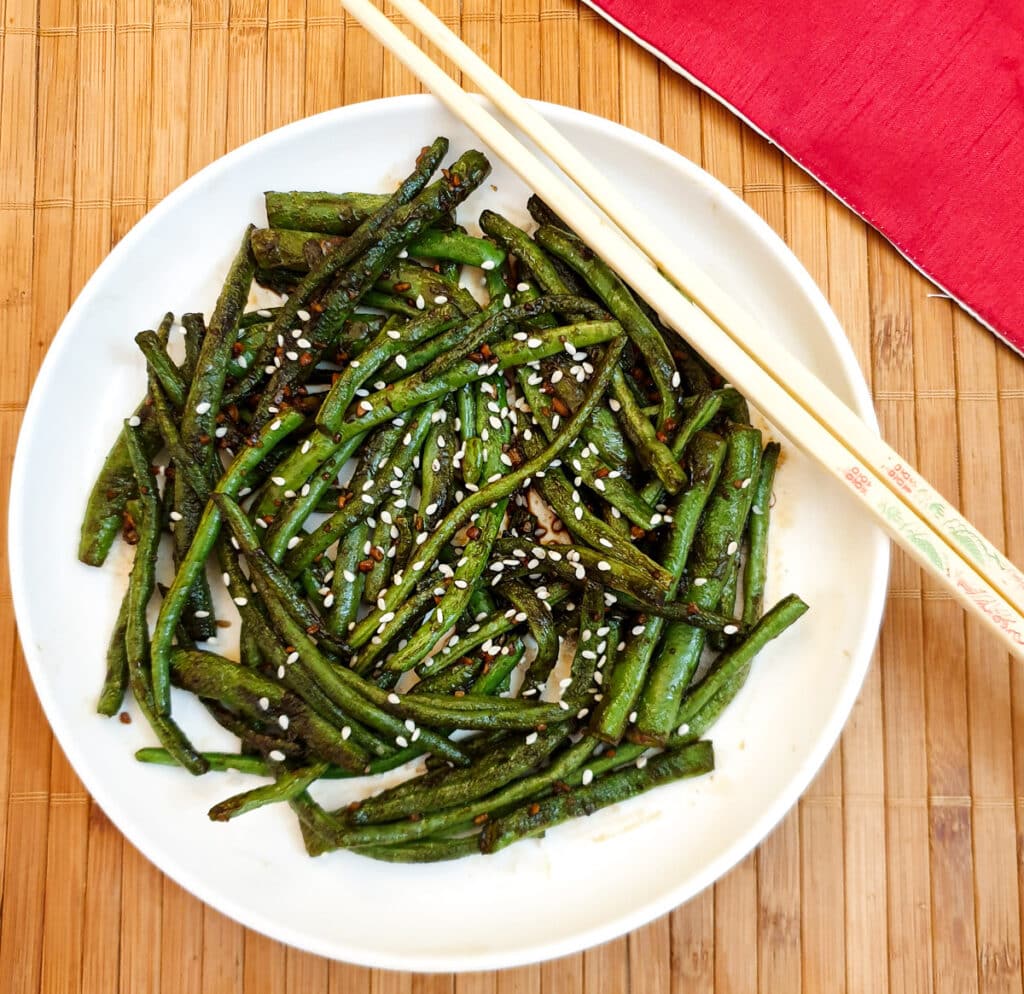
I absolutely love the garlic green beans that are served as a side dish at a Chinese buffet. The beans are tender with just the slightest 'bite', the sauce is garlicky and packed with flavour, and the toasted sesame seeds are the cherry on top. I always add an extra large helping to my plate!
But now I've discovered the secret to making them at home, and I have to tell you, it's so easy to make these beans you'll wonder why you've never made them before! They only take a few minutes to make.
The secret is to fry the beans quickly in a tiny amount of oil until they start to blister. Then drain the beans on kitchen paper while you make a one-minute sauce and toss the beans through and sprinkle with toasted sesame seeds. Job done!
The beans should be crisp-tender
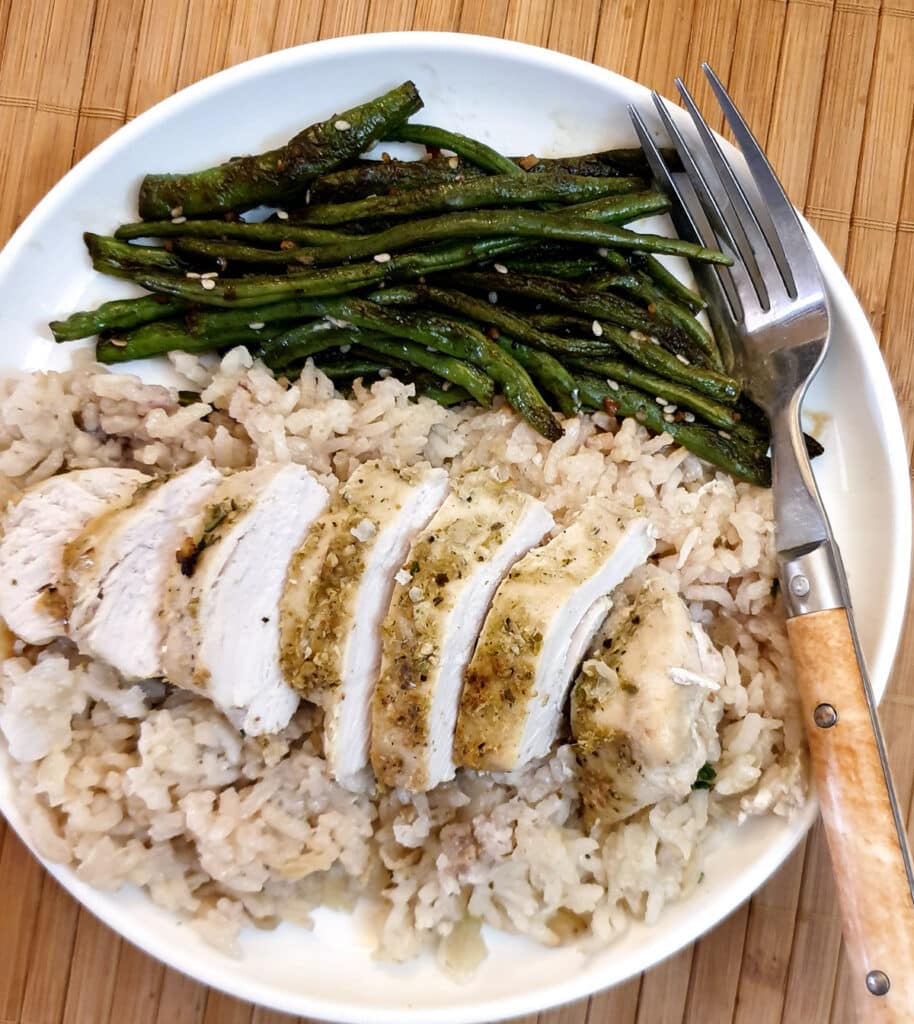
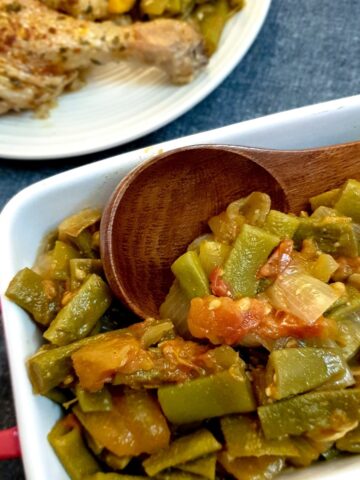
I like to serve these beans with any Asian meal, but especially with this oven-baked Thai coconut chicken casserole.
Here's what to do.
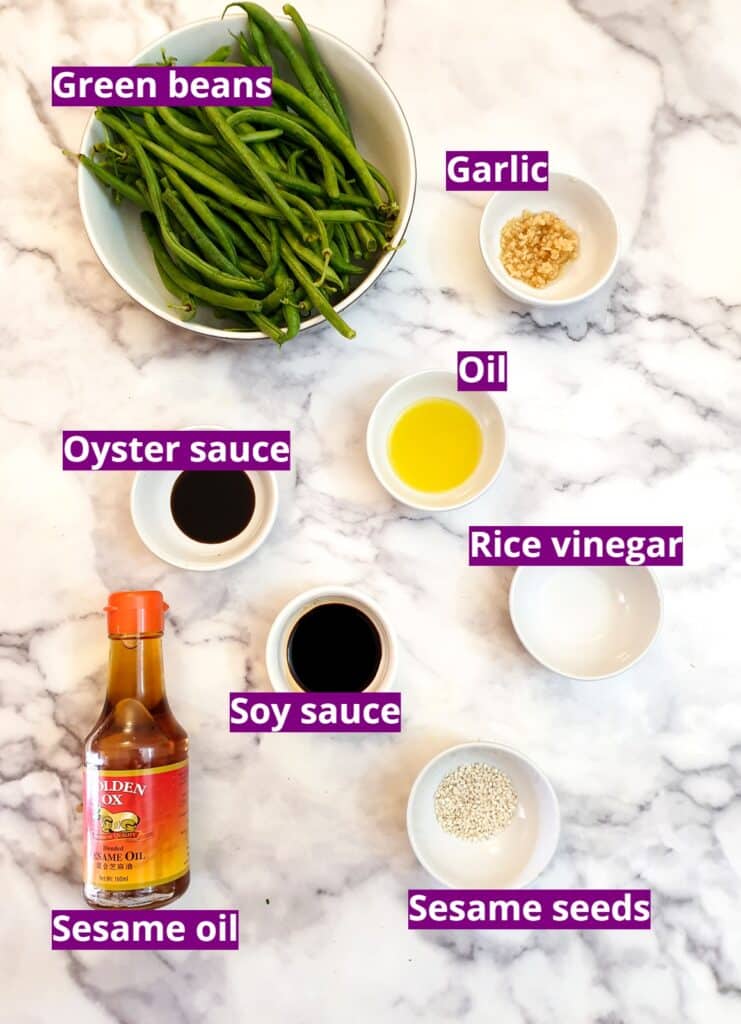
What you will need
Equipment
To make these Chinese garlic beans at home you will need a sharp knife, a chopping board and a frying pan.
Ingredients
The recipe will provide 4 portions of Chinese green beans as a side dish.
**You can find the complete list of ingredients and full instructions for making your own Chinese garlic green beans on the printable recipe card at the end of this post**
Let's talk about the ingredients.
Green beans - these must be fresh green beans. You won't get the same texture if you use frozen or tinned beans. The beans should be washed and patted dry, and topped and tailed.
Garlic - there is quite a lot of garlic in this recipe, they are garlic green beans after all. If you want to add less garlic, that's up to you.
Sunflower oil - you want a neutral flavoured oil for this dish. I wouldn't recommend using olive oil as it would change the flavour. If you prefer to blister the beans in a dry pan without using any oil, that is completely up to you.
Oyster sauce - this is a thick sauce, readily available in the Asian section of most supermarkets. The main ingredients are oysters, water, salt, sugar and thickening agents. It is widely used in Asian cooking to provide a savoury or umami flavour and does not taste 'fishy' at all. Vegetarian versions are available. They use soybeans and sometimes mushrooms instead of the oysters.
Dark soy sauce - this adds a salty element.
Rice vinegar - also known as rice wine vinegar. This is a light vinegar made from fermented rice. You can substitute this with mirin if you prefer, but don't use white spirit vinegar or brown malt vinegar, they will be too strong.
Sesame oil - this oil is used for flavouring rather than frying. You will only need a few drops as it has a very powerful flavour.
Toasted sesame seeds - they are optional and are used purely for garnishing the beans.
You may also like to add a small amount of sugar or honey if you prefer a sweeter dish. That's up to your own taste.
You should find you don't need to add any extra salt to the beans as the soy sauce will make them salty enough.
What to do
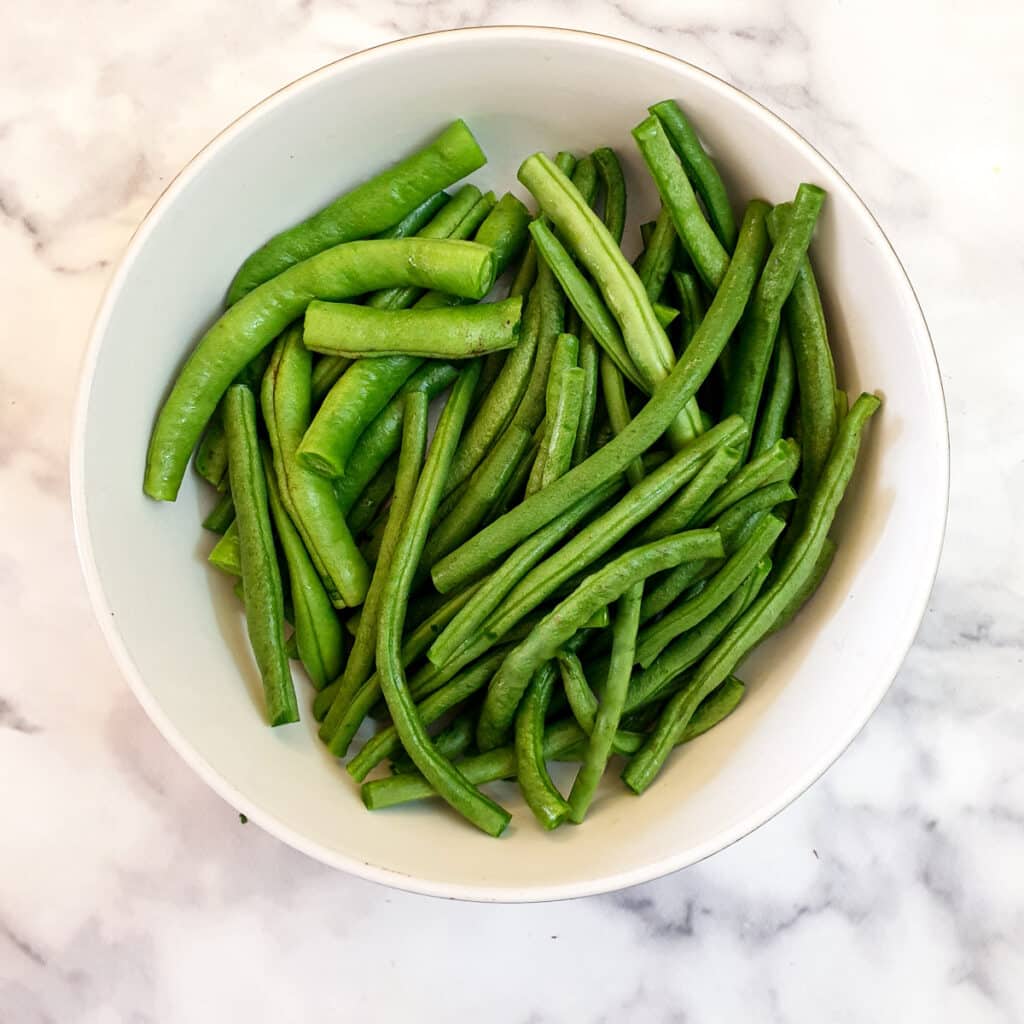
Wash the beans and pat them dry with paper towels, then remove the ends. Optionally cut the beans in half if they are very long.
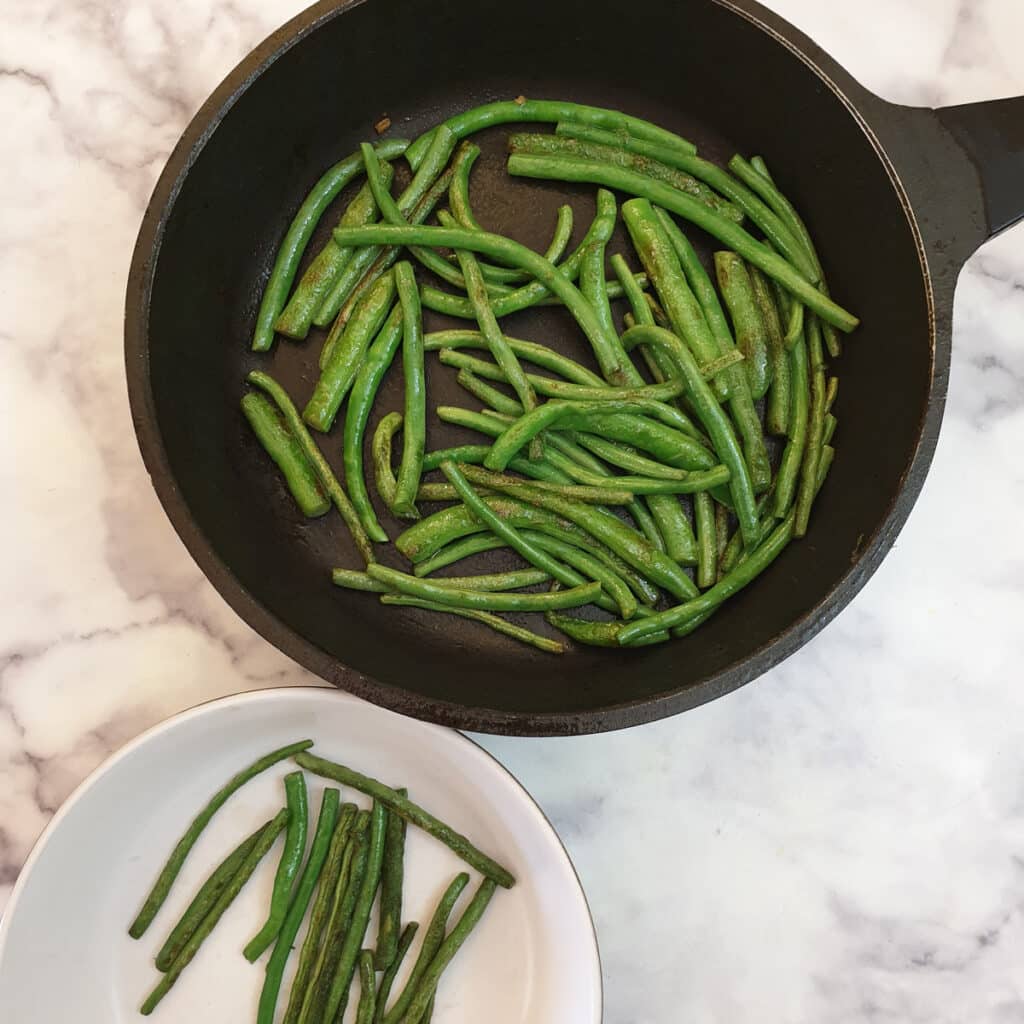
Heat the oil in a large frying pan, then add the beans and stirfry them for 3 to 4 minutes until they start to char and wrinkle. Some beans will blister before others - you can remove the beans and continue to fry until all the beans are nicely charred. Thicker beans will take longer than thinner ones.
Set the beans aside while you prepare the sauce. Depending on how much oil you used, you may like to drain the beans on paper towel.
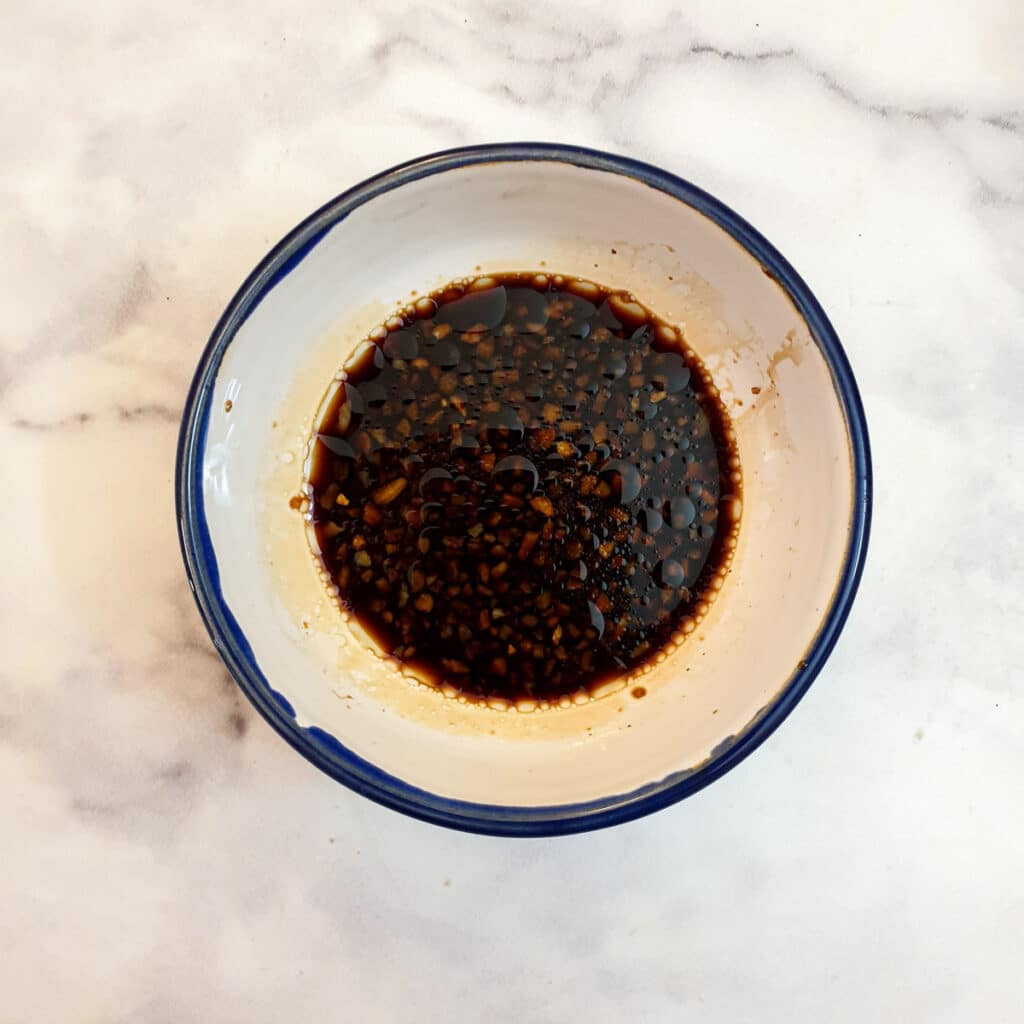
Combine all the sauce ingredients in a small dish.
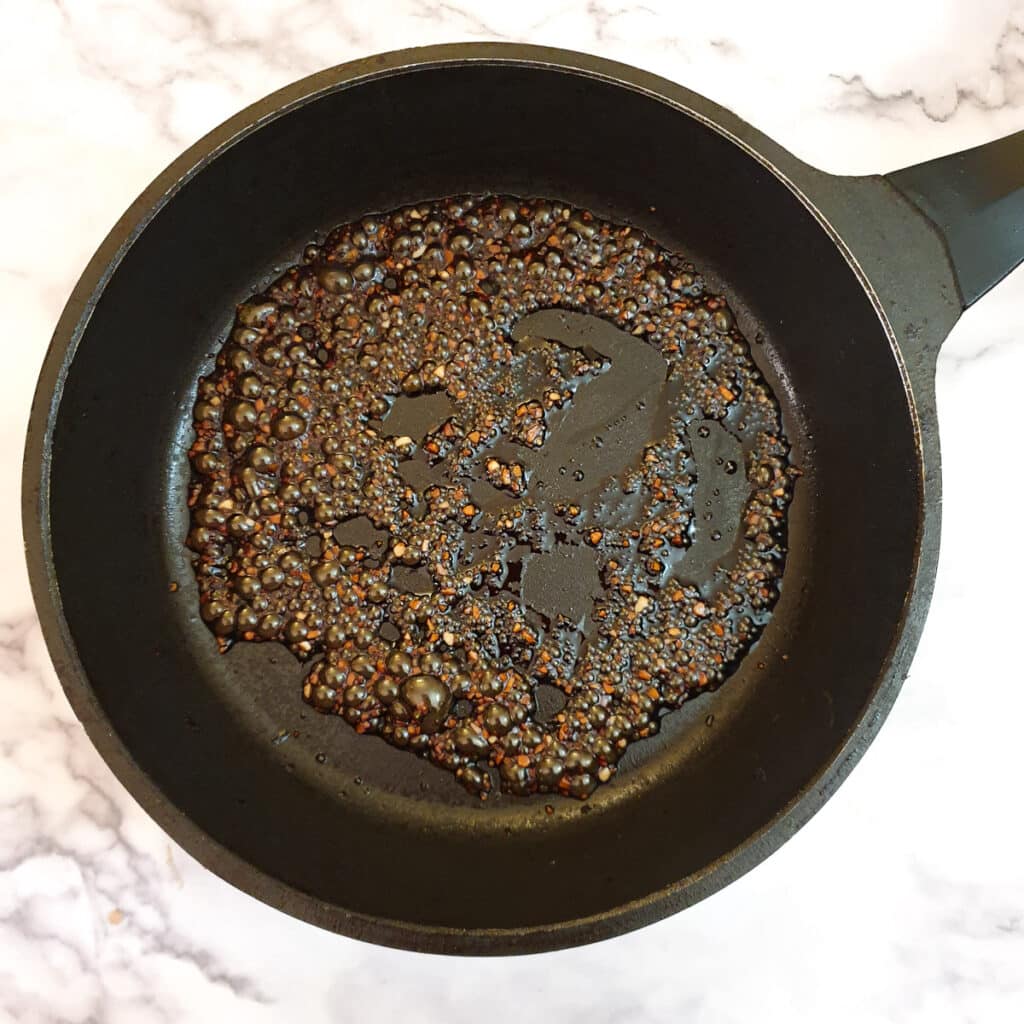
Tip the sauce into the frying pan you used for the beans, and heat gently until it bubbles. Stir it over low heat for 1 to 2 minutes to give the garlic a chance to soften slightly.
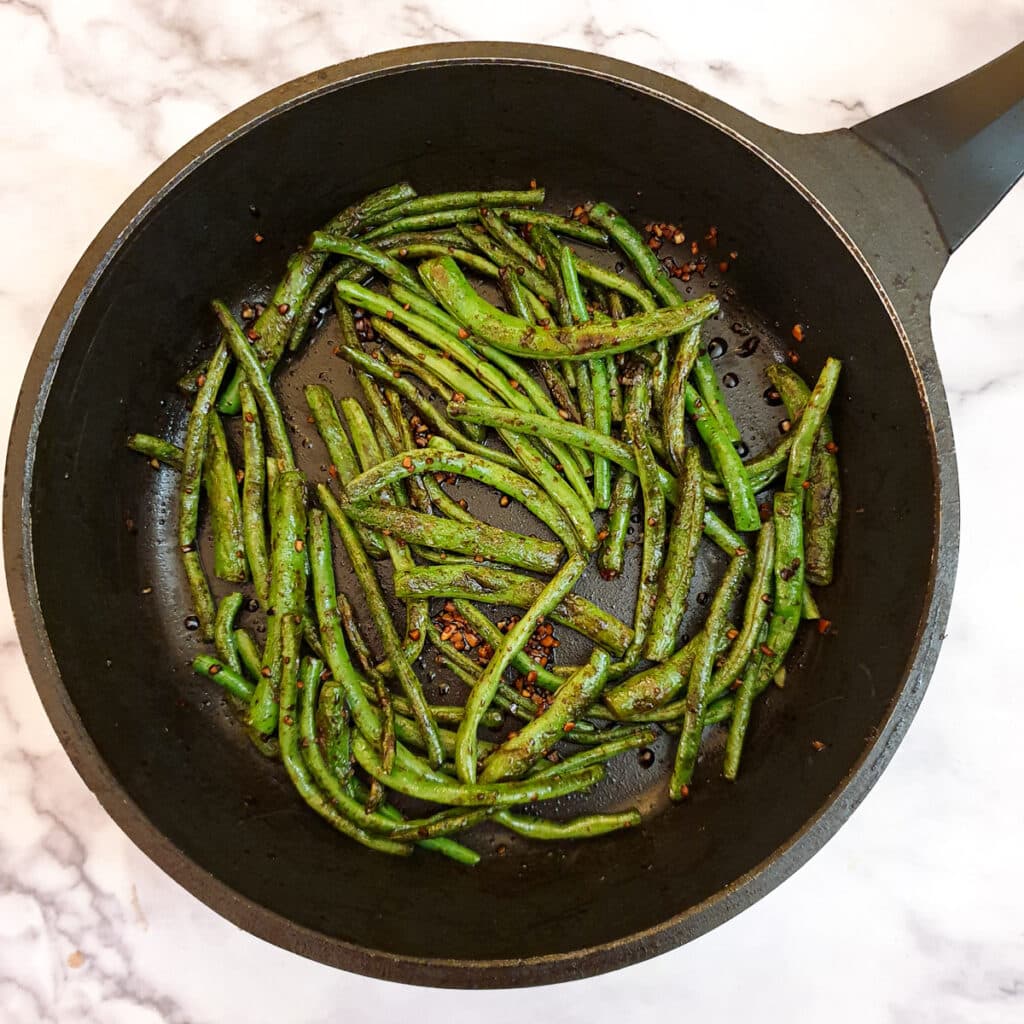
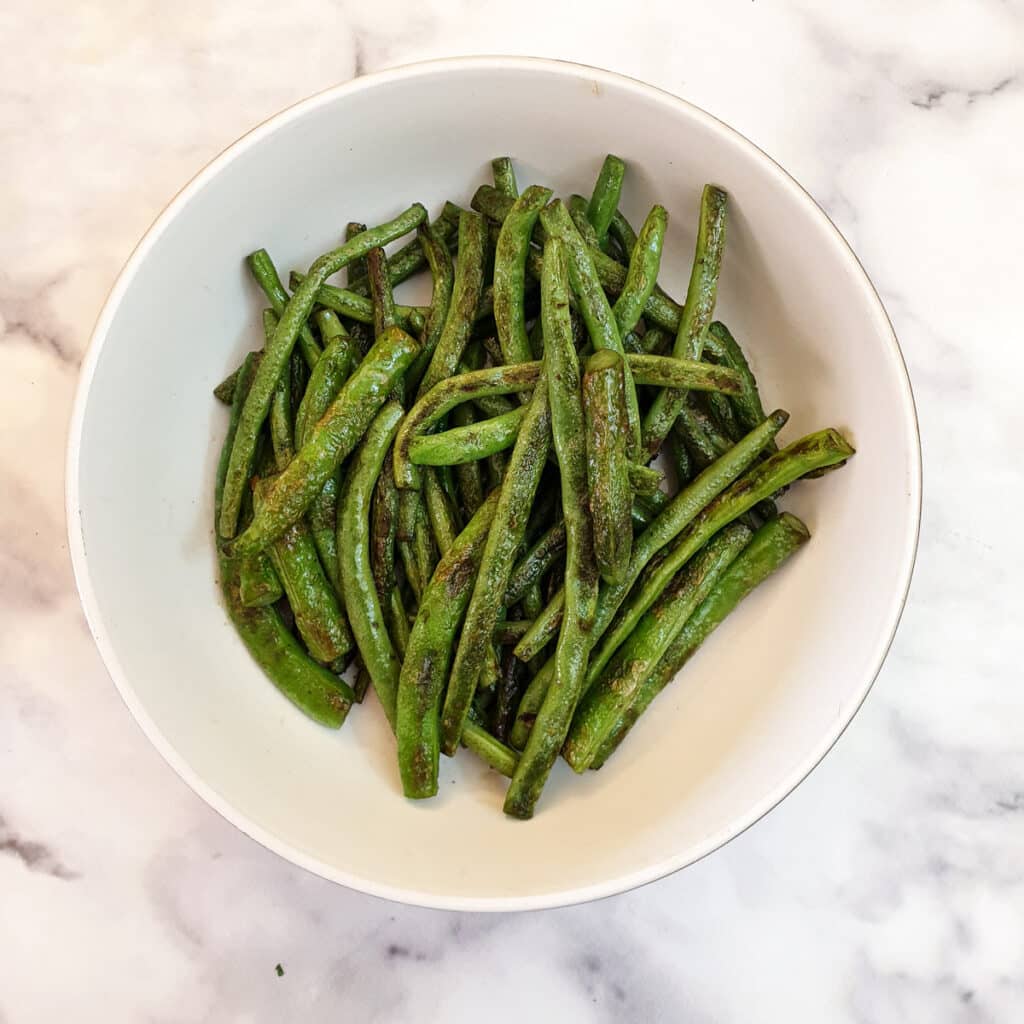
Add the beans and stir them for 1 minute longer so they are all well-coated with the sauce.

Transfer the beans to a serving dish and optionally garnish with toasted sesame seeds.

If you'd like to be notified of new recipes, why not subscribe to my newsletter? To say thank you, you will receive a free recipe e-book containing some of my most popular cakes and desserts.
Chinese garlic green beans FAQ
No, I don't find it necessary to blanch the beans. The beans I used were ultra fresh and tender, having been harvested the day I made them.
If your beans are older you may like to blanch them in boiling water for a maximum of one minute, then plunge them immediately into cold water to stop the cooking process.
If you do blanch them, ensure that you dry them completely with a paper towel before frying them or they will splatter everywhere.
Technically you can freeze them, but I recommend you make them fresh. The beans will lose their crispness once defrosted and reheated, and will not be as appetising as freshly made.
Once again, I recommend you cook the beans when you need them. It only takes a few minutes to do.
To save time, you could top and tail the beans and store them in a plastic bag. You could also mix up the sauce and store it in a small glass jar in the refrigerator until you are ready to cook them.
My benchmark for cooked beans is whether or not they 'squeak' against your teeth when you bite them. These beans should not squeak - they should be tender, but still have a slight 'bite'.
Save for later
If you would like to make these Chinese garlic beans, why not save the recipe to one of your Pinterest boards so you can find it easily? Just click on the image below.
Alternatively, you can save the recipe by clicking on the floating heart icon on the right-hand side of the screen.
Related recipes
If you enjoyed these Chinese green beans, you may like to try some of my other vegetable recipes:
📋The recipe
Chinese garlic green beans
(Click the stars to rate this recipe)
Equipment
- Sharp Knife
- Chopping Board
- Frying Pan
Ask a Question
If you have a question about this recipe that has not been answered, please use the box below to ask it.
Use this with care. This is an AI-generated result and may contain errors or inaccuracies. I cannot be held responsible for the information returned.
Ingredients
- 8 ounces / 225 grams green beans
- 5 cloves garlic minced
- 1 tablespoon oyster sauce
- 2 teaspoons dark soy sauce
- 1 teaspoon rice wine vinegar
- ½ teaspoon sesame oil
- 1 teaspoon toasted sesame seeds
- 1 tablespoon sunflower oil
Instructions
- Wash the beans and pat them dry with paper towels, then remove the ends. Optionally cut the beans in half if they are very long.8 ounces / 225 grams green beans
- Heat the oil in a large frying pan, then add the beans and stirfry them for 3 to 4 minutes until they start to char and wrinkle. Some beans will blister before others - you can remove the beans and continue to fry until all the beans are nicely charred. Thicker beans will take longer than thinner ones.1 tablespoon sunflower oil
- Set the beans aside while you prepare the sauce. Depending on how much oil you used, you may like to drain the beans on paper towel.
- Combine all the sauce ingredients in a small dish.5 cloves garlic, 1 tablespoon oyster sauce, 2 teaspoons dark soy sauce, 1 teaspoon rice wine vinegar, ½ teaspoon sesame oil
- Tip the sauce into the frying pan that you used for the beans, and heat gently until it starts to bubble. Stir it over a low heat for 1 to 2 minutes to give the garlic chance to soften slightly.
- Add the beans and stir them for 1 minute longer so they are all well-coated with the sauce.
- Transfer the beans to a serving dish and optionally garnish with toasted sesame seeds.1 teaspoon toasted sesame seeds
Notes
If you do blanch them, ensure that you dry them completely with a paper towel before frying them or they will splatter everywhere.
Nutrition
I am not a nutritionist. The nutrition information has been calculated using an on-line calculator, and is intended for information and guidance purposes only. If the nutrition information is important to you, you should consider calculating it yourself, using your preferred tool.
If you made this recipe and enjoyed it, I'd love it if you could give me a star rating in the comments below. And if you'd like to get in touch, you can email me at [email protected]. I'd love to hear from you. And don't forget to subscribe to my mailing list so you can grab yourself a copy of my FREE COOKBOOK!
If you'd like to continue browsing, just click on this link to all my recipes.


Did you make this recipe? Let me know!