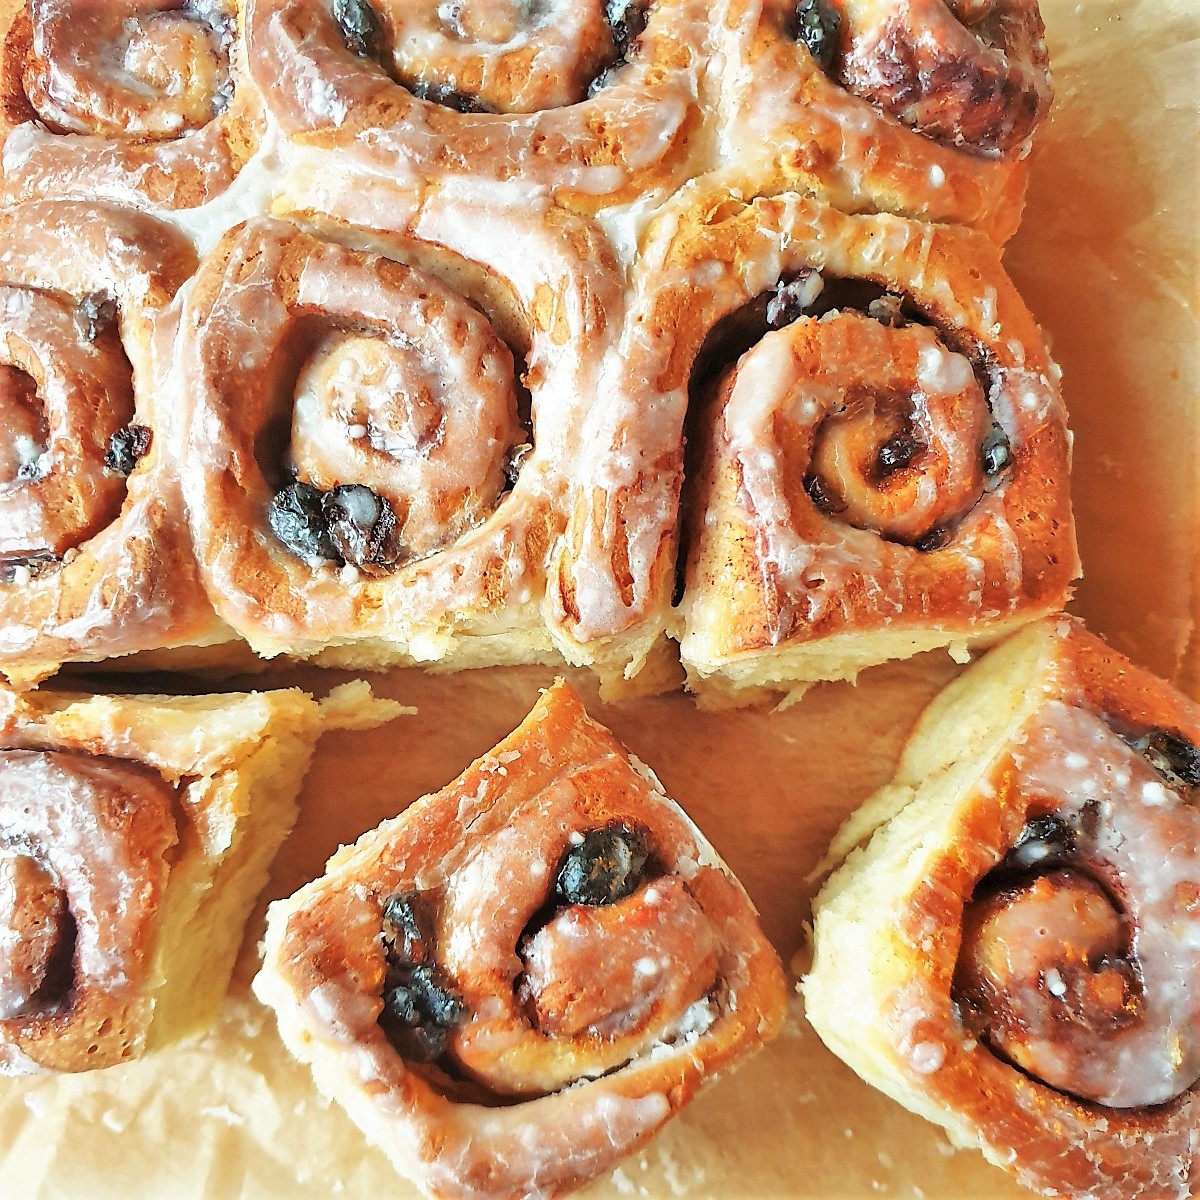
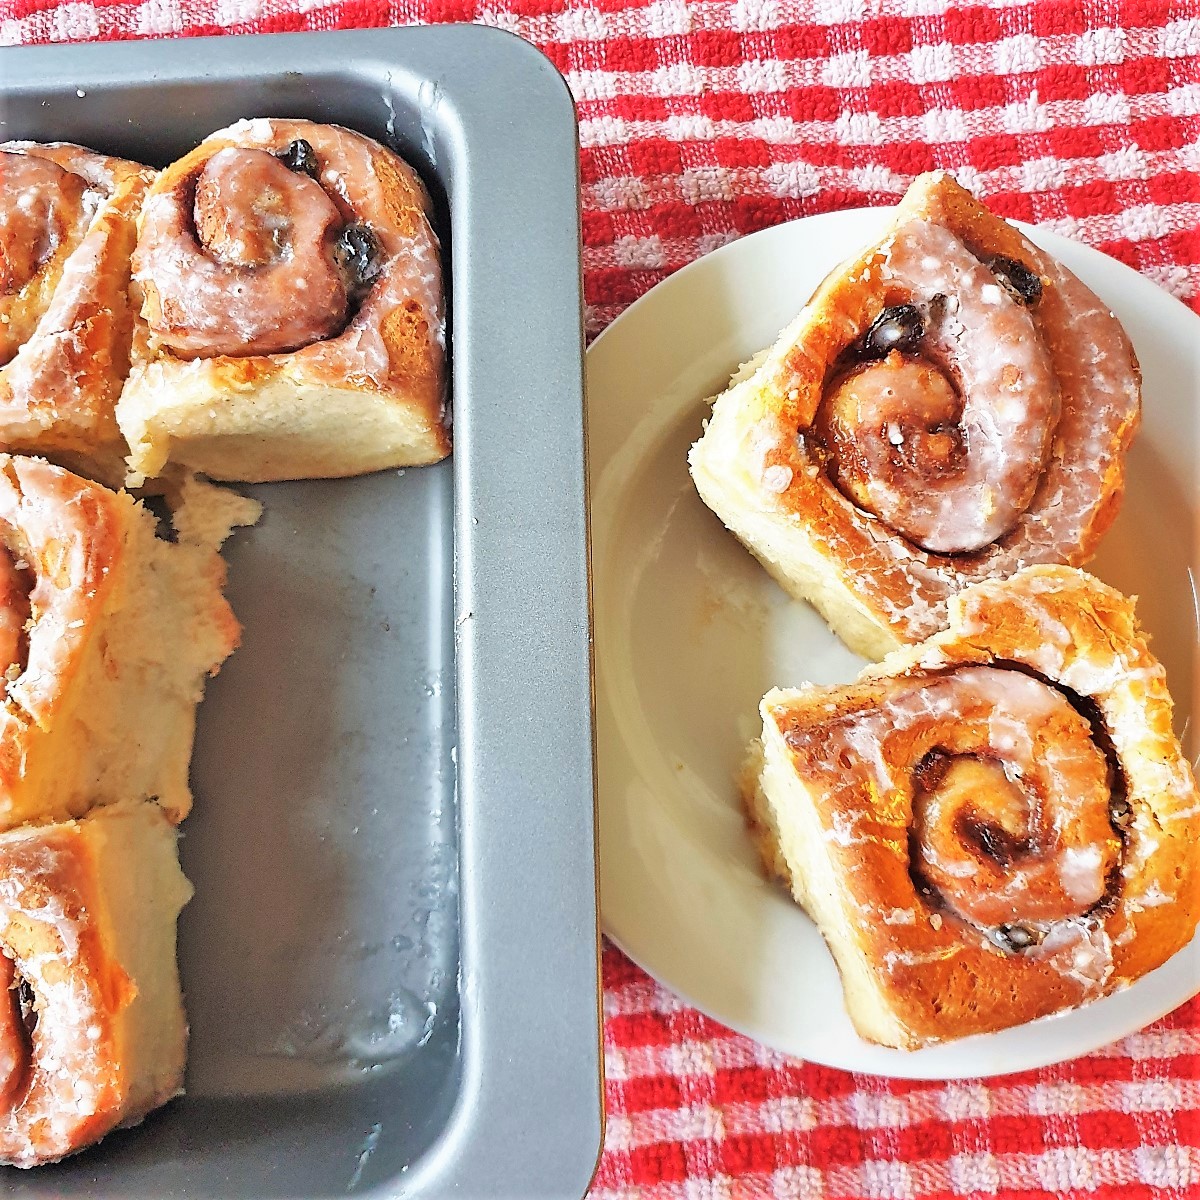
What do you do when your Australian granddaughter asks you for a recipe for cinnamon buns? You dig out your recipe for Chelsea buns of course! Fluffy and light, with a soft rich pastry, a brown sugar and cinnamon filling, and packed with sultanas, these homemade Chelsea buns taste amazing. For extra sweetness, they are covered with a simple icing sugar glaze.
Jump to:
Chelsea buns or cinnamon buns?
I often made these Chelsea buns at home when my children were younger - they are perfect for packing in lunch boxes or as an after-school snack. And they are especially delicious eaten warm, straight out of the oven. But once my family grew up and left home I stopped making them.
The other day my granddaughter messaged me on Facebook asking if I had a recipe for cinnamon buns and I remembered this recipe.
I think Chelsea buns and cinnamon buns are both pretty similar, it just depends on where in the world you are, as to what you call them. But there are a few subtle differences:
- In a Chelsea bun, the cinnamon is optional
- In a cinnamon bun, the sultanas (or other dried fruit like raisins and currents) are optional
- A cinnamon bun has a thick glaze, sometimes made with cream cheese, whereas a Chelsea bun has a much thinner glaze, made with icing sugar, which is poured over while the buns are still hot from the oven, so it sinks into the warm dough and becomes almost invisible.
- Chelsea buns originated from Chelsea in London
- Cinnamon buns originated in Sweden, where they are called 'kanelbulle', and the 4th of October each year is celebrated as Cinnamon Bun Day.
My recipe calls for both cinnamon and sultanas, so I guess it is a bit of a combination of both. Nevertheless, as Shakespeare so aptly put it in Romeo and Juliet -
What's in a name? That which we call a rose
Spoken by Juliet, Romeo & Juliet, Act 2 Scene 2
By any other name would smell as sweet
So this is my interpretation of a Chelsea bun/cinnamon bun. I hope you enjoy it.
The dough
Just look at the texture of the dough. The secret is to add an egg to the mixture. This enriches the dough and helps to form the characteristic soft chewy texture.
The dough for Chelsea buns also contains yeast. But don't let this put you off making them. The yeast is instant yeast, which comes in pre-weighed 7g packets, and you just sprinkle the granules in with the flour. There's no need to mix it with water and sugar and wait until it froths before using it. This recipe is instant baking at its best.
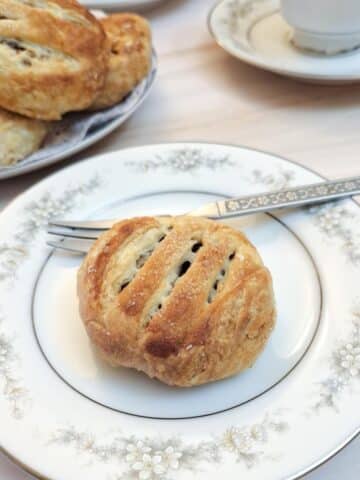
Update - I've adapted this recipe to make a Christmas version of Chelsea buns - called Fruit Mincemeat Star Bread - which is a cross between a Christmas mince pie and a giant Chelsea bun. Perhaps you'd like to try that one - I promise you, you won't be sorry!
Recipe information
- Prep time - 25 minutes
- Rising time - 1 hour and 30 minutes
- Cooking time - 25 minutes
- Yield - 9 buns
- Calories - 460 per bun
- Main equipment
- Mixing bowl - you will need a bowl large enough to hold all the flour plus the other ingredients.
- Stand mixer - of course, you don't have to knead these Chelsea buns by hand, if you have one, you could use a stand mixer fitted with a dough hook. I've had one for years and it does make short work of kneading dough.
What you will need to make Chelsea Buns
**You can get the complete list of ingredients and detailed instructions for making these Chelsea buns on the printable recipe card at the end of this post**
Ingredients

- Plain flour - don't use self-raising flour, this dough gets its rise from the yeast.
- Milk and butter - these should be warmed together in the microwave for a few seconds. The warmth from the warm ingredients will help to activate the yeast. Don't let the butter melt completely, it should just be nicely softened.
- Sugar - this is to add a bit of sweetness to the dough.
- Egg - to help form the distinctive texture.
- Yeast - as I mentioned, you need instant yeast, which comes in granule form.
- Salt - to add a little more flavour. You can leave this out if you wish.
For the filling
- Butter - this is spread on the rolled-out dough before the sugar and cinnamon are added. It helps keep the finished buns soft on the inside. If you are using it out of the fridge you can soften it in the microwave for a few seconds so it spreads easily.
- Brown Sugar - you can use white sugar if you don't have brown, but brown sugar does give a nicer flavour.
- Cinnamon - this is sprinkled onto the dough with the sugar.
- Sultanas - you can use either raisins or currents if you prefer. I like sultanas because they are so plump and juicy in the centre of the buns.
For the glaze
- Icing sugar - that's what we call it in England. Other parts of the world may refer to it as powdered sugar or confectioner's sugar.
- Milk - not too much, just enough to turn the icing sugar into a runny paste.
- Cream cheese - (optional) - this is used if you would like a cream cheese topping on your buns instead of just a plain icing glaze.
How to make Chelsea Buns
Make the dough
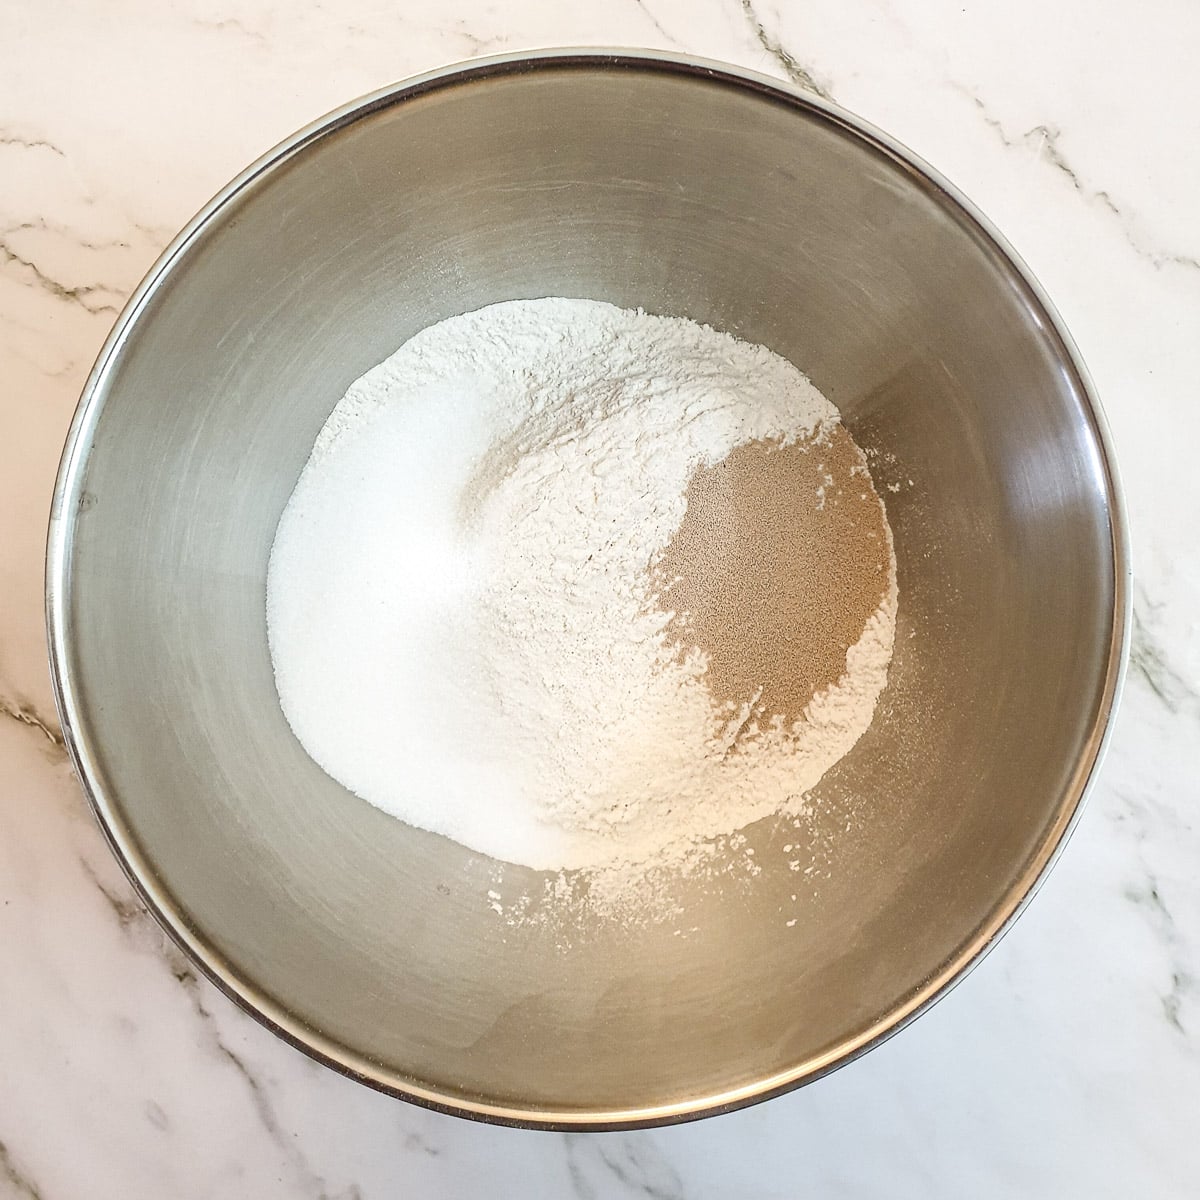
Place the flour, sugar, salt and yeast in the bowl of a stand mixer, or into a mixing bowl if you are going to be mixing these by hand.

Place the milk and butter into a measuring cup and microwave for a few seconds until the milk is lukewarm and the butter has softened slightly.
Yeast likes a warm environment and if the milk and butter are just out of the fridge they will be too cold and the yeast will take longer to activate and start rising.
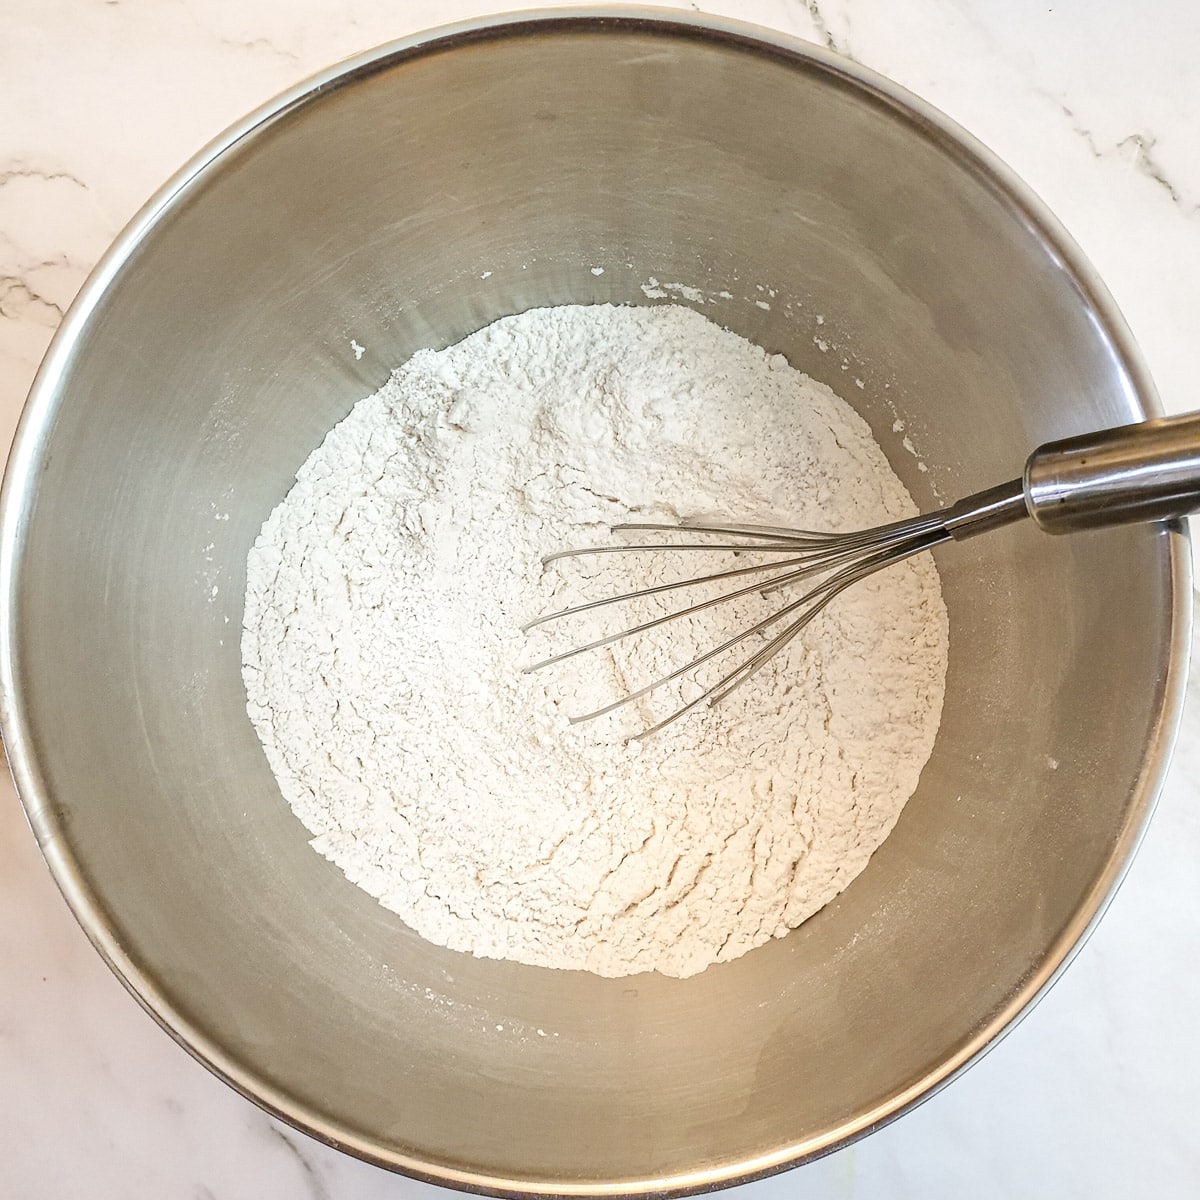
Mix the dry ingredients lightly with a balloon whisk to combine them.
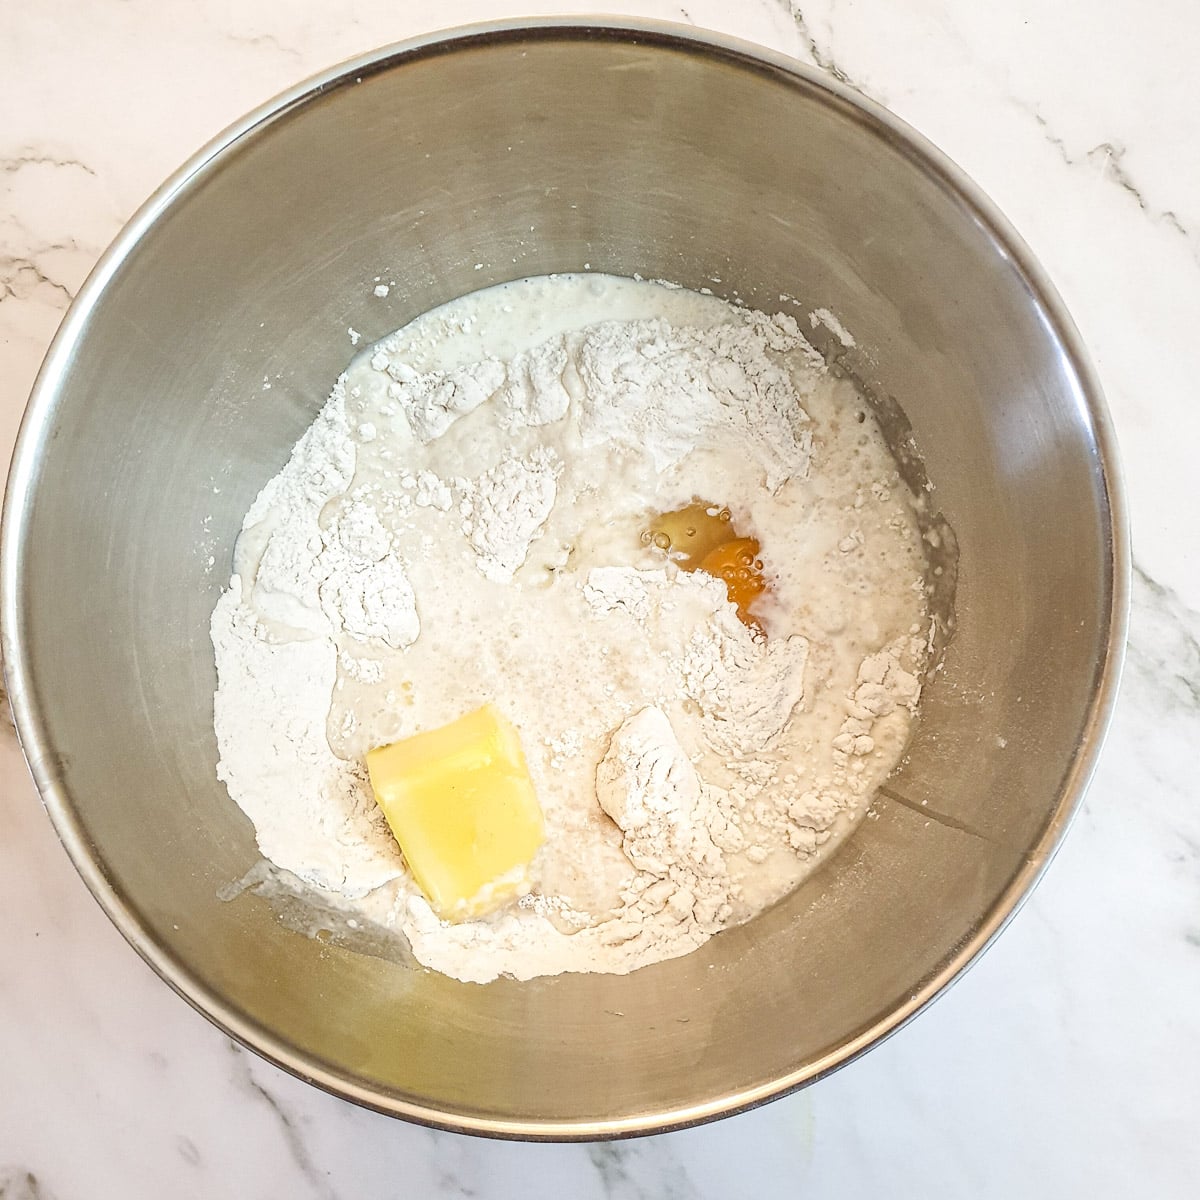
Pour in the milk and butter and add the egg.
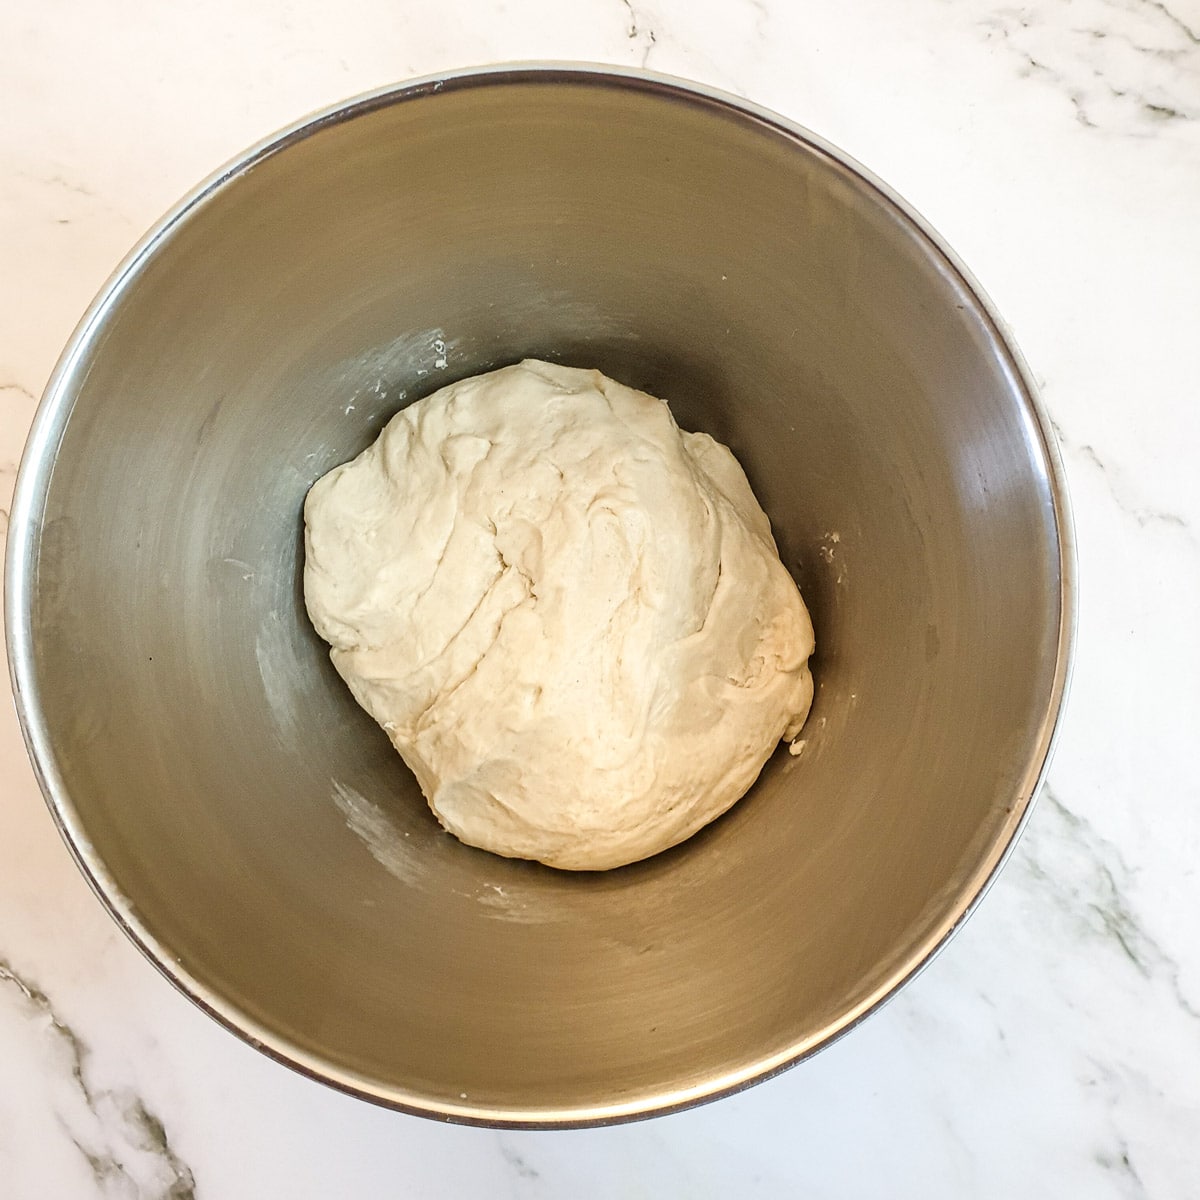
Knead the dough in a stand mixer fitted with a dough hook for about 5 minutes until you have a smooth pliable dough.
If you are mixing by hand, use a flat knife, or wooden spoon and mix the ingredients until they are combined. Now knead the dough for about 10 minutes.
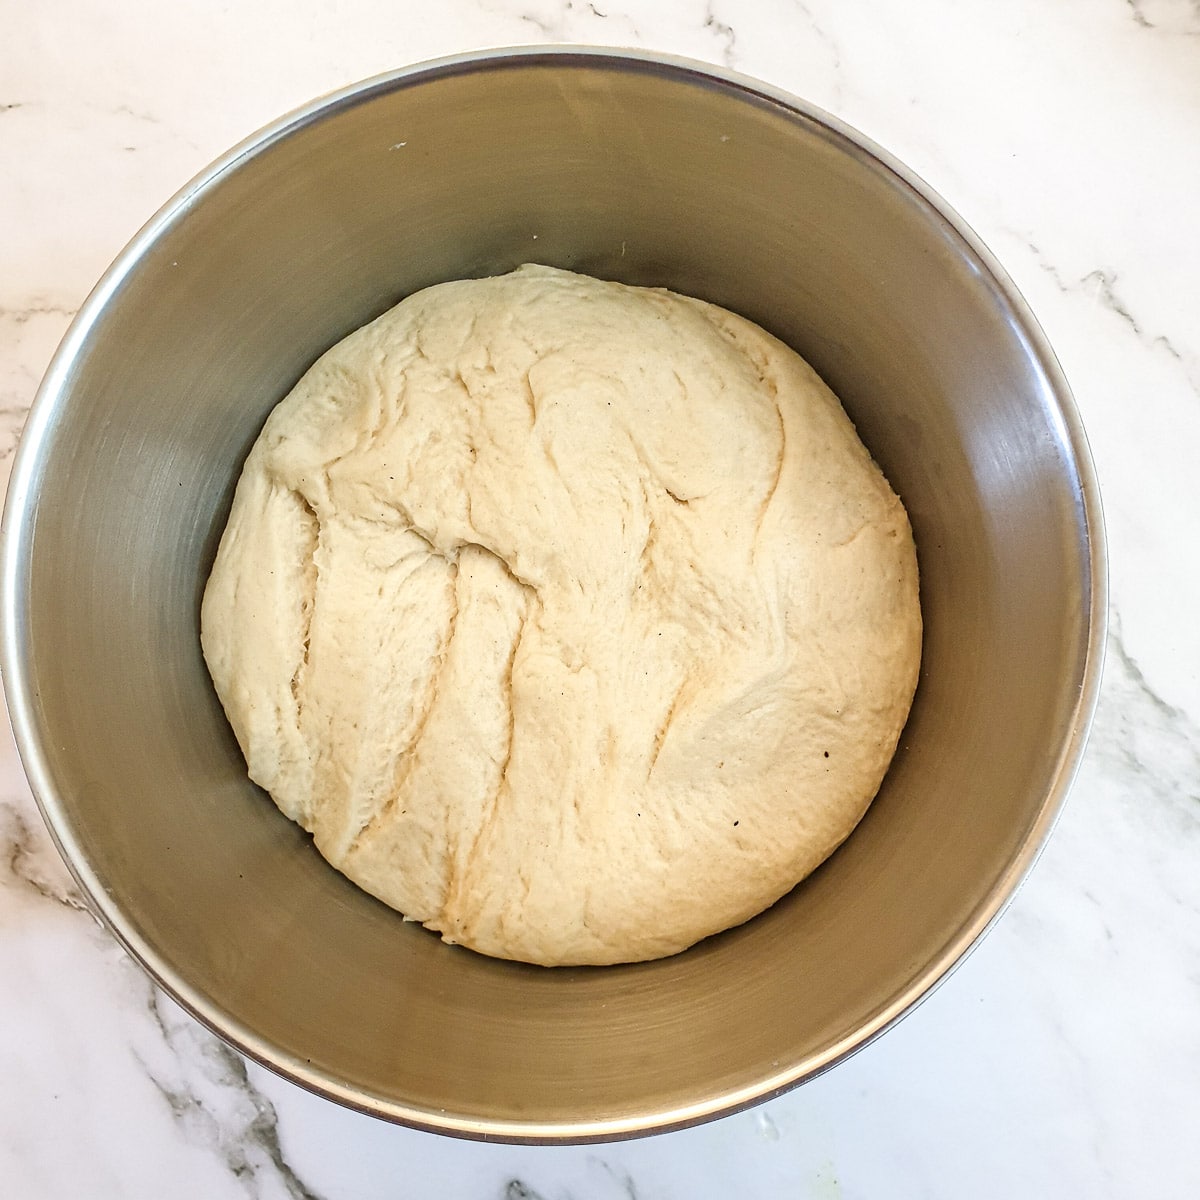
Cover the bowl with a sheet of plastic wrap or a clean towel and leave in a warm draught-free place for one to two hours until the dough has doubled in size.
Roll and fill
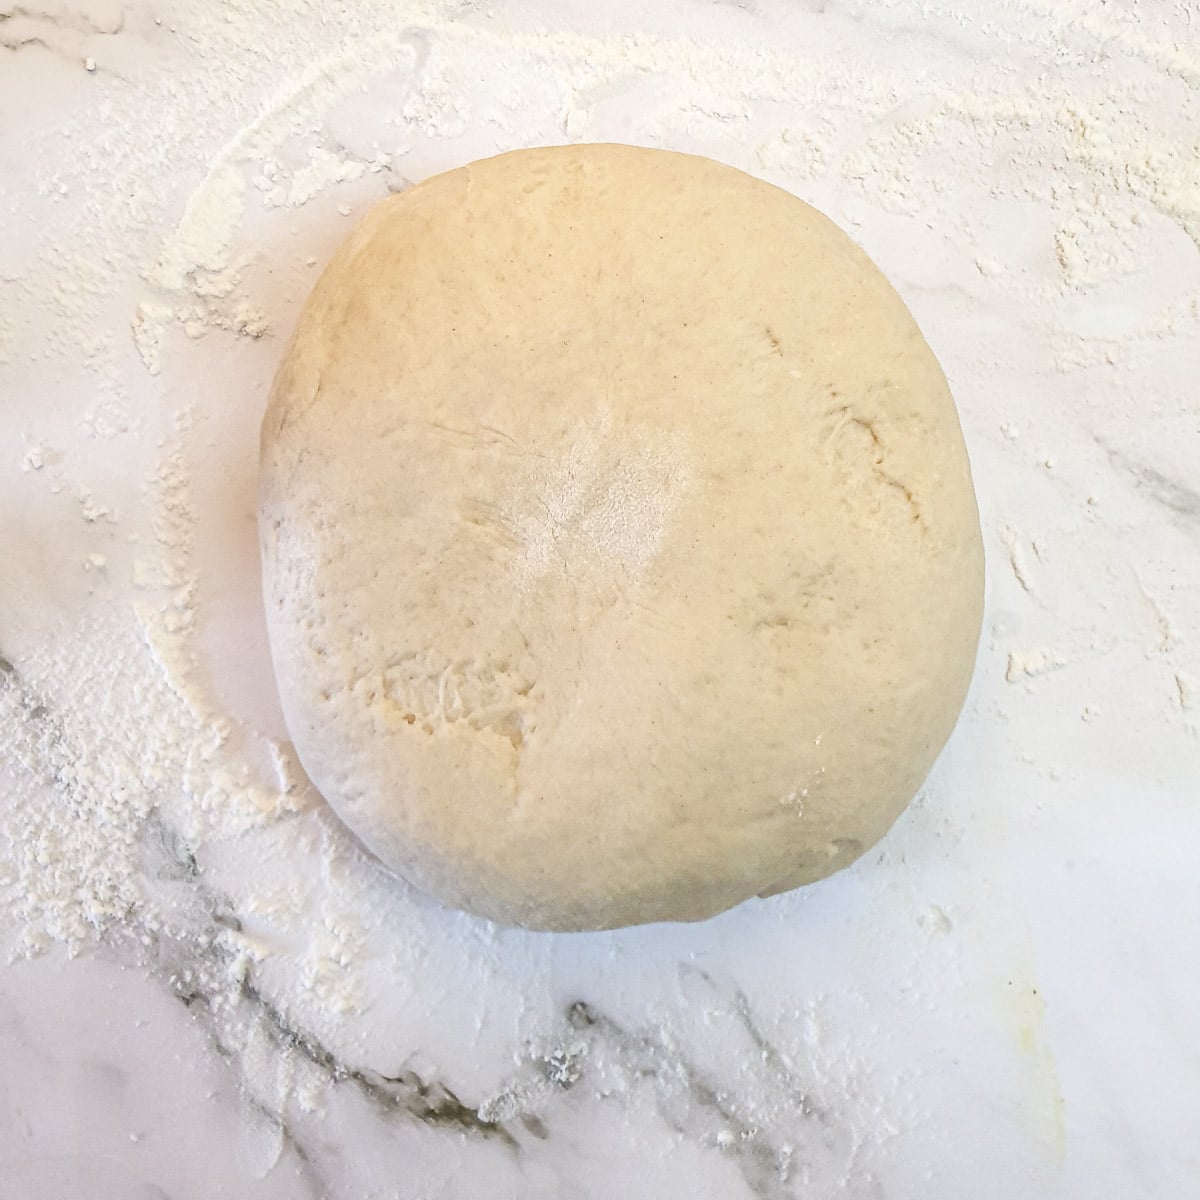
Tip the dough out of the bowl onto a lightly floured surface and knead it lightly to knock out the air.

Roll the dough out into a rectangle approximately 12" x 15" in size. Roll the dough as evenly as possible so that it is the same thickness all the way through.
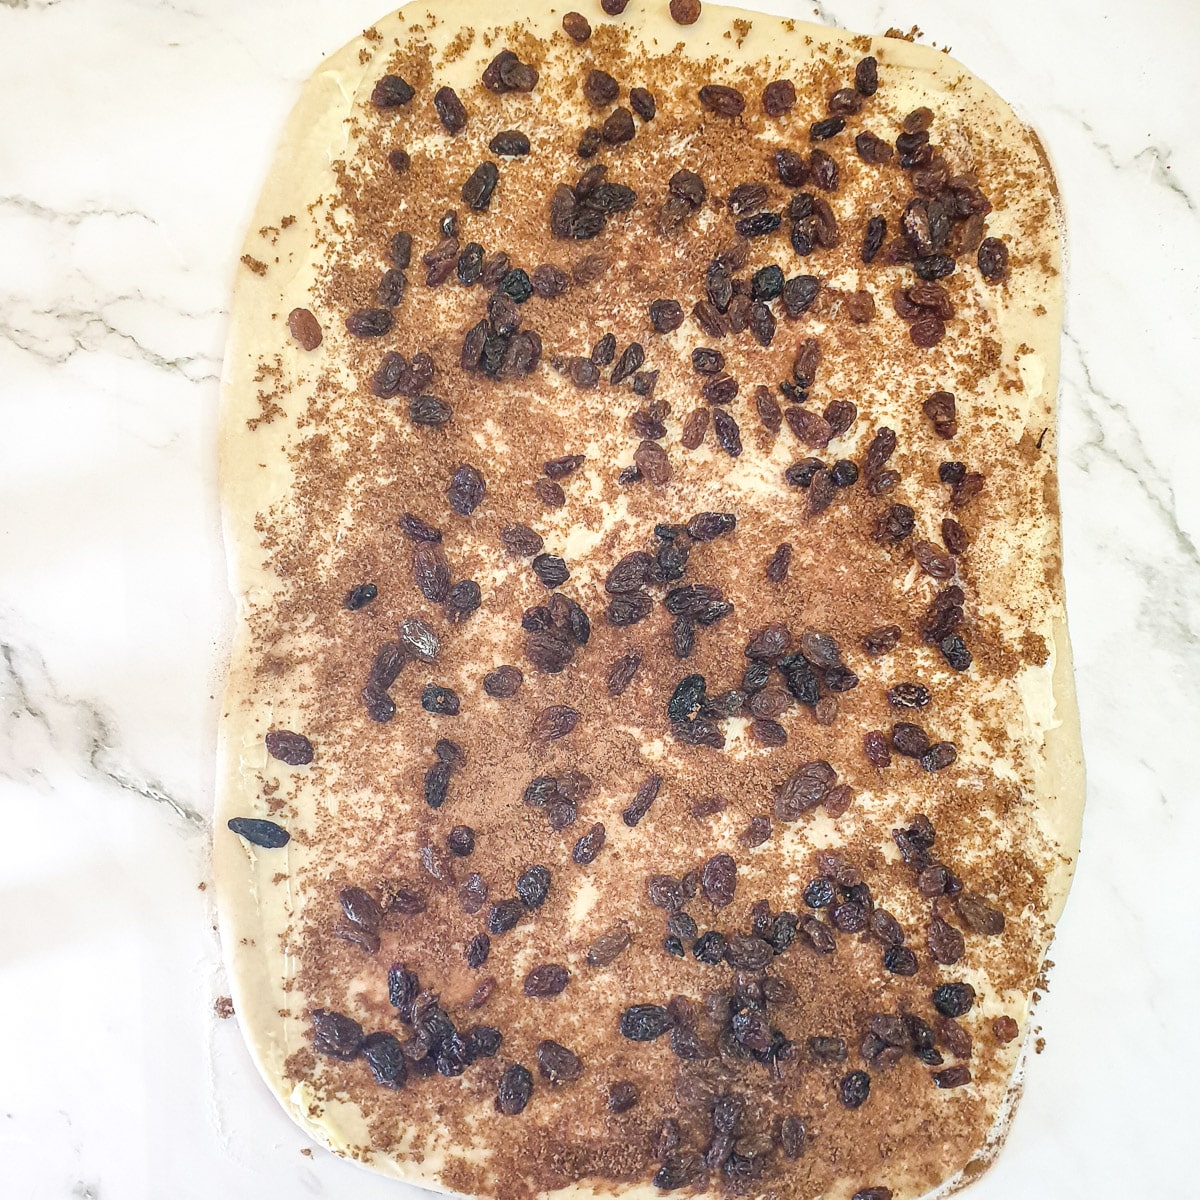
Spread the dough with the butter and then combine the brown sugar and cinnamon and spread that evenly over the butter.
Sprinkle the sultanas evenly over the sugar.
Leave about half an inch of dough uncovered on one long edge so that you can seal the dough when it is rolled.
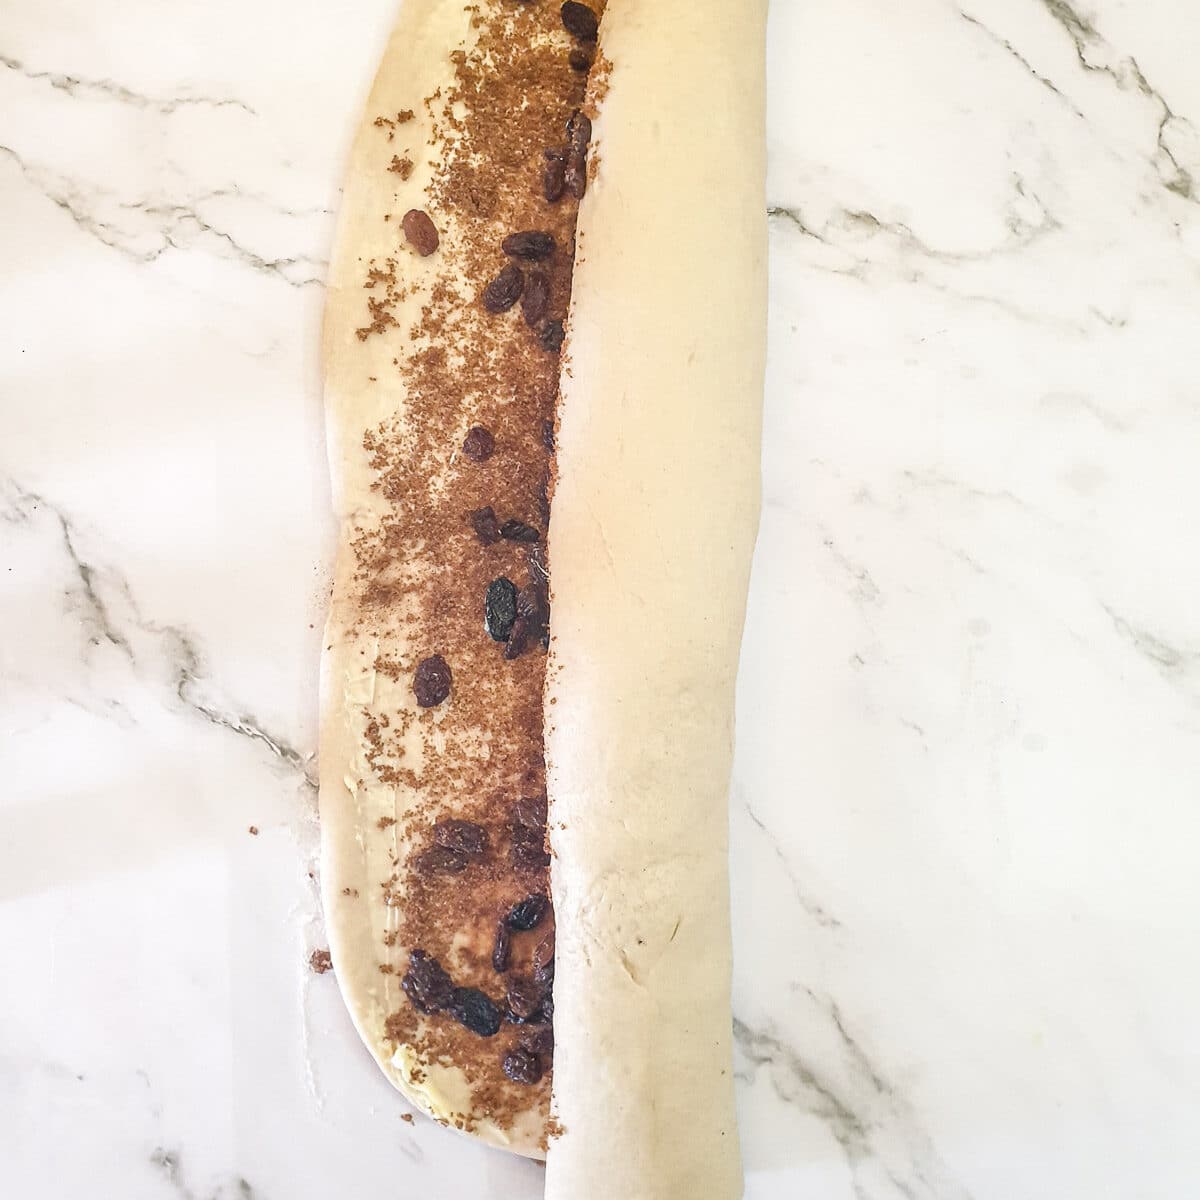
Starting at the long edge, roll the dough tightly towards the uncovered edge.
Press the edges of the dough onto the roll to seal, and place the dough seam-side down on your work surface.
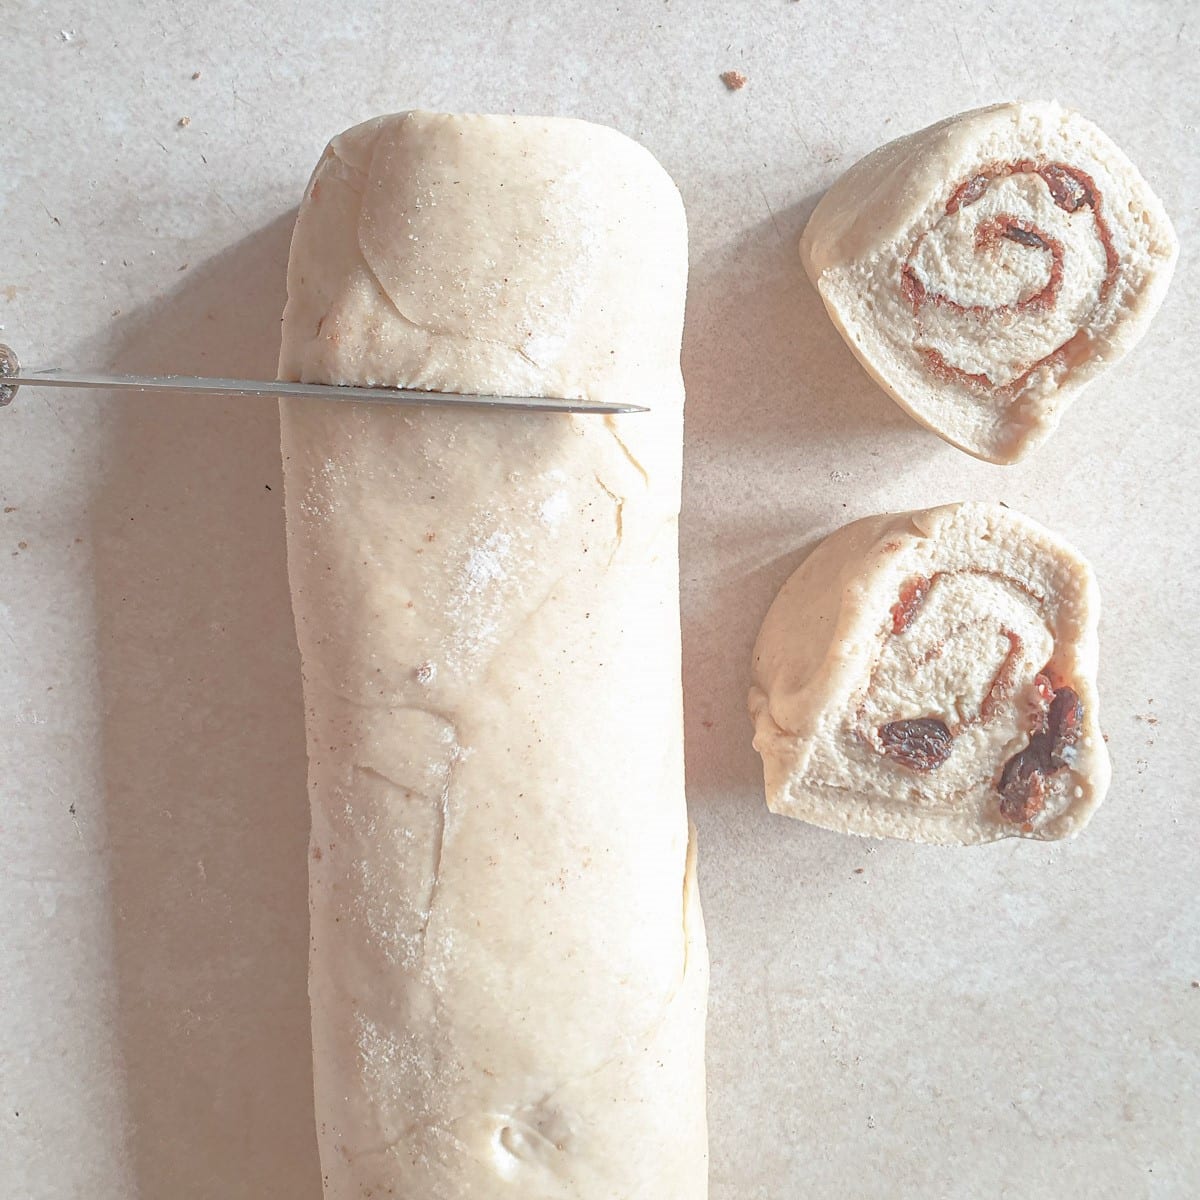
Cut away the ends to straighten it up and remove the bits of dough that may not have any filling.
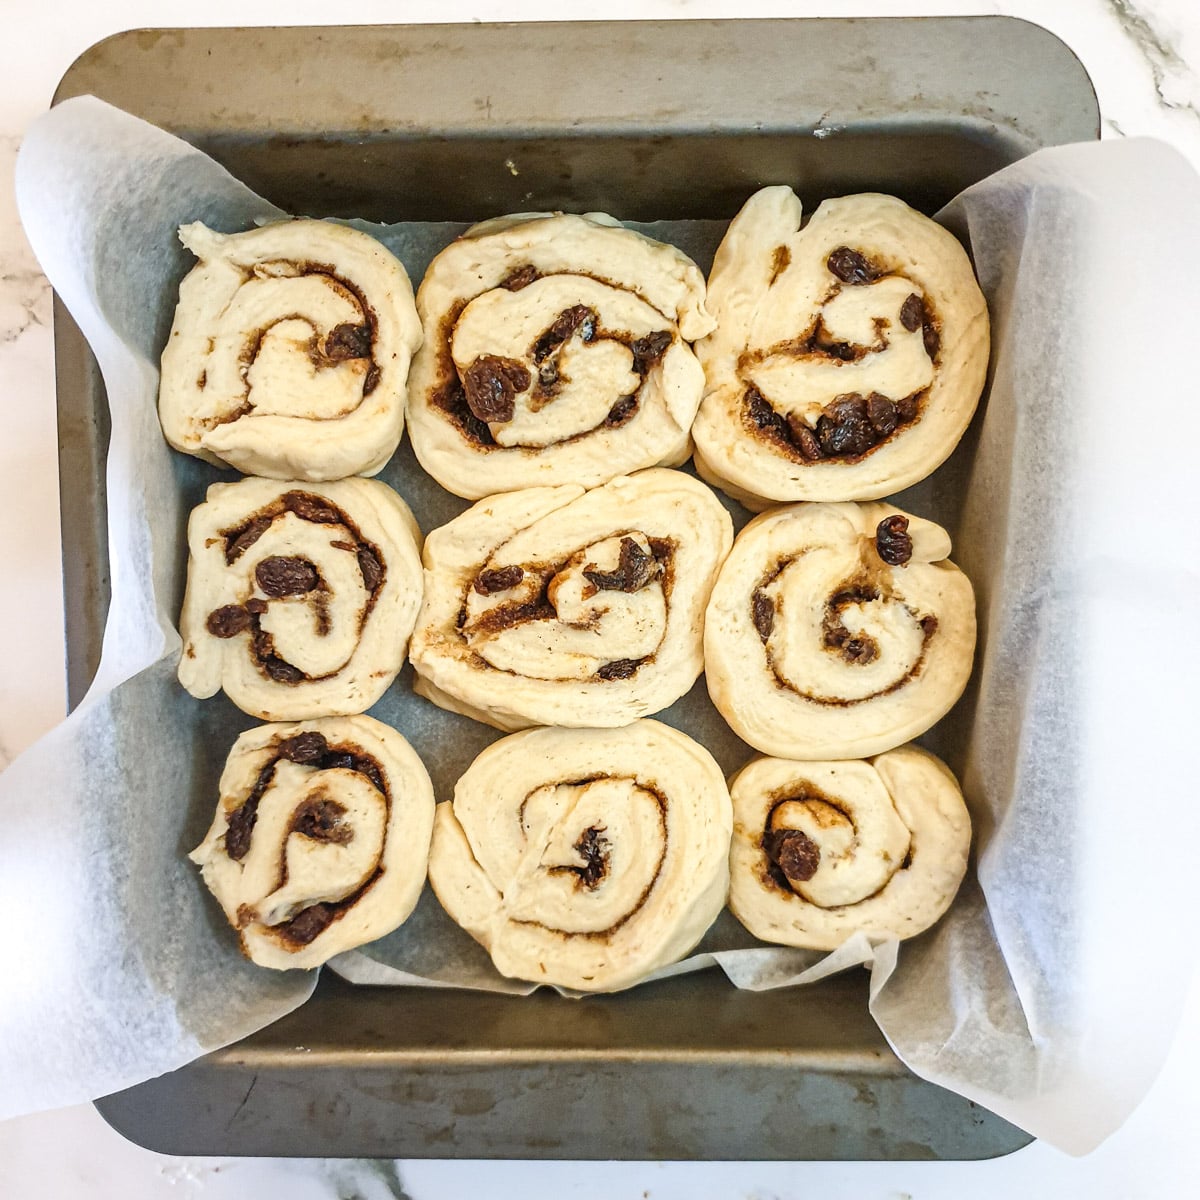
Line a 9" x 9" baking tin with baking parchment (to prevent the Chelsea buns from sticking).
Cut the roll of dough into 9 equal slices and place each one into the baking tin.
Don't worry about any gaps, they will close up as the buns rise.
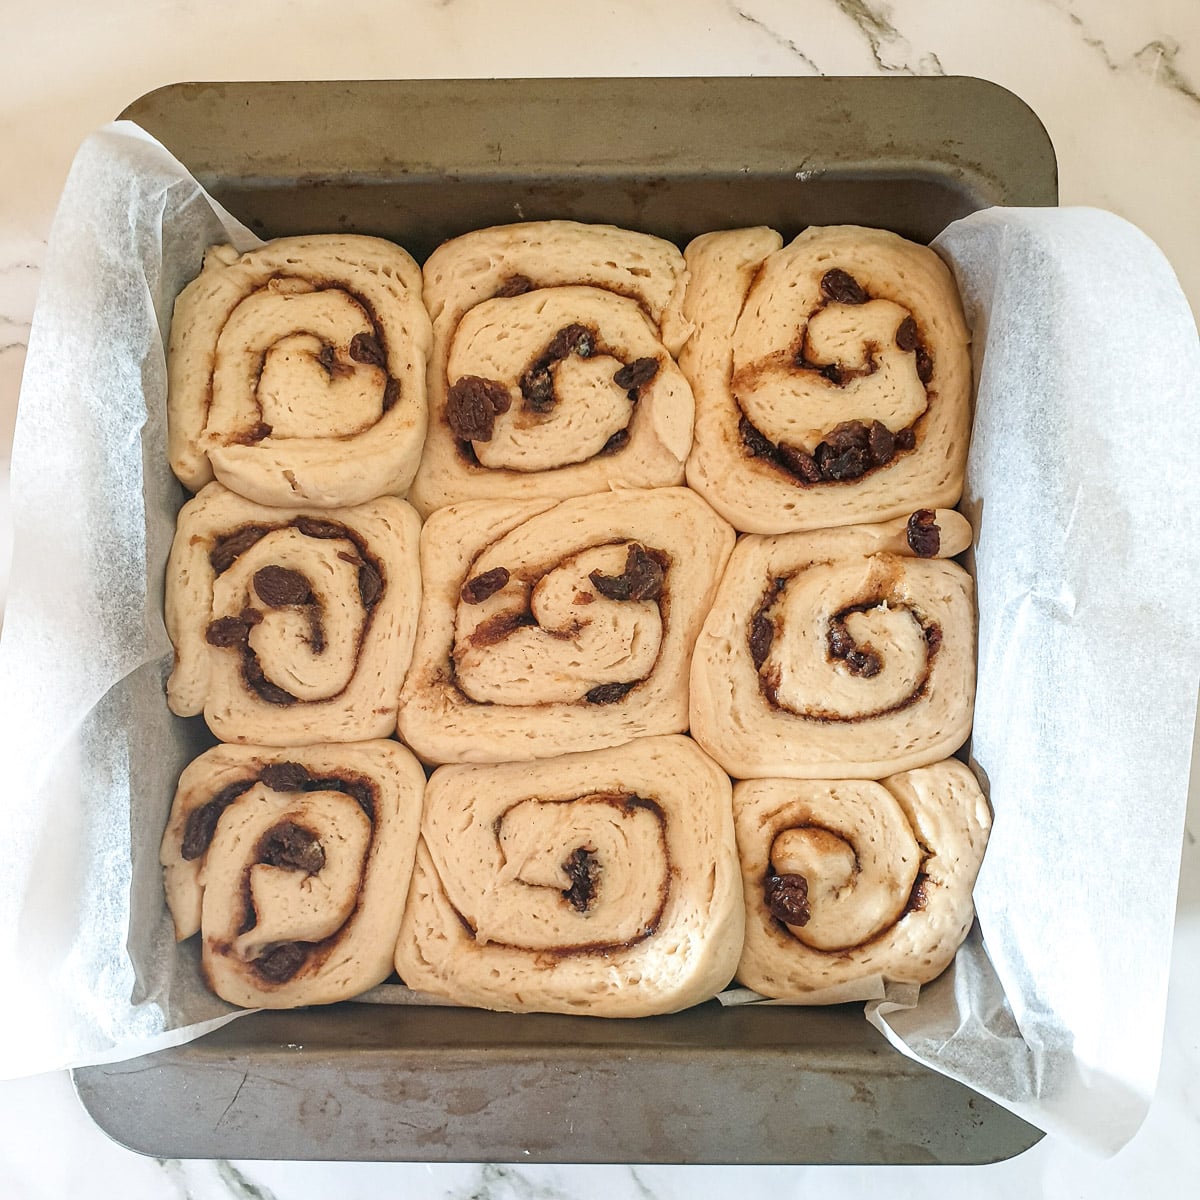
Cover with a sheet of plastic wrap or a clean tea towel and leave in a warm place for about 30 minutes to rise.
Once the buns have risen they should be tightly packed together. This means when you separate the cooked buns, each side will be nice and soft.
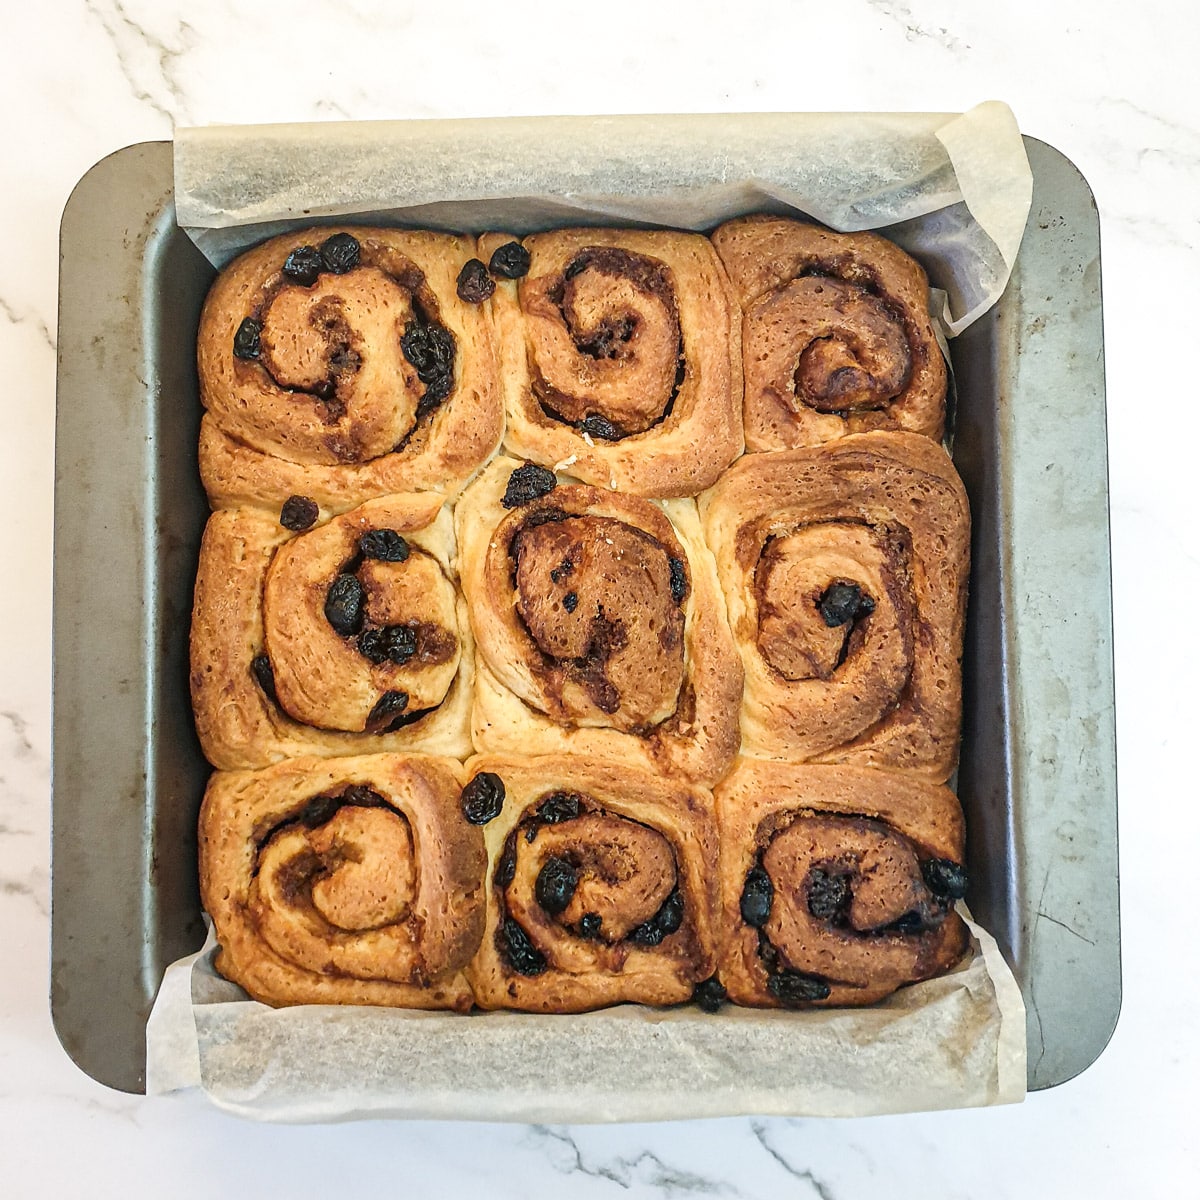
Preheat the oven to 190C / 375F and place the tray of Chelsea buns on the middle shelf in the oven.
There is no need to brush with milk or eggwash, the buns will brown nicely because of the butter in the dough, and the glaze will soften the top when you pour it over.
Bake for about 25 to 30 minutes until they are golden brown.
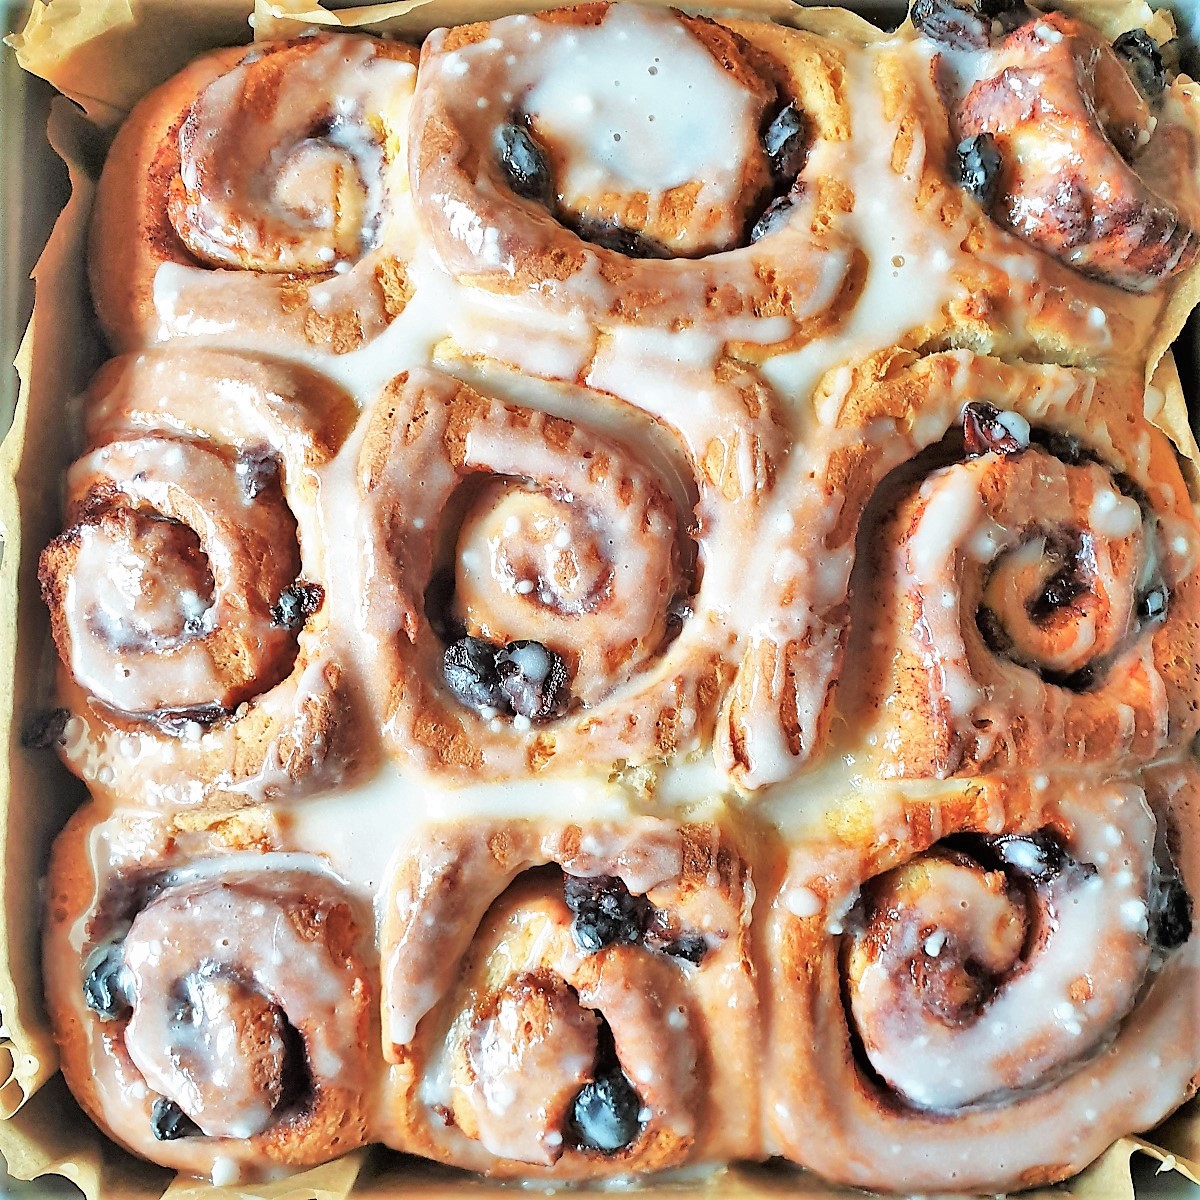
Remove from the oven and pour over the glaze while the buns are still hot.
Make the glaze
- Make the glaze while the Chelsea buns are in the oven.
- Put the icing sugar into a bowl and add just enough milk to make a pourable paste.
- Mix well to remove any lumps
- Pour over the Chelsea buns while they are still hot from the oven. The glaze will melt and sink into the buns, leaving just a thin coating on top.
- If you would like to add cream cheese to the glaze, you can add it in with the icing, but wait until the buns have cooled before coating the buns with the glaze.
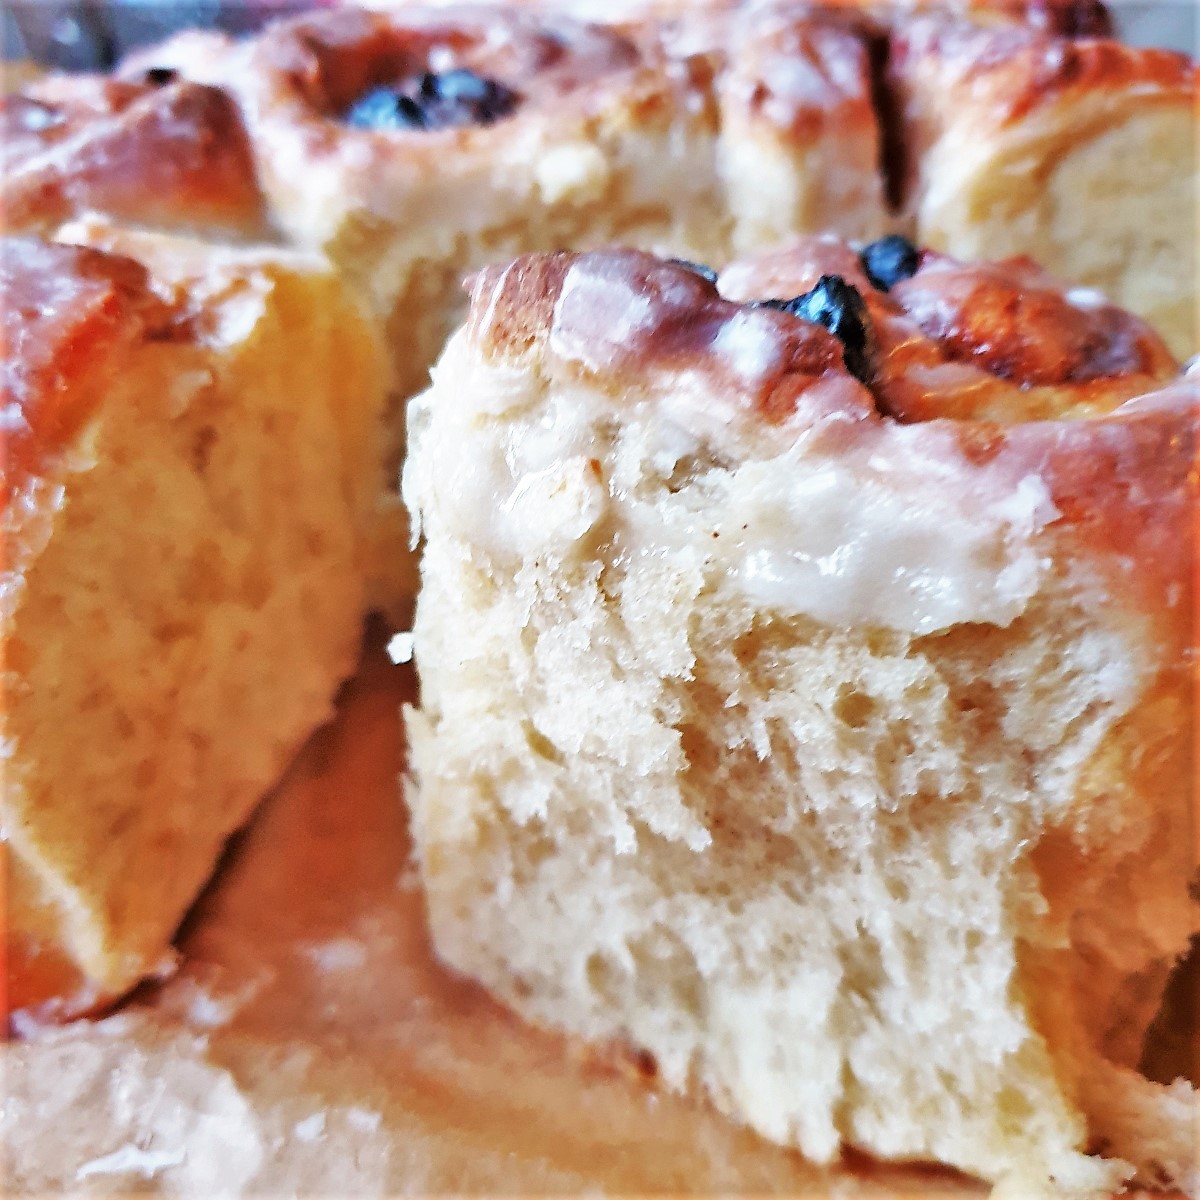
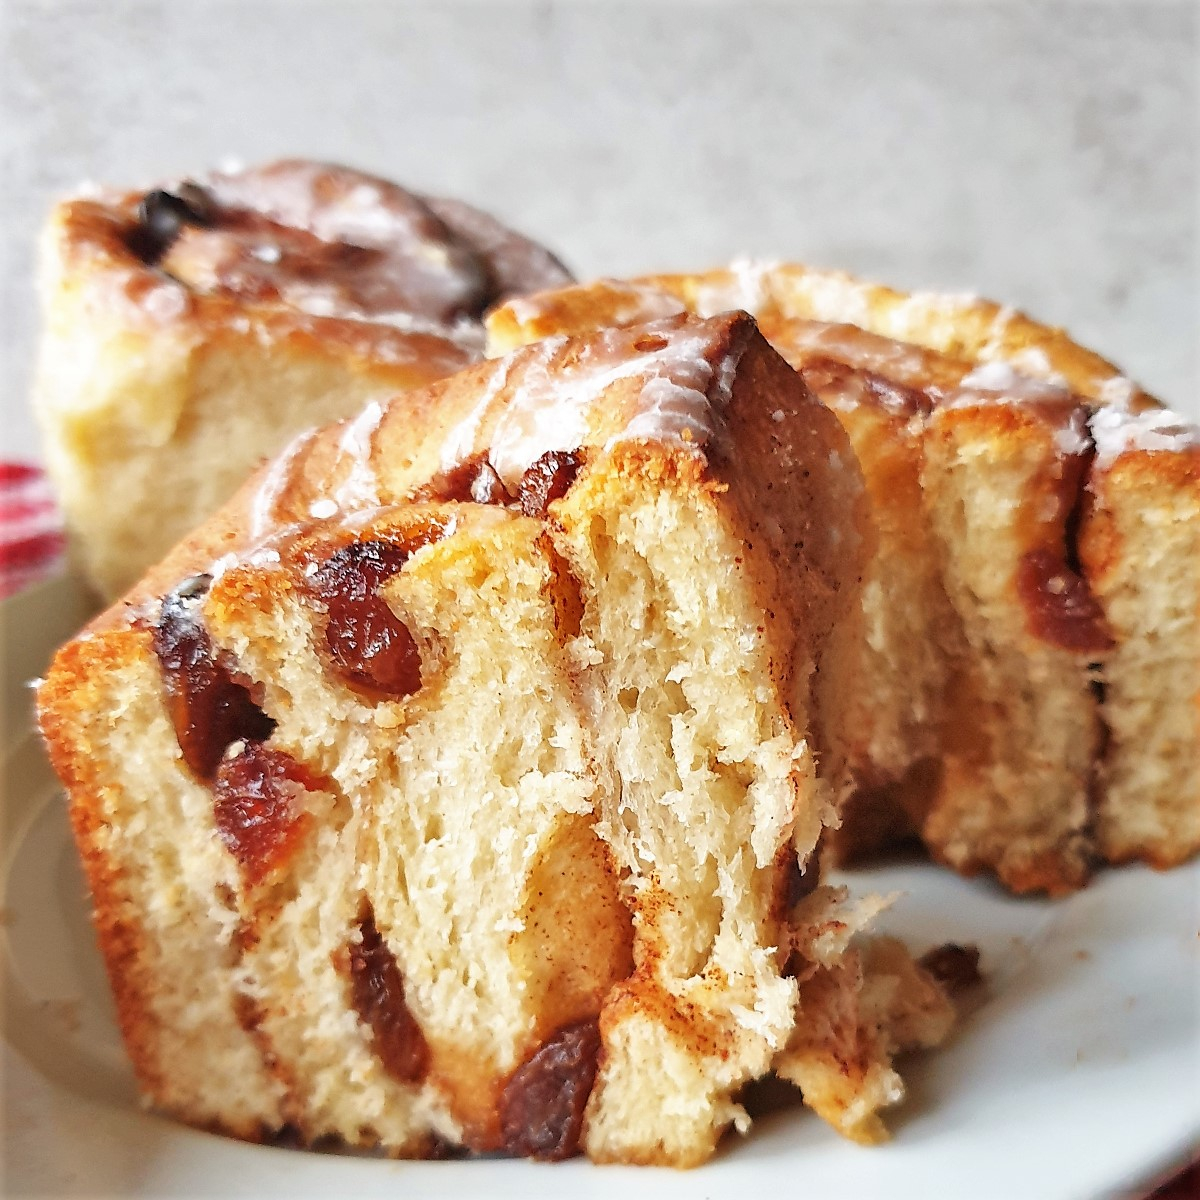
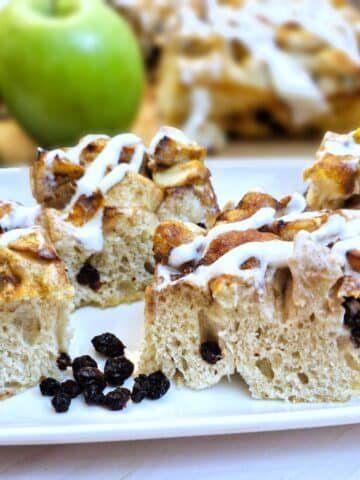
I've cut one of the Chelsea buns in half so you can see what the texture looks like. It should be soft, moist, chewy and even if I say it myself, absolutely delicious.
If you'd like to be notified of new recipes, why not subscribe to my newsletter? To say thank you, you will receive a free recipe e-book containing some of my most popular cakes and desserts.
How do I serve Chelsea buns?
Chelsea buns can be eaten at any time.
- Try having one for breakfast.
- Pop one into a lunch box for a sweet treat.
- Slice and spread with butter for a tea-time snack.
- You could even pour a helping of custard over and have it for a tasty dessert!
Chelsea buns will stay fresh in an airtight container for up to 3 days.
Can I freeze Chelsea buns?
If you want to freeze uncooked Chelsea buns, arrange the slices in a disposable tin foil container and then allow them to rise. Cover with clingfilm, then place the container with the buns in a large plastic bag and freeze until you are ready to bake them.
To bake, remove the Chelsea buns from the freezer and allow them to defrost. Once they are defrosted, discard the wrapping, place the buns in the oven in the tinfoil container and then bake as per the recipe instructions. Then make the glaze and pour it over the hot buns.
Baked Chelsea buns (with the glaze) can be wrapped in tin foil, covered with clingfilm and frozen for up to six months.
To reheat, remove from the freezer and allow to defrost then remove from the wrapping. Reheat them either in the microwave or place them in a hot oven for a few minutes.
Save for later
If you'd like to make these Chelsea buns yourself, why not pin this recipe to one of your Pinterest boards so you can find it easily? Just click on the image below.
Alternatively, you can save the recipe by clicking on the floating heart icon on the right-hand side of the screen.
Related recipes
If you enjoyed these Chelsea buns you may also enjoy some of my other baking recipes.
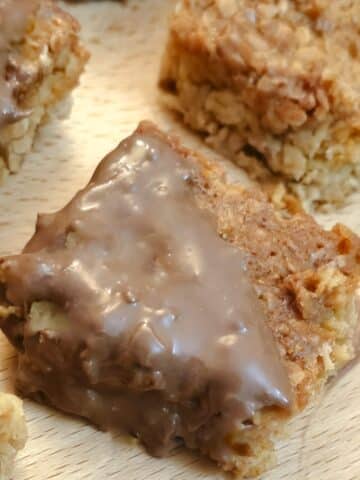

You can find these and similar recipes on my cake, biscuits and dessert recipes page.
📋The recipe

Chelsea Buns
(Click the stars to rate this recipe)
Equipment
- Mixing bowl
- Rolling Pin
- Small bowl
- Baking tin
- Baking parchment paper
Ask a Question
If you have a question about this recipe that has not been answered, please use the box below to ask it.
Use this with care. This is an AI-generated result and may contain errors or inaccuracies. I cannot be held responsible for the information returned.
Ingredients
Dough
- 4 cups / 560 grams flour
- 1 cup / 240 ml milk
- 4 ounces / 125 grams butter warmed in the microwave with the milk
- 4 tablespoons / 50 grans sugar
- 2 teaspoons / 7grans instant dry yeast
- 1 large egg at room temperature
- ½ teaspoon salt
Filling
- 6 tablespoons brown sugar you can use white sugar, but brown gives a better taste
- 4 tablespoons butter softened
- 2 teaspoons ground cinnamon powder
- 4 ounce / 100 grams sultanas be generous
Glaze
- 2 ounce / 60 grans icing sugar/confectioner's sugar about 4 heaped tablespoons
- Milk sufficient to mix with icing sugar to form a smooth thin paste
- 4 ounces / 100 grams cream cheese (optional)
Instructions
- Place the flour, sugar, salt and yeast in the bowl of a stand mixer, or into a mixing bowl if you are going to be mixing these by hand.4 cups / 560 grams flour, 4 tablespoons / 50 grans sugar, ½ teaspoon salt, 2 teaspoons / 7grans instant dry yeast
- Put the butter and milk into a measuring jug and then microwave for about 30 seconds. Do not allow the butter to melt completely, it should just soften.1 cup / 240 ml milk, 4 ounces / 125 grams butter
- Mix the dry ingredients lightly with a balloon whisk to combine them.
- Pour the mik and butter into the dry ingredients and add the egg.1 large egg
- Knead the dough in a stand mixer fitted with a dough hook for about 5 minutes until you have a smooth pliable dough.If you are mixing by hand, use a flat knife, or wooden spoon and mix the ingredients until they are just combined. Now knead the dough for about 10 minutes.
- Cover the bowl with a sheet of plastic wrap or a clean towel and leave in a warm draught-free place for one to two hours until the dough has doubled in size.
- Tip the dough out of the bowl onto a lightly floured surface and knead it lightly to knock out the air.
- Roll the dough out into a rectangle approximately 12" x 15" in size. Roll the dough as evenly as possible so that it is the same thickness all the way through.
- Spread the dough with the butter and then combine the brown sugar and cinnamon and spread that evenly over the butter. Sprinkle the sultanas evenly over the sugar.Leave about half an inch of dough uncovered on one long edge so that you can seal the dough when it is rolled.6 tablespoons brown sugar, 4 tablespoons butter, 2 teaspoons ground cinnamon powder, 4 ounce / 100 grams sultanas
- Starting at the long edge, roll the dough tightly towards the uncovered edge. Press the edges of the dough onto the roll to seal, and place the dough seam-side down on your worksurface.
- Cut away the ends to straighten it up and to remove the bits of dough that may not have any filling.
- Line a 9" x 9" baking tin with baking parchment (to prevent the Chelsea buns from sticking). Cut the roll of dough into 9 equal pieces and place each one into the baking tin.
- Cover with a cloth and leave for about 30 minutes in a warm place to let them rise again.
- Preheat the oven to 190°C / 375°F
- Place the tray of Chelsea buns in the preheated oven for about 25 minutes until golden brown.
Glaze
- Mix the icing/confectioner's sugar with sufficient milk to form a thin paste2 ounce / 60 grans icing sugar/confectioner's sugar, Milk
- Pour over the hot buns when they come out of the oven
- If you would like to add cream cheese to the glaze, you can add it in with the icing, but wait until the buns have cooled before coating the buns with the glaze.4 ounces / 100 grams cream cheese
Notes
- Just mix enough to combine all the ingredients. You will find there are still lumps of butter in the dough. This is perfectly fine - it will incorporate fully as you knead the dough.
- When kneading the dough you should not need any extra flour. If you find the dough is too sticky you can add a small amount, but don't add too much. As you knead, you will find the dough becomes less sticky.
- I have specified 6 tablespoons of brown sugar. Use what you need to cover the dough completely in a thin layer.
- 2 teaspoons of cinnamon should be sufficient, but you can use more or less depending on your taste.
- Be generous with the sultanas. 100g should be enough to give a nice covering, but you can use more or less depending on your taste.
- If you wish, you can substitute the sultanas with currents or raisins.
- Cut away each end of the roll to trim away any dough that doesn't have filling.
- Use a serrated knife to cut the rolls neatly
- Do not pack the rolls too tightly - leave a small gap between each roll to allow for expansion as the rolls rise.
- There should be enough room for the rolls to expand and just touch one another when they rise. This way when you separate the cooked rolls, the sides will be nice and soft.
Nutrition
I am not a nutritionist. The nutrition information has been calculated using an on-line calculator, and is intended for information and guidance purposes only. If the nutrition information is important to you, you should consider calculating it yourself, using your preferred tool.
If you made this recipe and enjoyed it, I'd love it if you could give me a star rating in the comments below. And if you'd like to get in touch, you can email me at [email protected]. I'd love to hear from you. And don't forget to subscribe to my mailing list so you can grab yourself a copy of my FREE COOKBOOK!
If you'd like to continue browsing, just click on this link to all my recipes.
Val says
Hi never made these guys before and they turned out great ! Many thx
Best, Val
VJ says
My pleasure! Glad you enjoyed them!
Sally says
A bit sweeter than what we are used to- I will cut the sugar in the filling down a bit but otherwise these were seriously delish. I would love to be able to print out the recipe in a more succinct way but I will just write it on a recipe card
VJ says
Glad you enjoyed them Sally. Please let me know how you would like the printed recipe to appear and I'll see what I can do!
Margaret says
Absolutely love this recipe and made them many, many times. My teenage granddaughter loves them too.
She is coming to spend the day with me tomorrow and I asked what she would like to do. I expected a shopping trip, lunch out etc but oh no…..please please can we make your Chelsea buns. 😂
Thank you
Margaret
VJ says
Oh Margaret - thank you! That made me smile. I'm so happy you (and your granddaughter) enjoy them.
Margaret says
Love this recipe but never sure if temp is 190 non fan or not. Should I bake at 170 fan?
VJ says
I use a fan oven and I baked them at 190C.
Reinhold Jahnke says
Made these today, Lovely, lovely, lovely
VJ says
Glad you enjoyed them 🙂
Sue says
Made these yesterday. Absolutely delish.
VJ says
Thank you - It really makes my day when I get a comment like this.
Chloe says
Amazing dough!
I hate waste, what can I do with any leftover dough?
Ideas please!
VJ says
Because the dough is sweet it wouldn't really be suitable for use in a savoury recipe. Perhaps you could make small balls out of any leftover dough, flatten them slightly and deep fry (like doughnuts) then roll in cinnamon sugar. Otherwise what about mixing a handful of chocolate chips through the dough, forming it into small balls and baking on a baking sheet a bit like pain au chocolat? You could also freeze the dough for up to 3 months, let it defrost and make another batch of chelsea buns with it!
Grace says
Absolutely delicious.
I have just made this receipe for the first time and my dough did not rise but they still came out perfectly.
Thanks
VJ says
Glad they turned out well. Perhaps your yeast was out-of-date. That could cause them not to rise!
Victoria Adamako-Mensah says
Have not tried yet. Just finished reading the recipe and want to join your group for more
VJ says
I'd love to have you join. Just click on the subscribe link on any of the recipes to join. You'll get a free cookery e-book in return too!
Bonga says
Can you use margarine instead of butter?
VJ says
Yes, you can use yellow margarine instead of butter.
Bridget says
Made these today ... one word “delicious “ thank you
NADIA says
TASTY AND YUMMY ALL I CAN SAY
VJ says
Thank you
Michelle says
Perfect recipe is all I can say. I have made this over and over and over again and it's a huge hit with my family. Sending love from South Africa.
Eve says
What do you do with the butter in the filling part if recipe
VJ says
Oops - sorry. Thank you for pointing this out (I've updated the recipe).
The instructions were in the body of the post, but somehow this step got left out of the recipe card.
The butter should be spread over the dough before the cinnamon and brown sugar is added.
Marie Nell says
VJ, Thank you for sharing your recipe. I bake some today, and I can only say - perfect!!
VJ says
Hi Marie, I'm so pleased you enjoyed them. Thanks for letting me know. 🙂
VJ X
Sanet says
Best chelsea buns ever! You made a lot of people very happy during lockdown
VJ says
Hi Sanet - thank you so much for your lovely comment. You've just made me very happy too 🙂