
Slow-roasted until meltingly tender, these sticky pork belly slices are finished with a sweet and savoury maple glaze that turns deliciously sticky in the oven. Served with creamy mash and vegetables, this easy family supper is mostly hands-off cooking that delivers amazing results.
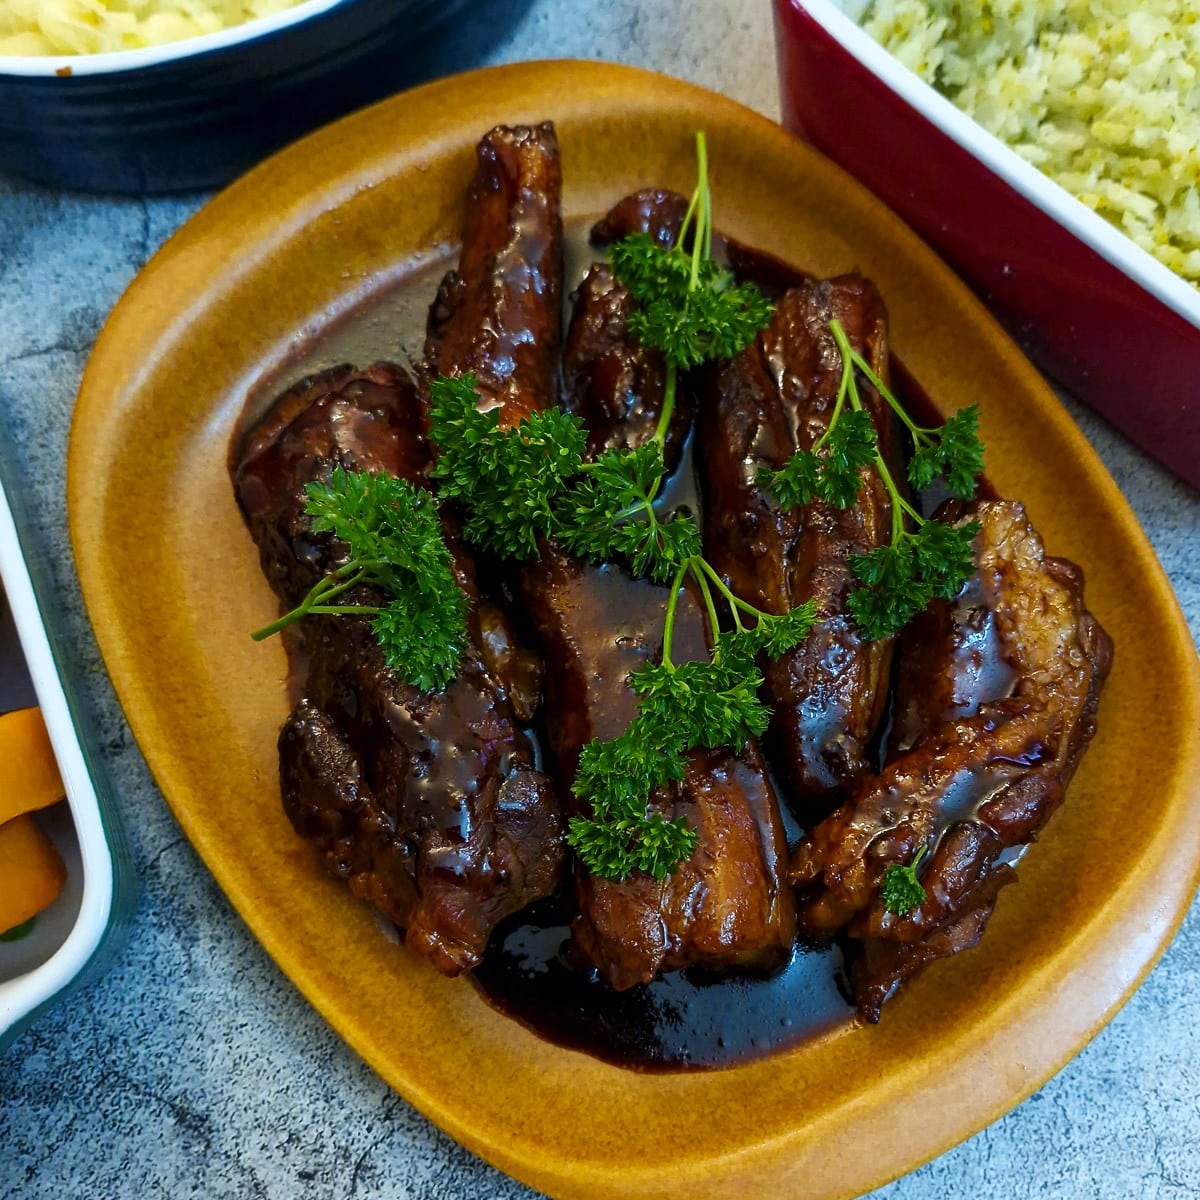
These pork belly slices (you may know them as pork belly rashers) with sticky maple glaze are first slow-braised in apple juice to tenderise the meat and add a subtle sweetness. As they cook long and slow, the fat renders and the meat becomes beautifully soft and succulent.
Once tender, the rashers are brushed with a generous amount of maple glaze that clings to the meat. Back in the oven, the glaze thickens and caramelises, creating a sticky, glossy coating, providing a sweet and savoury mouthful with every bite.
I based this recipe on my twice-cooked pork belly, where the pork is tenderised in chicken stock (in a wok) before being coated with a sticky Chinese-flavoured glaze. In this new recipe, the concept is the same, but instead of boiling it in stock, the pork belly is slow-roasted in apple juice to tenderise, before it is glazed with a maple syrup marinade, which, of course, makes the flavours totally different.
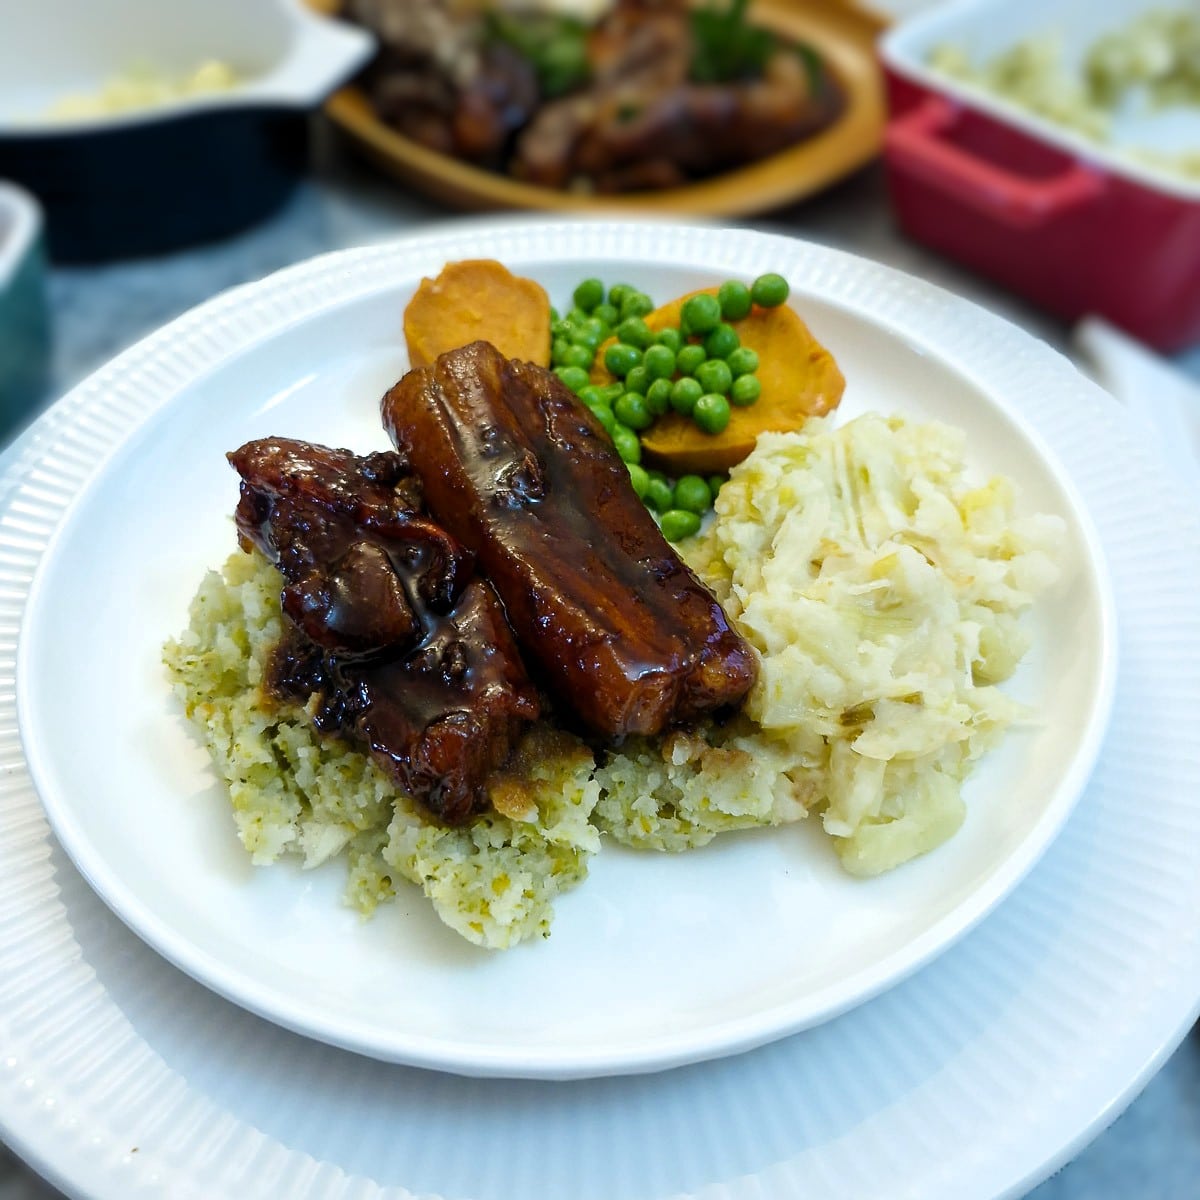
Table of Contents
Maple-glazed pork belly at a glance
- Recipe overview: The pork belly slices are slow-cooked in apple juice in the oven until tender, then coated in a soy-and-maple glaze that caramelises into a sticky, luscious finish.
- Main ingredients: Pork belly slices, apple juice, maple syrup, soy sauce, mustard
- Prep time: 5 minutes
- Cooking time: 2 hours, which is 1 hour and 45 minutes to braise the pork, and a further 15 minutes to allow it to brown.
- Yield: Serves 4
- Difficulty: Easy
Why I think you'll love this pork belly rashers recipe
- Incredibly succulent pork. Slow-roasting the pork belly in apple juice adds an extra layer of flavour , while also keeping the meat moist and juicy.
- Caramelised glaze. The maple and soy glaze clings to the pork belly slices, turning thick and sticky in the oven.
- Hands-off cooking. 2 hours seems a long time to cook a meal, but at least 80% of the time is hands off while the oven does all the work. You end up with the most tender pork belly rashers imaginable!
- Simple ingredients - amazing taste. This caramelised pork belly is another of those recipes that prove you don't need a lot of fancy ingredients to create delicious-tasting meals.
- Cook ahead. The pork belly can be braised in the apple juice, cooled and refrigerated. When you are ready to eat, pour the glaze over and pop it back into a preheated oven for 20 minutes to allow the glaze to caramelise.
Ingredients
**This is just an overview to explain why I used a particular ingredient. The complete list of ingredients and the exact measurements are on the printable recipe card at the end of this post.**
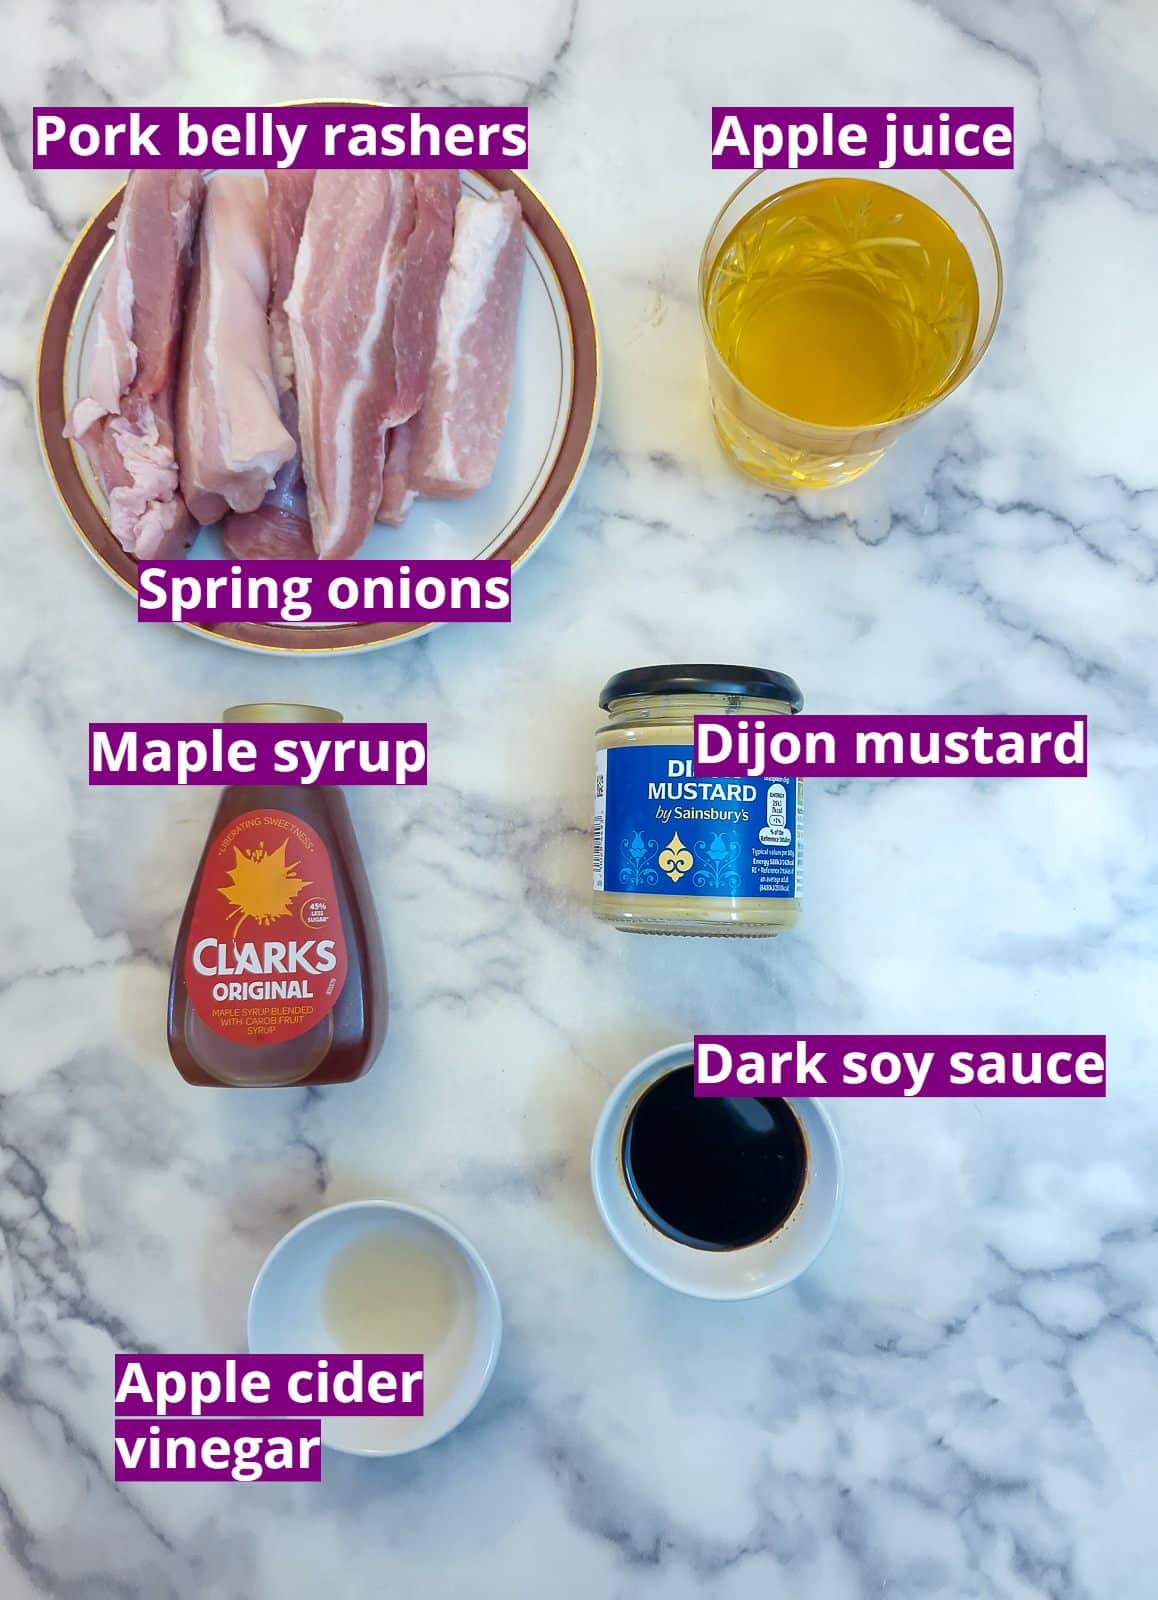
- Pork belly slices. This is pork belly, sliced into approximately 1-inch thick strips. Each piece has a layer of meat, fat and skin (or rind). You can trim away the skin and some of the fat if you prefer, but I usually leave it on. During the slow cook, much of the fat renders out, and the skin becomes beautifully soft and gelatinous, adding richness to the final dish. In the UK and, I know, in South Africa as well, where it is sometimes referred to as Chinese pork, you can buy ready-sliced pork belly.
- Apple juice. This is just plain bottled apple juice (no need for anything fancy unless you've got a juicer and you want to use it). This gently braises the pork as it cooks. You can substitute with chicken stock, although you'll lose some of the subtle sweetness.
- Maple syrup. Adds sweetness and is what gives the glaze its sticky, caramelised finish once it's been in the oven.
- Dijon mustard. Balances the sweetness of the maple syrup with a sharp savoury tang. Substitute with wholegrain mustard for more texture and pops of mustard seed.
- Dark soy sauce. Adds saltiness, depth and a rich umami flavour to the glaze. A little goes a long way, so don't overdo it.
- Apple cider vinegar. Just a small amount to balance the richness. You'll notice if it's missing. Substitute with any fruity vinegar.
- Salt (not pictured). I salt the pork lightly before arranging it in the roasting pan with the apple juice. Seasoning at the start helps build better flavour during cooking rather than relying on seasoning at the end.
How to cook sticky pork belly strips
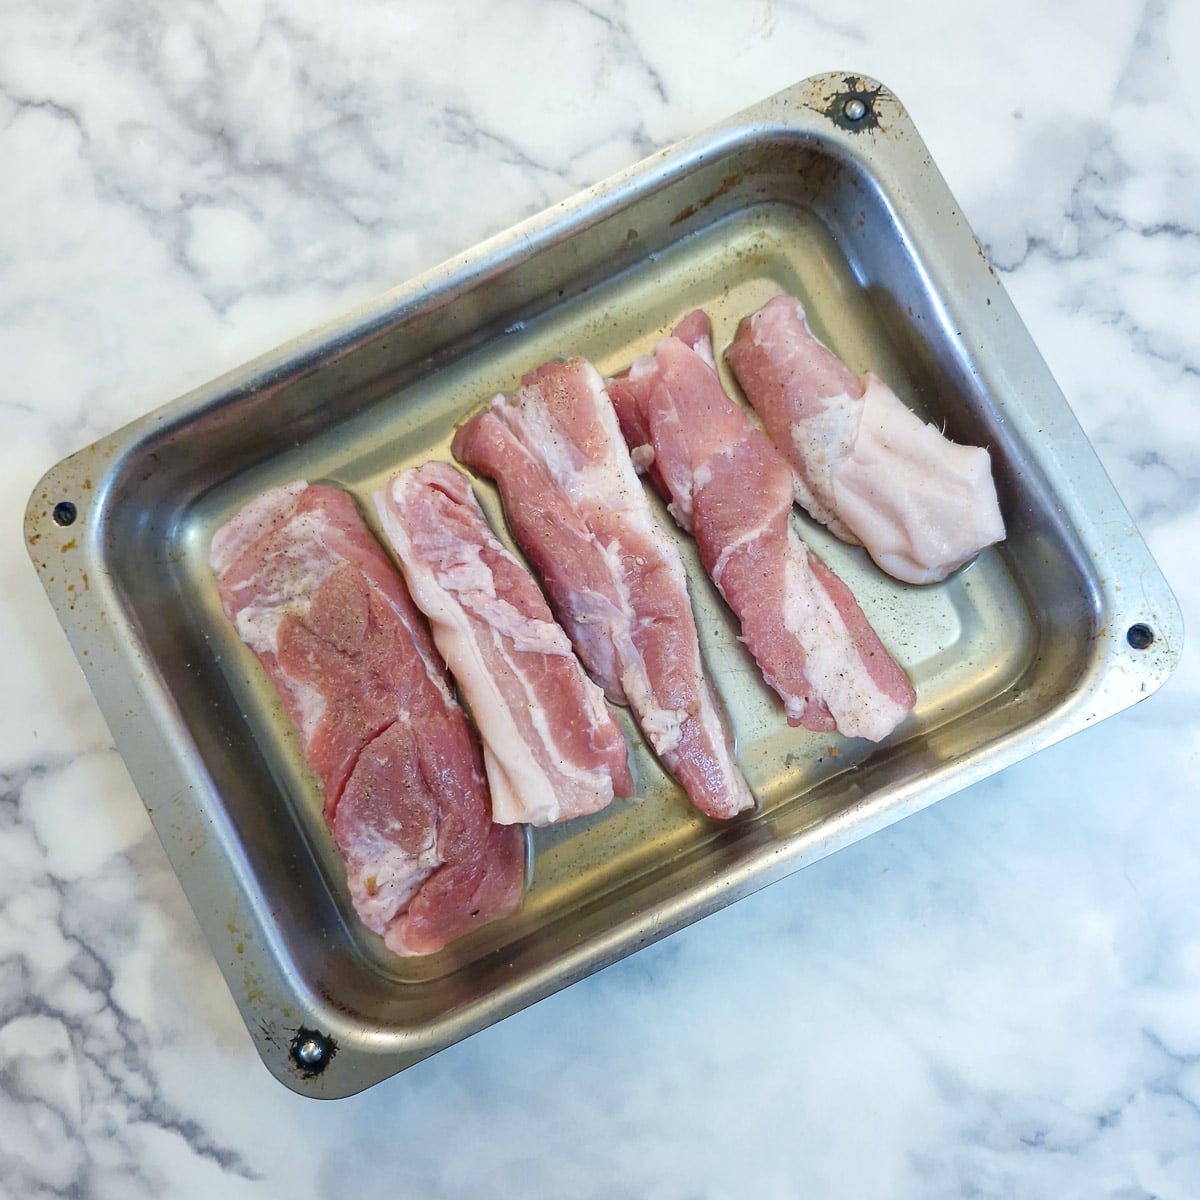
Step 1: Sprinkle the pork belly strips lightly with salt and arrange them in a single layer in a roasting pan. Pour the apple juice into the pan to a depth of approximately ¼-inch
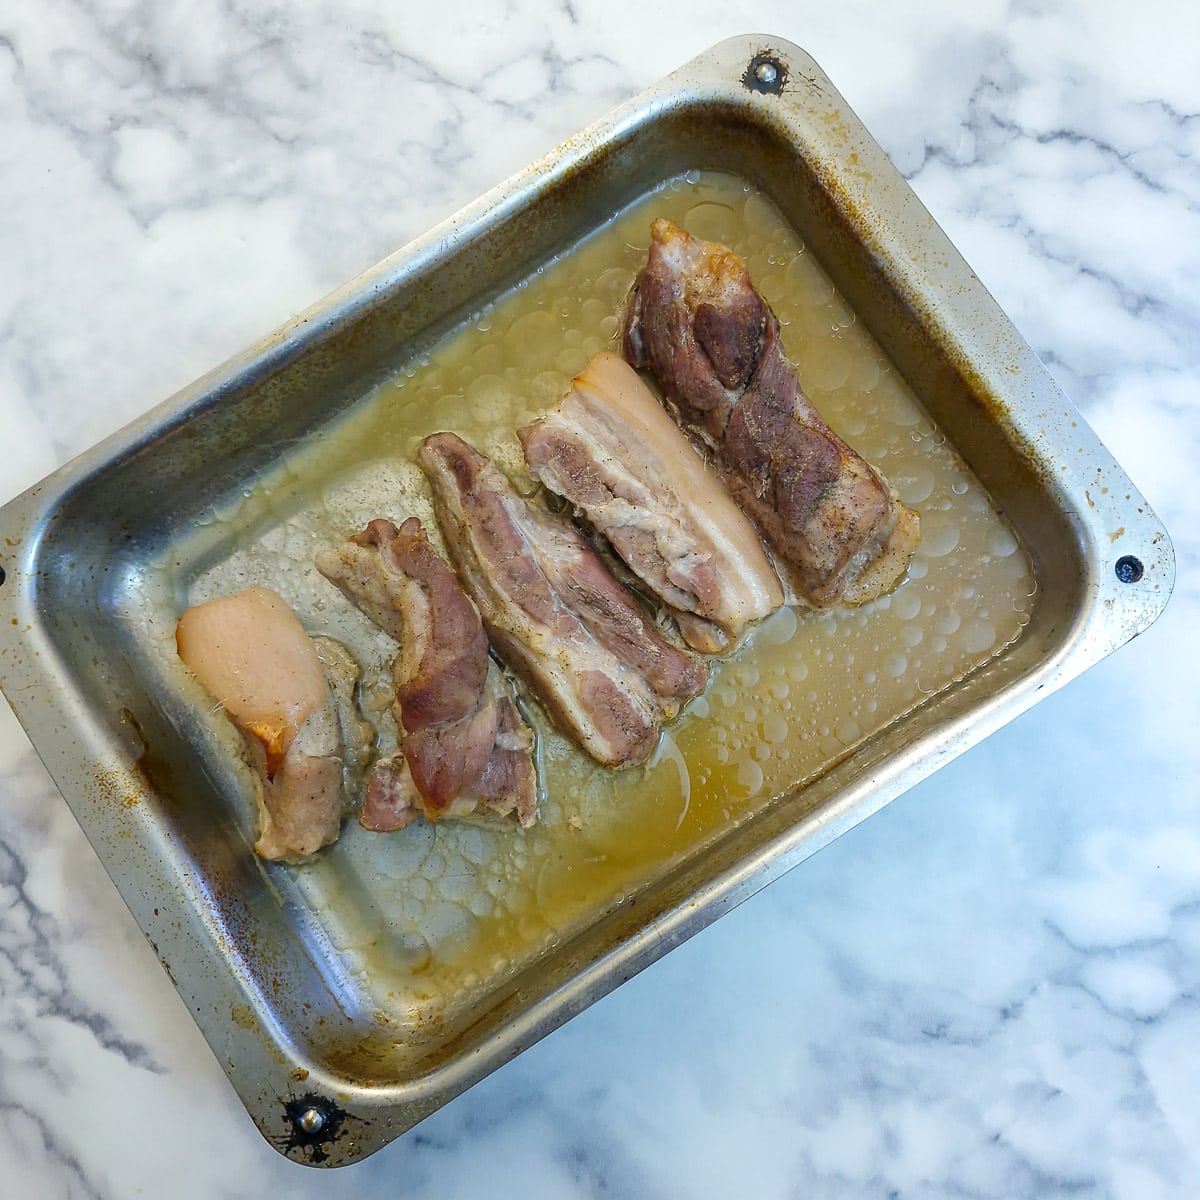
Step 2: Cover the pan tightly with tin foil and place it in a preheated oven (170C / 150C (fan) or 340F / 300F (fan)). Bake for 1.5 to 2 hours, depending on the thickness of your pork belly strips. Drain the apple juice (and cooking juices) and reserve for other recipes (see below).
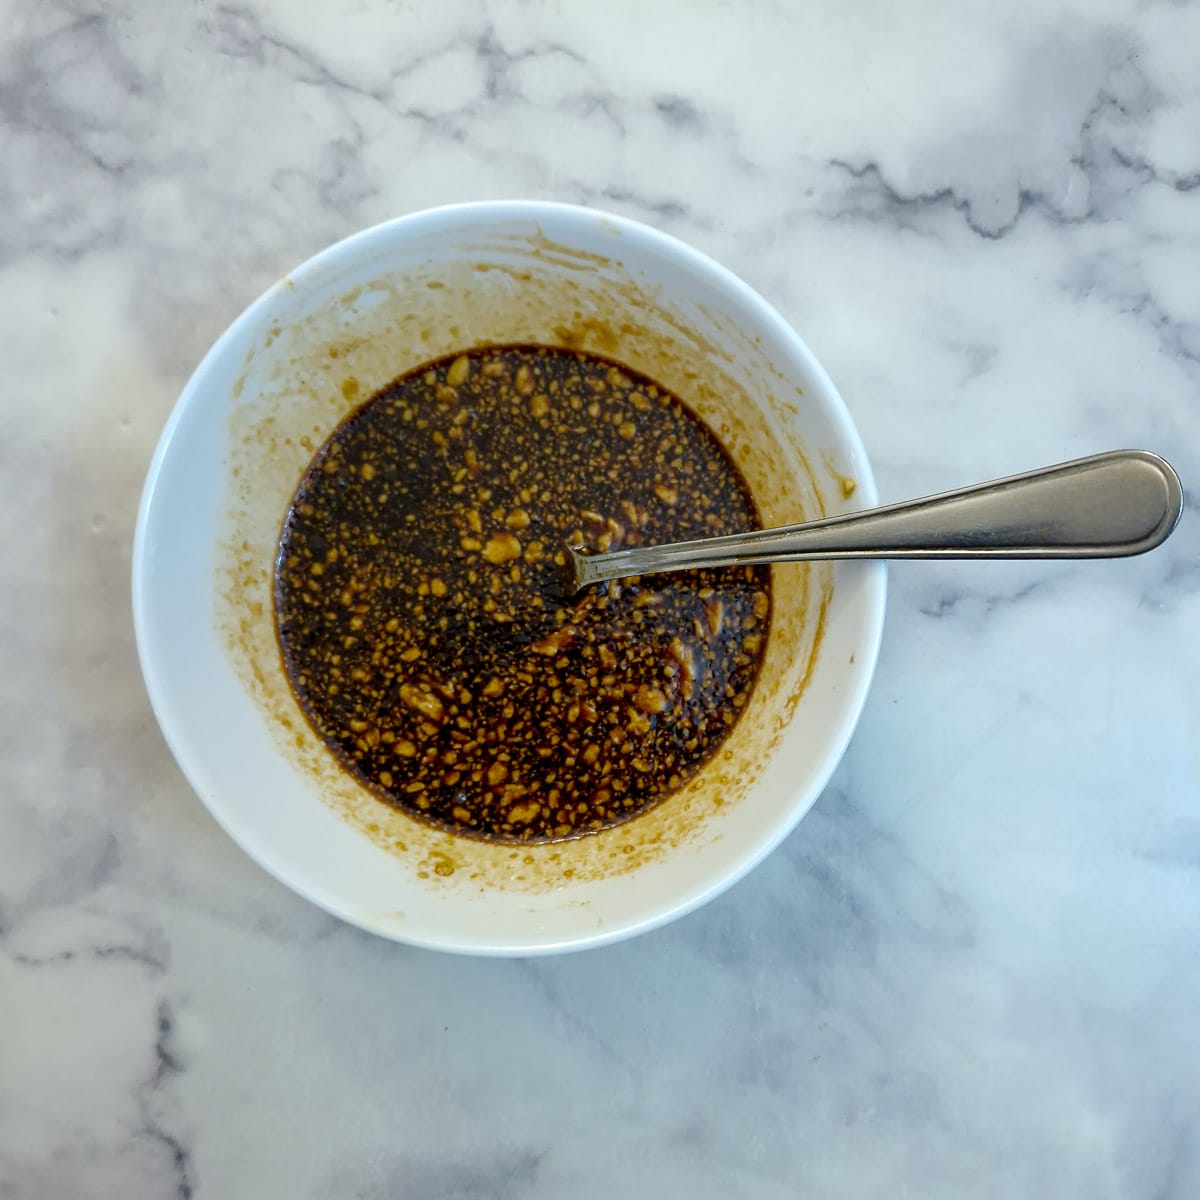
Step 3: Combine the glaze ingredients in a small bowl. They may not dissolve completely, but don't worry, once they hit the heat of the oven, they'll combine.
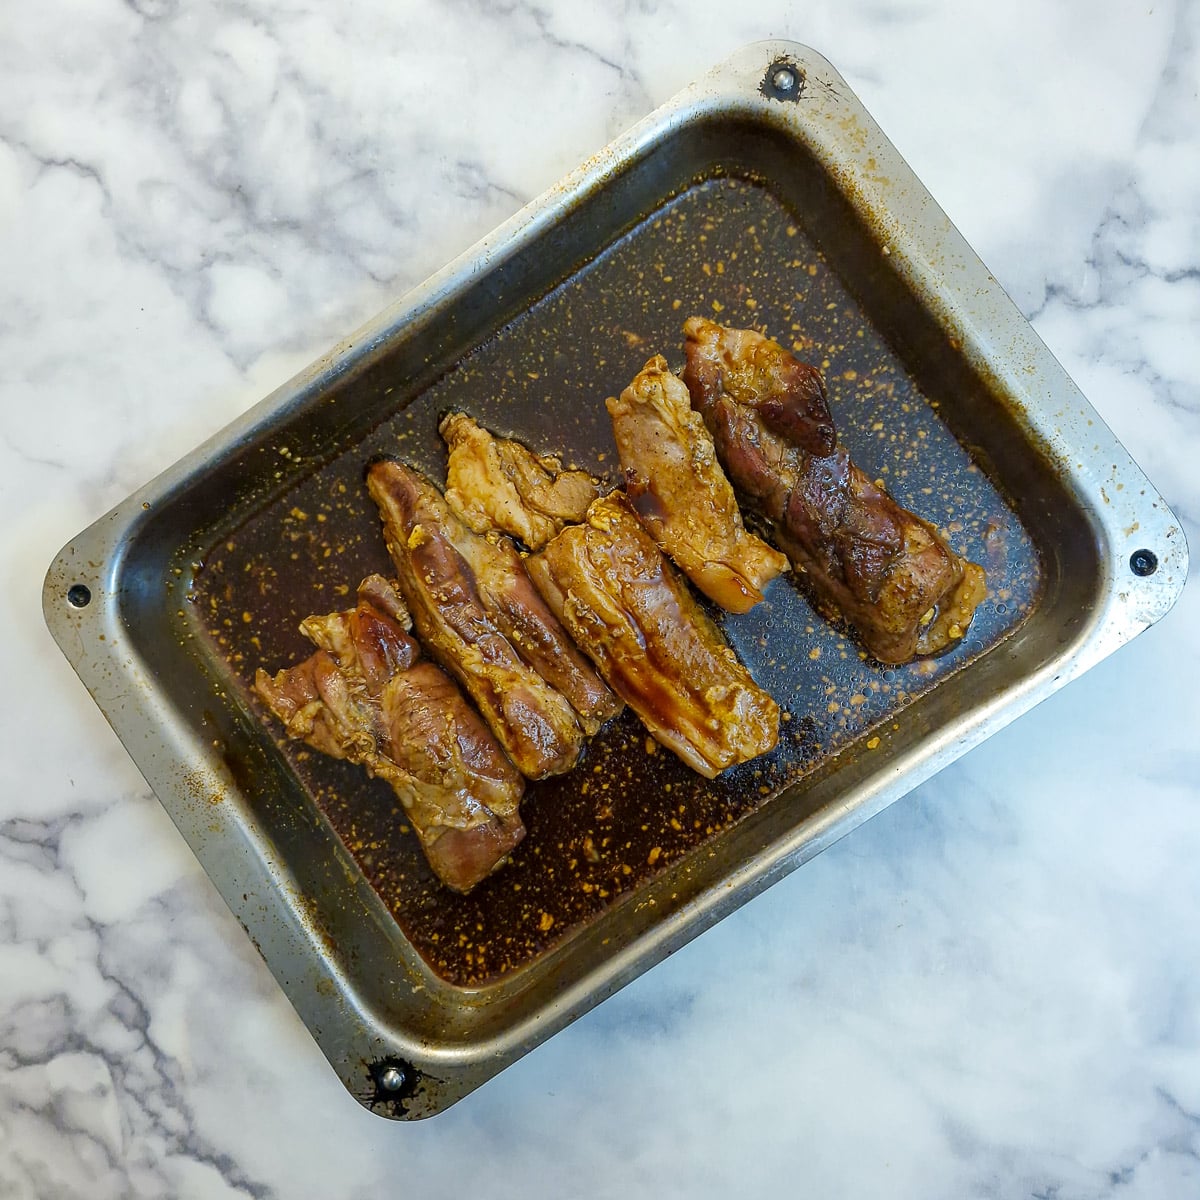
Step 4: Pour the marinade over the pork belly slices. Turn the pork so that it's fully coated on all sides. Turn up the heat to 240C /220C (fan) or 465F / 430F (fan), remove the foil, and cook the pork slices for a further 15 minutes, basting immediately and then every 5 minutes.
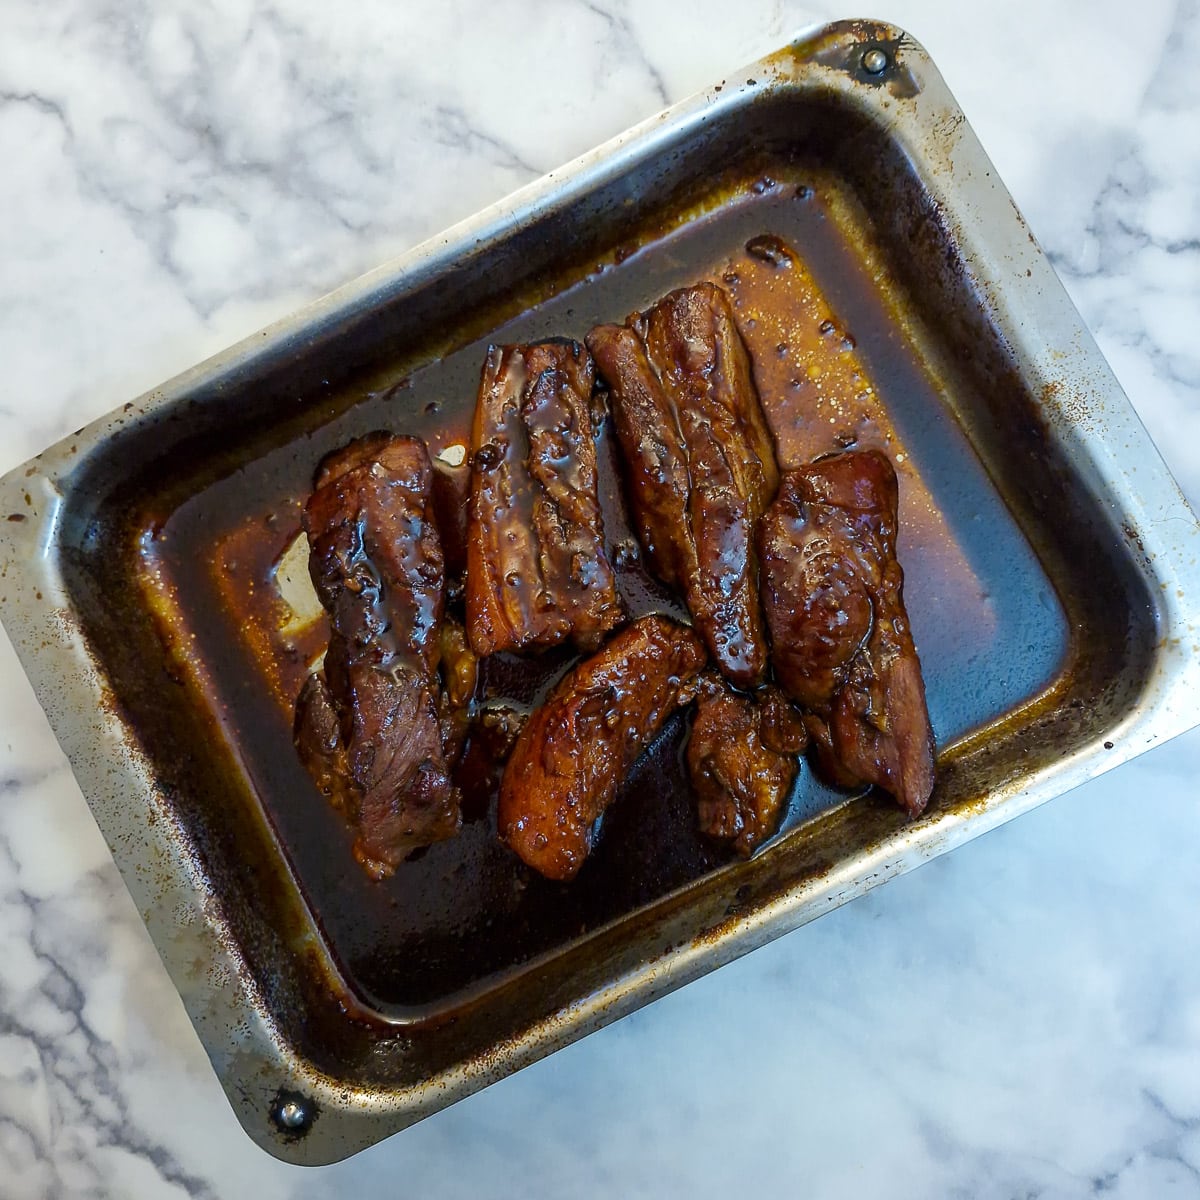
Step 5: Remove the dish from the oven, cover lightly with foil and leave to rest for 10 minutes. The glaze thickens as it stands.
Tips for perfectly sticky pork belly strips
Here are my top tips to ensure your sticky pork belly strips always turn out perfectly:
- Season early, not late. I always think, especially when cooking meat, that you should season the meat before you cook it, not afterwards. This allows the seasoning to penetrate the meat fibres and improves the flavour overall. If you season only after the meat has cooked, all the seasoning remains on the outside of the meat.
- Don't drown the pork in apple juice. You need a shallow layer of liquid - the idea is to braise the pork gently, not boil it.
- Temperature is important. Start off low and slow to allow the collagen and fat to break down. Then increase the heat for the final 15 minutes to caramelise the glaze on the outside of the pork.
- Don't rush the long, slow first cooking stage. This is where the magic happens. If the heat is too high, the meat will dry out. If you take the pork out of the oven too early, the skin and fat stay chewy. Follow the recipe steps for the correct time and temperature to end up with succulent meat, where the knife slides in with no resistance.
- Drain the rendered fat before adding the glaze. This is important. If you leave the apple juice and rendered fat in the roasting pan, it will dilute the glaze, and you'll get a thin, runny gravy instead of a yummy sticky coating.
- Glaze late, not early. You only need to glaze for the final 15 minutes. But you do need to keep your eye on it. and baste it every few minutes. The sugar in the glaze can burn easily, so take care.
- Don't skip resting. The resting stage is important; it gives the juices a chance to redistribute themselves and settle back into the meat fibres so they don't leak out all over the plate when you cut into the pork.
Serving suggestions
The richness of the pork belly lends itself to being served on a dish of creamy mashed potatoes. However, that said, it doesn't have to be plain mashed potatoes. Why not try serving the pork belly slices with one of these dishes:
- Boereboontjies - South African green beans and onions mashed with potatoes.
- Rumbledethumps - Scottish root vegetable mash.
- Spring green potato mash - made with tasty early spring cabbage and lots of black pepper.
- Irish colcannon - made with leeks and cabbage.
I also like to add other vegetables, such as this South African creamed cabbage, which my late father-in-law insisted was cauliflower cheese each time I served it!
And of course, there are the delicious cooking juices to take into account! Don't pour the cooking juices down the sink! Use a cupful of the juices to thicken into a delicious gravy. Pour it into a saucepan and thicken with a teaspoon of cornflour mixed to a paste with a tablespoon of cold water. Stir in any leftover glaze, and you'll have a lovely sauce to pour over the pork belly on top of the mashed potatoes.
Equipment
Just a quick note on the equipment. If possible, choose a deep roasting dish with a rim around the edge so that you can tuck the tin foil in tightly. It should also be deep enough to hold the pork rashers and the apple juice
Alternatively, cook the pork rashers in a cast-iron roasting pan with a heavy lid. Either of these methods will ensure the liquid in pork belly slices doesn't evaporate during the long, slow cooking time. If you're worried that the liquid will evaporate, add an extra splash of apple juice before sealing the dish.
Storage and freezing
- Refrigerator. Allow the pork belly to cool completely, then transfer it to an airtight container and refrigerate for up to 3 days.
- Freezing. For best results, freeze before glazing, in a little of the apple juice cooking liquid. This will ensure the pork remains succulent. Thaw in the refrigerator, then pour off any excess liquid and glaze the pork according to the recipe instructions.
- Reheating. Place the pork belly (into an ovenproof dish with a splash of water or reserved cooking liquid). Cover with foil and reheat at 160C / 325F for 20 - 25 minutes until piping hot. Remove the foil for the final 5 minutes and crank up the heat to 220C/435F to refresh the sticky glaze.
- Microwave method. The pork can be reheated in a covered container in the microwave on short (30-seconds) bursts at full power until piping hot. Depending on the amount of pork, this may take 3 to 4 minutes.
FAQ
No, you don't need to remove it. In this recipe, the skin softens beautifully in the apple juice, becoming slightly gelatinous, and adding richness to the dish. If you prefer a leaner result, you can trim some of the skin and excess fat before cooking, but remember the apple juice and cooking juices will be drained before adding the glaze.
That's up to you, but it's a shame to waste it! I turn it into a gravy (see Serving Suggestions above), but I also like to freeze leftover cooking juices in ice-cube trays. It's basically a light pork and apple stock, and full of flavour. Add a frozen cube to pork casseroles, gravy, braised cabbage, soups ... basically anywhere you want a quick flavour boost!
Yes, you could use chicken stock instead. The result will taste less fruity, but will still be rich and tender.
This usually happens if too much liquid (apple juice) or rendered fat is left in the tray before glazing. Be sure to drain off excess juices before adding the glaze, and always finish the pork at a higher oven temperature so the sugars in the glaze can caramelise properly.
Yes. You can slow-cook the pork belly in advance and refrigerate it. When ready to serve, place the belly slices in a roasting tray and pour the glaze over. Reheat at 150C / 300F, covered with foil, for 10 minutes, just to take the chill off the pork. Remove the foil, crank up the heat and glaze according to the recipe instructions.
Save for later
If you'd like to try these sticky apple-braised pork belly slices, why not save the recipe to one of your Pinterest boards so you can find it easily? Just click the image below.
Alternatively, you can save the recipe by clicking on the floating heart icon on the right-hand side of the screen.
Related recipes
Visit my pork recipes page for other tasty recipes using pork. Here are a few you might enjoy:

The recipe
Sticky slow-roasted sticky pork belly slices with maple glaze
(Click the stars to rate this recipe)
Equipment
- Deep roasting tray OR
- Cast-iron roasting pan with lid
- Tin foil optional to seal the dish if you don't have a lid
- Small bowl to mix the marinade
Ask a Question
If you have a question about this recipe that has not been answered, please use the box below to ask it.
Use this with care. This is an AI-generated result and may contain errors or inaccuracies. I cannot be held responsible for the information returned.
Ingredients
- 1¾ pounds / 800 grams pork slices between 8 and 10 thick rashers
- ½ - 1 cup / 120 to 240 ml apple juice depends on the size of your roasting tray. Tha apple juice should be about ¼ inch deep.
- 1 teaspoon salt or to taste
- 1 - 2 teaspoons cornflour optional - for thickening the gravy
- 1 - 2 tablespoon cold water optional - mixed to a paste with the cornflour
Maple syrup glaze
- ⅓ cup / 80 ml maple syrup
- 1½ tablespoons Dijon mustard
- 2 tablespoons dark soy sauce
- 1 tablespoon apple cider vinegar
Instructions
- Sprinkle the pork belly strips lightly with salt and arrange them in a single layer in a roasting pan. Pour the apple juice into the pan to a depth of approximately ¼-inch1¾ pounds / 800 grams pork slices, 1 teaspoon salt, ½ - 1 cup / 120 to 240 ml apple juice
- Cover the pan tightly with tin foil and place it in a preheated oven (170C / 150C (fan) or 340F / 300F (fan)). Bake for 1.5 to 2 hours, depending on the thickness of your pork belly strips. Drain the apple juice (and cooking juices) and reserve for use in other recipes (see Notes).
- Combine the glaze ingredients in a small bowl. They may not dissolve completely, but don't worry, once they hit the heat of the oven, they'll combine.⅓ cup / 80 ml maple syrup, 1½ tablespoons Dijon mustard, 2 tablespoons dark soy sauce, 1 tablespoon apple cider vinegar
- Pour the marinade over the pork belly slices. Turn the pork so that it's fully coated on all sides. Turn up the heat to 240C /220C (fan) or 465F / 430F (fan), remove the foil, and cook the pork slices for a further 15 minutes, basting immediately and then every 5 minutes.
- Remove the dish from the oven, cover lightly with foil and leave to rest for 10 minutes before serving. The glaze thickens as it stands.
- There should be sufficient glaze left in the pan to spoon over the pork belly. If you would like extra gravy, add a cup of the reserved apple cooking juice to the glaze remaining in the pan, and stir in a slurry of cornflour and water. Stir over gentle heat for a minute or two until the gravy thickens. You may not need all the cornflour and water mixture - just enough to thicken the gravy!1 - 2 teaspoons cornflour, 1 - 2 tablespoon cold water
- Serve on a bed of either plain mashed potatoes or vegetable mash.
Notes
- Season early, not late. I always think, especially when cooking meat, that you should season the meat before you cook it, not afterwards. This allows the seasoning to penetrate the meat fibres and improves the flavour overall. If you season only after the meat has cooked, all the seasoning remains on the outside of the meat.
- Don't drown the pork in apple juice. You need a shallow layer of liquid - the idea is to braise the pork gently, not boil it.
- Temperature is important. Start low and slow to allow the collagen and fat to break down as the meat braises. Then increase the heat for the final 15 minutes to caramelise the glaze on the outside of the pork.
- Don't rush the long, slow first cooking stage. This is where the magic happens. If the heat is too high, the meat will dry out. If you take the pork out of the oven too early, the skin and fat stay chewy. Follow the recipe steps for the correct time and temperature to end up with succulent meat, where the knife slides in with no resistance.
- Drain the rendered fat before adding the glaze. This is important. If you leave the apple juice and rendered fat in the roasting pan, it will dilute the glaze, and you'll get a thin, runny gravy instead of a yummy sticky coating.
- Glaze late, not early. You only need to glaze for the final 15 minutes. But you do need to keep your eye on it. and baste it every few minutes. The sugar in the glaze can burn easily, so take care.
- Don't skip resting. The resting stage is important; it gives the juices a chance to redistribute themselves and settle back into the meat fibres so they don't leak out all over the plate when you cut into the pork.
- Refrigerator. Allow the pork belly to cool completely, then transfer it to an airtight container and refrigerate for up to 3 days.
- Freezing. For best results, freeze before glazing, in a little of the apple juice cooking liquid. This will ensure the pork remains succulent. Thaw in the refrigerator, then pour off any excess liquid and glaze the pork according to the recipe instructions.
- Reheating. Place the pork belly (into an ovenproof dish with a splash of water or reserved cooking liquid). Cover with foil and reheat at 160C / 325F for 20 - 25 minutes until piping hot. Remove the foil for the final 5 minutes and crank up the heat to 220C/435F to refresh the sticky glaze.
- Microwave method. The pork can be reheated in a covered container in the microwave on short (30-second) bursts at full power
Nutrition
I am not a nutritionist. The nutrition information has been calculated using an on-line calculator, and is intended for information and guidance purposes only. If the nutrition information is important to you, you should consider calculating it yourself, using your preferred tool.
If you made this recipe and enjoyed it, I'd love it if you could give me a star rating in the comments below. And if you'd like to get in touch, you can email me at [email protected]. I'd love to hear from you. And don't forget to subscribe to my mailing list so you can grab yourself a copy of my FREE COOKBOOK!
If you'd like to continue browsing, just click on this link to all my recipes.


Did you make this recipe? Let me know!