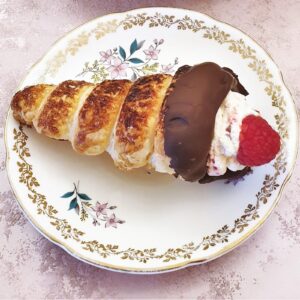
These raspberry cream horns dipped in dark chocolate, are the perfect summer dessert or tea-time treat. And they are so easy to make. Once you've made these easy cream horns yourself, you'll never buy them from a bakery again!
Jump to:
What is a cream horn?
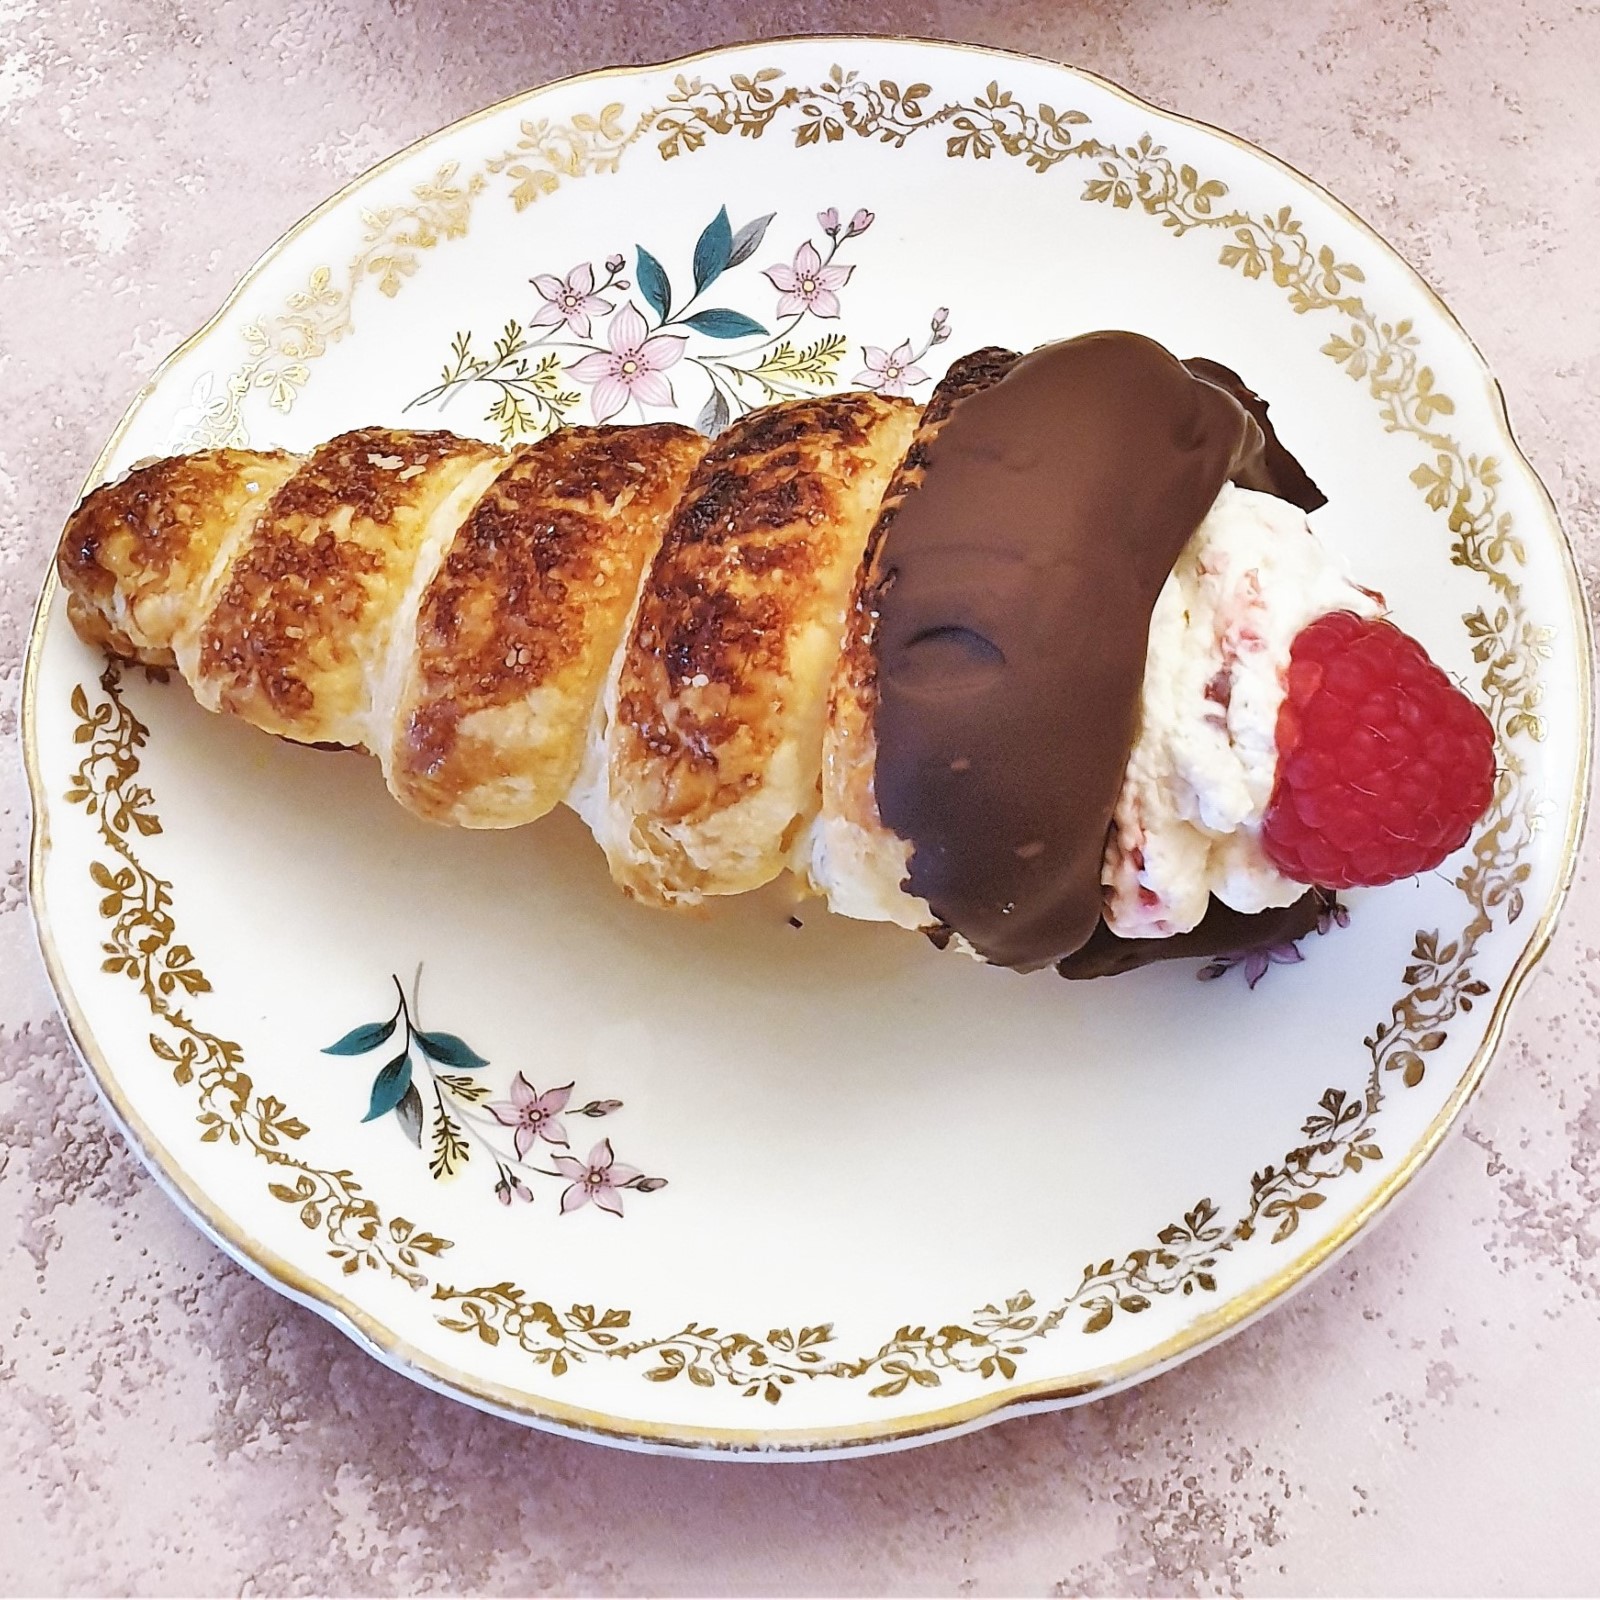
At its most basic, a cream horn is simply a cone of crispy puff pastry filled with thickly whipped fresh cream and perhaps dusted with icing sugar. The outside of the pastry cone is lightly sprinkled with demerara sugar before baking, to provide an extra crunch of sweetness.
However, there are many variations on the basic cream horn. For instance, Paul Hollywood fills his cream horns with a spicy orange filling (plus he makes the pastry himself!). You could fill them with chocolate cream, or creme patissiere, and you can find out how to make your own creme patissiere in this German Bee Sting cake recipe. I've even seen them filled with prawns and cream cheese and served as a savoury snack.
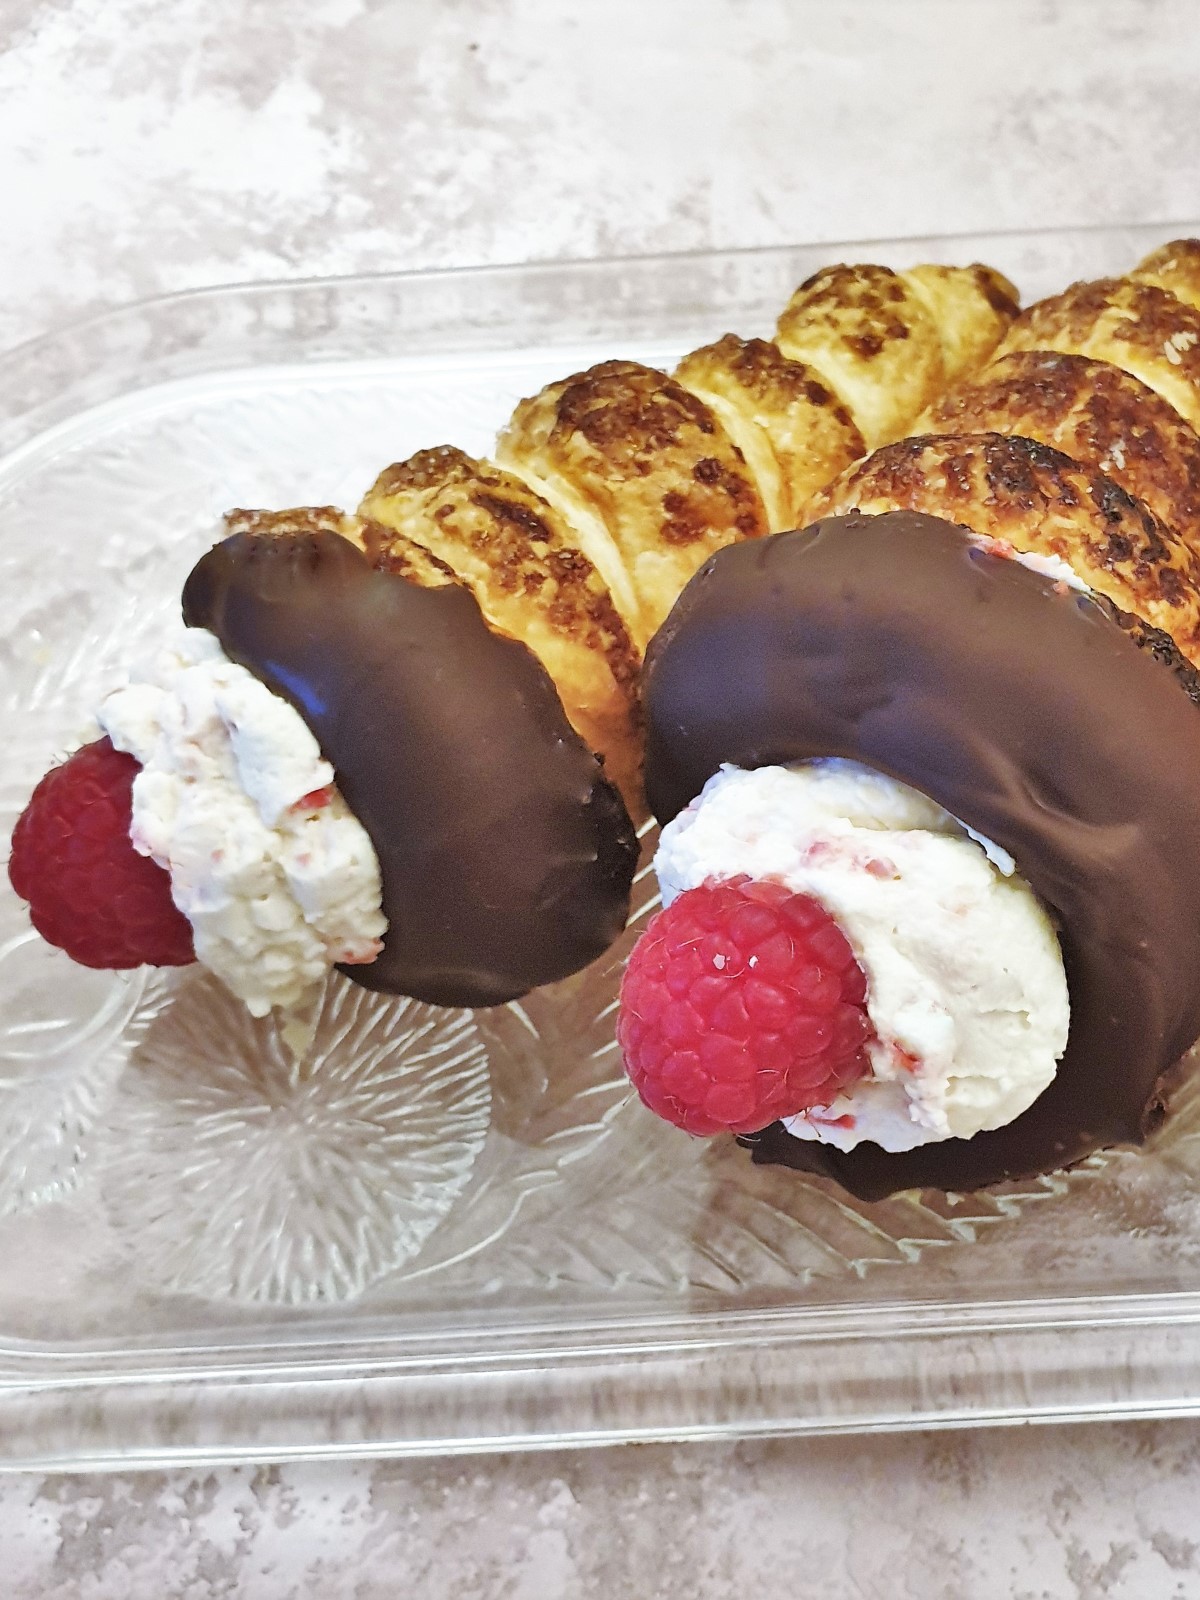
The version I'm sharing today is for raspberry cream horns with a dark chocolate rim, filled with thick whipped raspberry cream. The bitterness of the dark chocolate pairs beautifully with the tartness of the raspberries, but if you prefer milk chocolate, by all means, use that instead.
Are they difficult to make?
Not at all. Cream horns are simple to make. You will need some cream horn moulds, but if you don't have moulds I've got instructions below for you to make your own moulds from paper plates and aluminium foil.
In addition, they are made with shop-bought puff pastry so they couldn't be easier.
Recipe information
You can get the complete list of ingredients and full instructions for making raspberry cream horns on the printable recipe card at the end of this post.
- Prep time - 30 minutes
- Cooking time - 20 to 25 minutes
- Yield - makes 12 cream horns
- Calories - 330 each
- Main equipment - Cream horn moulds. If you don't have any you can buy them from Amazon, or make your own from paper plates and aluminium foil (instructions provided below).
Ingredients
You will only need a few simple ingredients
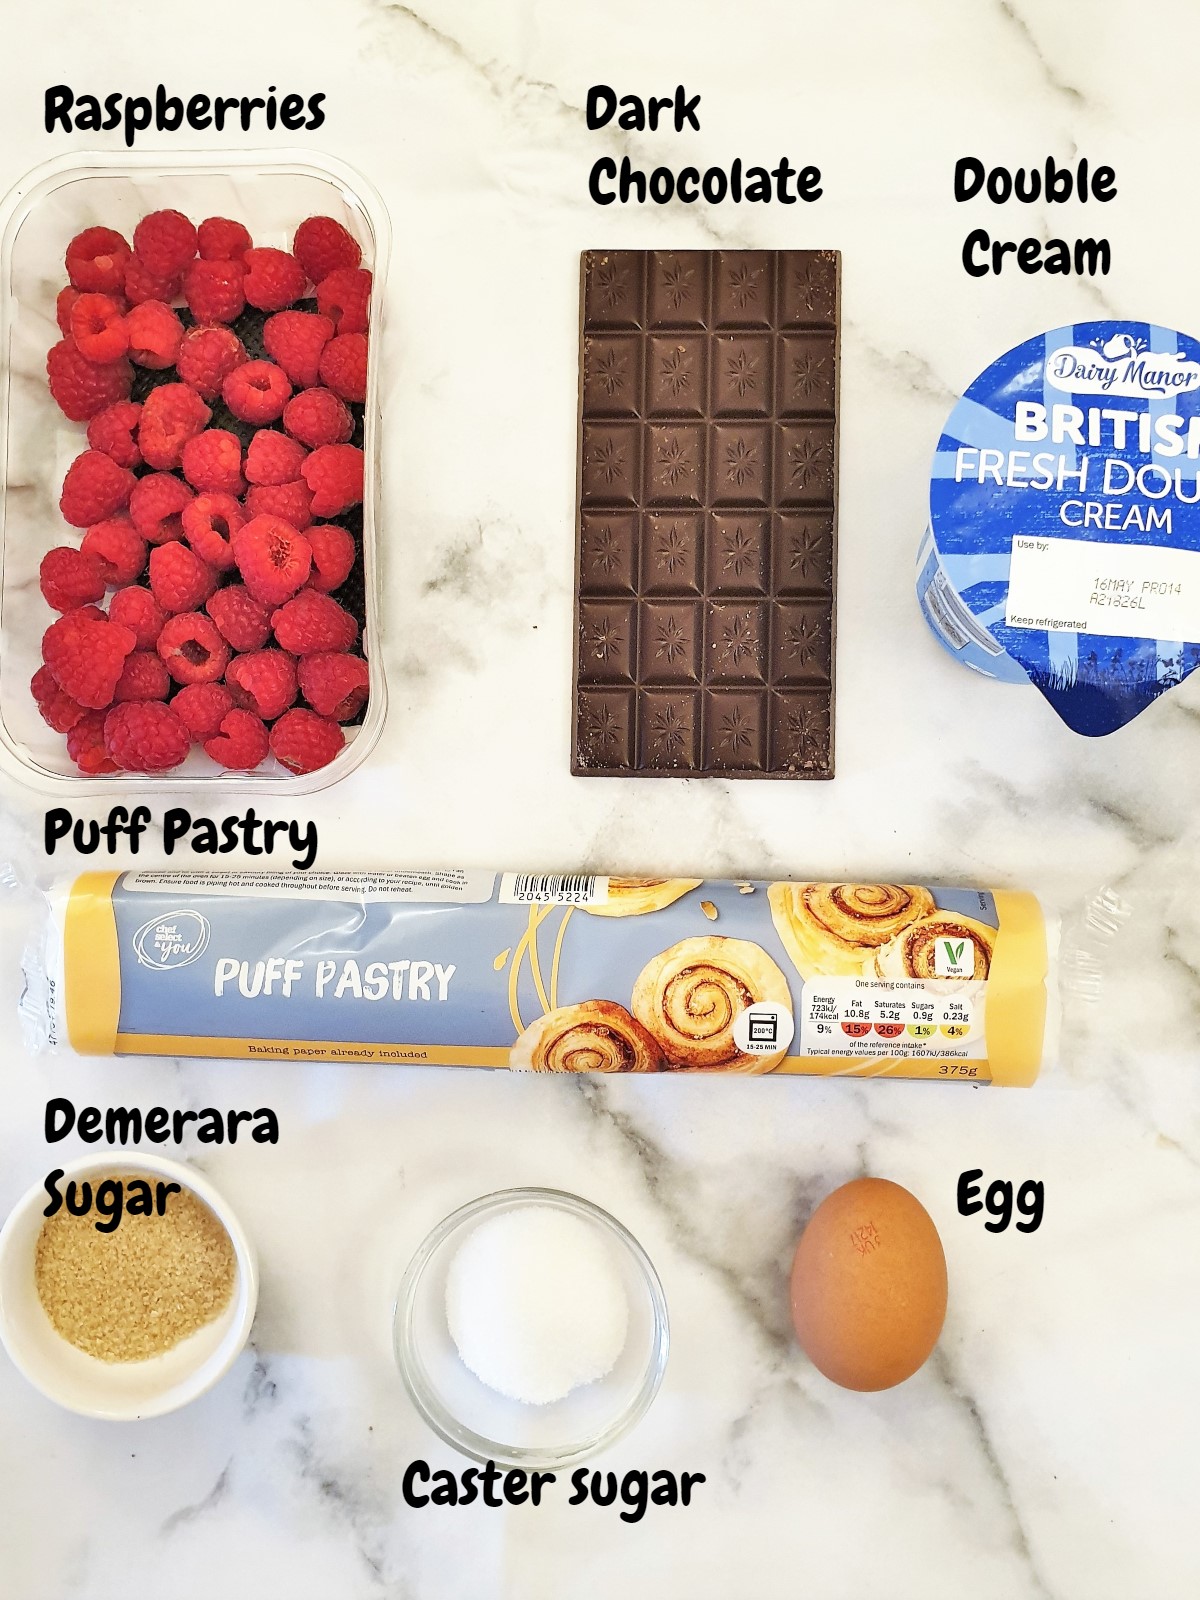
Raspberries - I like to use fresh raspberries for this dish. I haven't tried making it with frozen raspberries, but I don't think it will be a problem if that's all you have.
Puff pastry - you could make your own puff pastry but I find store-bought puff pastry is so much easier and less time-consuming. You just unroll it and it's ready for use. If you can only get hold of a block of puff pastry (rather than ready-rolled) roll it out into a rectangle roughly 10" x 15" in size.
Dark chocolate - the baked empty horns are dipped in melted dark chocolate before being filled with whipped cream. The combination of tart raspberries and dark chocolate works so well together. If you prefer you could use your favourite brand of milk chocolate, or leave it off altogether.
Double or heavy whipping cream - don't use single cream, you can beat it all day but it won't thicken up sufficiently to hold its shape.
Caster sugar - (optional) - used for sweetening the whipped cream. I prefer to leave it out, but if you like a sweeter cream you can add a little sugar to the cream as you beat it.
Egg - egg-washing the pastry before baking gives a nice golden colour to the cream horns and helps the demerara sugar stick to the pastry.
Demerara sugar - this is sprinkled on the pastry cones before they are baked in the oven.
You will also need about a tablespoon of sunflower or vegetable oil to grease the outside of the moulds.
How to make cream horn moulds
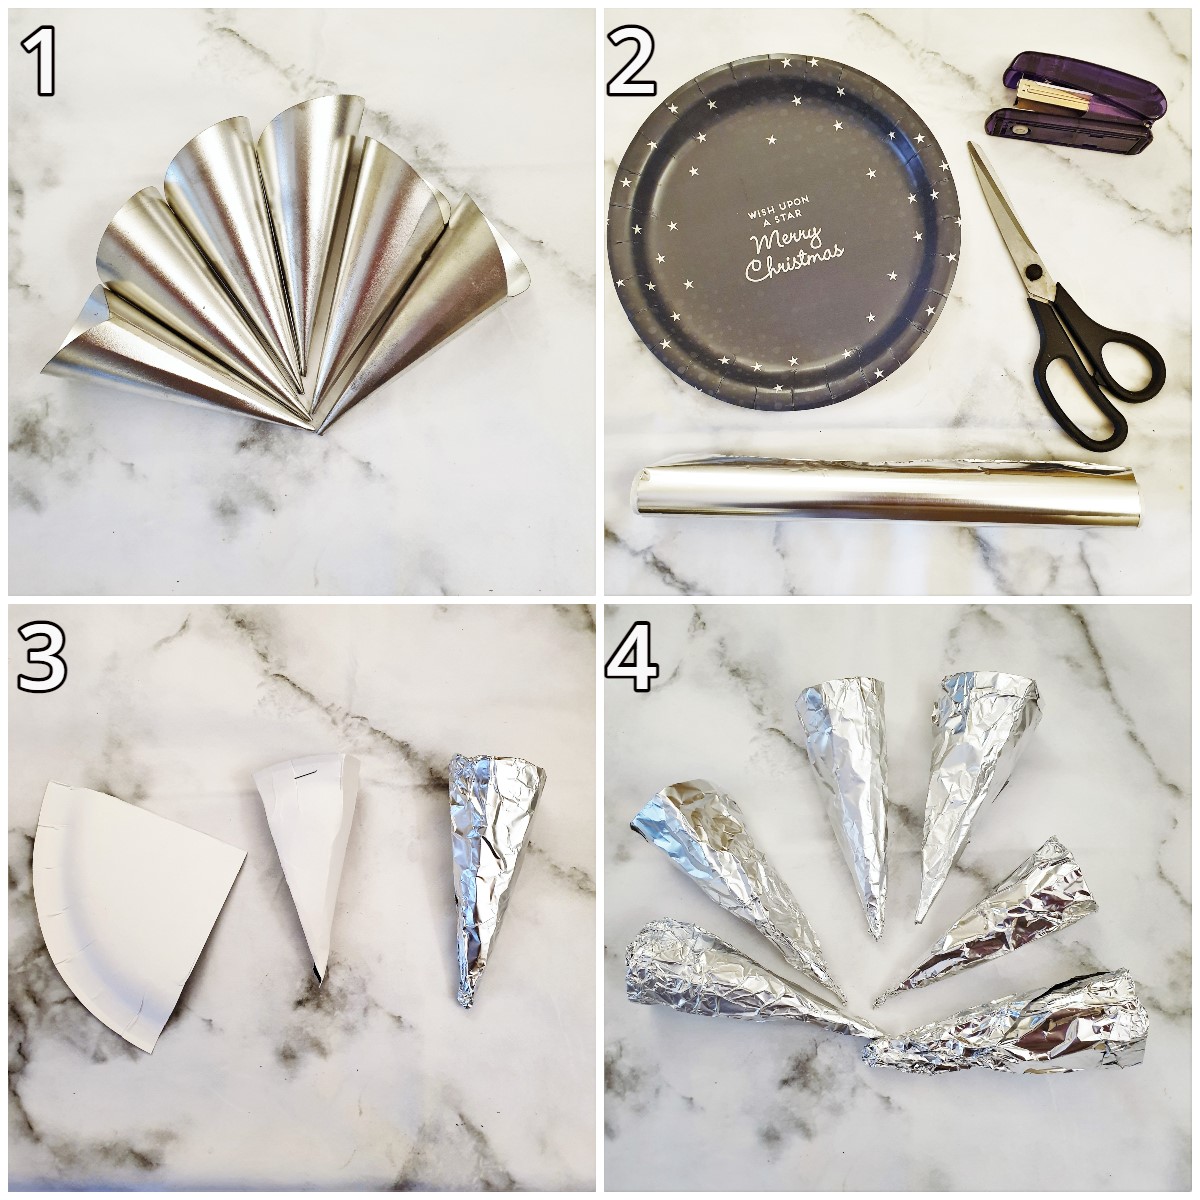
Image 1 above shows what the cream horn moulds look like. If you want to make your own, you will need:
- paper plates (I had some left over from Christmas 🙂 )
- a pair of scissors
- a stapler
- aluminium foil
Cut the paper plate into quarters. Form each quarter into a cone shape, with a point at the bottom, and a top opening of approximately 1 and a half inches.
Staple the top where the cardboard overlaps to hold it together.
Cover each cone with a double layer of aluminium foil, folding any overlap inside the top of the cone.
Note - some people believe that the shiny side of the aluminium foil reflects heat away from food. For these cones, It doesn't matter whether the shiny side of the aluminium foil faces inside or outside. I made some both ways, and there was no difference in the baking time.
How to make the cream horns

- Using your fingers, rub a few drops of sunflower or vegetable oil on the outer surface of each mould.
- Unroll the sheet of puff pastry and cut a strip approximately three-quarters of an inch wide, down the long edge. You will need to get 12 strips so it might be easier to make 12 evenly-spaced marks across the top of the pastry before cutting it.
- Starting at the point of each cone, wrap the pastry around the cone, overlapping each layer slightly. Once the mould is covered, press the end of the pastry to the underlying layer to prevent it from unrolling as it bakes. If you look at image 4 above you will see that I didn't do this for one or two of my cones and the ends unravelled a bit. It's not a problem if this happens - trim away any excess pastry with a sharp knife before filling it with cream.
- When rolling the pastry you may find that it doesn't quite cover the cone. This is perfectly OK. On the other hand, if the pastry rolls around to the top of the cone (the opening) don't fold the pastry inside the mould or you will be unable to remove the baked cones from the mould.
- Brush each pastry cone with beaten egg and sprinkle lightly with demerara sugar. You will find this makes less mess if you hold the cones over the sink to sprinkle on the sugar.
- Place the cones on a baking tray lined with baking parchment to prevent sticking. Leave a space between each cone as they will expand on baking.
- Bake in a preheated oven (200C / 400F) for 20 minutes or until golden brown.
- Remove from the oven and leave on the baking tray to cool.
- Once cool, remove the pastry cones from the moulds. The easiest way to do this is to hold the entire pastry cone in one hand, and gently twist the metal cone with the other hand. The mould should slip out easily.
Filling the cream horns

Dip the cones in melted chocolate
If you are using chocolate you should melt the chocolate either in the microwave, or in a clean glass bowl over a pan of simmering water. If you don't want to dip your cones in chocolate you can skip these steps.
- I like to use the microwave because it is so easy. Just break the chocolate into pieces and place it in a microwave-safe bowl. Microwave on high in 30-second bursts, stirring after each burst. My 900W microwave melts 150g of chocolate in 2 30-second bursts. Different microwaves may vary.
- If you want to melt the chocolate over a pan of water, break the chocolate into pieces and place them in a large glass bowl that fits on top of your pan without falling in. Half-fill the pan with water, place the bowl on top and bring the water to a simmer. Stir the chocolate until it melts. Do not allow any water to come into contact with the chocolate.
- Once the chocolate has melted, dip the open end of each pastry cone into the chocolate, then hold the cone above the chocolate and allow the excess to drip off.
- Place the dipped cones on a large plate to set. Once all the cones have been dipped, place the plate into the refrigerator for 10 minutes until the chocolate has hardened.
Prepare the cream
- Remove 12 raspberries and set aside. These will be used to press onto the end of the cream horns.
- Chop the remaining raspberries coarsely.
- Pour the cream (and optionally, the caster sugar) into a mixing bowl and beat either with an electric hand mixer or a balloon whisk until the cream thickens and holds its shape.
- Stir in the chopped raspberries.
- Spoon the raspberry cream into a piping bag and pipe the cream into each cream horn. If you don't have a piping bag you can use a ziploc bag with the corner snipped off.
- Press a raspberry into each filled cream horn.

Storage
Raspberry cream horns are best eaten fresh on the day. That said, you can store them in an airtight container in the refrigerator for up to 3 days.
If you want to make the raspberry cream horns in advance, you can store the unfilled pastry cones in an airtight container in the kitchen for two days before filling them.
Unfortunately, I do not recommend freezing the filled cream horns, but you can freeze the unfilled pastry cones in a rigid plastic container for up to 6 months. Remove from the freezer and defrost on paper towels (to absorb any moisture) and then fill with cream and serve.
If you'd like to be notified of new recipes, why not subscribe to my newsletter? To say thank you, you will receive a free recipe e-book containing some of my most popular cakes and desserts.
Save for later
If you would like to make these raspberry cream horns yourself, why not pin the recipe to your Pinterest board so you can find it again easily? Just click the image below.
Alternatively, you can save the recipe by clicking on the floating heart icon on the right-hand side of the screen.
Related recipes
You may also enjoy these other quick and easy dessert recipes:


You can find these and other delicious dessert recipes on my cake, biscuits and dessert dessert recipes page.
📋The recipe
Raspberry cream horns with dark chocolate
(Click the stars to rate this recipe)
Equipment
- 12 x Cream horn moulds
- Mixing bowl
- Electric hand mixer or balloon whisk
- Baking sheet
- Baking parchment
Ask a Question
If you have a question about this recipe that has not been answered, please use the box below to ask it.
Use this with care. This is an AI-generated result and may contain errors or inaccuracies. I cannot be held responsible for the information returned.
Ingredients
- 7 ounce (200g) fresh raspberries
- 13 ounce (375g) puff pastry
- 5 ounce (150g) dark chocolate optional
- 1 cup (240ml) double or heavy whipping cream
- 1 to 2 tablespoons caster sugar optional (or to taste)
- 1 tablespoon demerara sugar
- 1 small egg
- 1 tablespoon sunflower or vegetable oil for greasing the moulds
Instructions
- Preheat the oven to 200°C / 400°F
- Using your fingers, rub a few drops of sunflower or vegetable oil on the outer surface of each mould.
- Unroll the sheet of puff pastry and cut a strip approximately three-quarters of an inch wide, down the long edge. You will need to get 12 strips so it might be easier to make 12 evenly-spaced marks across the top of the pastry before cutting it.
- Starting at the point of each cone, wrap the pastry around the cone, overlapping each layer slightly. Once the mould is covered, press the end of the pastry to the underlying layer to prevent it from unrolling as it bakes.
- Brush each pastry cone with beaten egg and sprinkle lightly with demerara sugar.
- Place the cones on a baking tray lined with baking parchment to prevent sticking. Leave a space between each cone as they will expand on baking.
- Bake in the preheated oven for 20 minutes or until golden brown.
- Remove from the oven and allow to cool. Once cool, remove the pastry cones from the moulds.
- Break the chocolate into pieces and melt it either in the microwave, or over a pan of simmering water.
- Once the chocolate has melted, dip the open end of each pastry cone into the chocolate, then hold the cone above the chocolate and allow the excess to drip off.
- Place the dipped cones on a large plate to set. Once all the cones have been dipped, place the plate into the refrigerator for 10 minutes until the chocolate has hardened.
- Set 12 raspberries aside and chop the remaining raspberries coarsely.
- Pour the cream (and optionally, the caster sugar to sweeten the cream to your own taste) into a mixing bowl and beat either with an electric hand-mixer or a balloon whisk until the cream thickens and holds its shape.
- Stir in the chopped raspberries.
- Spoon the raspberry cream into a piping bag and pipe the cream into each cream horn. If you don't have a piping bag you can use a ziploc bag with the corner snipped off.
- Press one of the reserved raspberries onto the front of each filled cream horn.
- Store covered in the refrigerator.
Notes
- Cut a paper plate into quarters. Form each quarter into a cone shape, with a point at the bottom, and a top opening of approximately 1 and a half inches.
- Staple the top where the cardboard overlaps to hold it together.
- Cover each cone with a double layer of aluminium foil, folding any overlap inside the top of the cone.
Nutrition
I am not a nutritionist. The nutrition information has been calculated using an on-line calculator, and is intended for information and guidance purposes only. If the nutrition information is important to you, you should consider calculating it yourself, using your preferred tool.
If you made this recipe and enjoyed it, I'd love it if you could give me a star rating in the comments below. And if you'd like to get in touch, you can email me at [email protected]. I'd love to hear from you. And don't forget to subscribe to my mailing list so you can grab yourself a copy of my FREE COOKBOOK!
If you'd like to continue browsing, just click on this link to all my recipes.
Did you make this recipe? Let me know!